This post contains affiliate links at no cost to you.
Our bathroom needed some details to spruce it up. When we bought the house, the primary bath looked completely different than it does now. All the big things were updated and now it’s time to add some personality and tchotchkes.
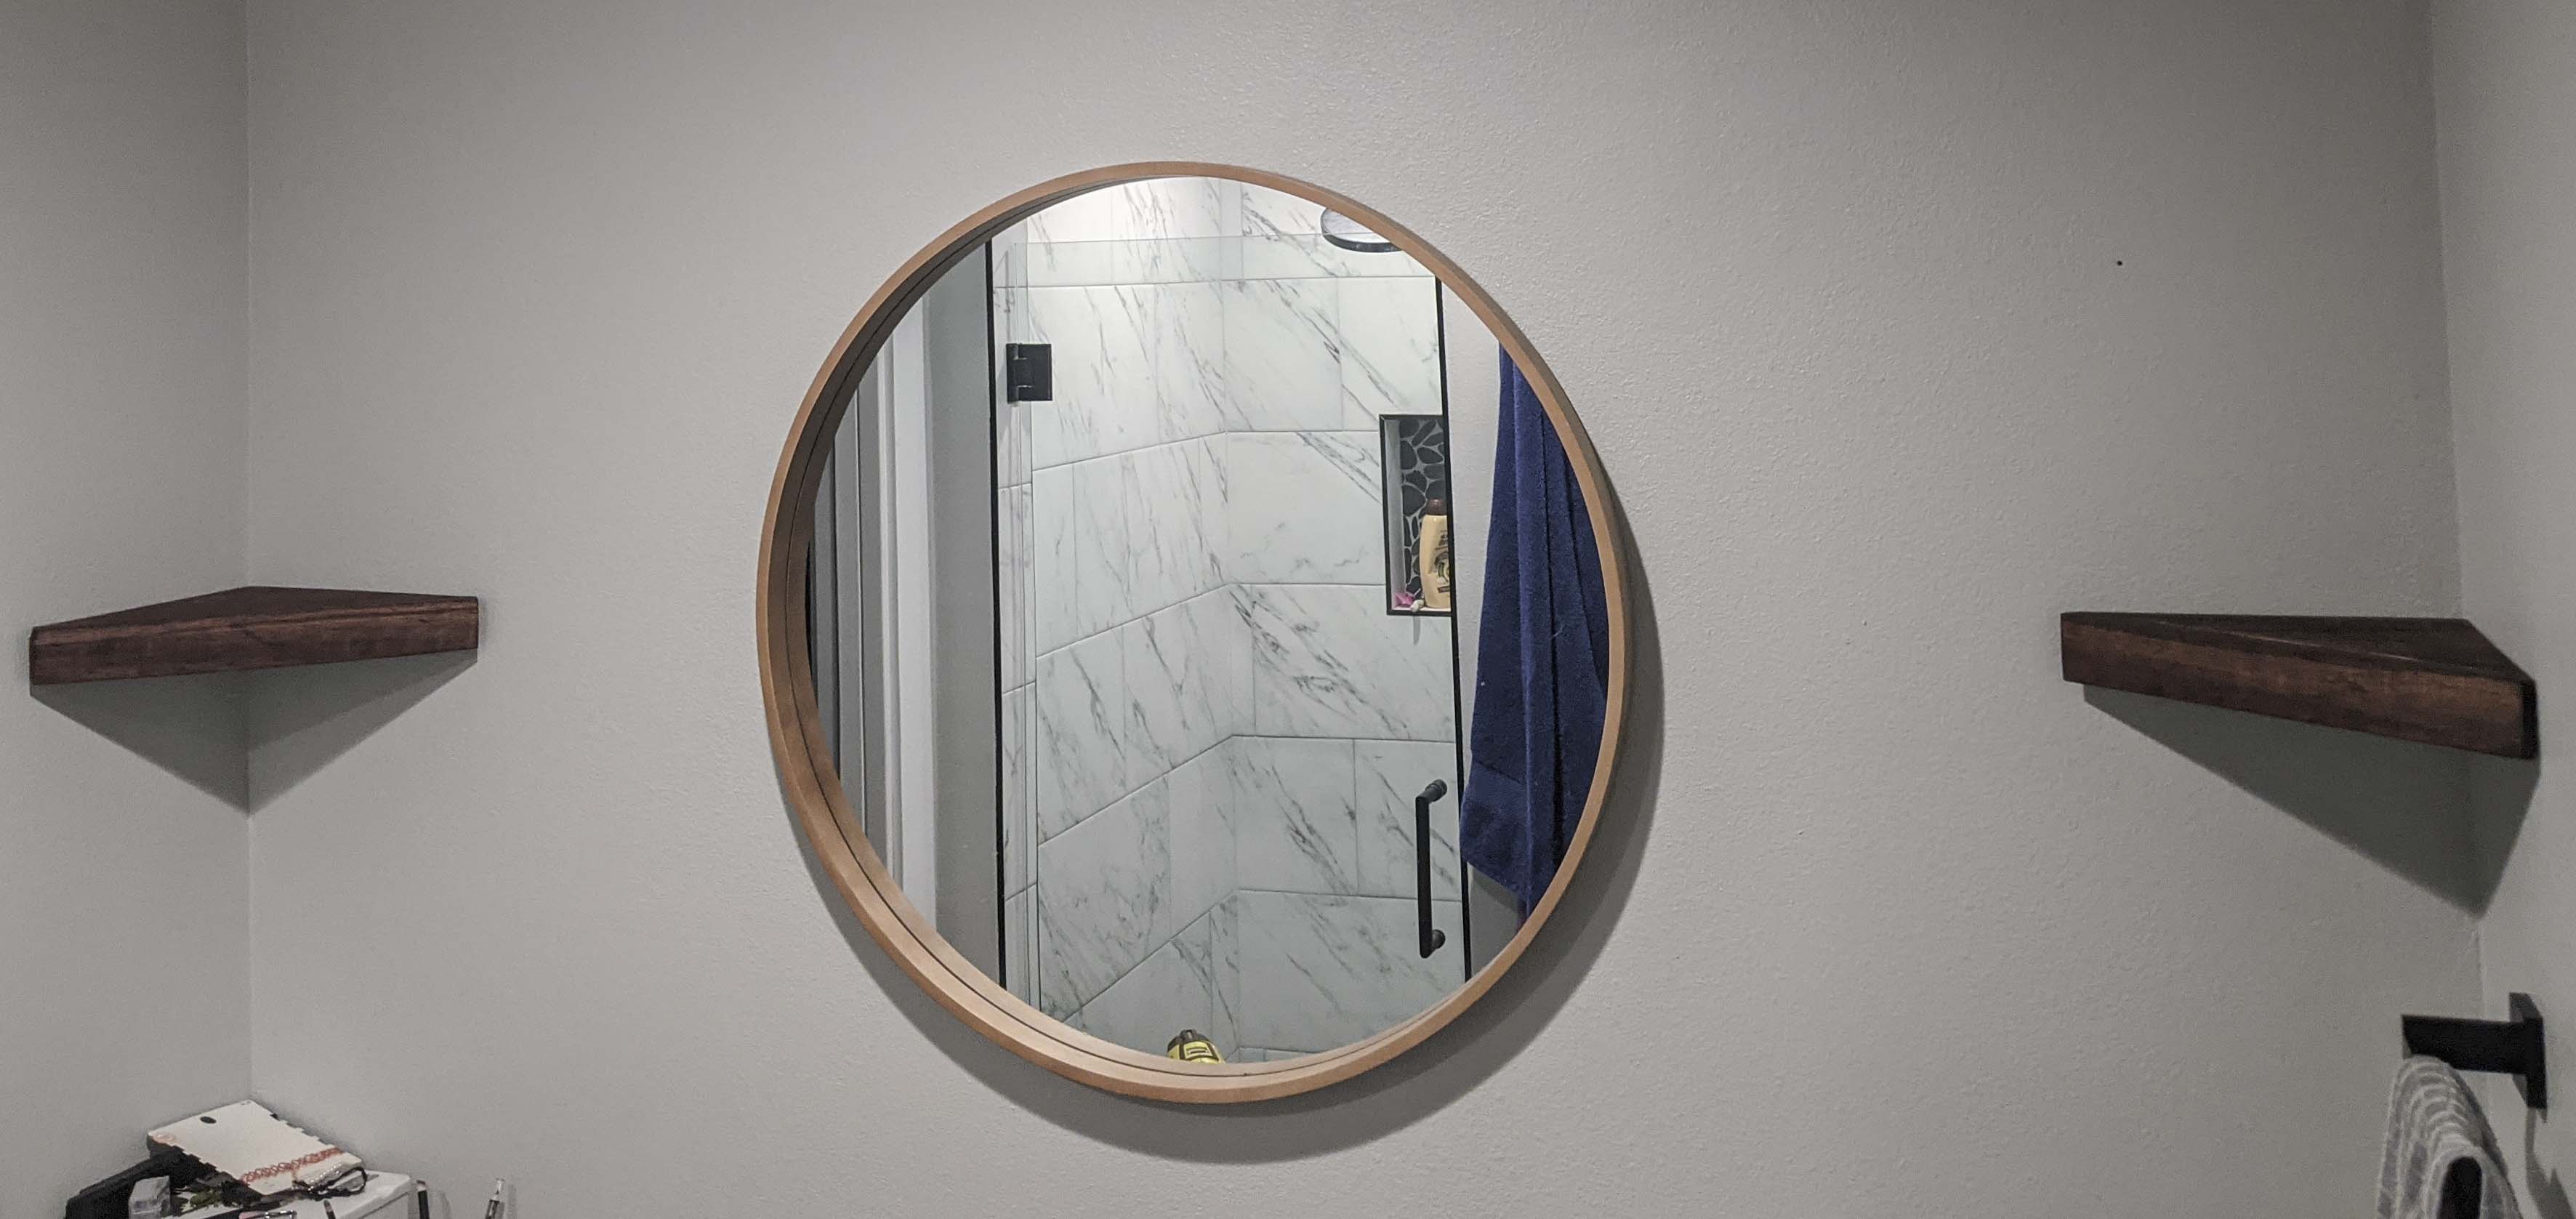
The space above the vanity was looking a little barren. We removed the light and had recessed lighting installed instead, so we were left with a big, blank wall that now has a singular mirror on it. I wanted to get some greenery in there, but there was no place to put potted plants or anything else for that matter sans hanging something.
Lightbulb: shelving! I had spare plywood from the shelf I made for our pantry and I’ve always liked how corner shelves look. Time to experiment!
Supplies:
- Jigsaw
- Drill
- Sander
- Mitre box and saw
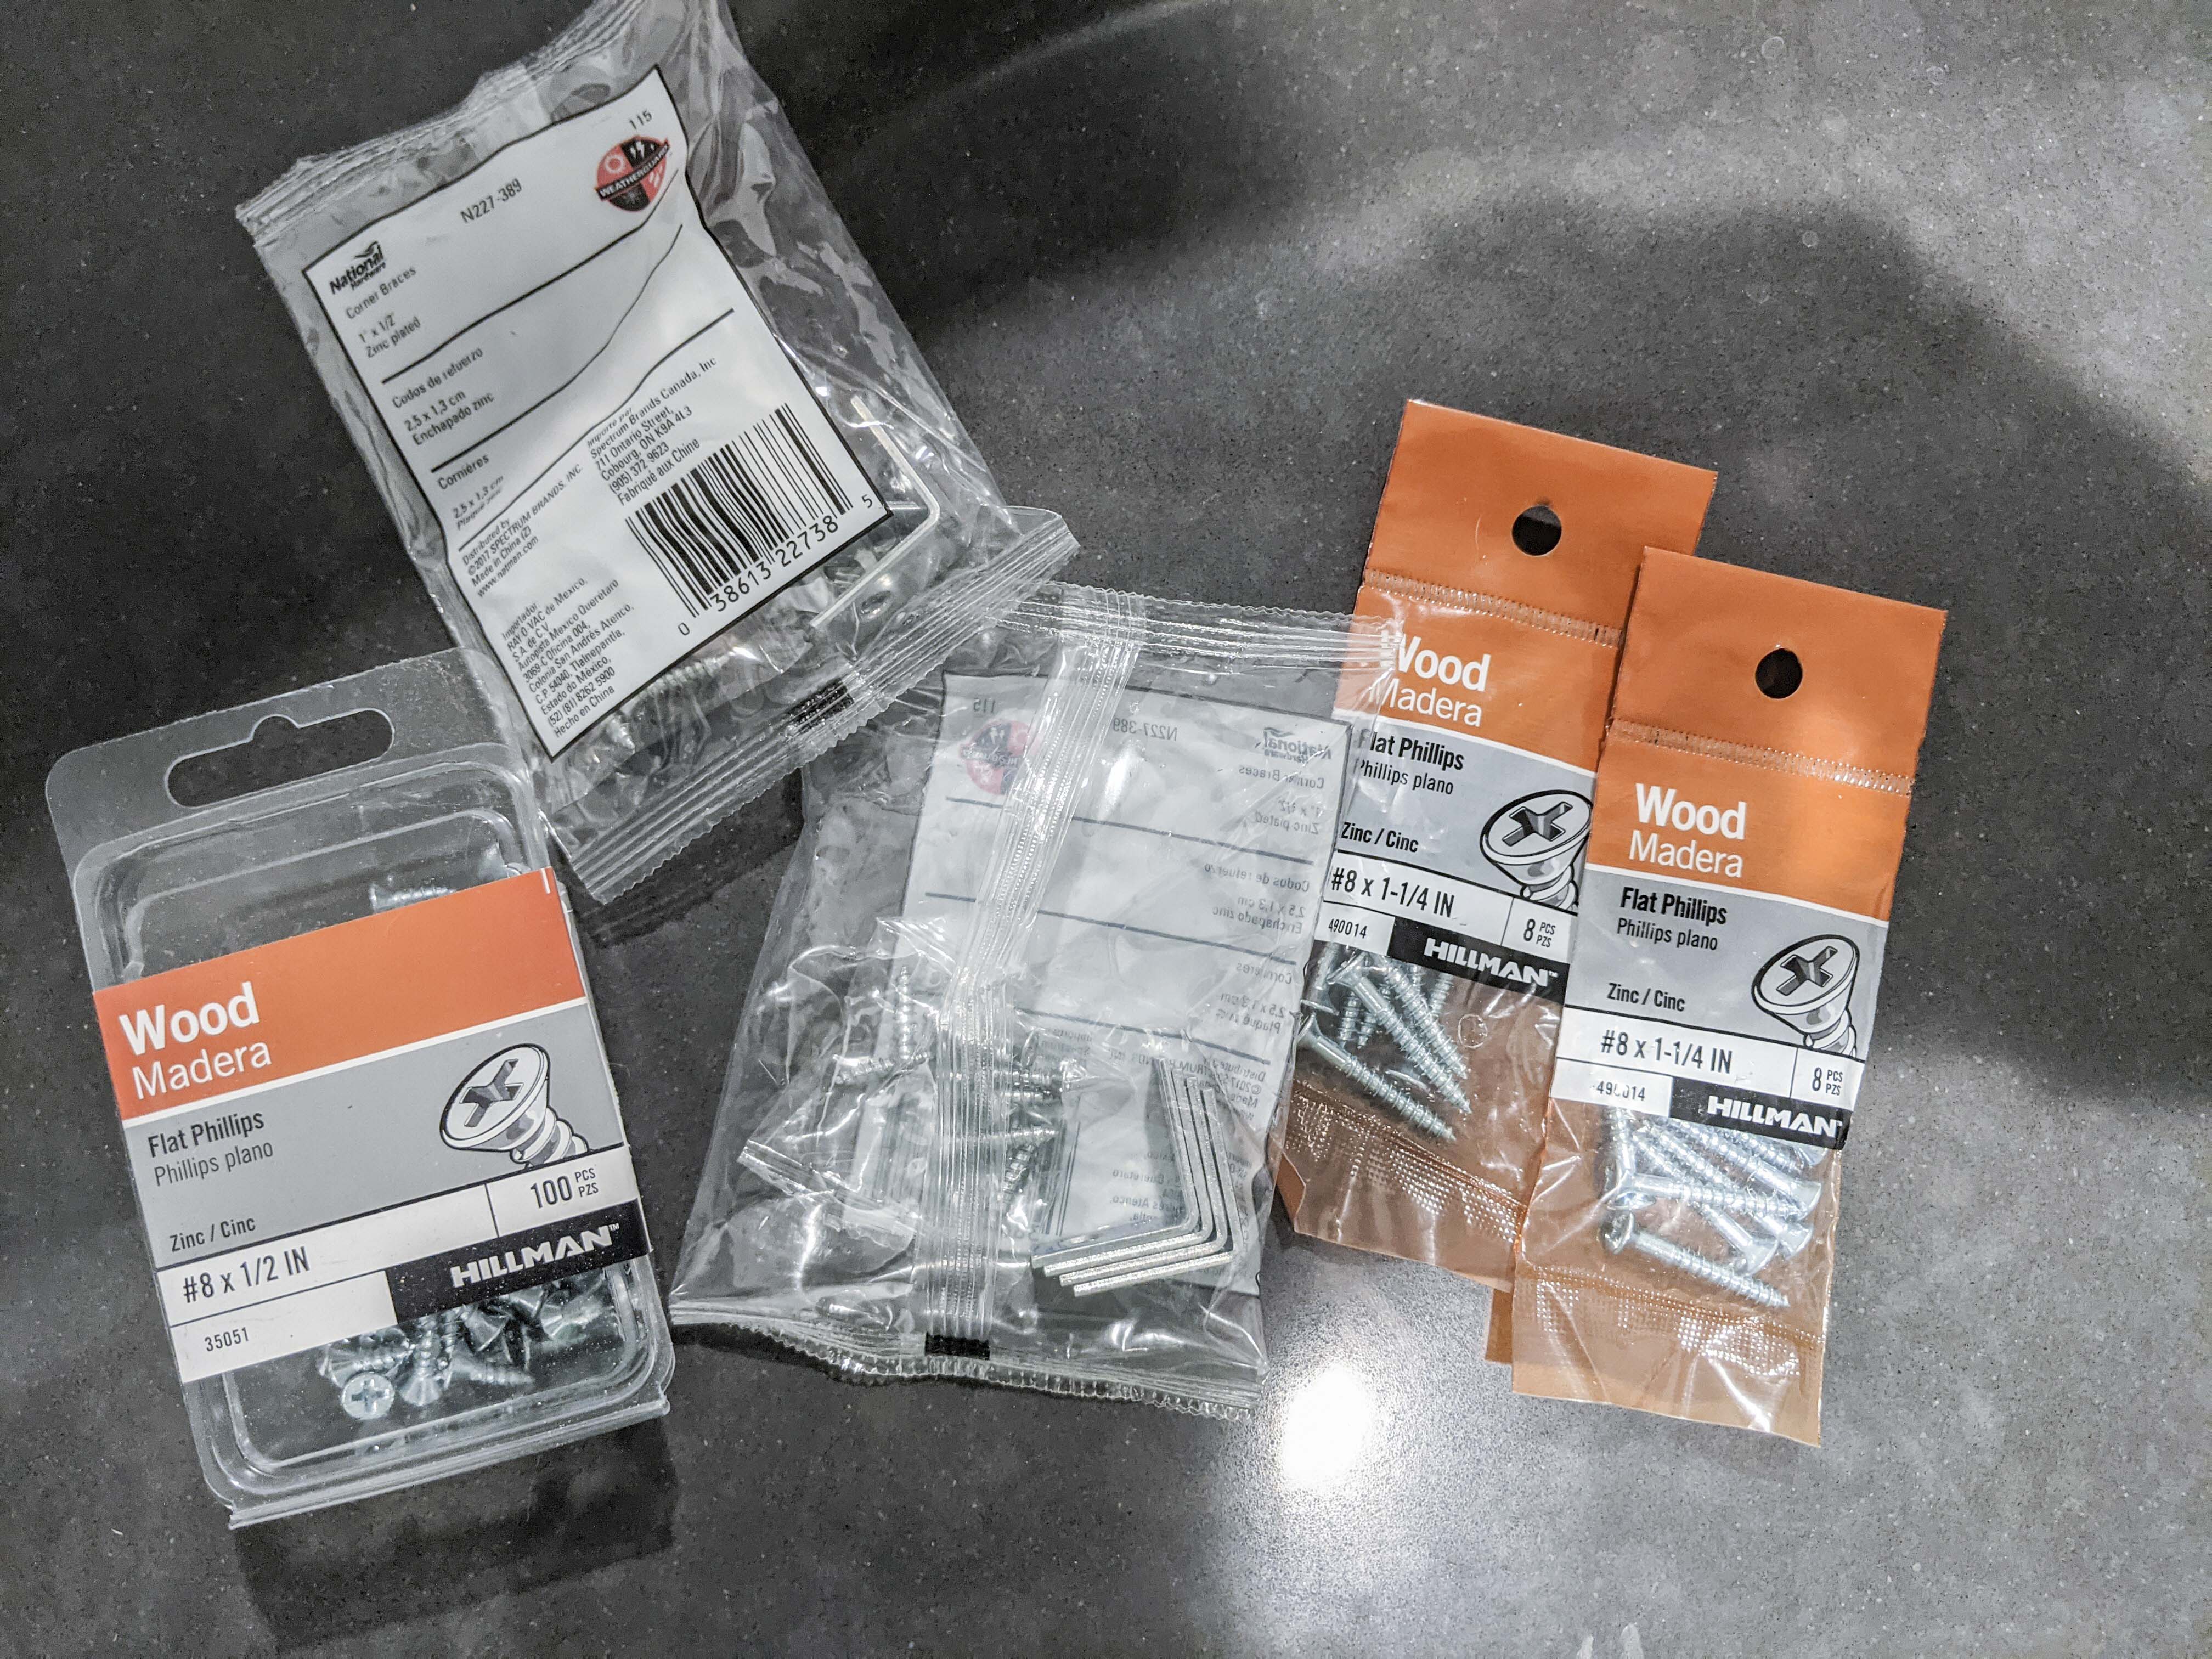
- Screws
- L-brackets
- Plywood (mine was 3/4" thick)
- Laser level (this is the one I used)
- Ruler or Square
- Stain
- Wood Glue
I used a piece of yarn to measure out how wide I wanted my shelves and decide what would look good for the space. Since one would be over a towel rack and the sink, I didn’t want them to be in the way, but they also needed to hold decor. I decided that about 14 inches wide would work just fine.
I measured out the hypotenuse of the shelves to be 14 inches and used a level to make sure my ruler was straight. This would be easier if you have a larger square ruler. Then, I brought out my trusty jigsaw and cut down the line I made. These are going to be “faux” floating shelves so I needed to make a front piece to hide the hardware I’m going to use to hang it. I cut a straight strip of wood long than 14 inches- about 18 inches because it needs to be wider so it will touch the wall. I used wood glue to attach it to the front of each shelf and waited for it to dry. You’ll want to clamp the pieces together if you can to get a solid bond. I didn’t have a good clamp at the time, but they still came out well. Remember to wipe away any excess glue.
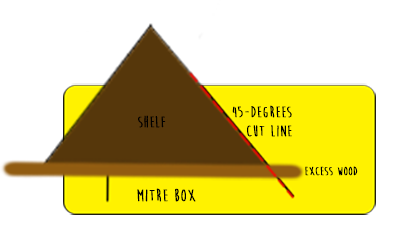
After it dries, use a mitre box and saw to cut the excess off of that strip. This shelf is a right triangle so you’ll want to use the 45-degree slot. The saw should slide down the side of the shelf and cut the excess. Do this for both sides and that front strip will look like a seamless part of the shelf. Note that your shelves will be slightly wider than 14 inches now.
Now it’s time to stain. Pick whatever stain or paint color you like. I have an excess of red mahogany so that’s what all my wood gets stained as. Chip or sand away any excess glue you may have missed before staining.

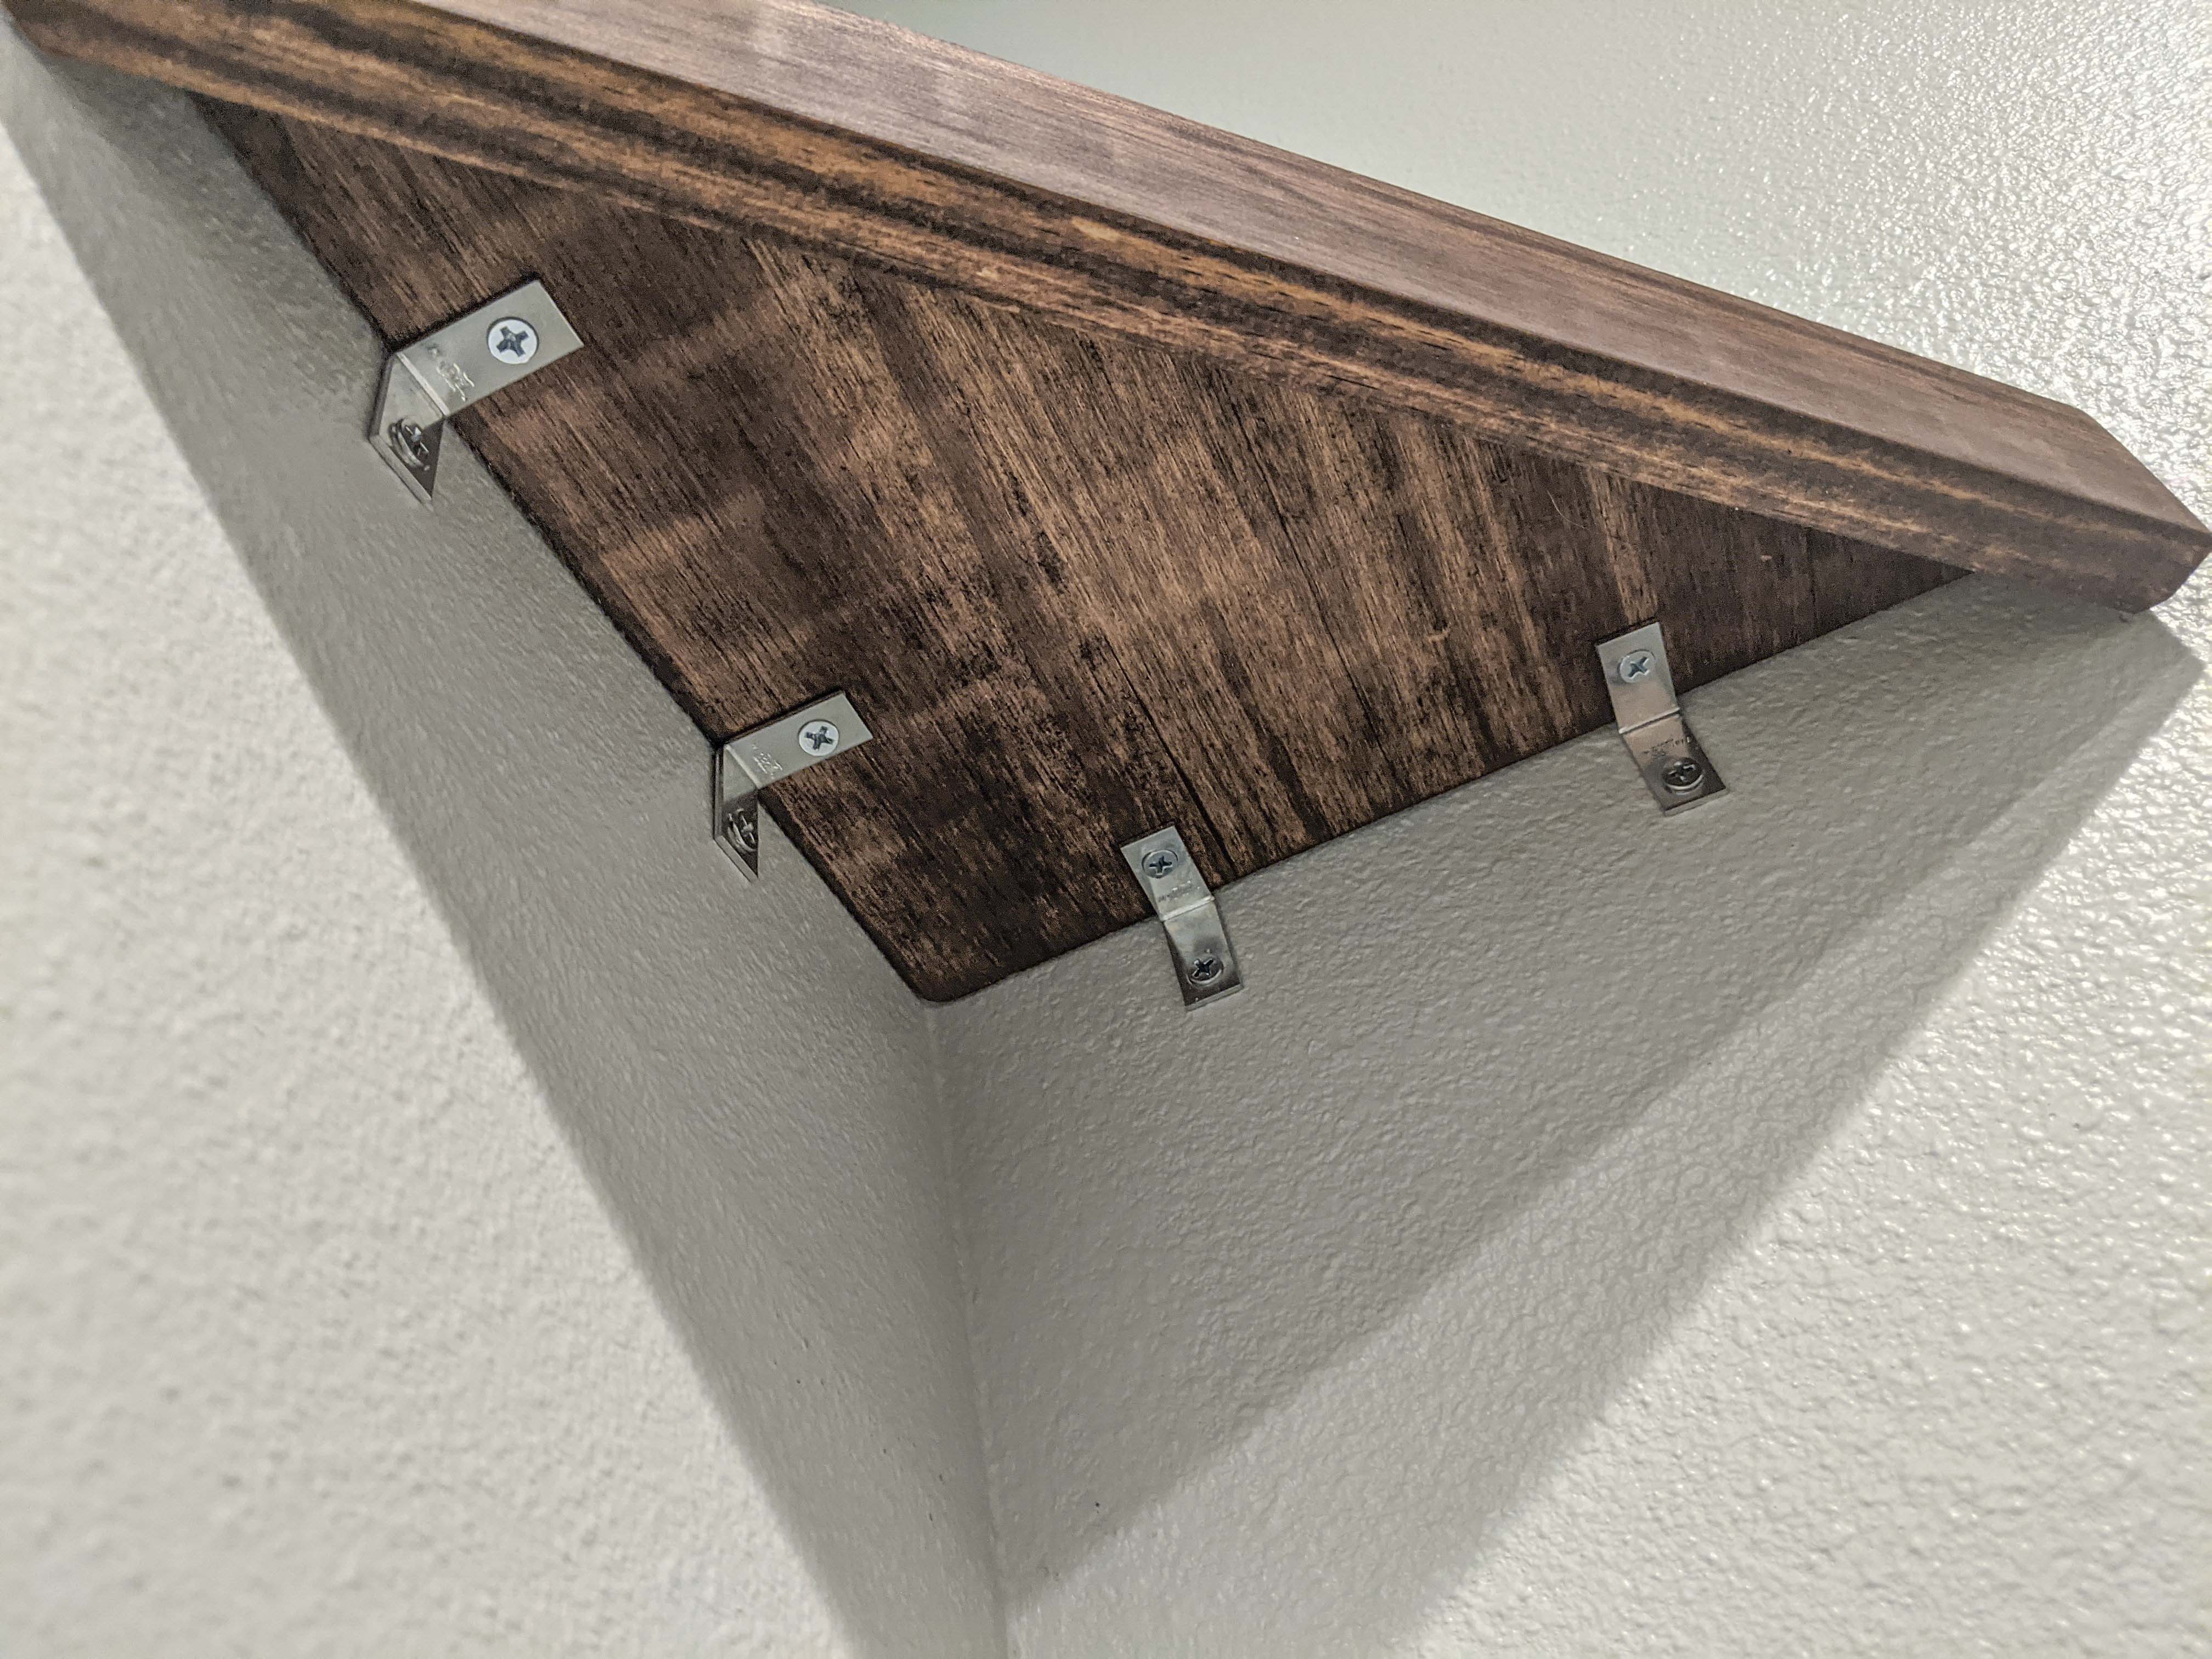
When it’s dry, it’s time to hang! I used a laser level to make sure both sides were even and the same distance above the vanity. I bought some small L-brackets from Lowe’s that came 4 in a pack to mount the shelves. If you’re planning on putting anything heavy on your shelves, be sure to screw them into studs. I mounted the L-brackets first, then placed the shelves on top and screwed them in underneath. Make sure your screws are shorter than the thickness of your wood.
Voila! All done! The whole project takes about a day for drying time, but only costs a few dollars total- especially if you have scrap wood lying around. If you want them to have a bottom piece, you can cut another triangle out that’s the same width as your shelf with the strip attached. Mount the shelf in the same way, then glue the bottom triangle onto the strip and 100% clamp until cured.