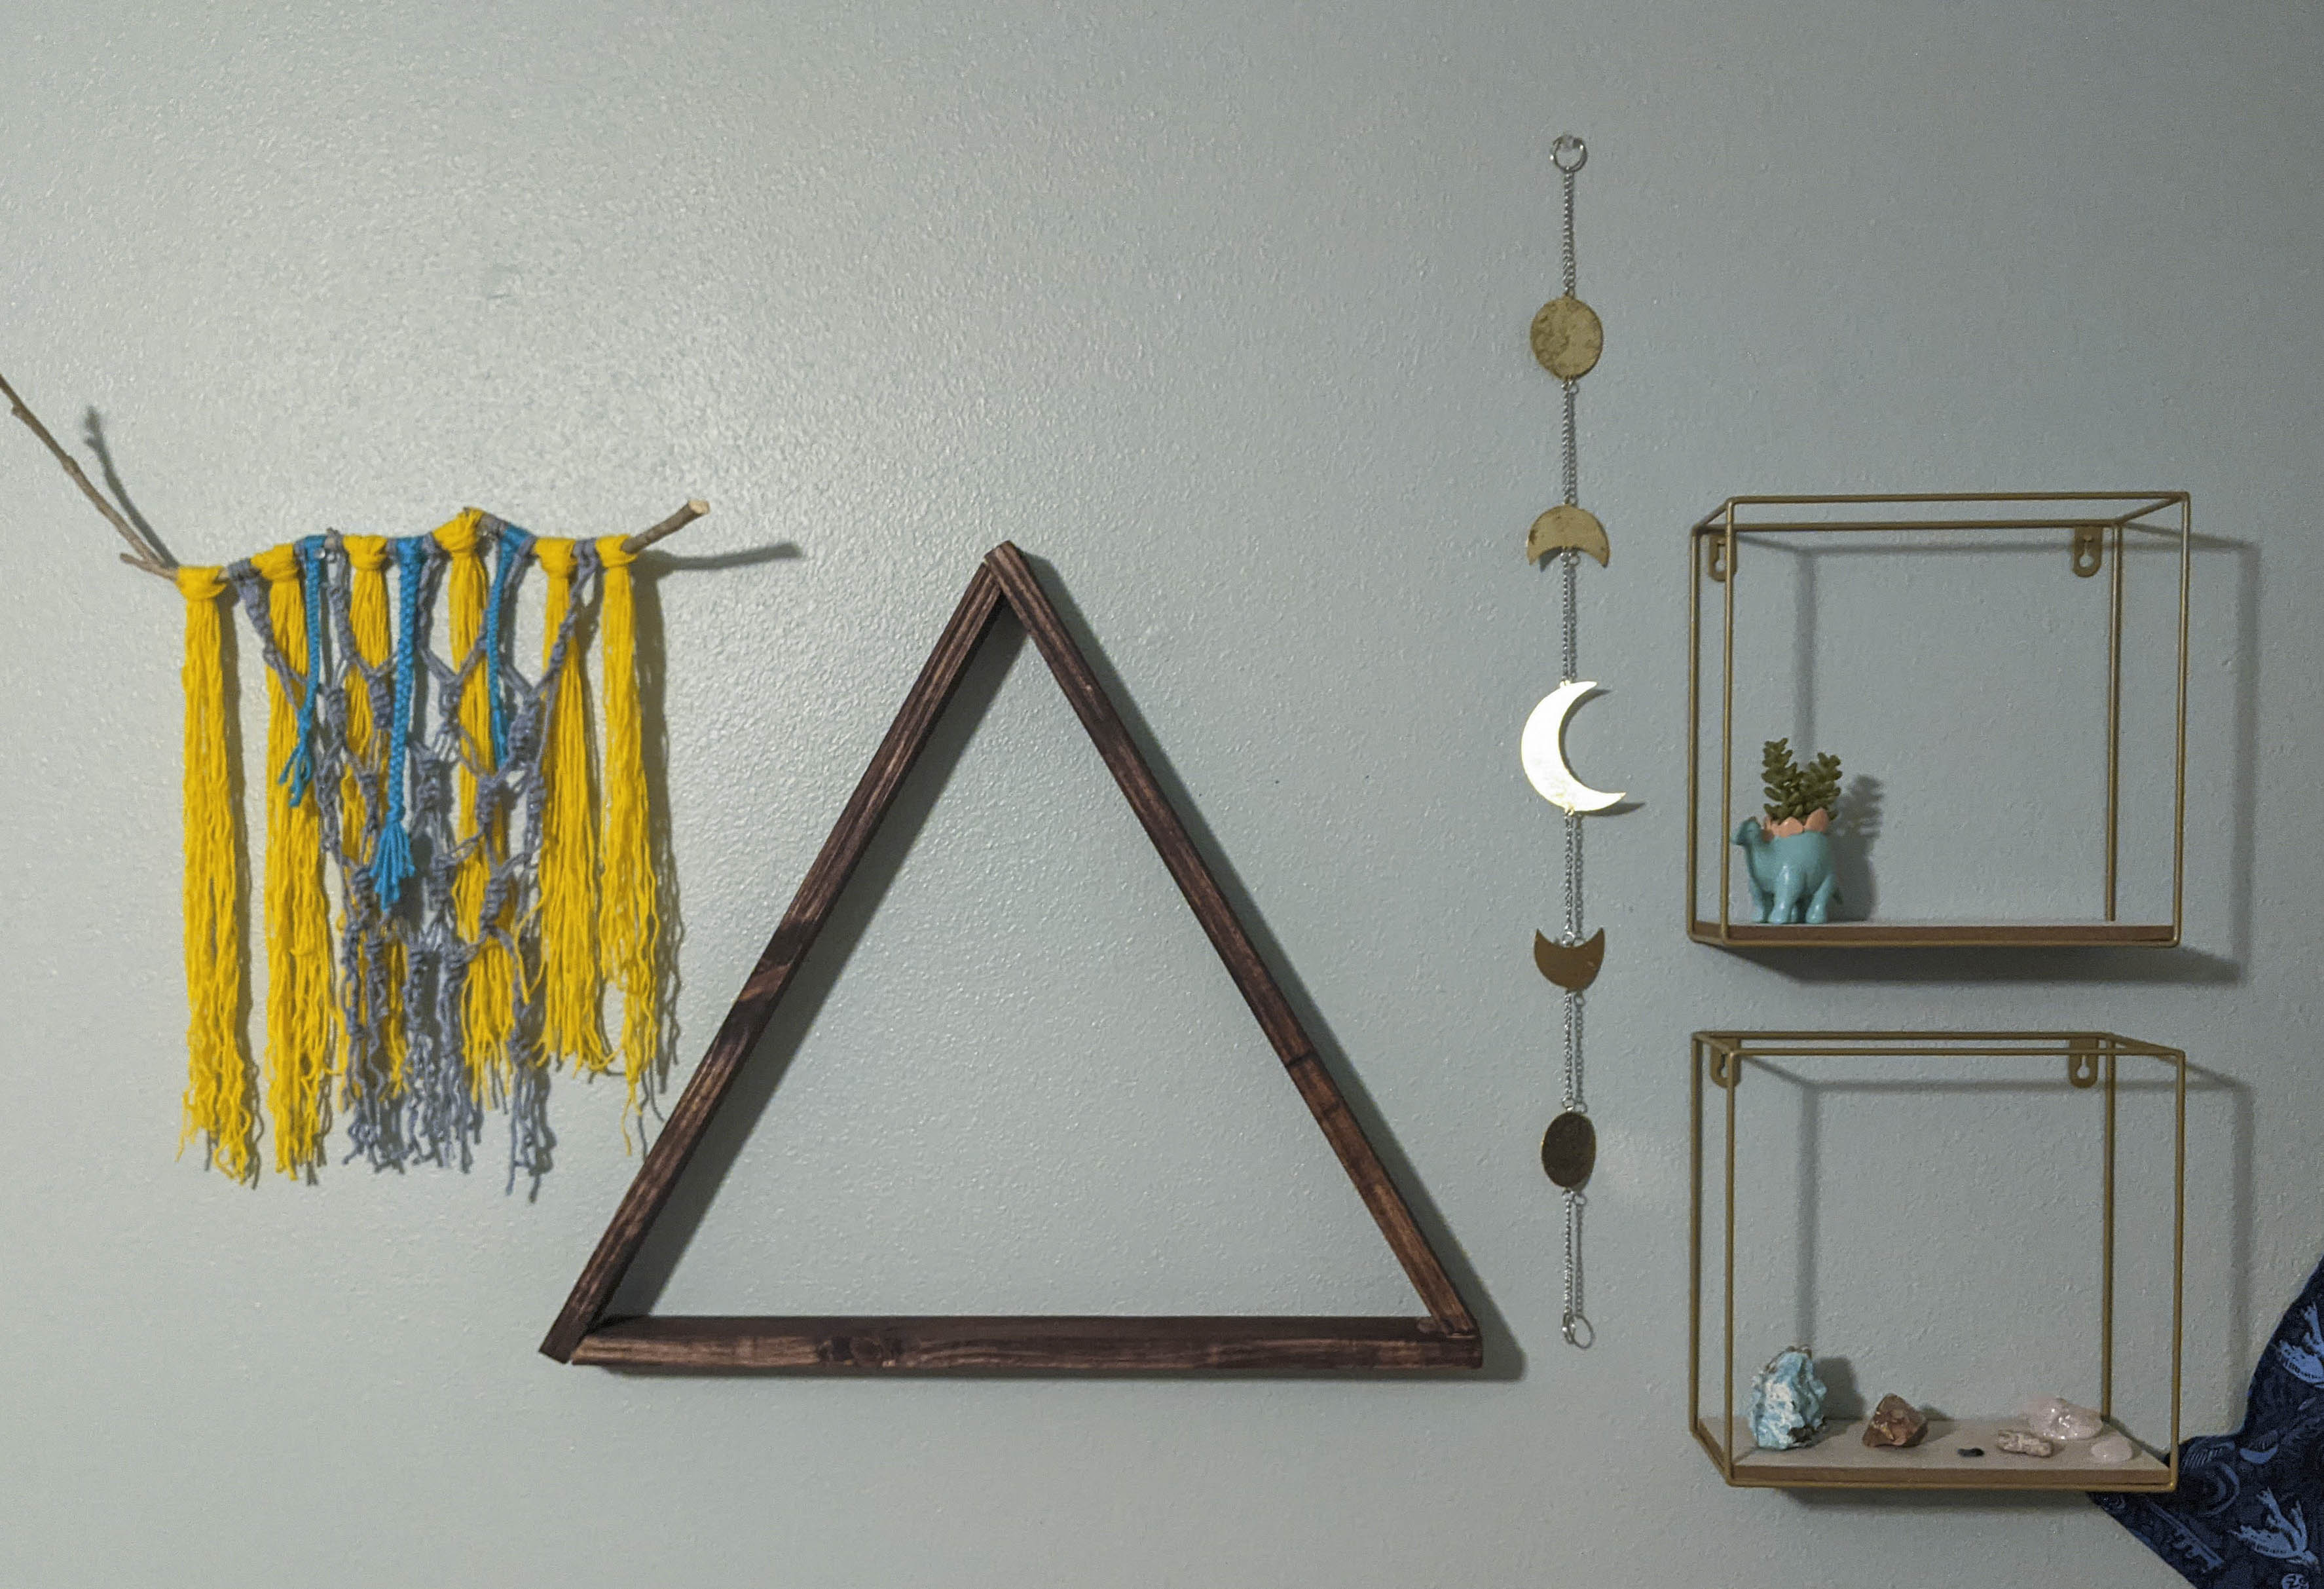
I love to build and make things. What I don’t love is how expensive tools are. So, I’m going to try and make fun, inspired pieces with as few tools as possible and as inexpensively possible. We’re going to make a boho-style triangle to hang on the wall. If made thick enough then it can be used as a shelf.
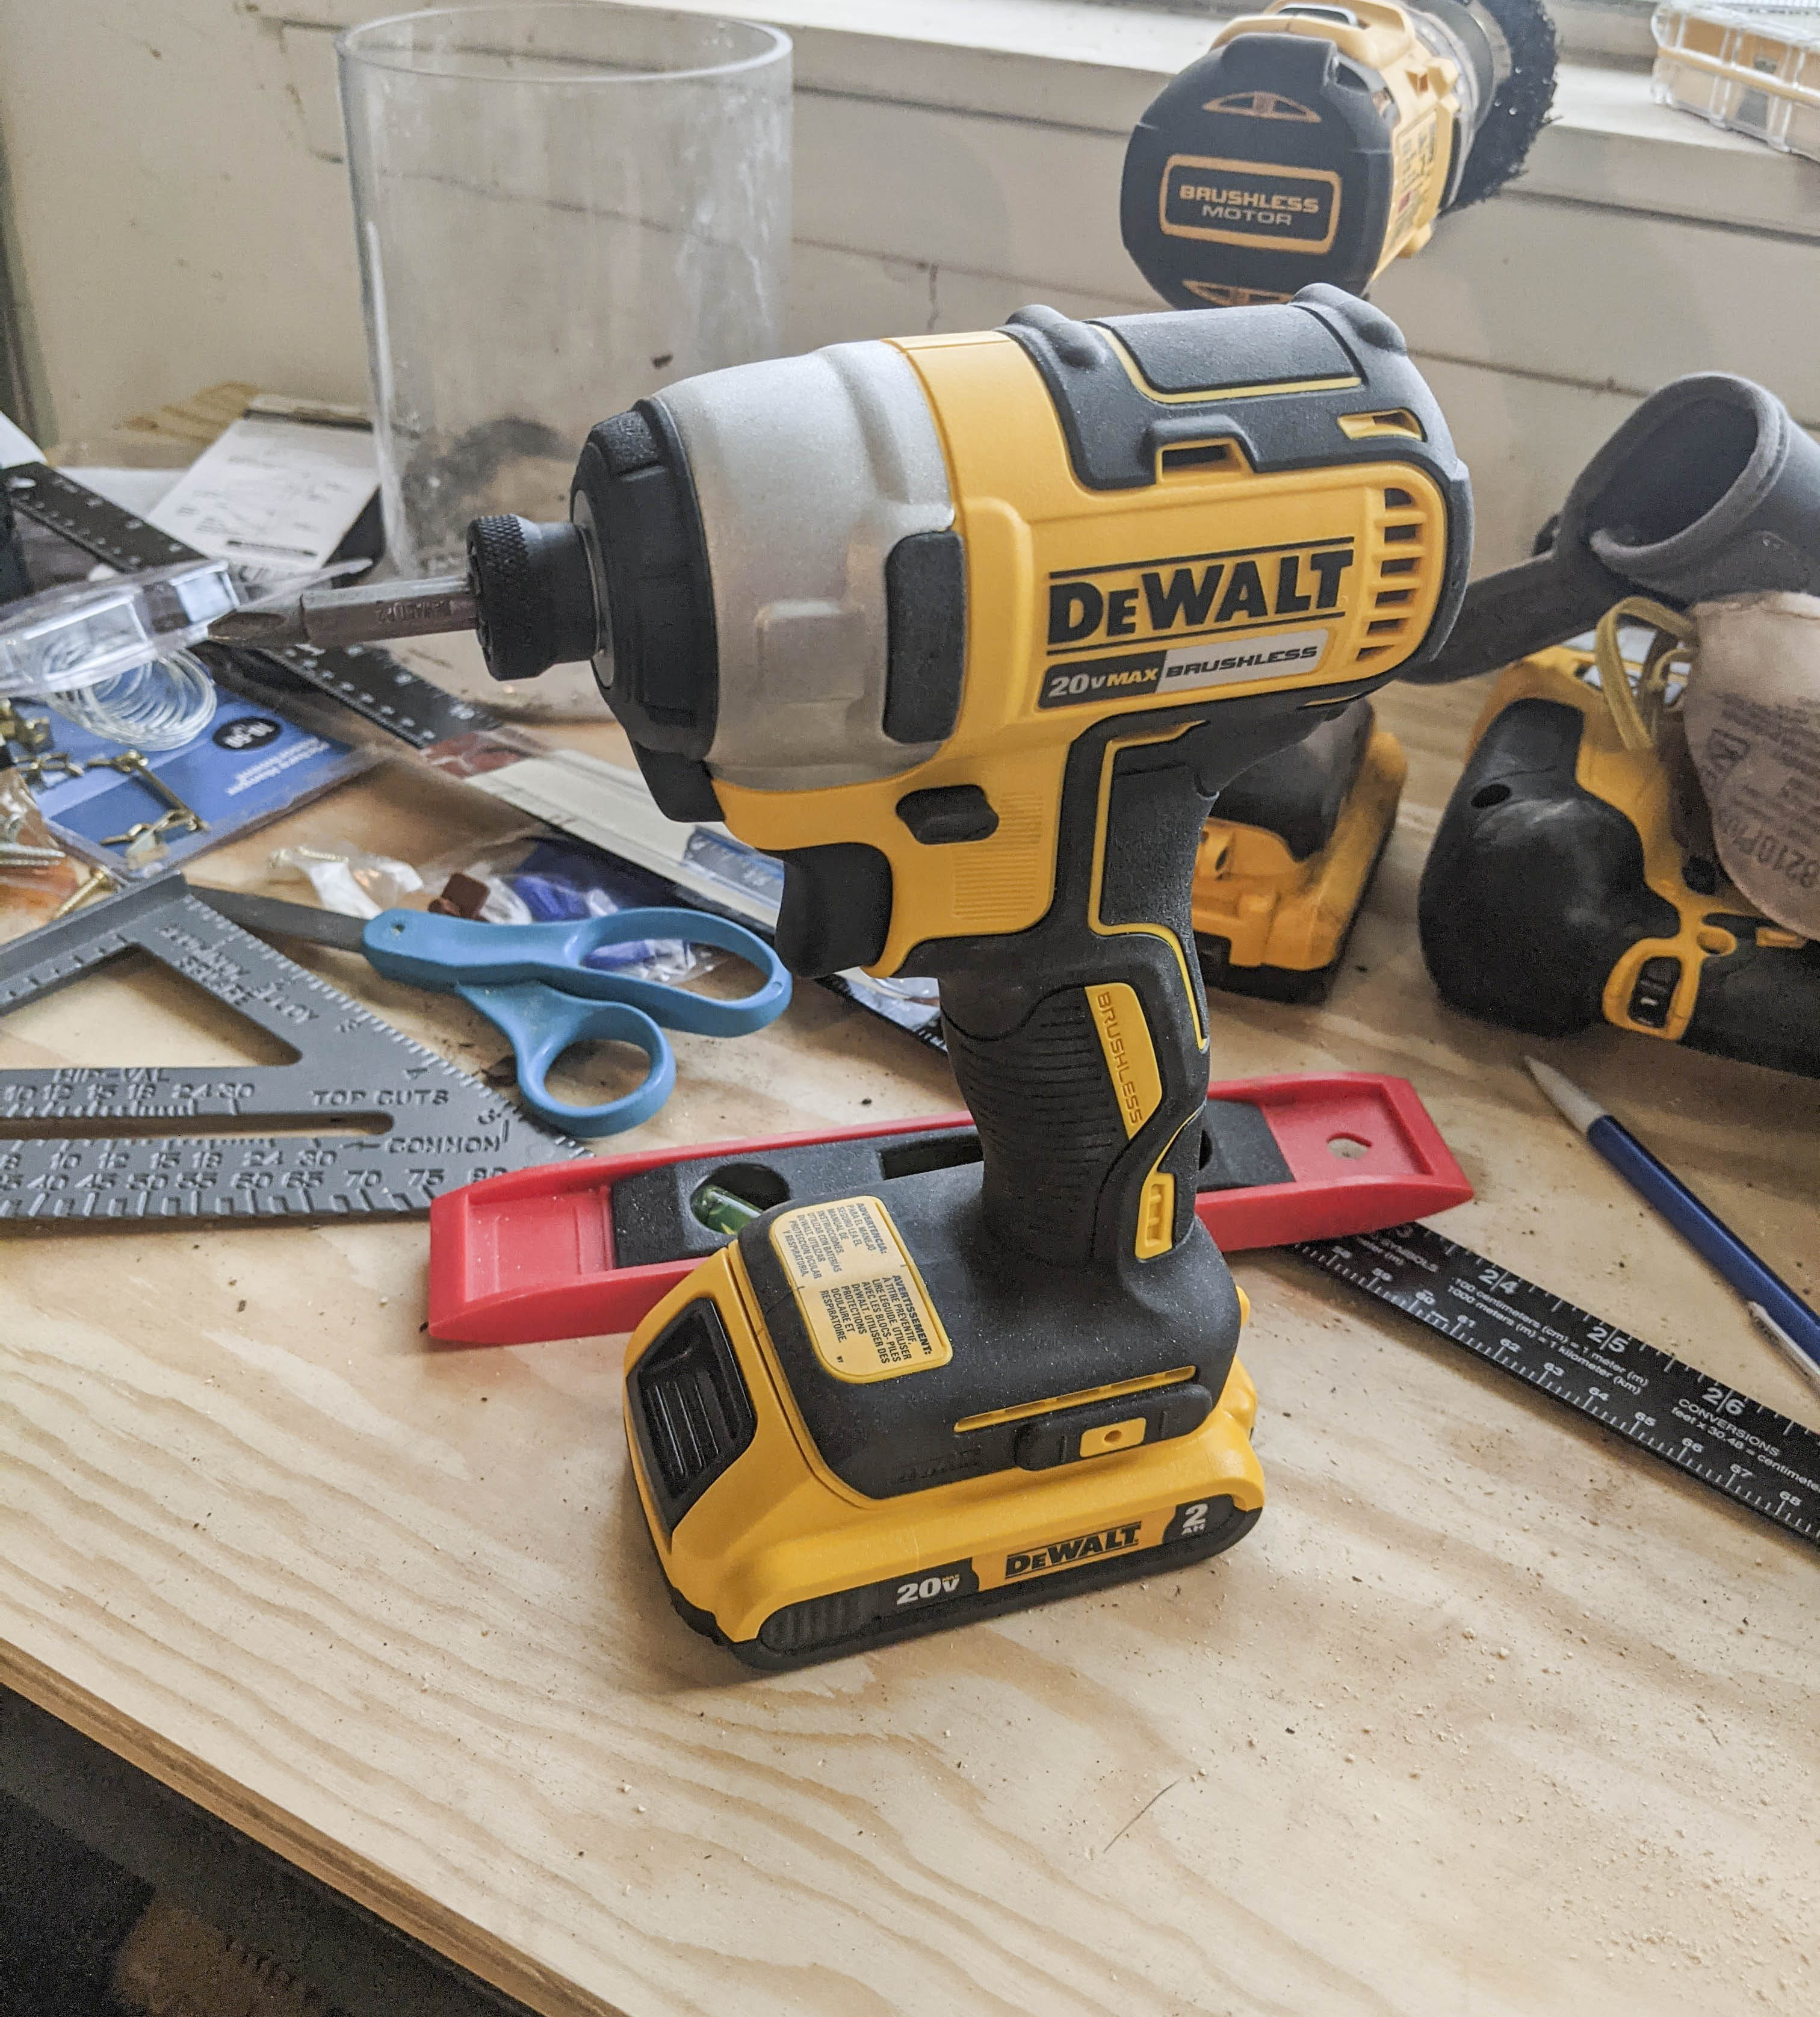
This is the first tutorial where the only power tools I use are a jigsaw, impact driver, and sander. You can always sand by hand and use a drill if you don’t have an impact driver. Also, if you have a circular saw, you can use that instead of a jigsaw however having some kind of power saw is important because it’ll be very difficult and time-consuming to saw by hand.
Let’s get started.
Supplies
Power Tools:
- Jigsaw
- Impact Driver
- Sheet, Orbital, or Belt Sander
Supplies:
- Stain
- Screws
- Wood glue
- Scrap plywood
- Coping saw
- Ruler
- Square or Protractor for angles
- Clamps
- Pencil
- Safety glasses (always)
- Mask (always)
Steps
The wood I used was leftover from my corner shelf project I did in my bathroom. It’s plywood I bought from Lowe’s for about $18 and got three solid projects out of it- not too bad!
Be sure to always wear safety gear and be super safe when using power tools! You don’t want to breathe any dust in or get anything in your eyes. I always do little rituals before using saws especially. If you follow the same safety steps every time, then you can help prevent any accidents.


I started by clamping it to my workbench and trimming off the excess with my jigsaw to get a nice rectangle. It was 6 inches wide, so I marked off 2-inch spaces to get 3 even pieces for my triangle. As I said earlier, if you can get wider pieces then you can use this as a shelf, but I think mine is a little too narrow to put things in and just serves as wall decor.
Next, I used my saw to cut the strips apart and that’s it for the jigsaw!
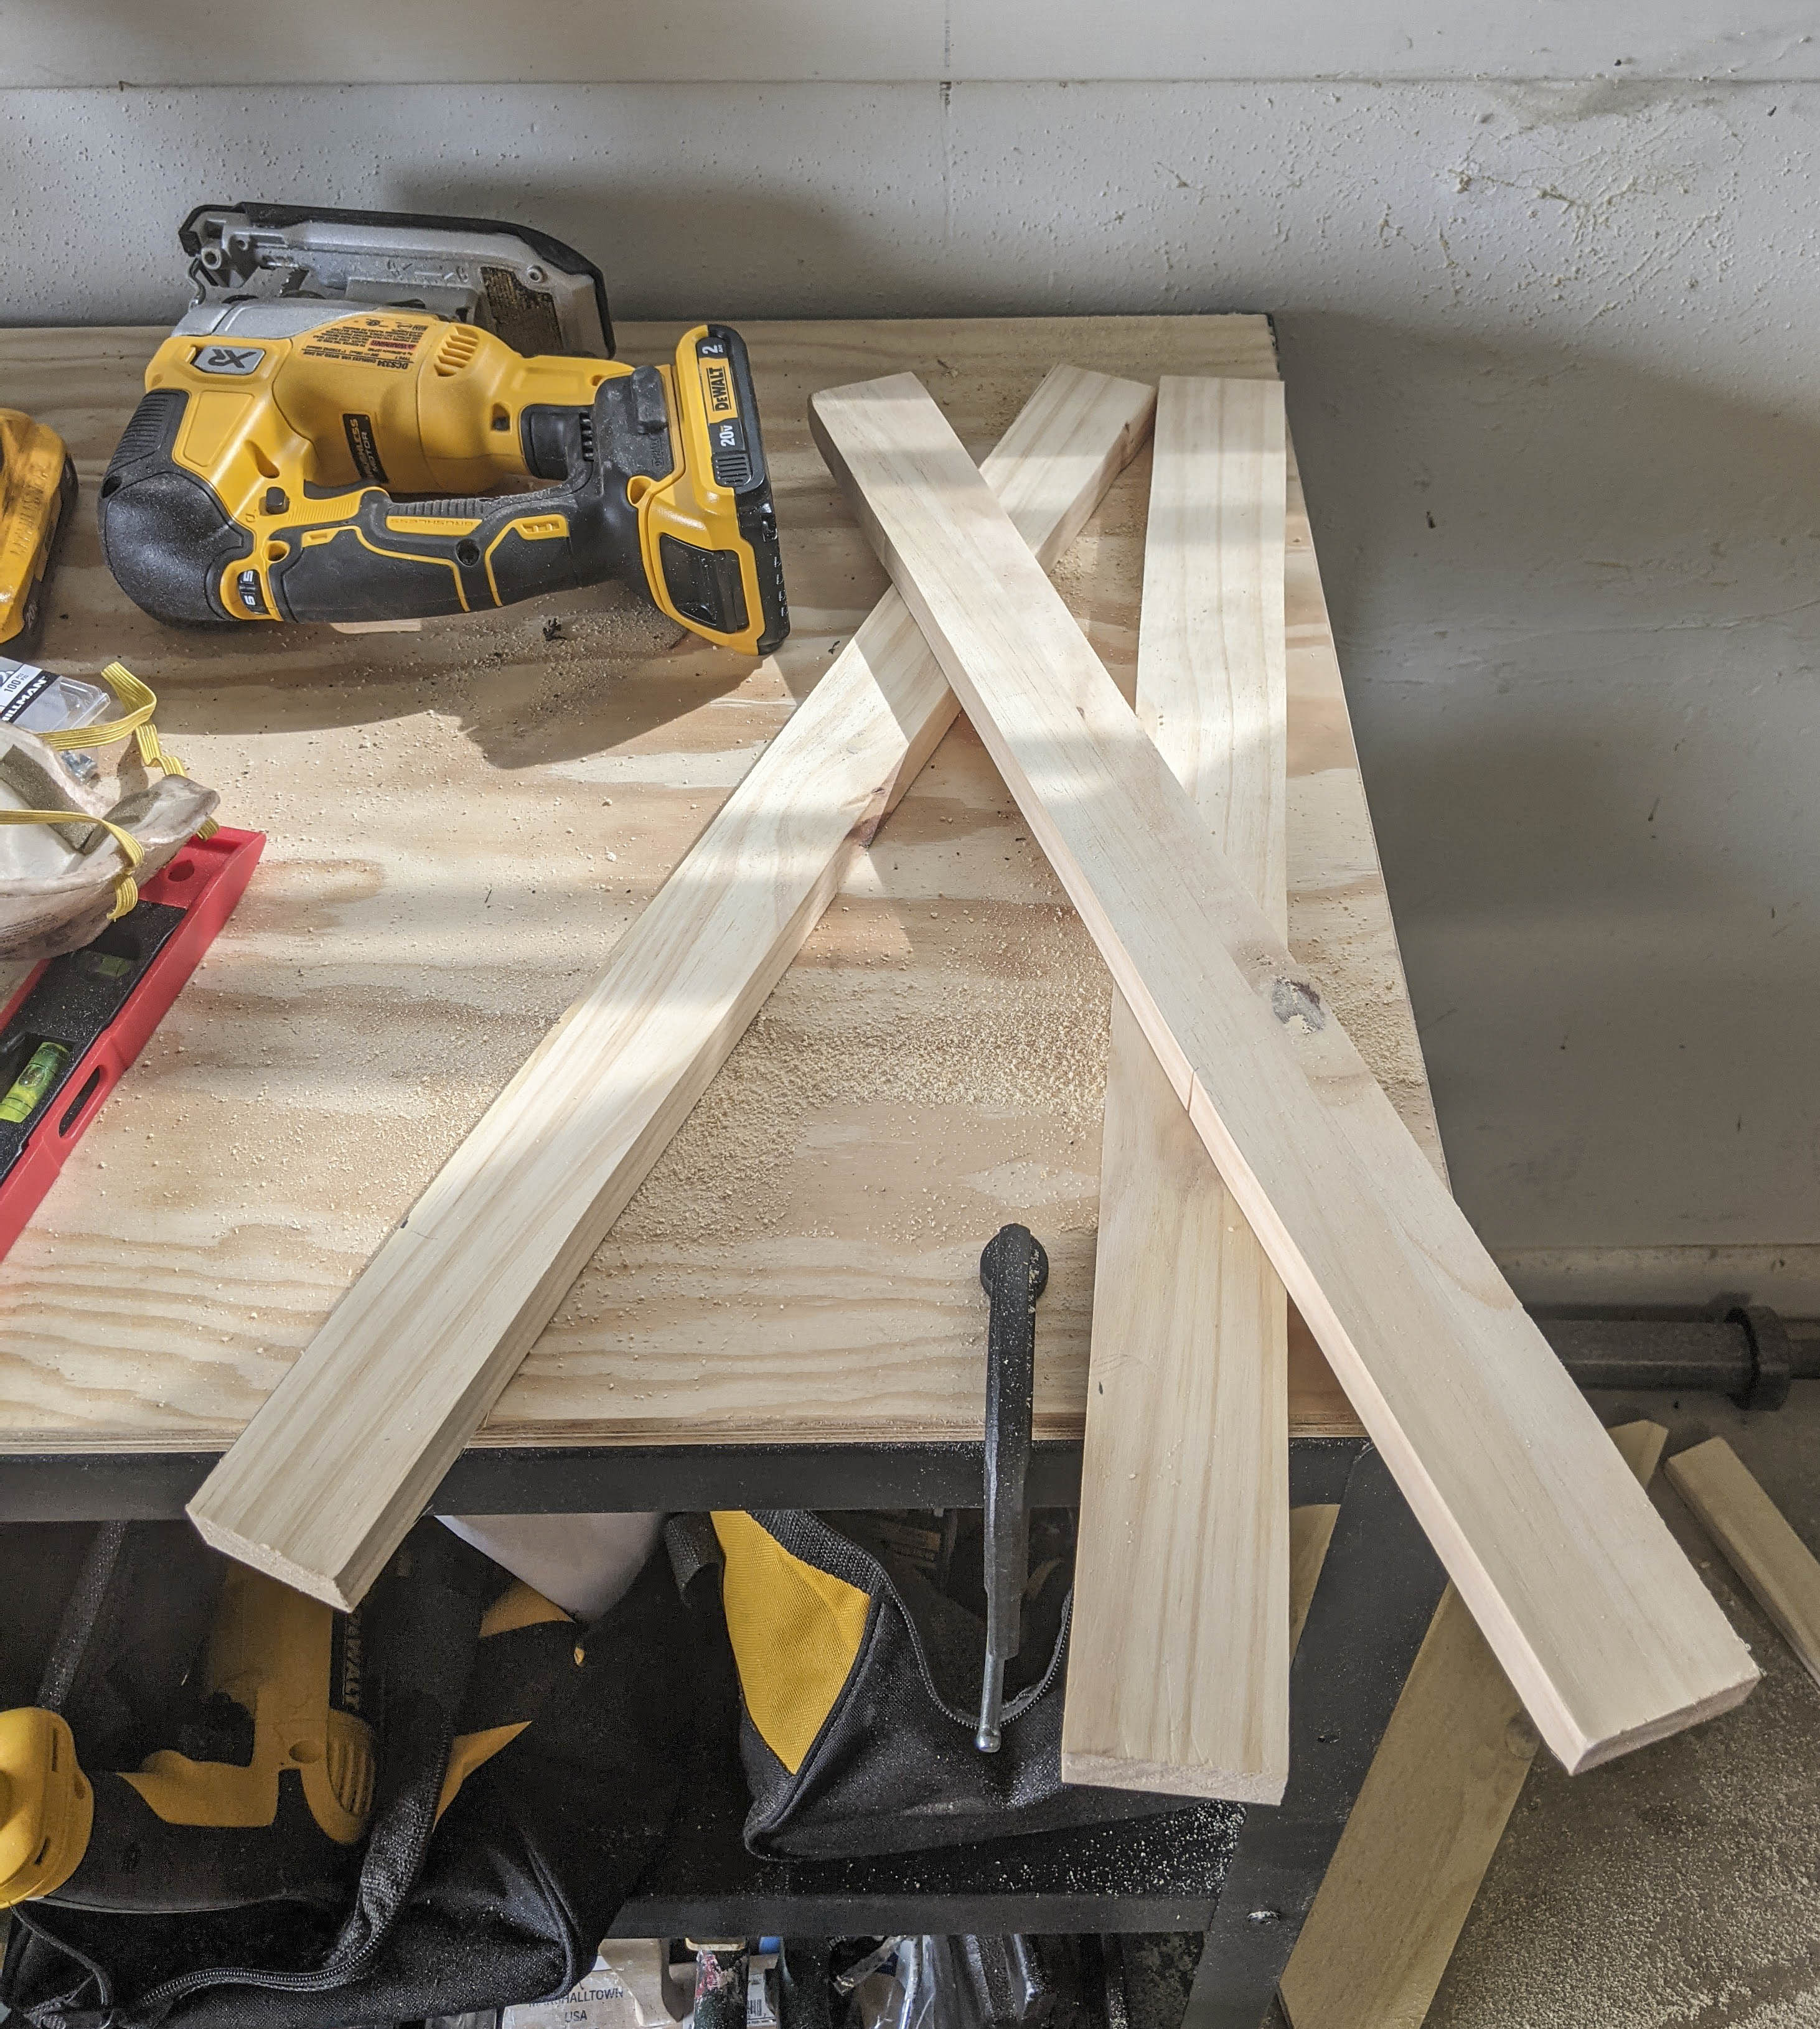
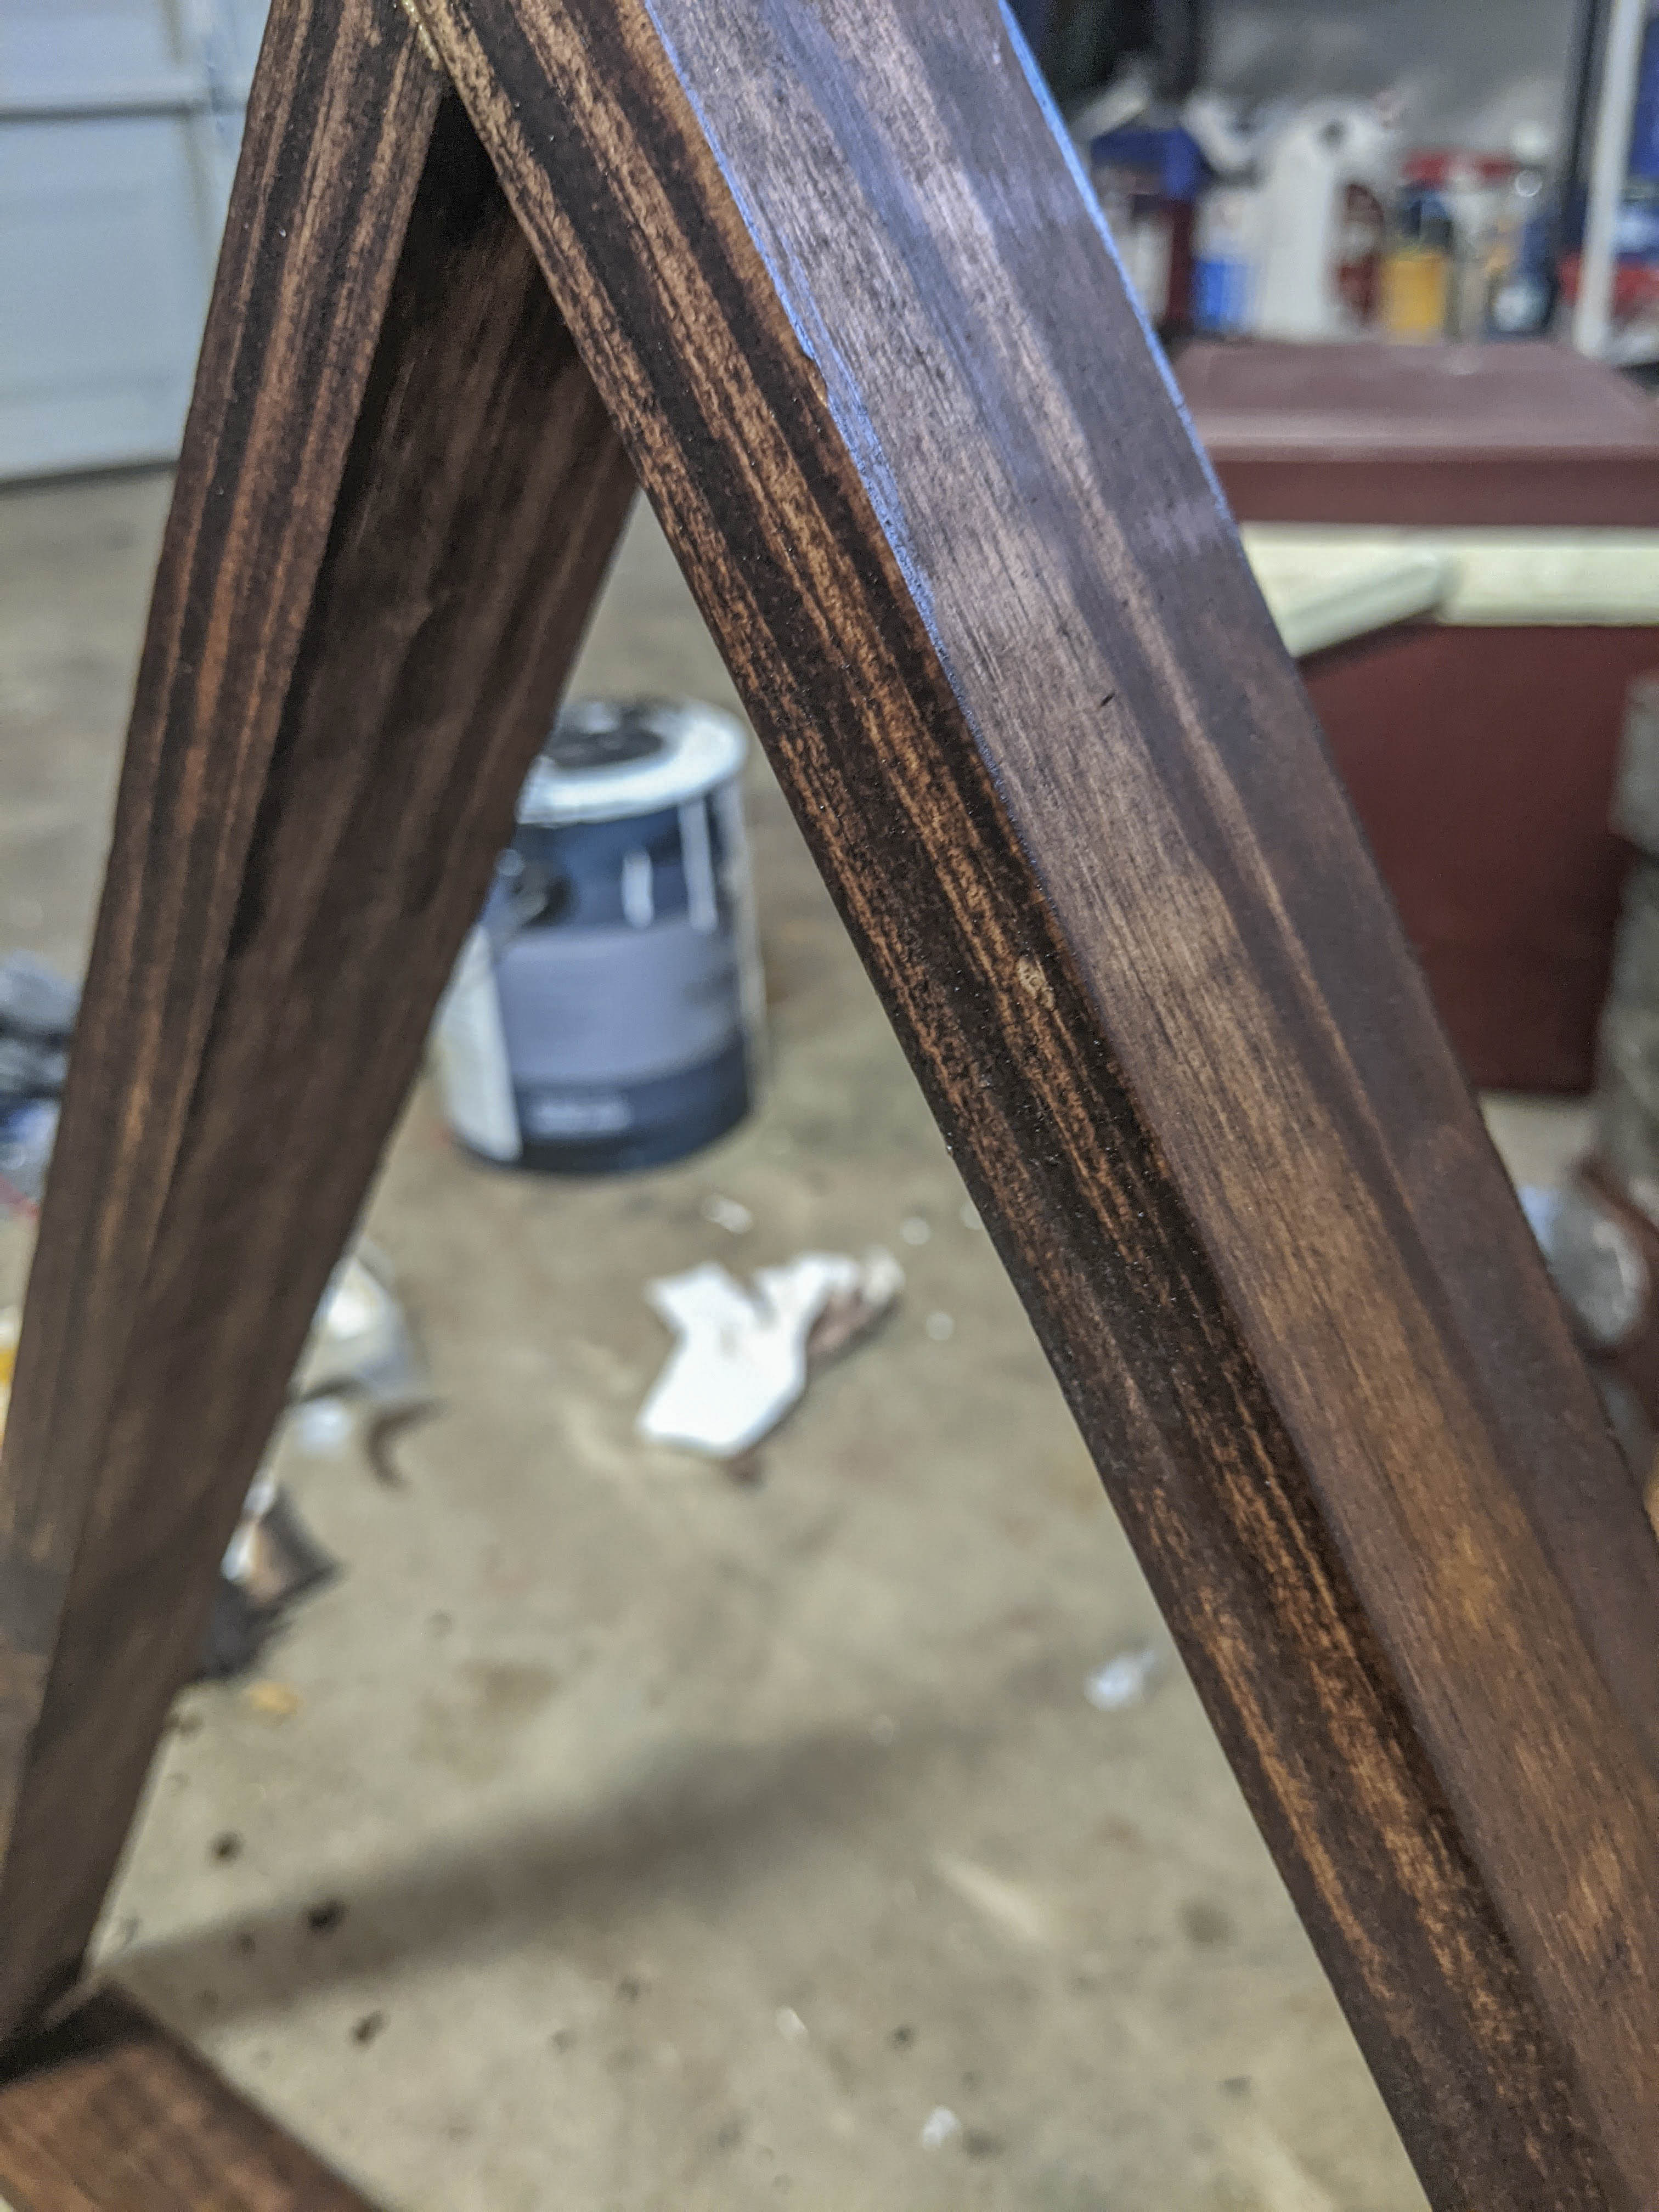
Now we need to cut one end on each triangle at an angle so they fit together. This is where your square or protractor, ruler, and pencil comes in. Mark off 60 degrees for each as your angle and you’ll get a nice, equilateral triangle to hang up.
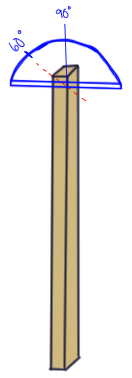

60 degrees is not that sharp of an angle so you can’t really see it in the photos, but I promise it’s there. The best way I found to make the cut is with a coping saw. Might work if you have an adjustable mitre box, but I do not. Also, if you have none of the above, you can use a sander with really gritty paper to sand down the corner. It’s difficult to get it even and flat, but it’s doable and works in pinch.
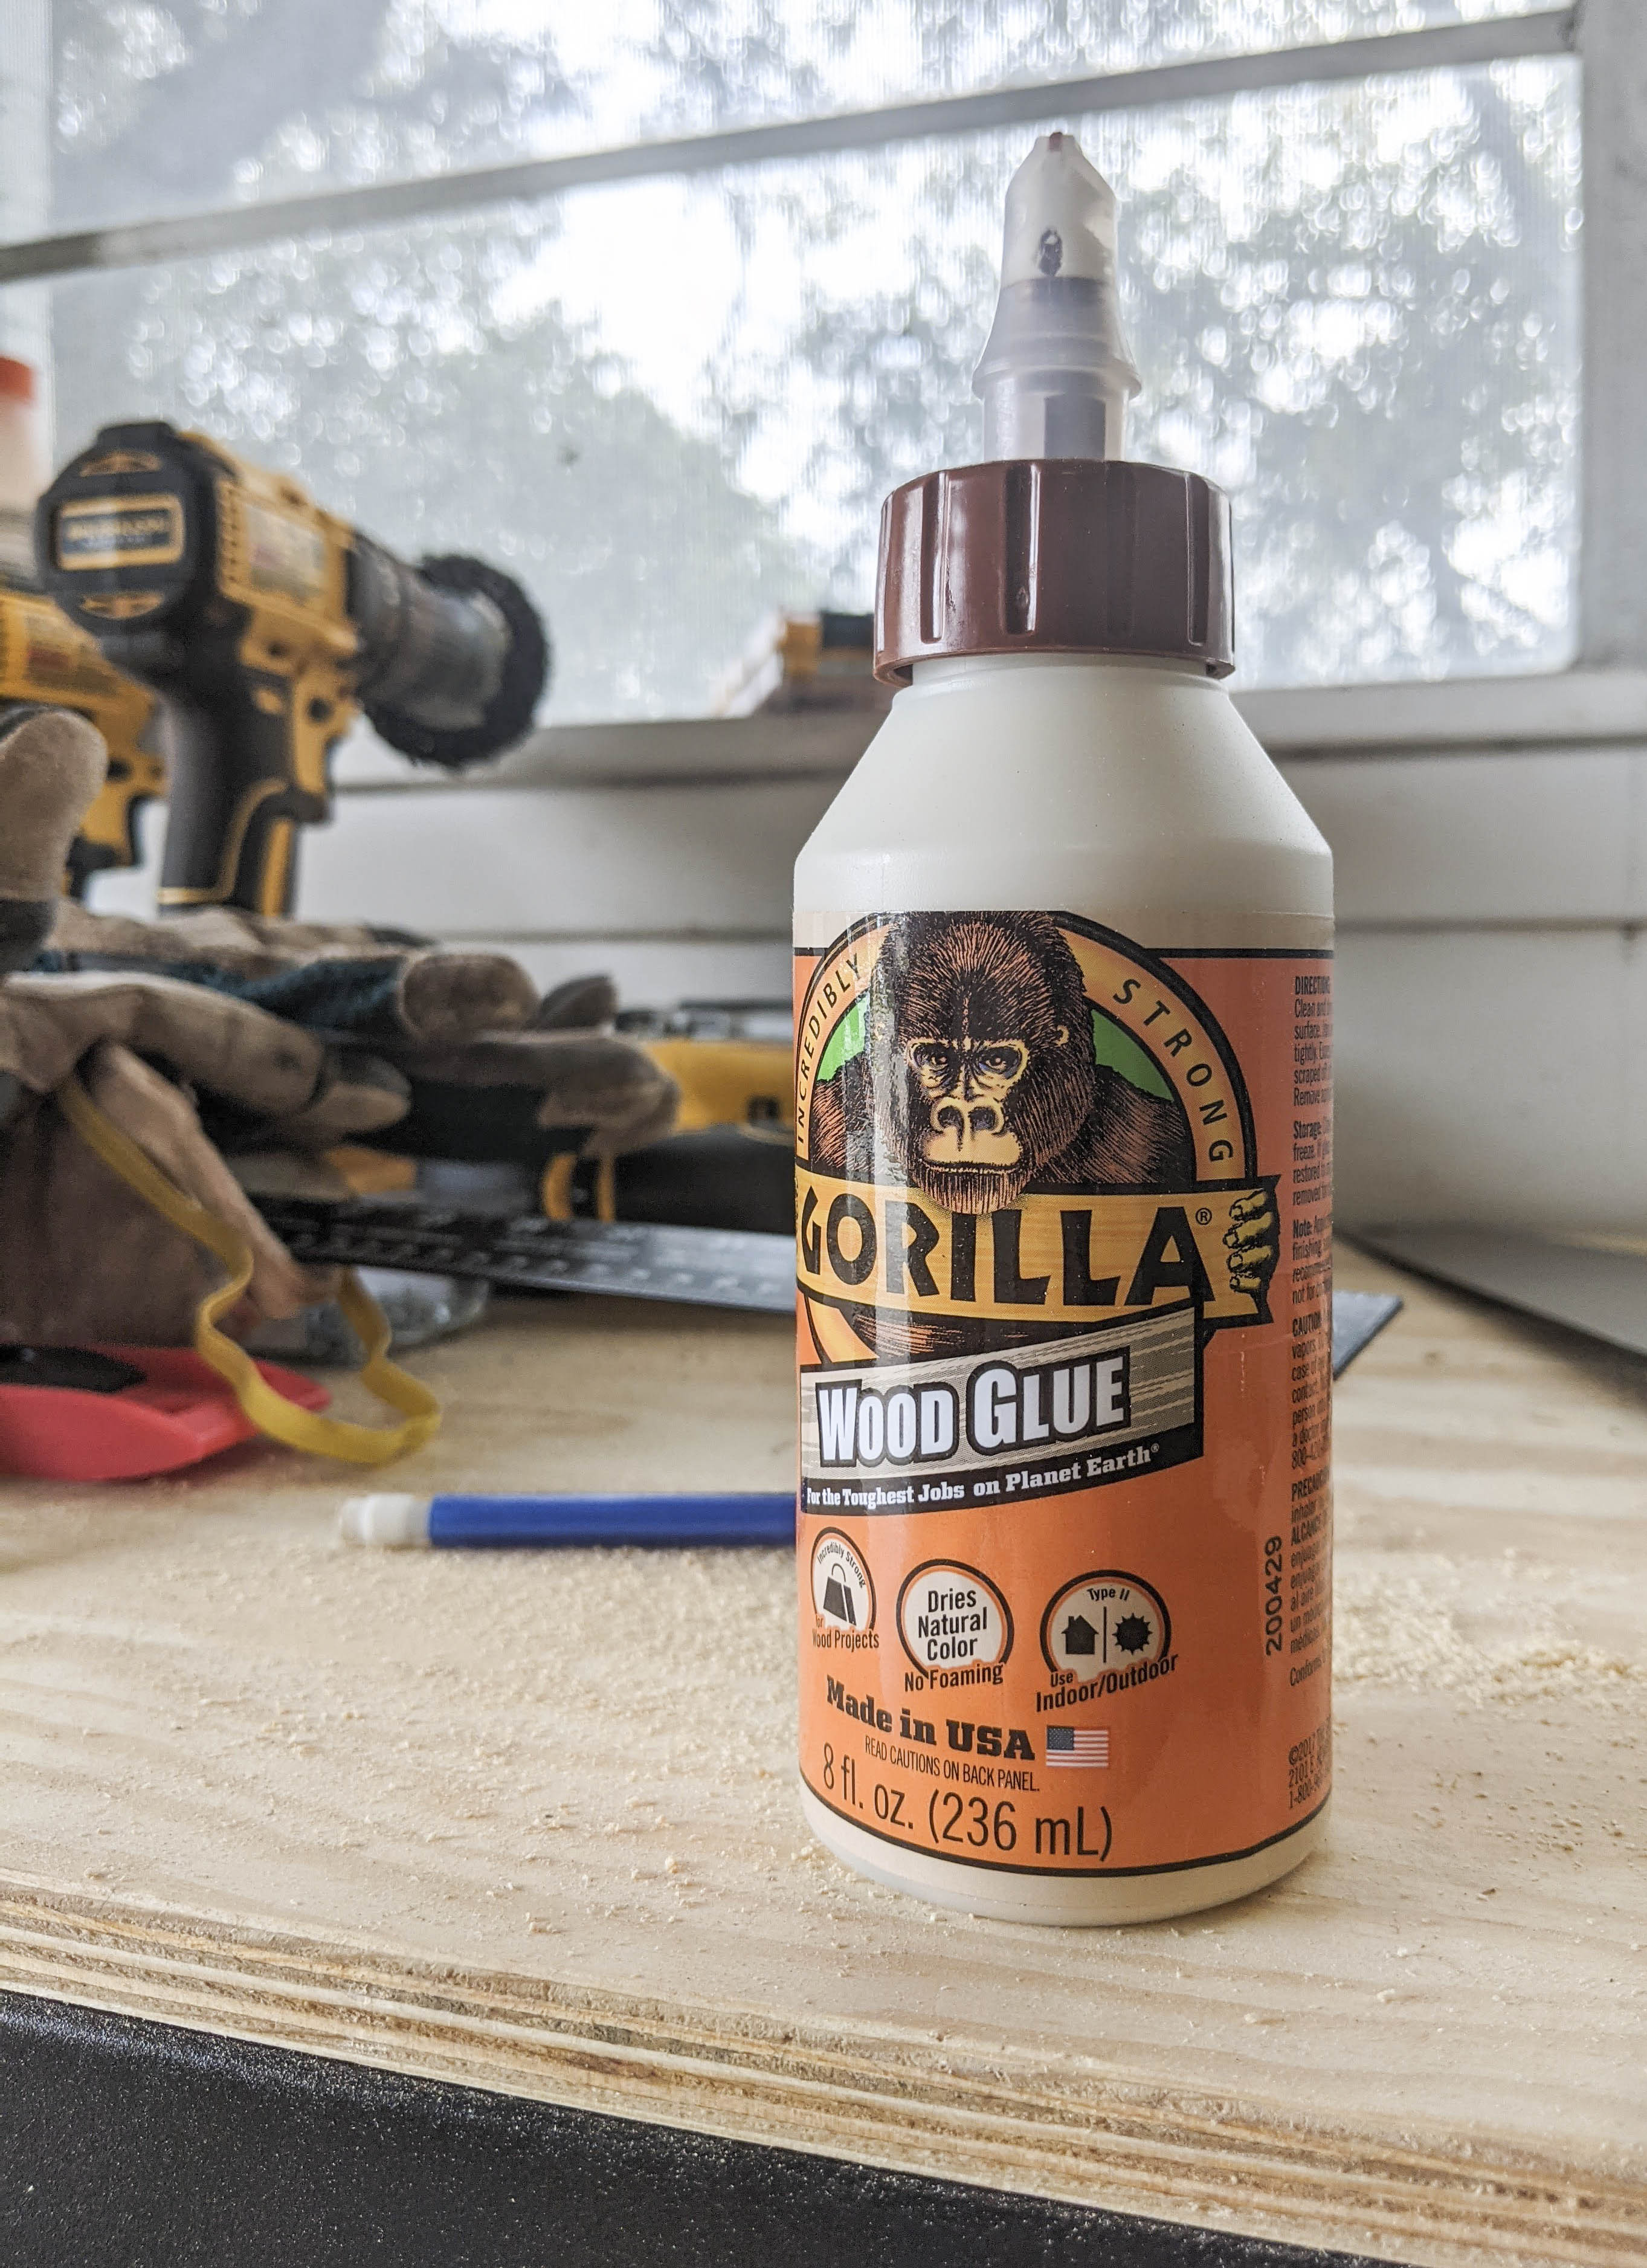
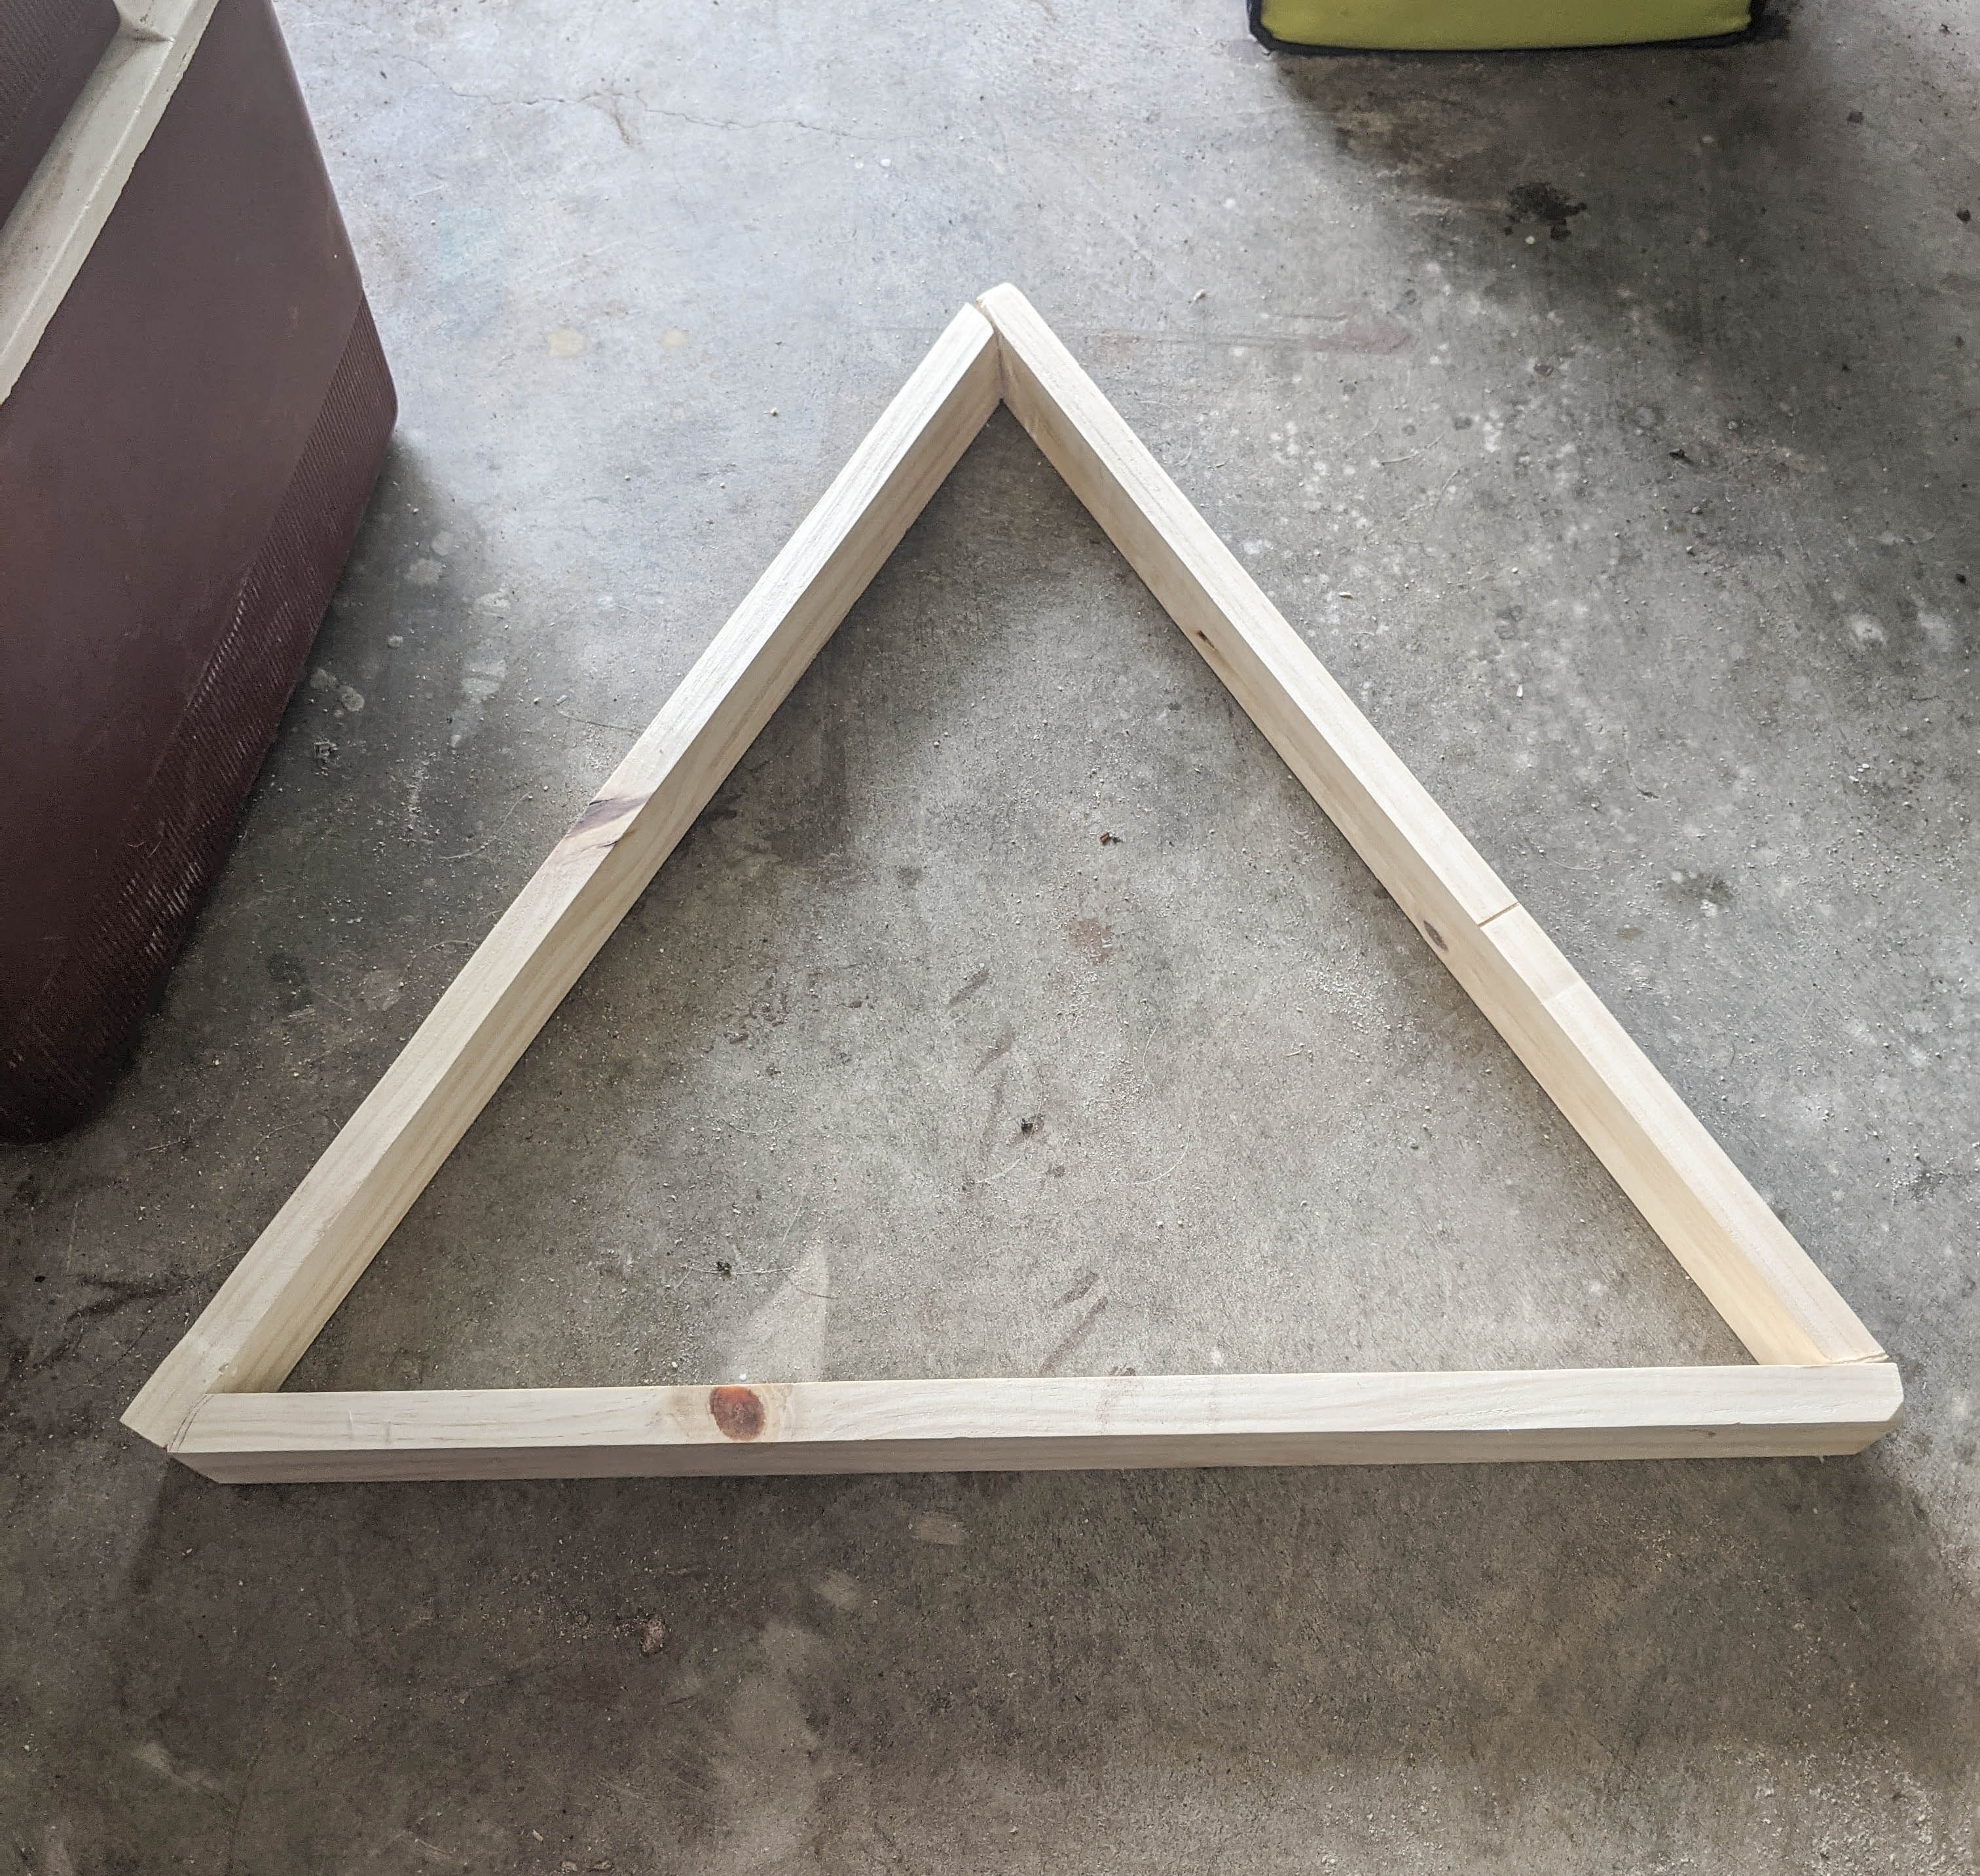
It’s time to glue! Each corner will have an angled side and a flat side it gets glued to. I like this look and keeping one side untouched makes it easier to screw together later.
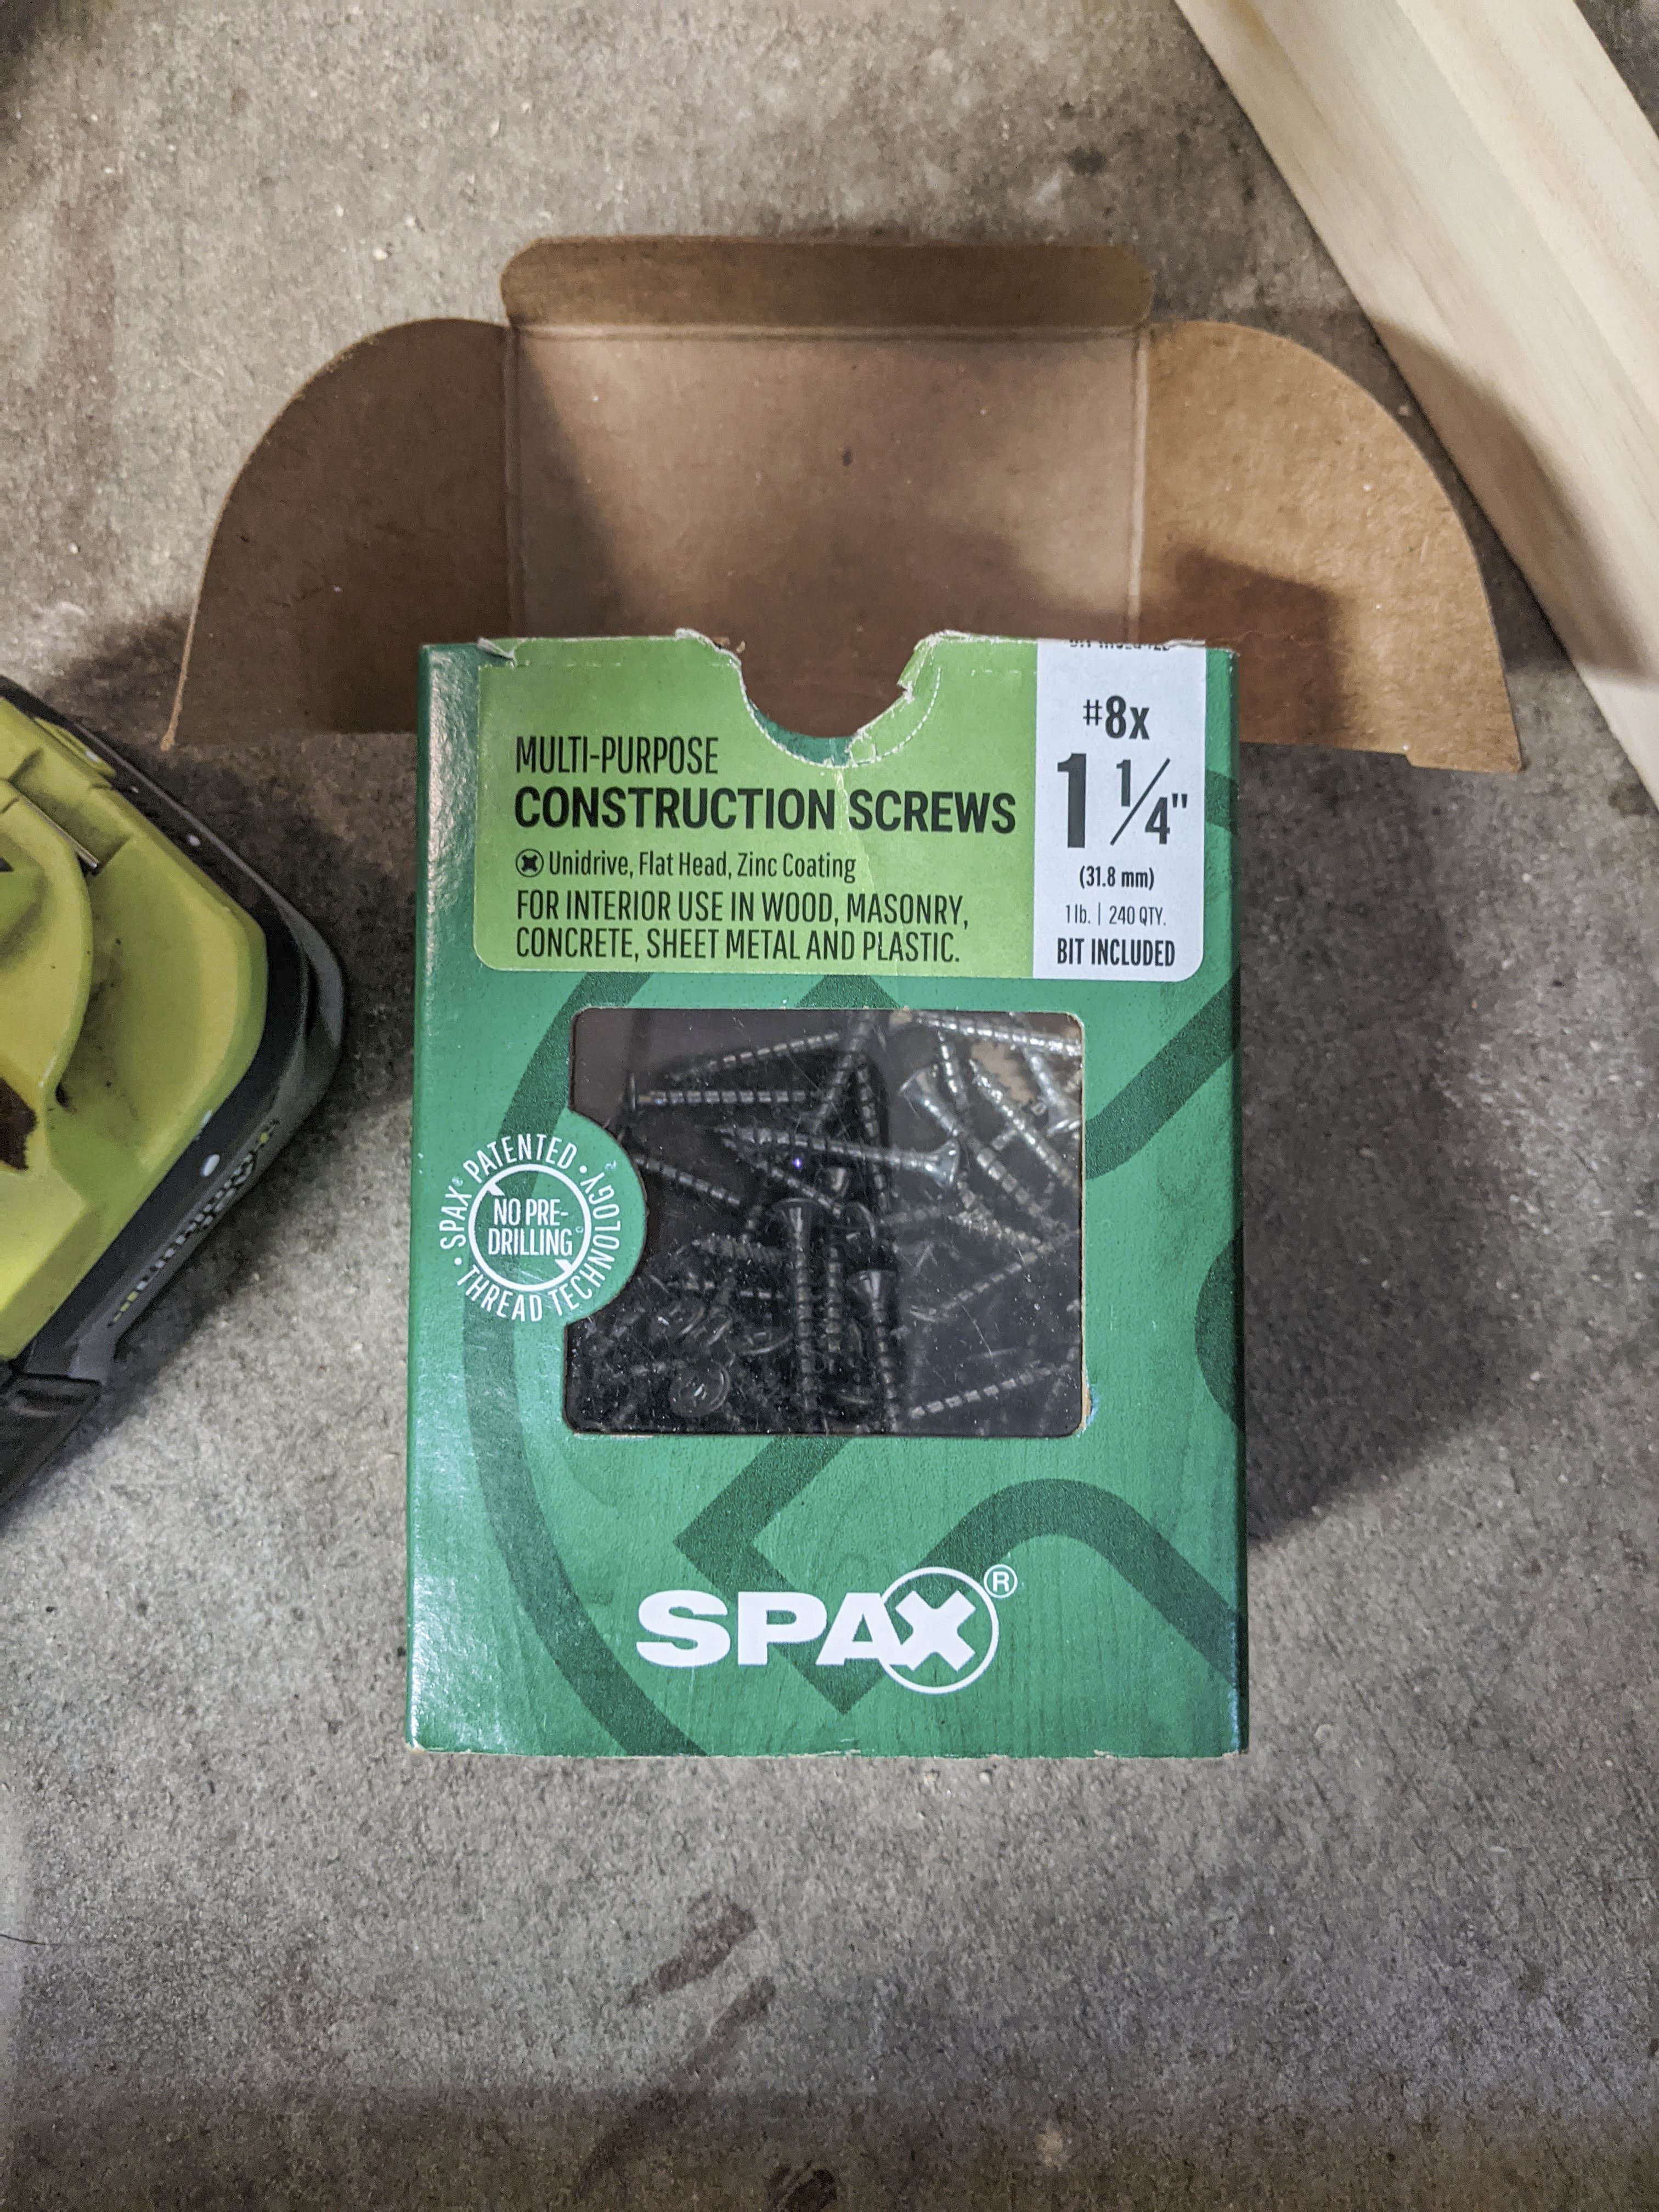
Speaking of, it’s time to screw (har har)! Let your glue dry for the allotted time it says on the bottle, then grab a drill and box of screws. These are screws I already had. If you’re buying new for this project, get wood screws and make sure the length works. My plywood is about 3/4" thick so the length of these screws worked great.
My drill was having a hard time getting the screws in (I think because of knots in the wood), so I grabbed my impact driver and made quick work of them. I started the screw on the thicker, flat sides and drilled into the angled sides as you can see below. Be careful about drilling too much because you can split the wood easily.
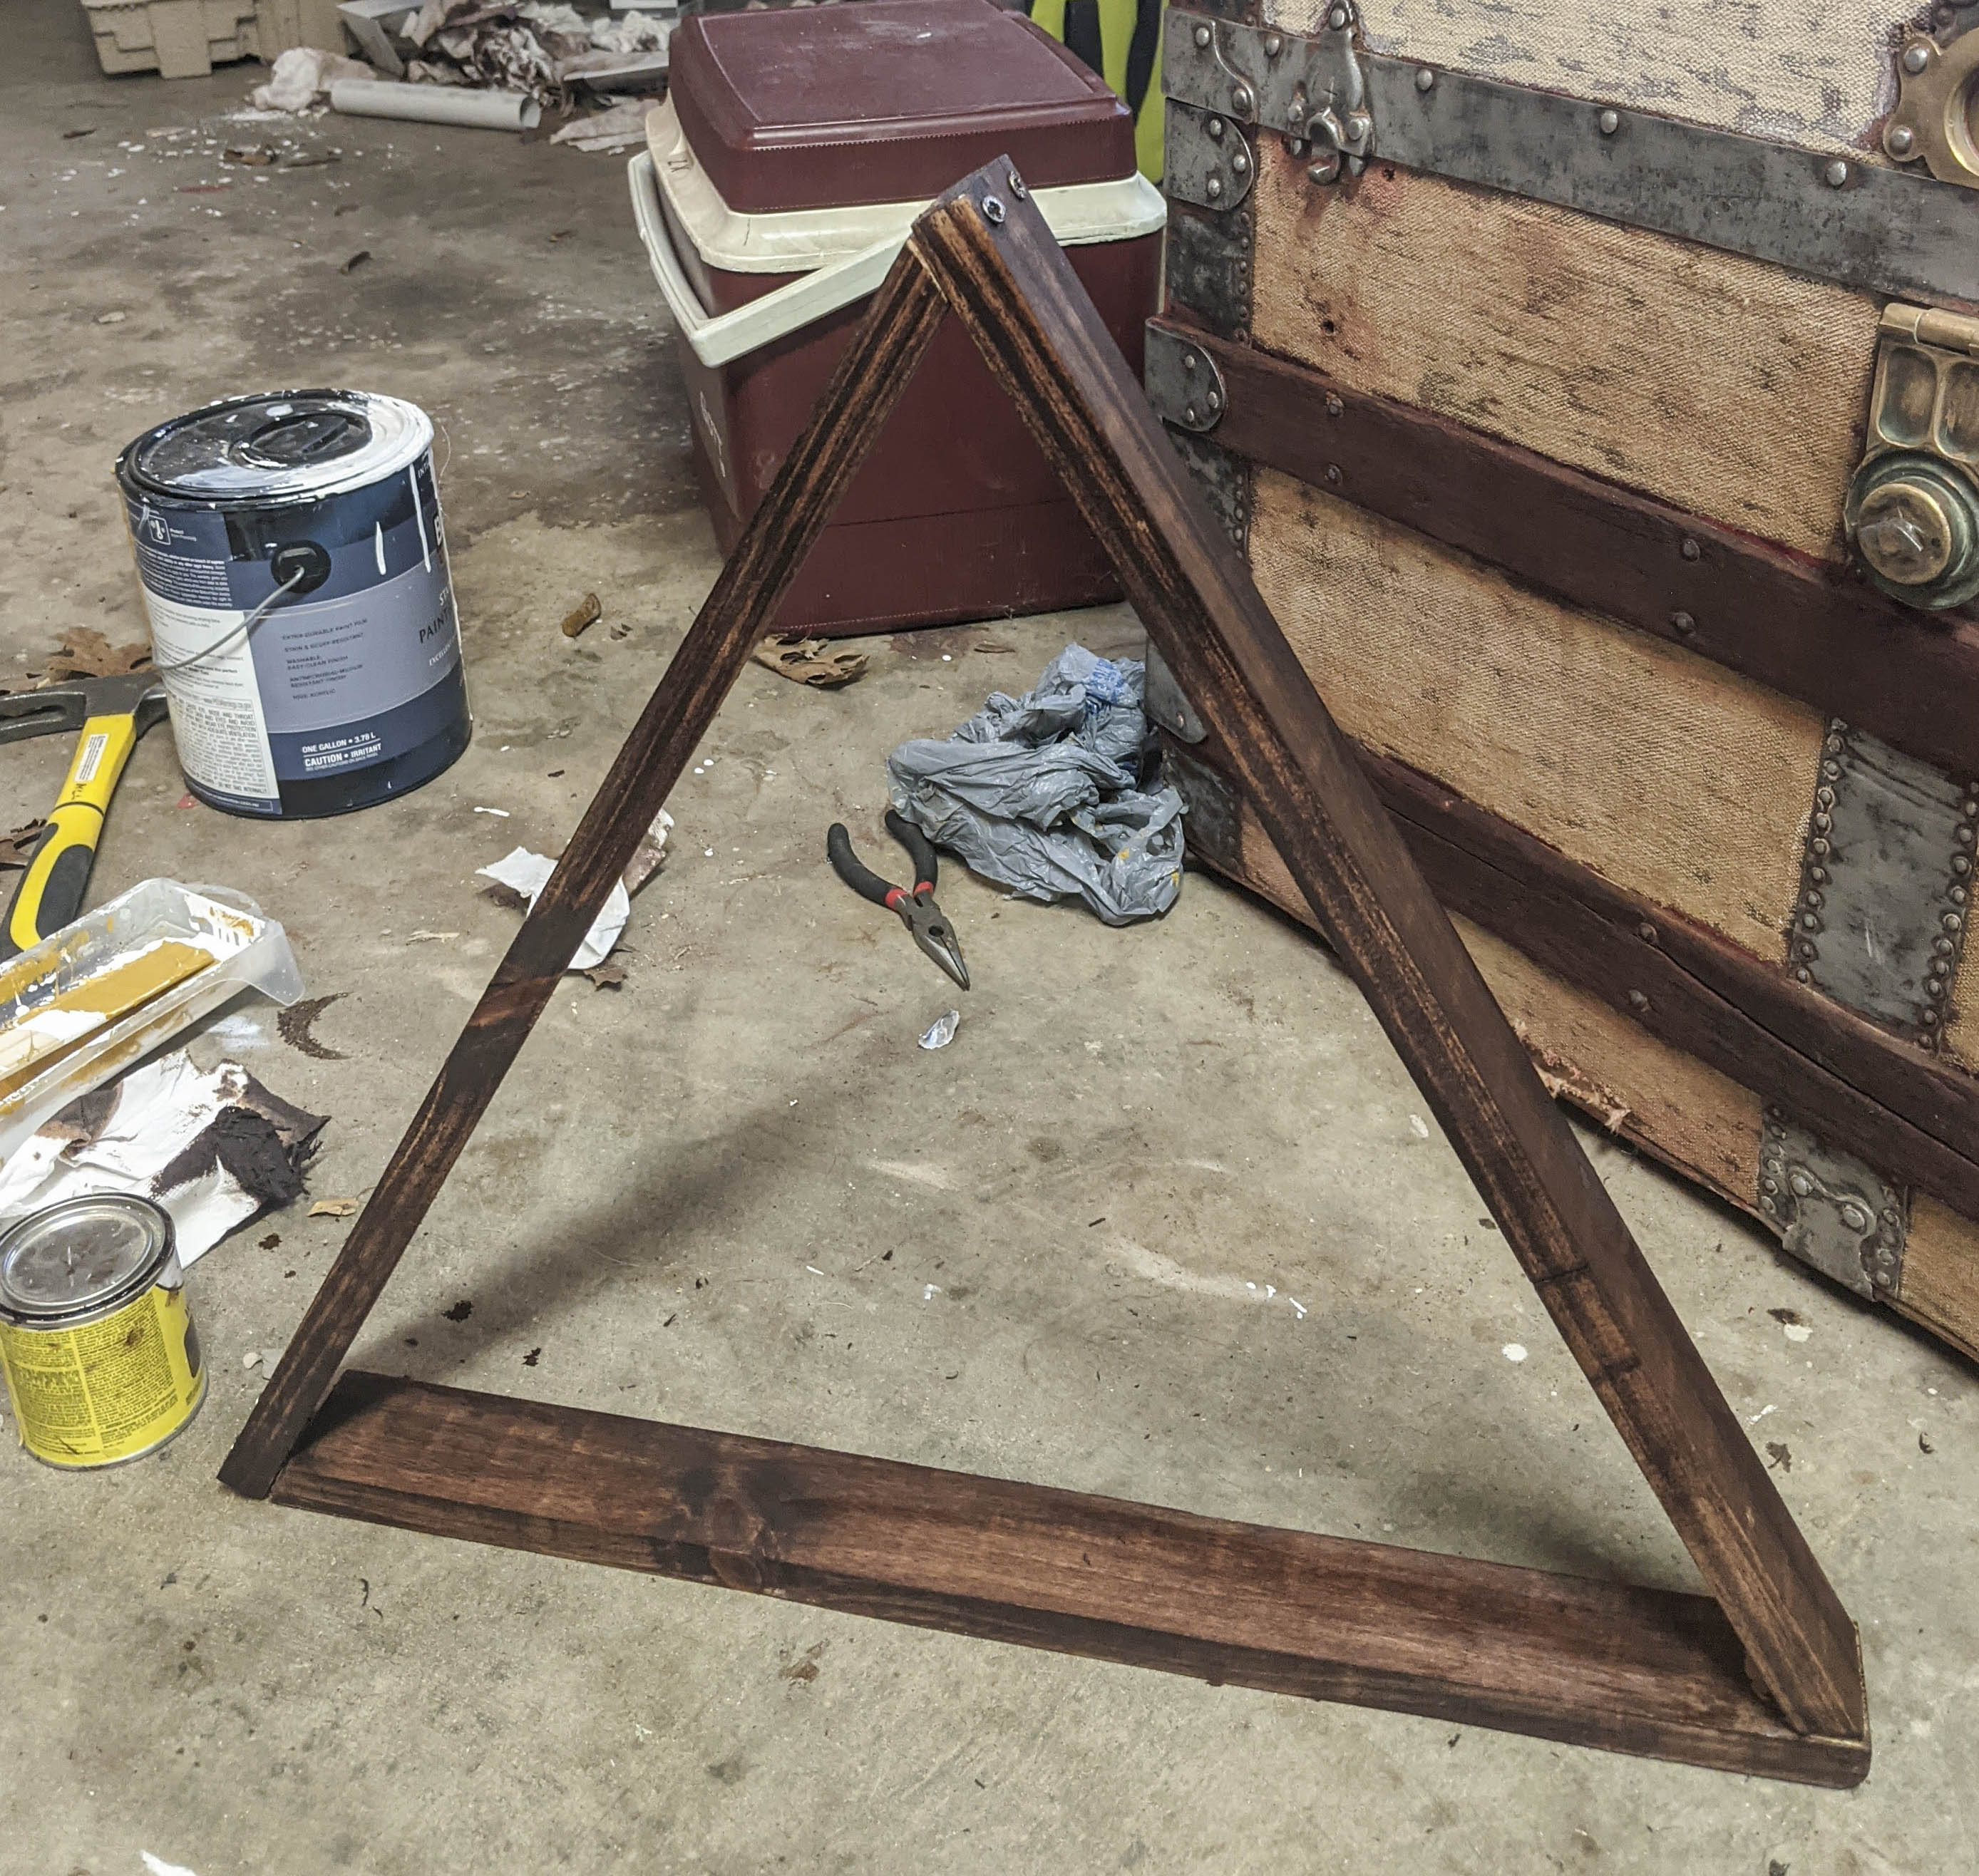
Once it’s firmly together, it’s time to stain! Be sure to sand any excess glue off otherwise your stain won’t be able to cover that part and it’ll look splotchy. I’m speaking from experience here. You can choose any stain (or paint!) color you’d like- whatever goes with your decor! I went with “red mahogany”.
A nice stain can make anything look great! This project only took me a couple of hours (sans drying time) and I have a piece that looks like I went out and bought. It’s always more special when you make it!
Tag me on Instagram so I can see all your projects! Happy crafting!