This post contains affiliate links at no cost to you.
A lot of our furniture screams “college chic” and I hate it. I don’t need matchy-matchy and I’m certainly not going to run out and buy an $8,000 living room set, but I’ve really been wanting some cohesiveness. Everything is a hodgepodge from things we brought with us when we moved in together to items we’ve found on curbs and by dumpsters to things friends have given us. We’re grown adults! I just want a more put-together look and if I have to make it myself, I will.
And I did.
Our former TV stand was one of those cube organizers from Ikea. You know the ones. We found it at our old apartment complex and it was in perfect shape. Then, when we moved it became our TV stand. It looks good, but it’s just time to have some grown-up furniture. Its new home is in the craft room housing my yarn and various supplies.
As the title says, this is the first large project I’ve taken on and it isn’t even technically finished. My plan was to remove the top 3 drawers and turn them into a shelf that would make it look less dresser-y. However, with coronavirus still running rampant, my husband and I didn’t think it would be a great idea to make any unnecessary trips out so the shelf will have to wait until this is over. I’m looking forward to it though!
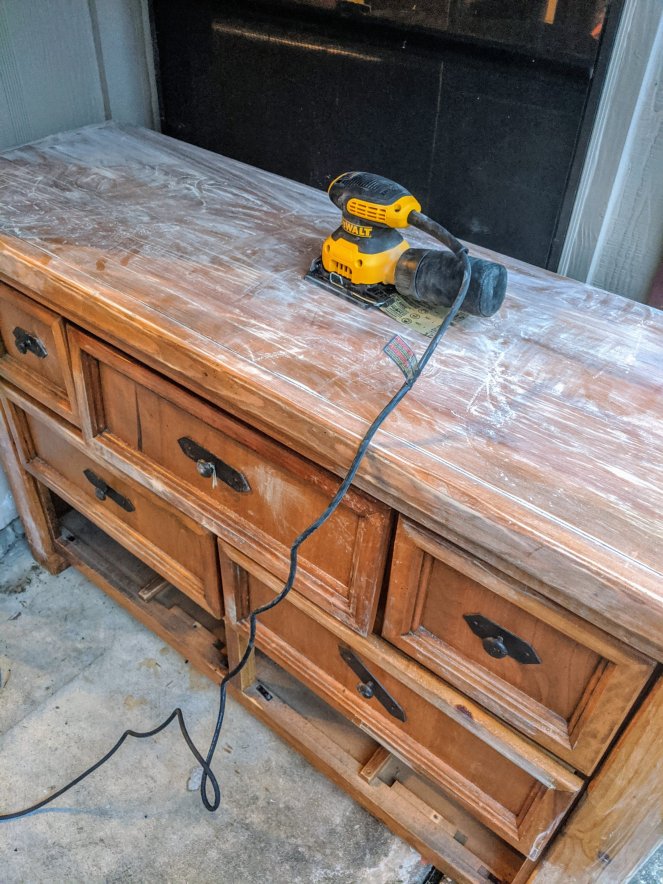
The best part about this project is I was able to get a new toy! A brand new Dewalt power sander. It has made my life so much easier. I was hand sanding for years because I was working on smaller things, but that would have taken way too long with this bad boy.
Alright, let’s dive in.
Supplies:
- Power sander
- Mask
- Protective eyewear
- Strong glue if you need to fix drawers
- Stain
- Paint
- Paint brushes
- Painters tape
- Spray polyurethane
- Screwdriver
- Time, which we have so much of these days
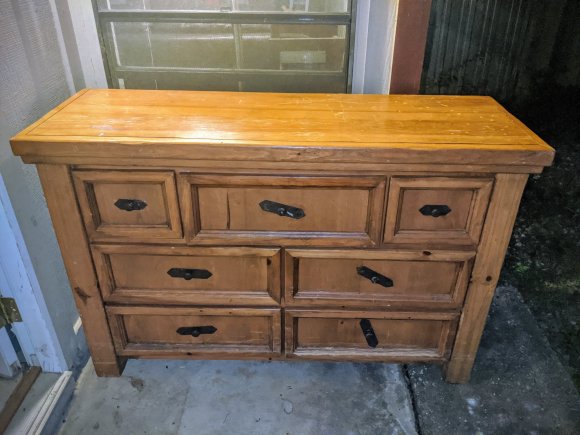
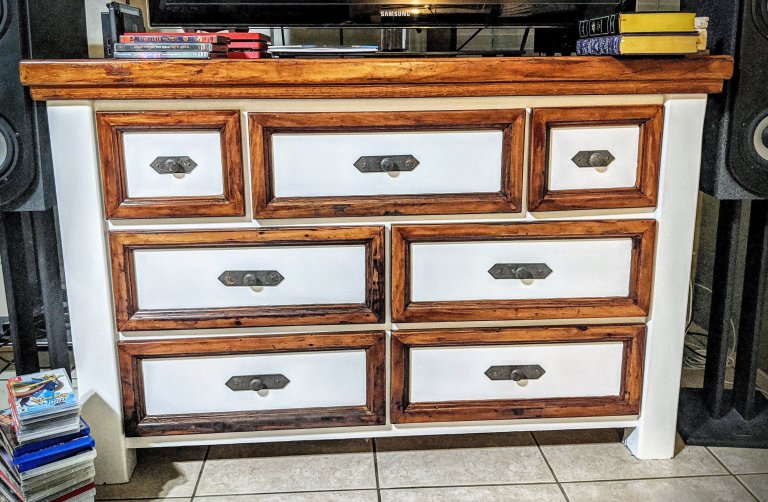
This is where we started. We found it by the curbside so it was absolutely free (sans having to shove it in my Nissan Cube). The hardware was wonky, some of the drawers were coming apart, and it was this ugly yellowy-orange color. I like rustic furniture for the most part, but I also don’t want it to look like I live in Cabela’s. Plus, it didn’t match anything else we own, but it was a solid piece.
The first step is to get to sanding. Mainly focusing on the top, I powered up my new toy and got to work. I went around the edges of the drawers as well since some of them were kind of gross.
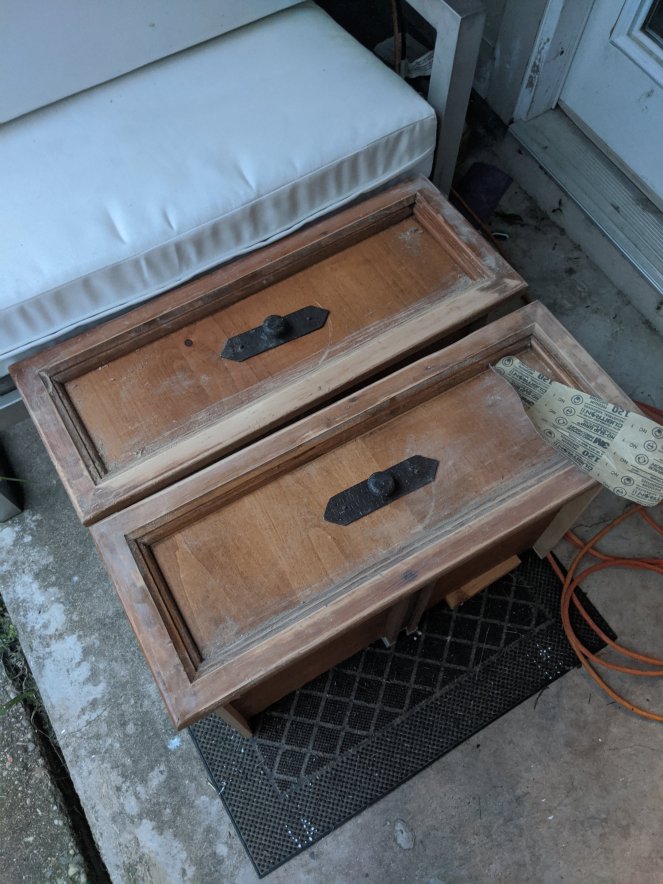

There were a lot of scratches all over the top of this thing. I spent quite a bit of time searching how to get rid of them…especially with limited supplies. I found a DIY recipe of a 1/4 cup of white vinegar mixed with a 1/4 cup of cooking oil that would basically erase scratches. Nothing super deep, but all the surface-level ones would go away. Sidebar: I don’t know if just putting stain on there were fix them, but I didn’t want to risk it then have all this discoloration.
I made the DIY solution and oh my gosh. It hella worked, check this out:
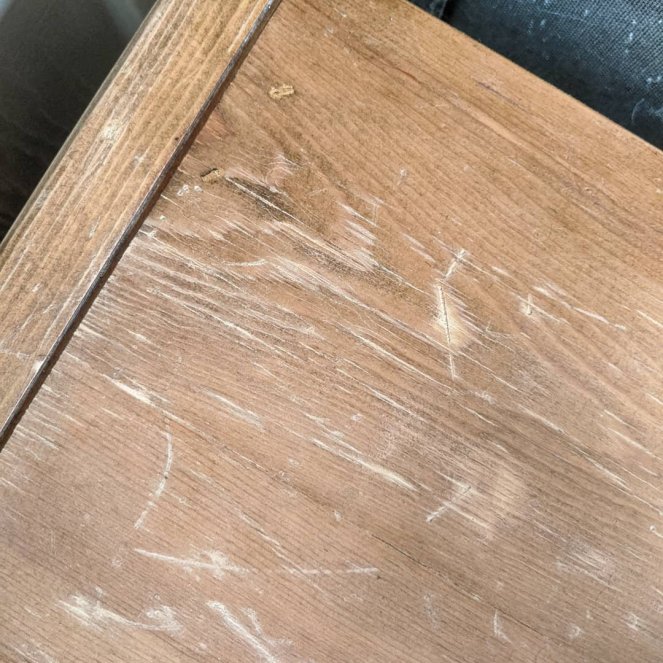
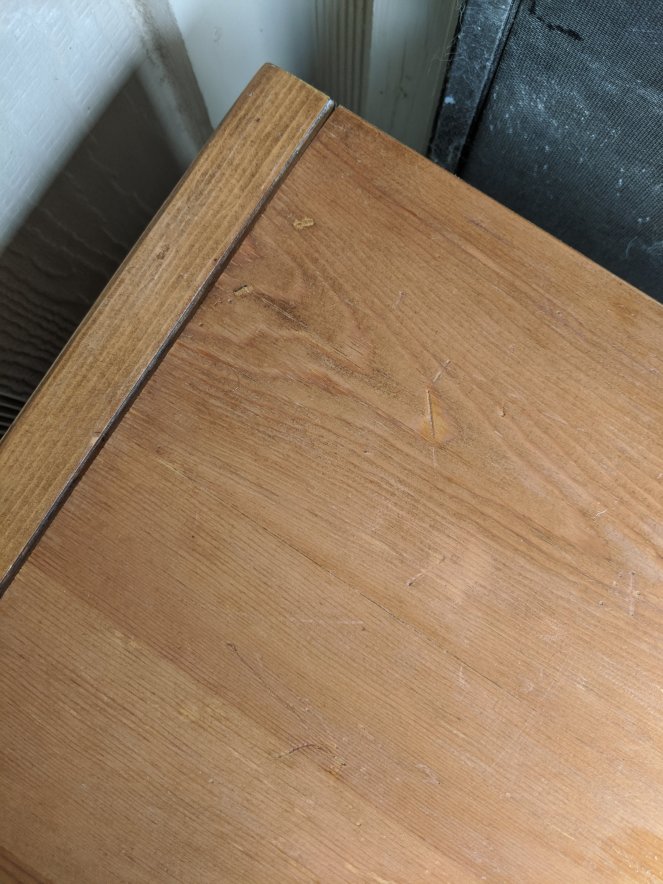
It’s like magic! I was super surprised at how well it worked. Like I said, It didn’t get rid of deep grooves, but it evened out the color for the most part which is what I was looking for.
I let that dry then gave it a bit of a wipe to get rid of any excess oil. Now it was time to start staining.
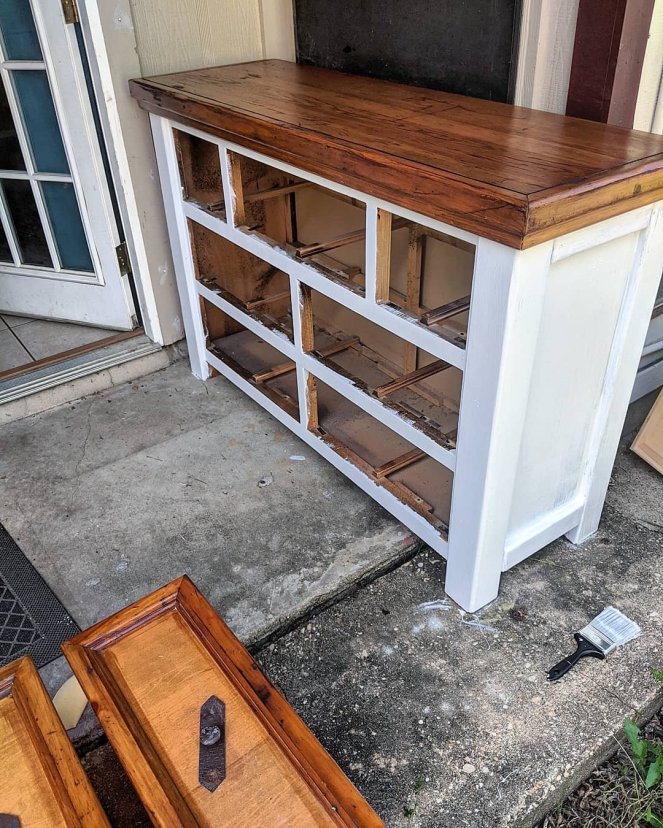
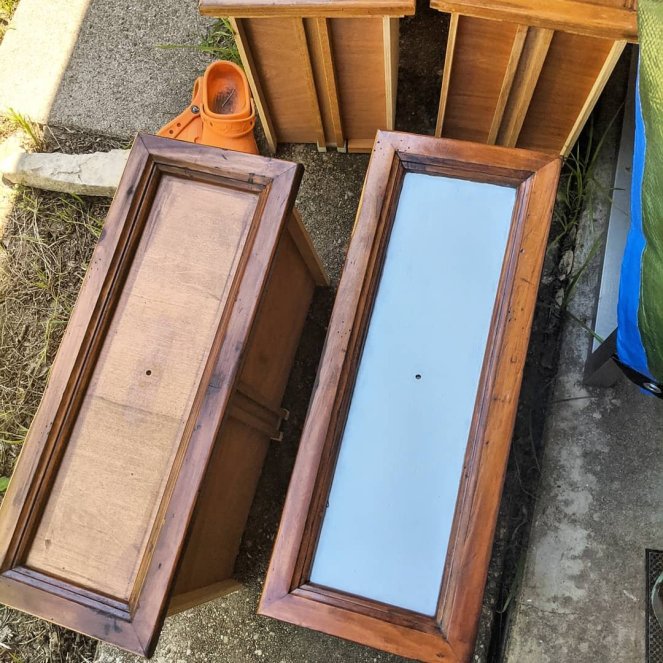
I don’t have any photos pre-paint, but I probably did about 4 layers of stain and about 3-4 layers of paint. You know how I like a deep, rich wood. I also got started on the drawers. I stained the edges of them and painted the middle white. Be sure to remove the hardware before you do this. I kept them all in a bowl to keep them together. I was also planning on spray painting the hardware black but again didn’t want to make any more trips out than what was absolutely necessary. I think I’m going to get different knobs anyway when it comes time to make the shelf so I’m glad I didn’t buy any more paint.
I taped around the edges and painted the middle of the drawers white to break up all that wood. I suggest painting them first then staining them. I tried both ways and that was faster and cleaner looking for me. I love how the wood turned out. So much better than the yellow-ish it was before.
After the staining is done, be sure to put your polyurethane on. I did 4 coats, sanding with a fine grain (220) in between coats 3 and 4. It really helps protect the wood and keeps the stain from sticking onto anything you set down on it.
The hard part will be that shelf I was talking about. I’ll make a new post when I’m ready to do that. The plan is to remove those top 3 drawers and saw off the 2 drawer dividers then getting a piece of plywood cut to size and sliding it in place.
Done for now! I’m looking forward to wrapping it up soon. Stay tuned for an update post. Stay safe!