This post contains affiliate links at no cost to you.
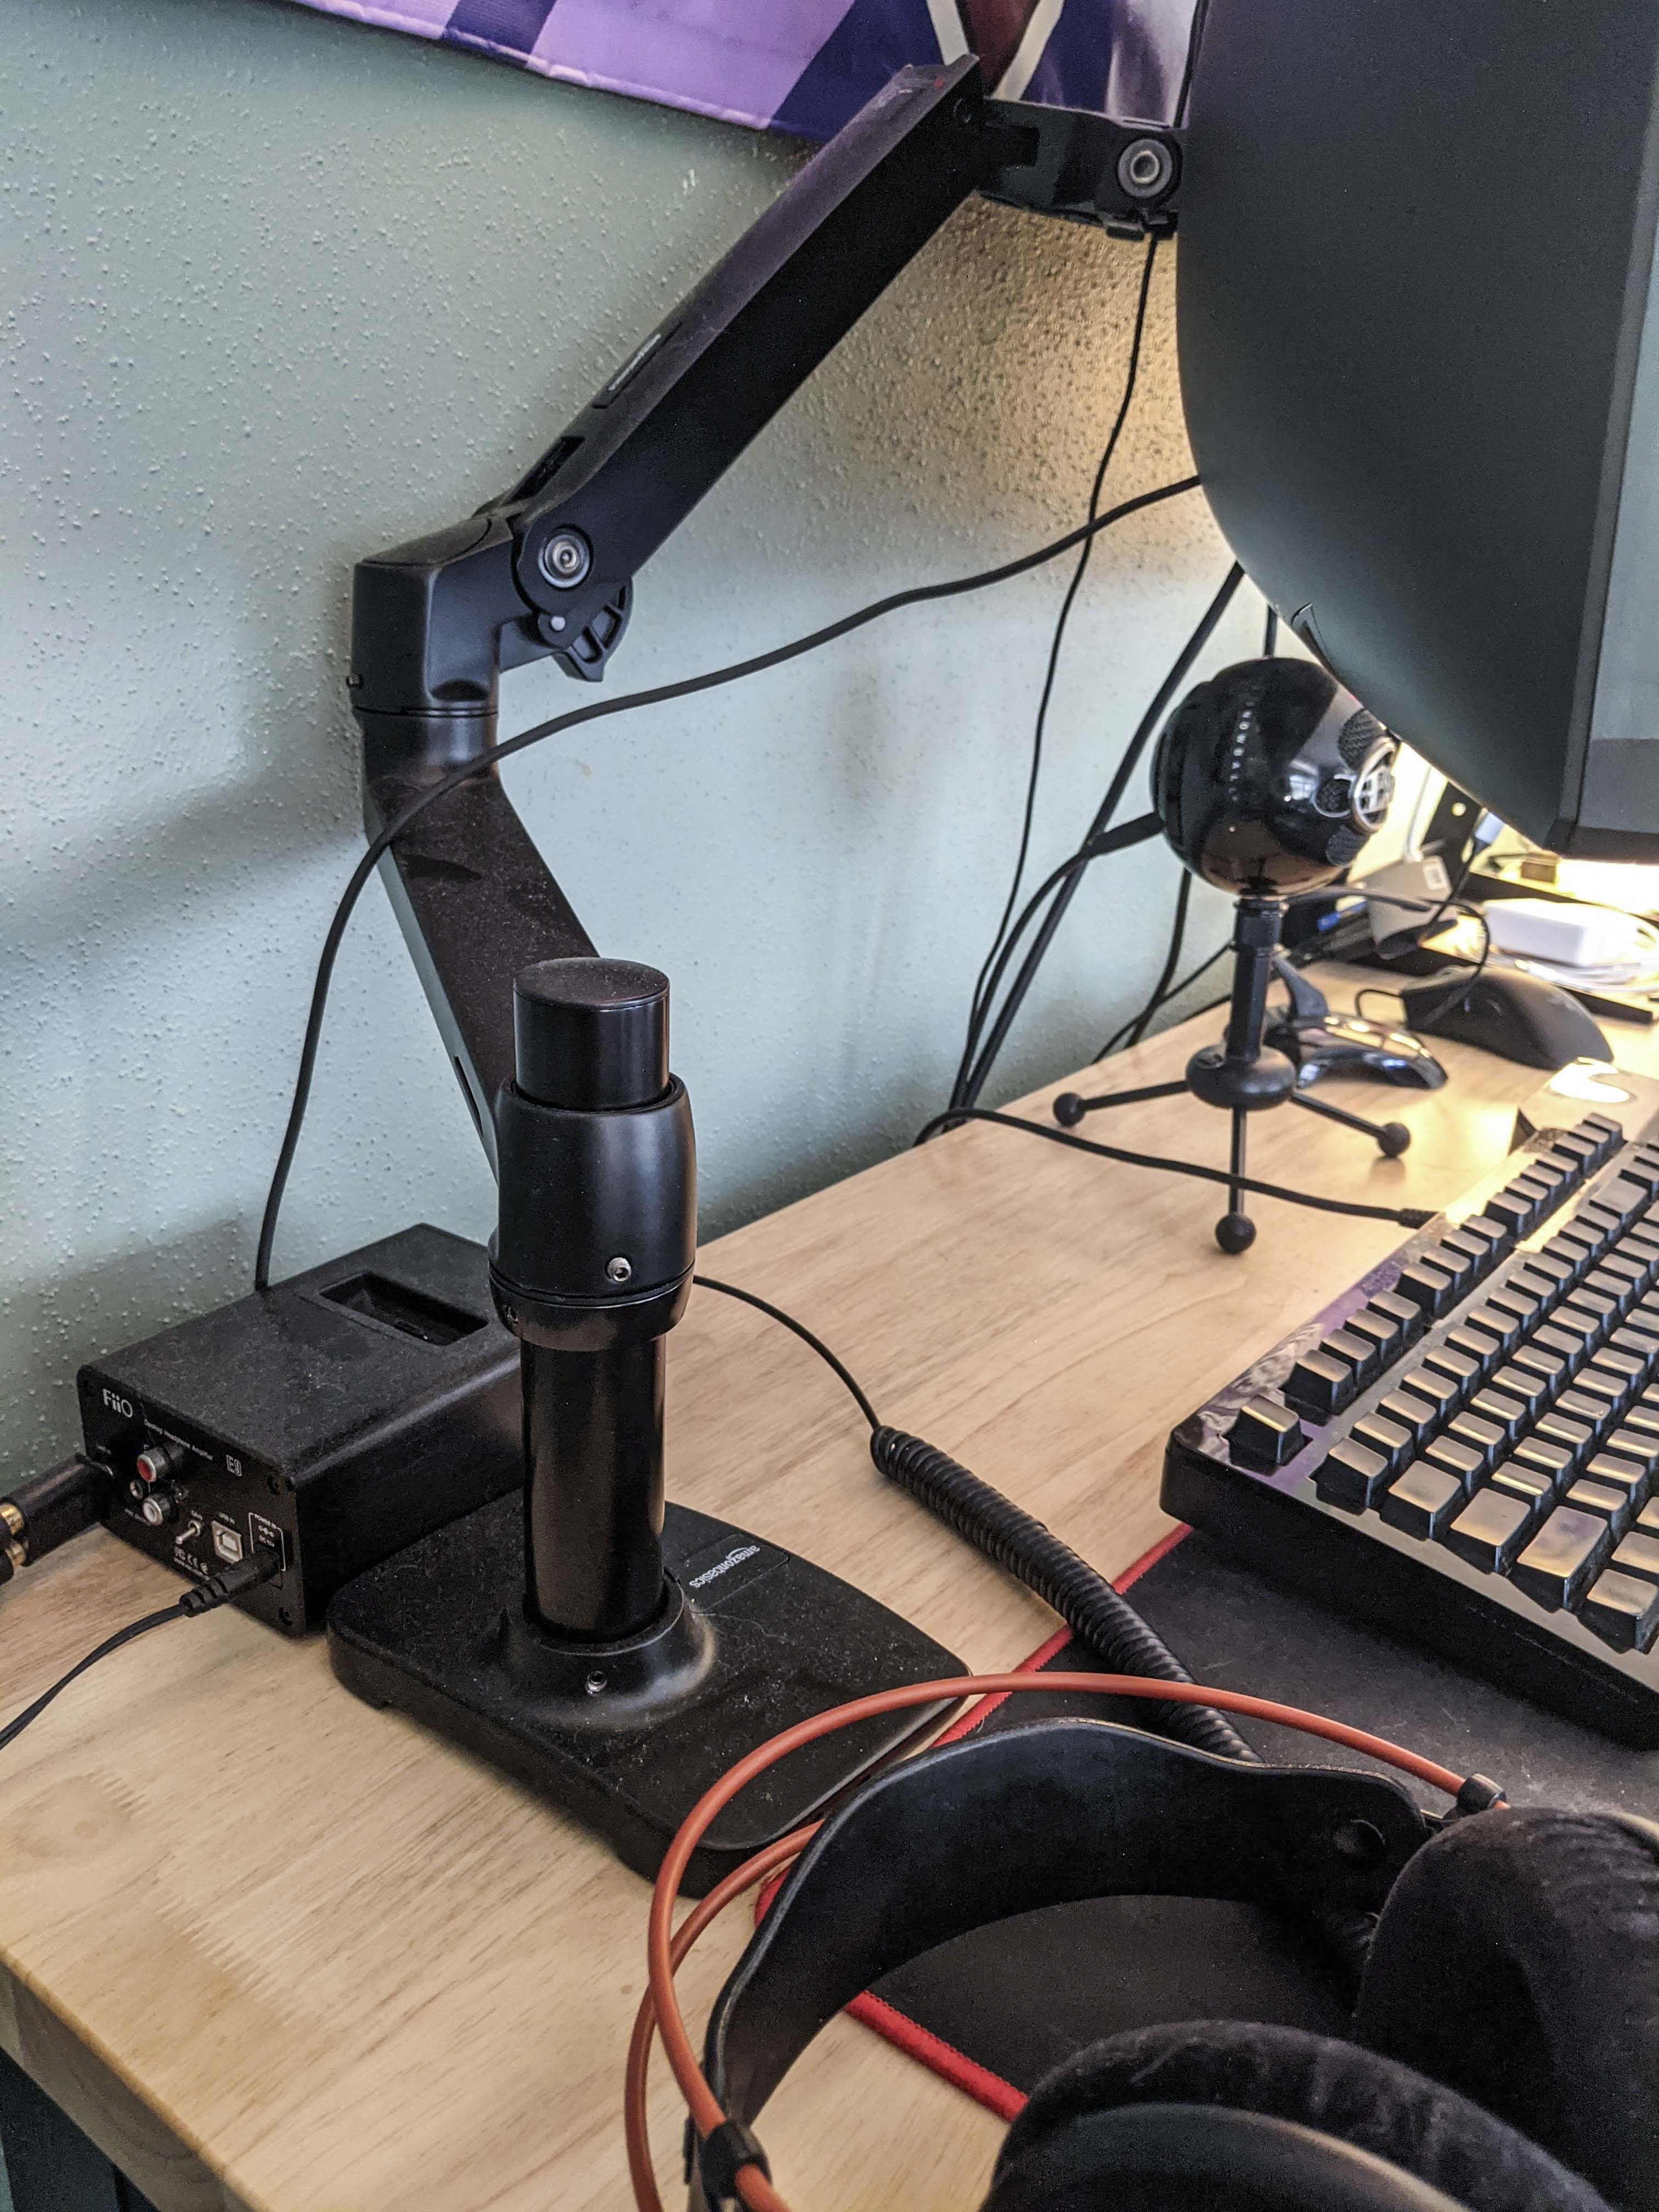
My husband recently bought the AmazonBasics monitor arm for his giant, one million inch, curved, heavy Asus monitor. To be fair, I have the same one. Also, we bought them refurbished and did not pay that hefty price tag.
Anyway, these things weigh a ton and their stands take up a lot of real estate on our desks. My husband likes a very clean and maneuverable workspace, so he wanted to ditch the stand and raise his monitor so he could move it around freely.
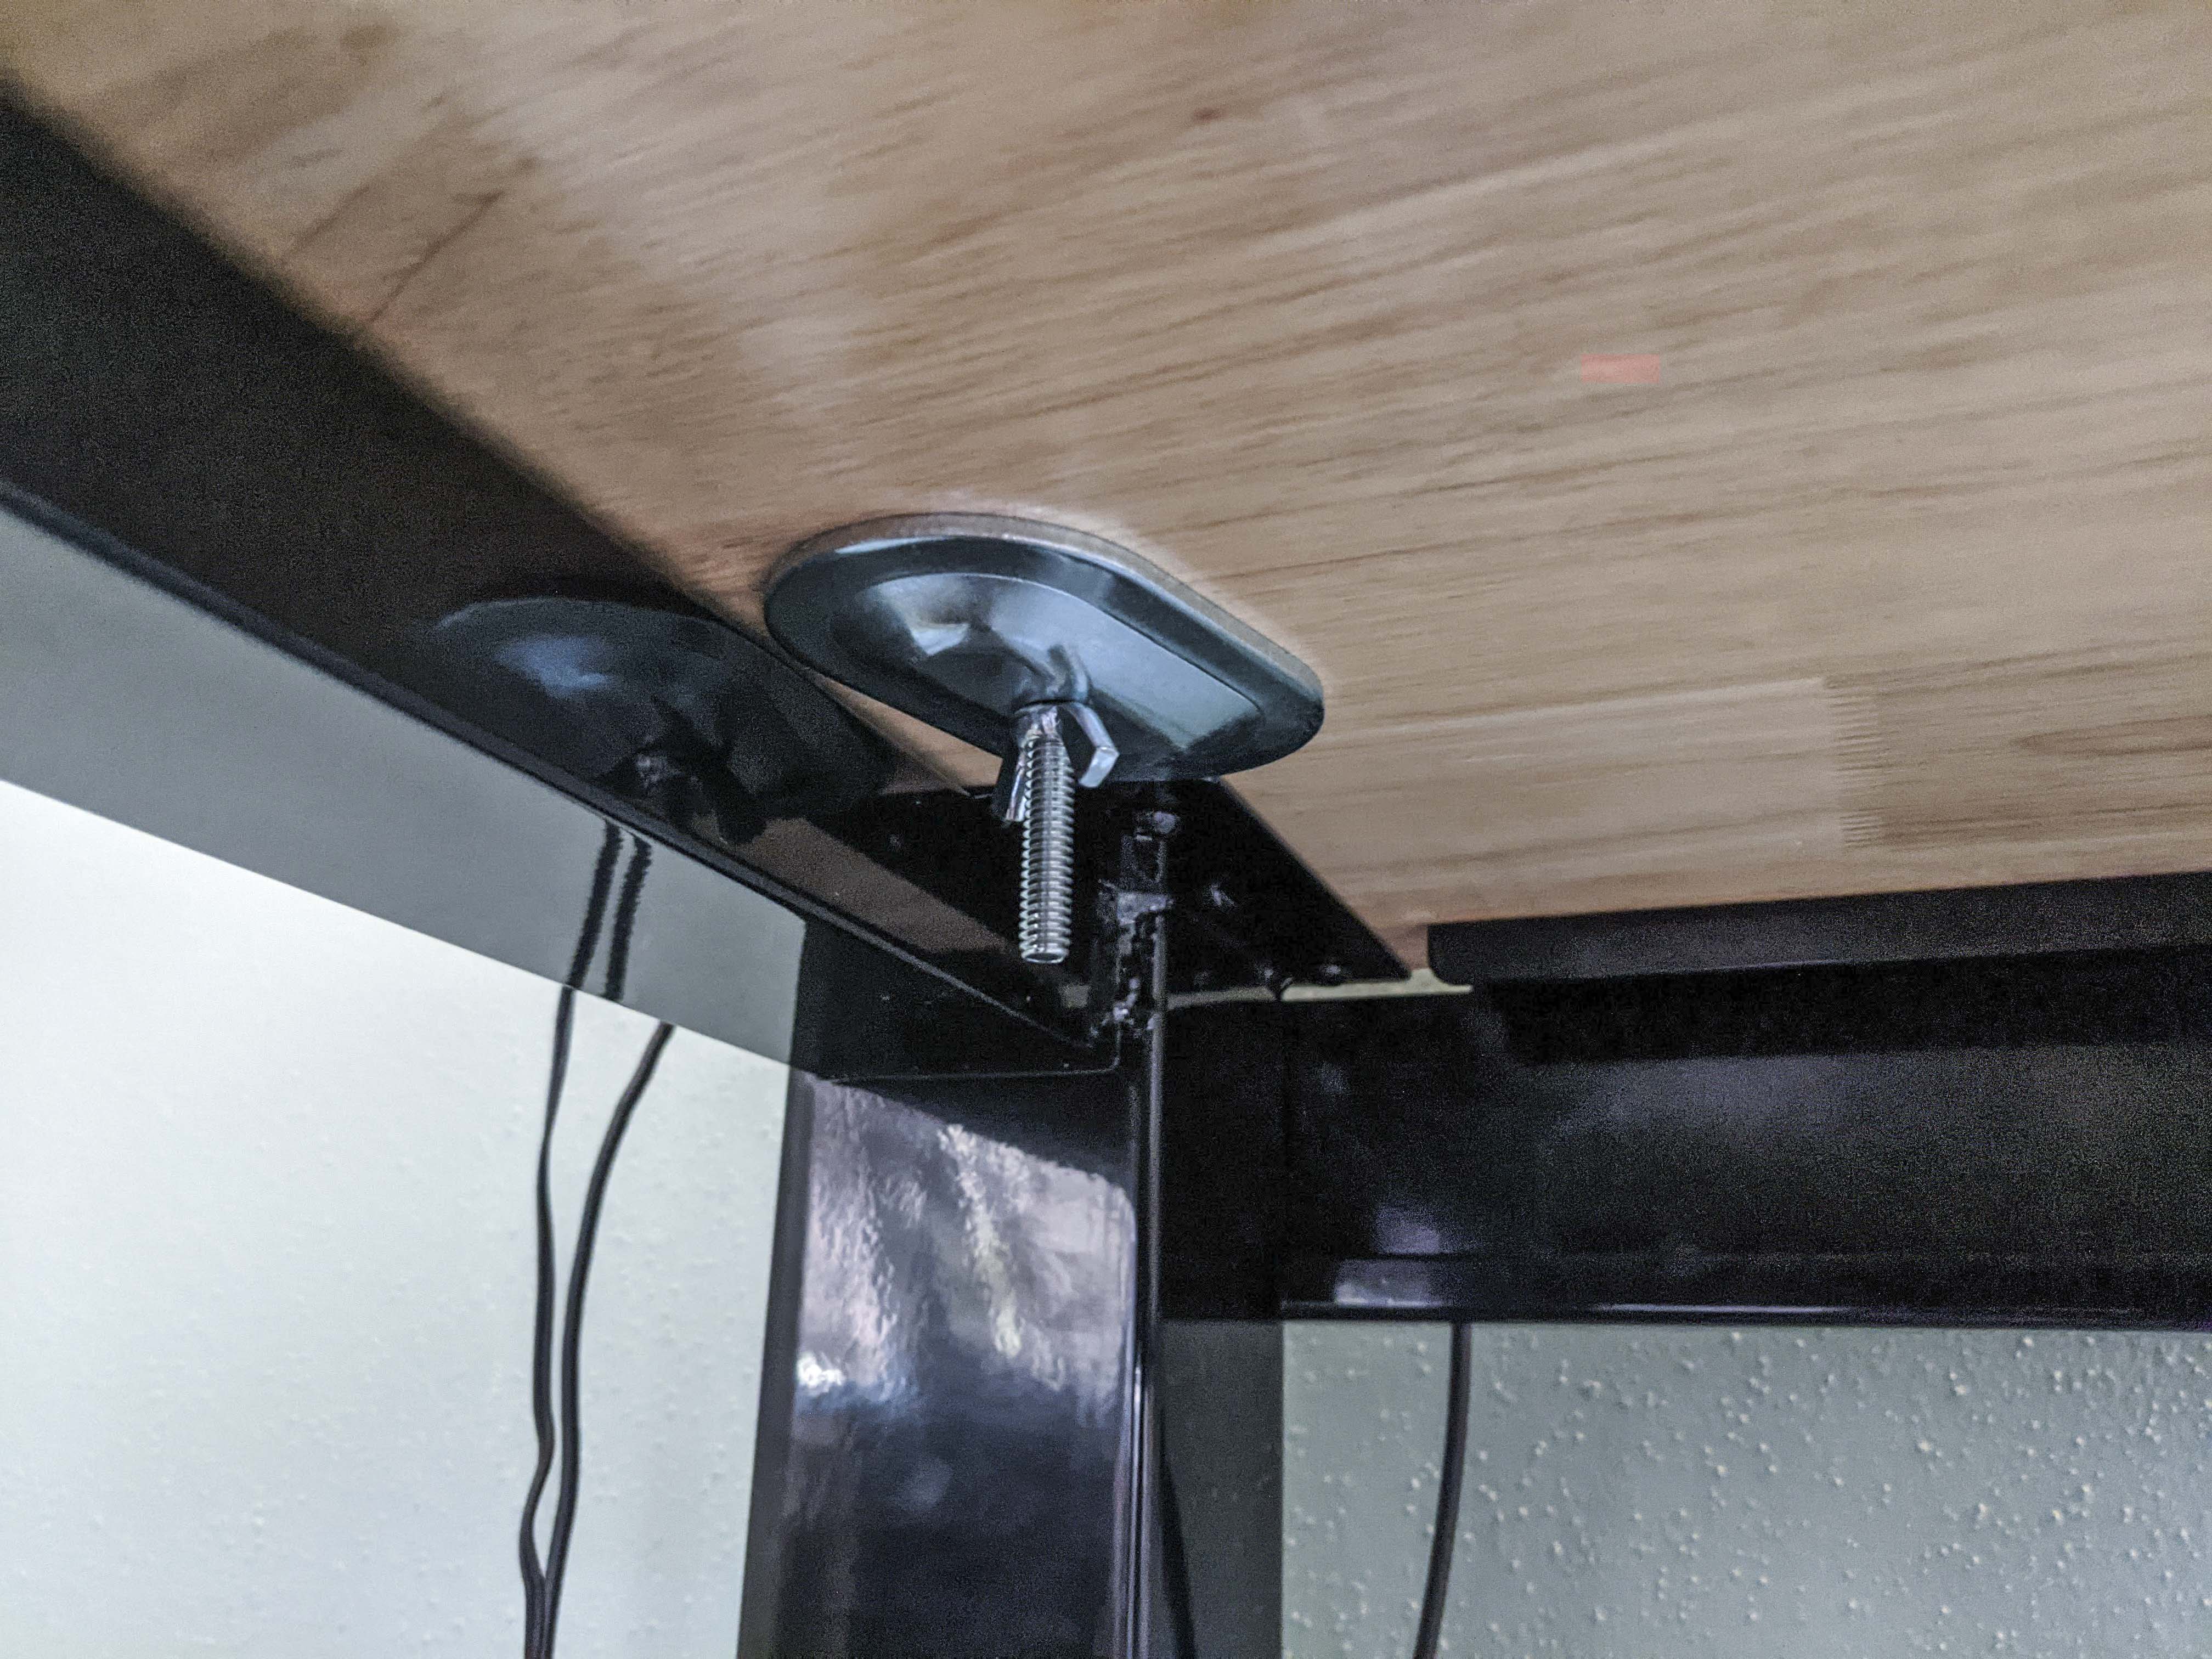
After looking at a bunch of options, he settled on the AmazonBasics arm and it came in yesterday. He uses a Husky workbench as a standing desk- we bought it from Home Depot, but this one on Amazon looks similar albeit slightly shorter in width. The workbench has a metal frame all around the top making it difficult to use the clamp option of the arm, so we needed to drill it into the desk which the instructions also say how to do. For reference, the drill bit I used was a 1/4" (we’re a Dewalt family, haha) and the bolt included with the stand fit snuggly through.
The instructions themselves were relatively easy to follow. They’re like Ikea’s in that it’s all pictures and very few words. There was a moment or two of decrypting an image, but all-in-all it wasn’t bad. What I would have really liked to know was how to tighten the springs and joints in the arm. Nowhere in the instructions does it say how to do this, at least we couldn’t find it. This was probably our biggest issue/complaint. We had to go on Youtube and watched 3 videos until someone finally mentioned how to do it. As I said, our monitors are big and heavy and the arm comes loosely tightened out of the box so it slowly drops when it’s all set up with the monitor.
Sidebar: The listing now has a video that shows you where those points are. Wish that was there when we bought it.
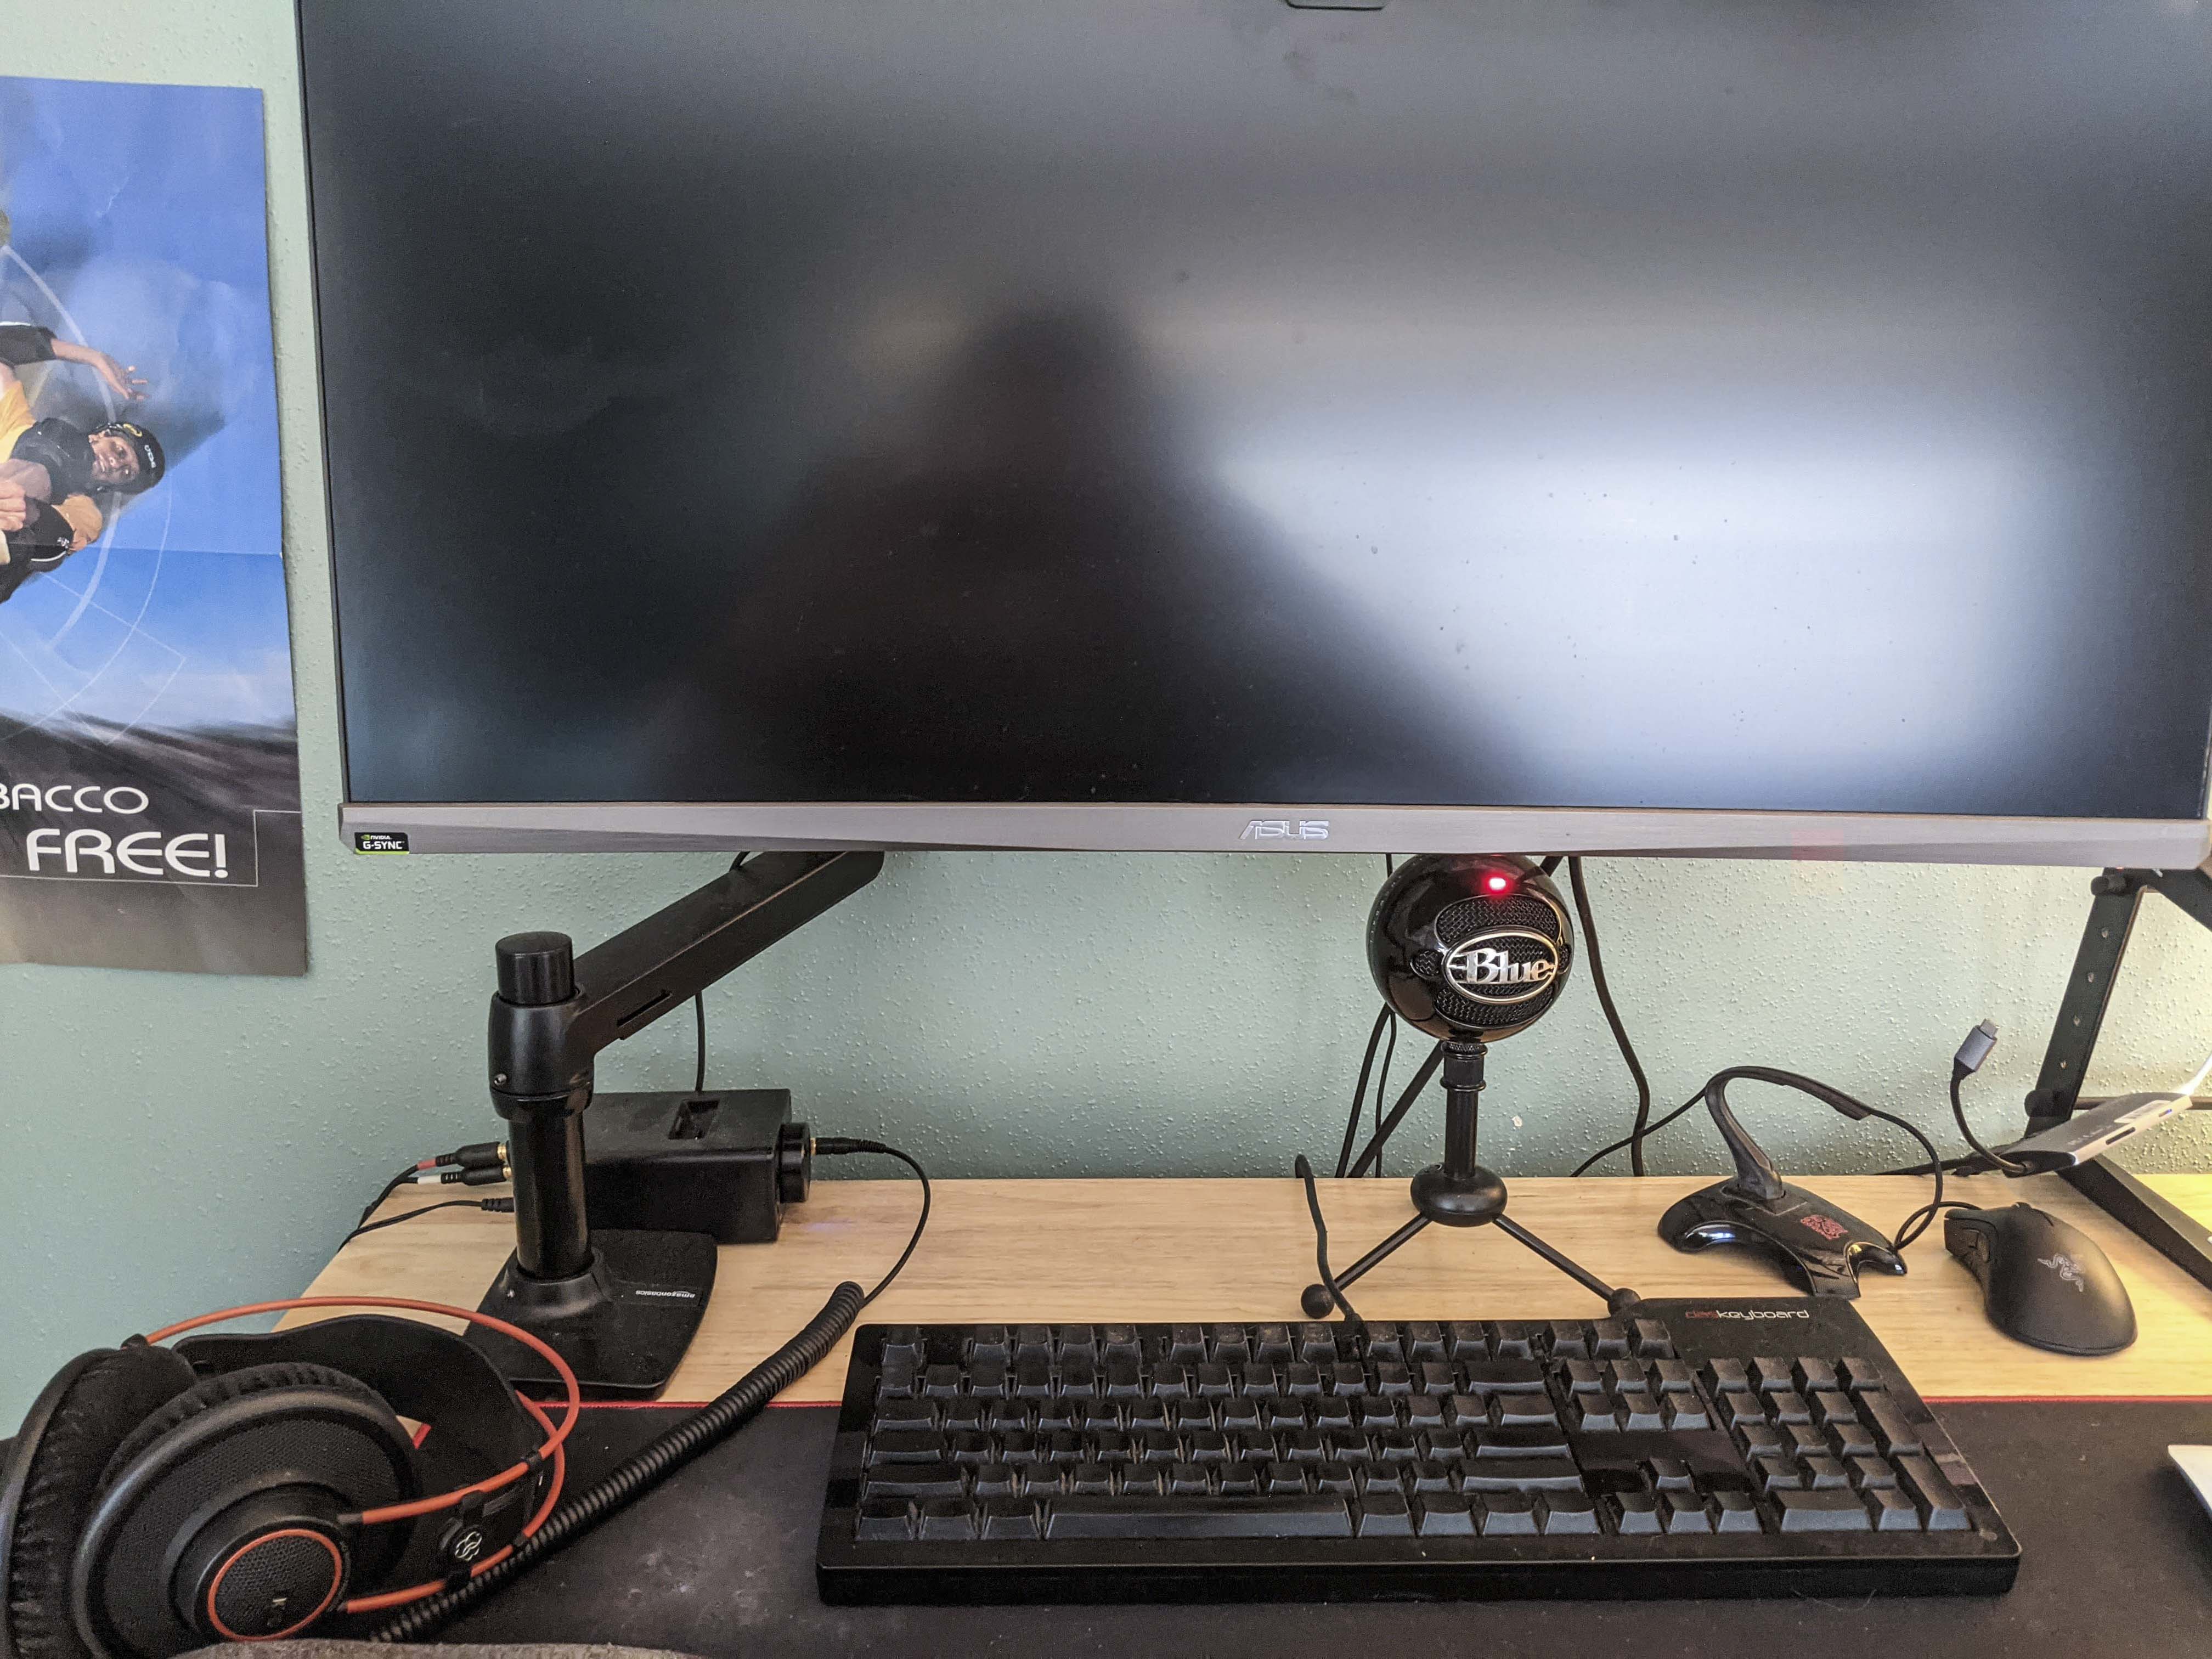
How to adjust:
Here are all the spots where you can tighten the arm to make sure it holds your monitor upright and stays put:
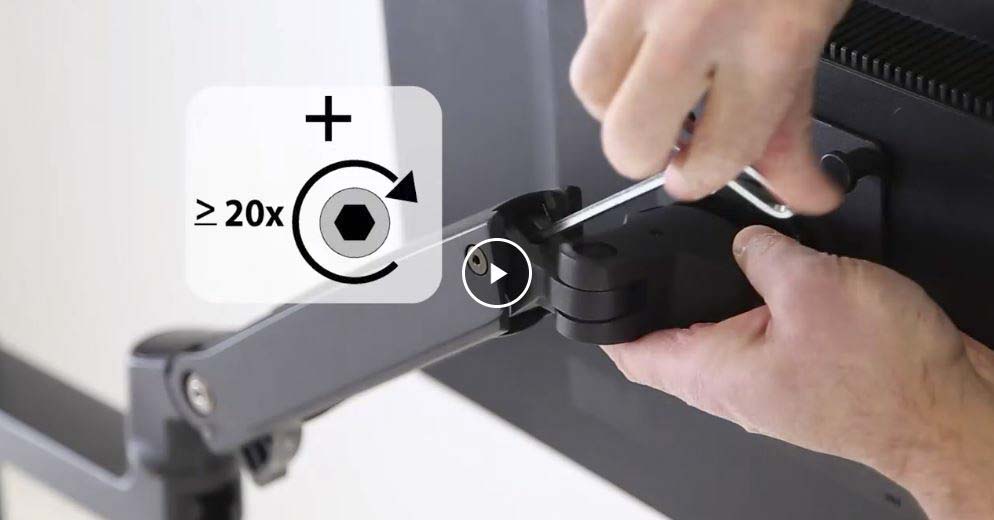
This is probably the most important one. It’s located right behind where the arm attached to the monitor. You use the included, larger hex key to tighten it. It’s pretty loose out of the box and we cranked it around several times (like 30-50) so that it would actually be able to hold the monitor in place. This one is a little easier to turn when the arm is off the stand so you can get a good angle.
The next one is on the monitor plate and controls how easy it is to pitch the monitor.
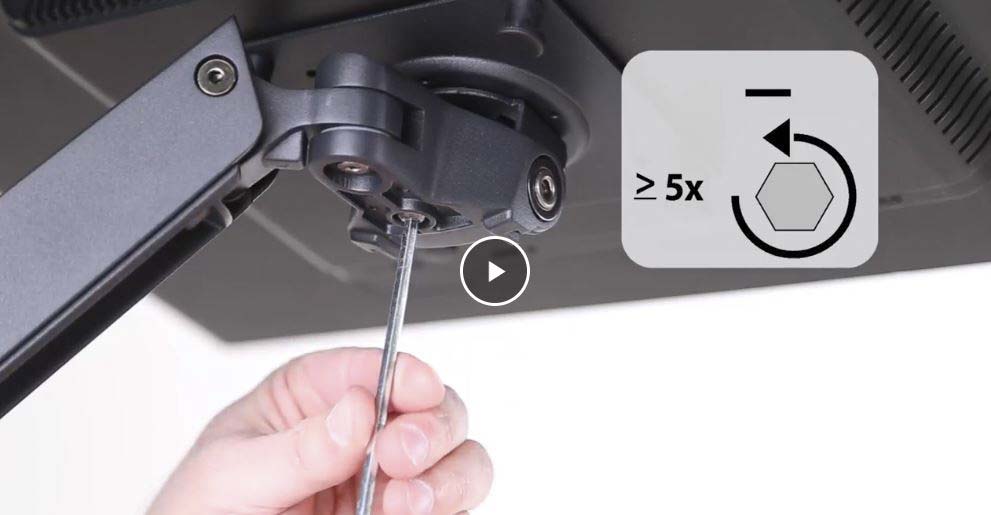
These two small screws control the swivel tightness of the arms. You use the smaller Allen wrench to tighten them.
Final thoughts:
So far, so good! It has been successfully holding his monitor up for about 3 months now with no issue. I’m not foreseeing any problems with it but will update if something happens. I know this it’s a tad on the expensive side, but when you’re levitating an $800 monitor, you want something super sturdy.