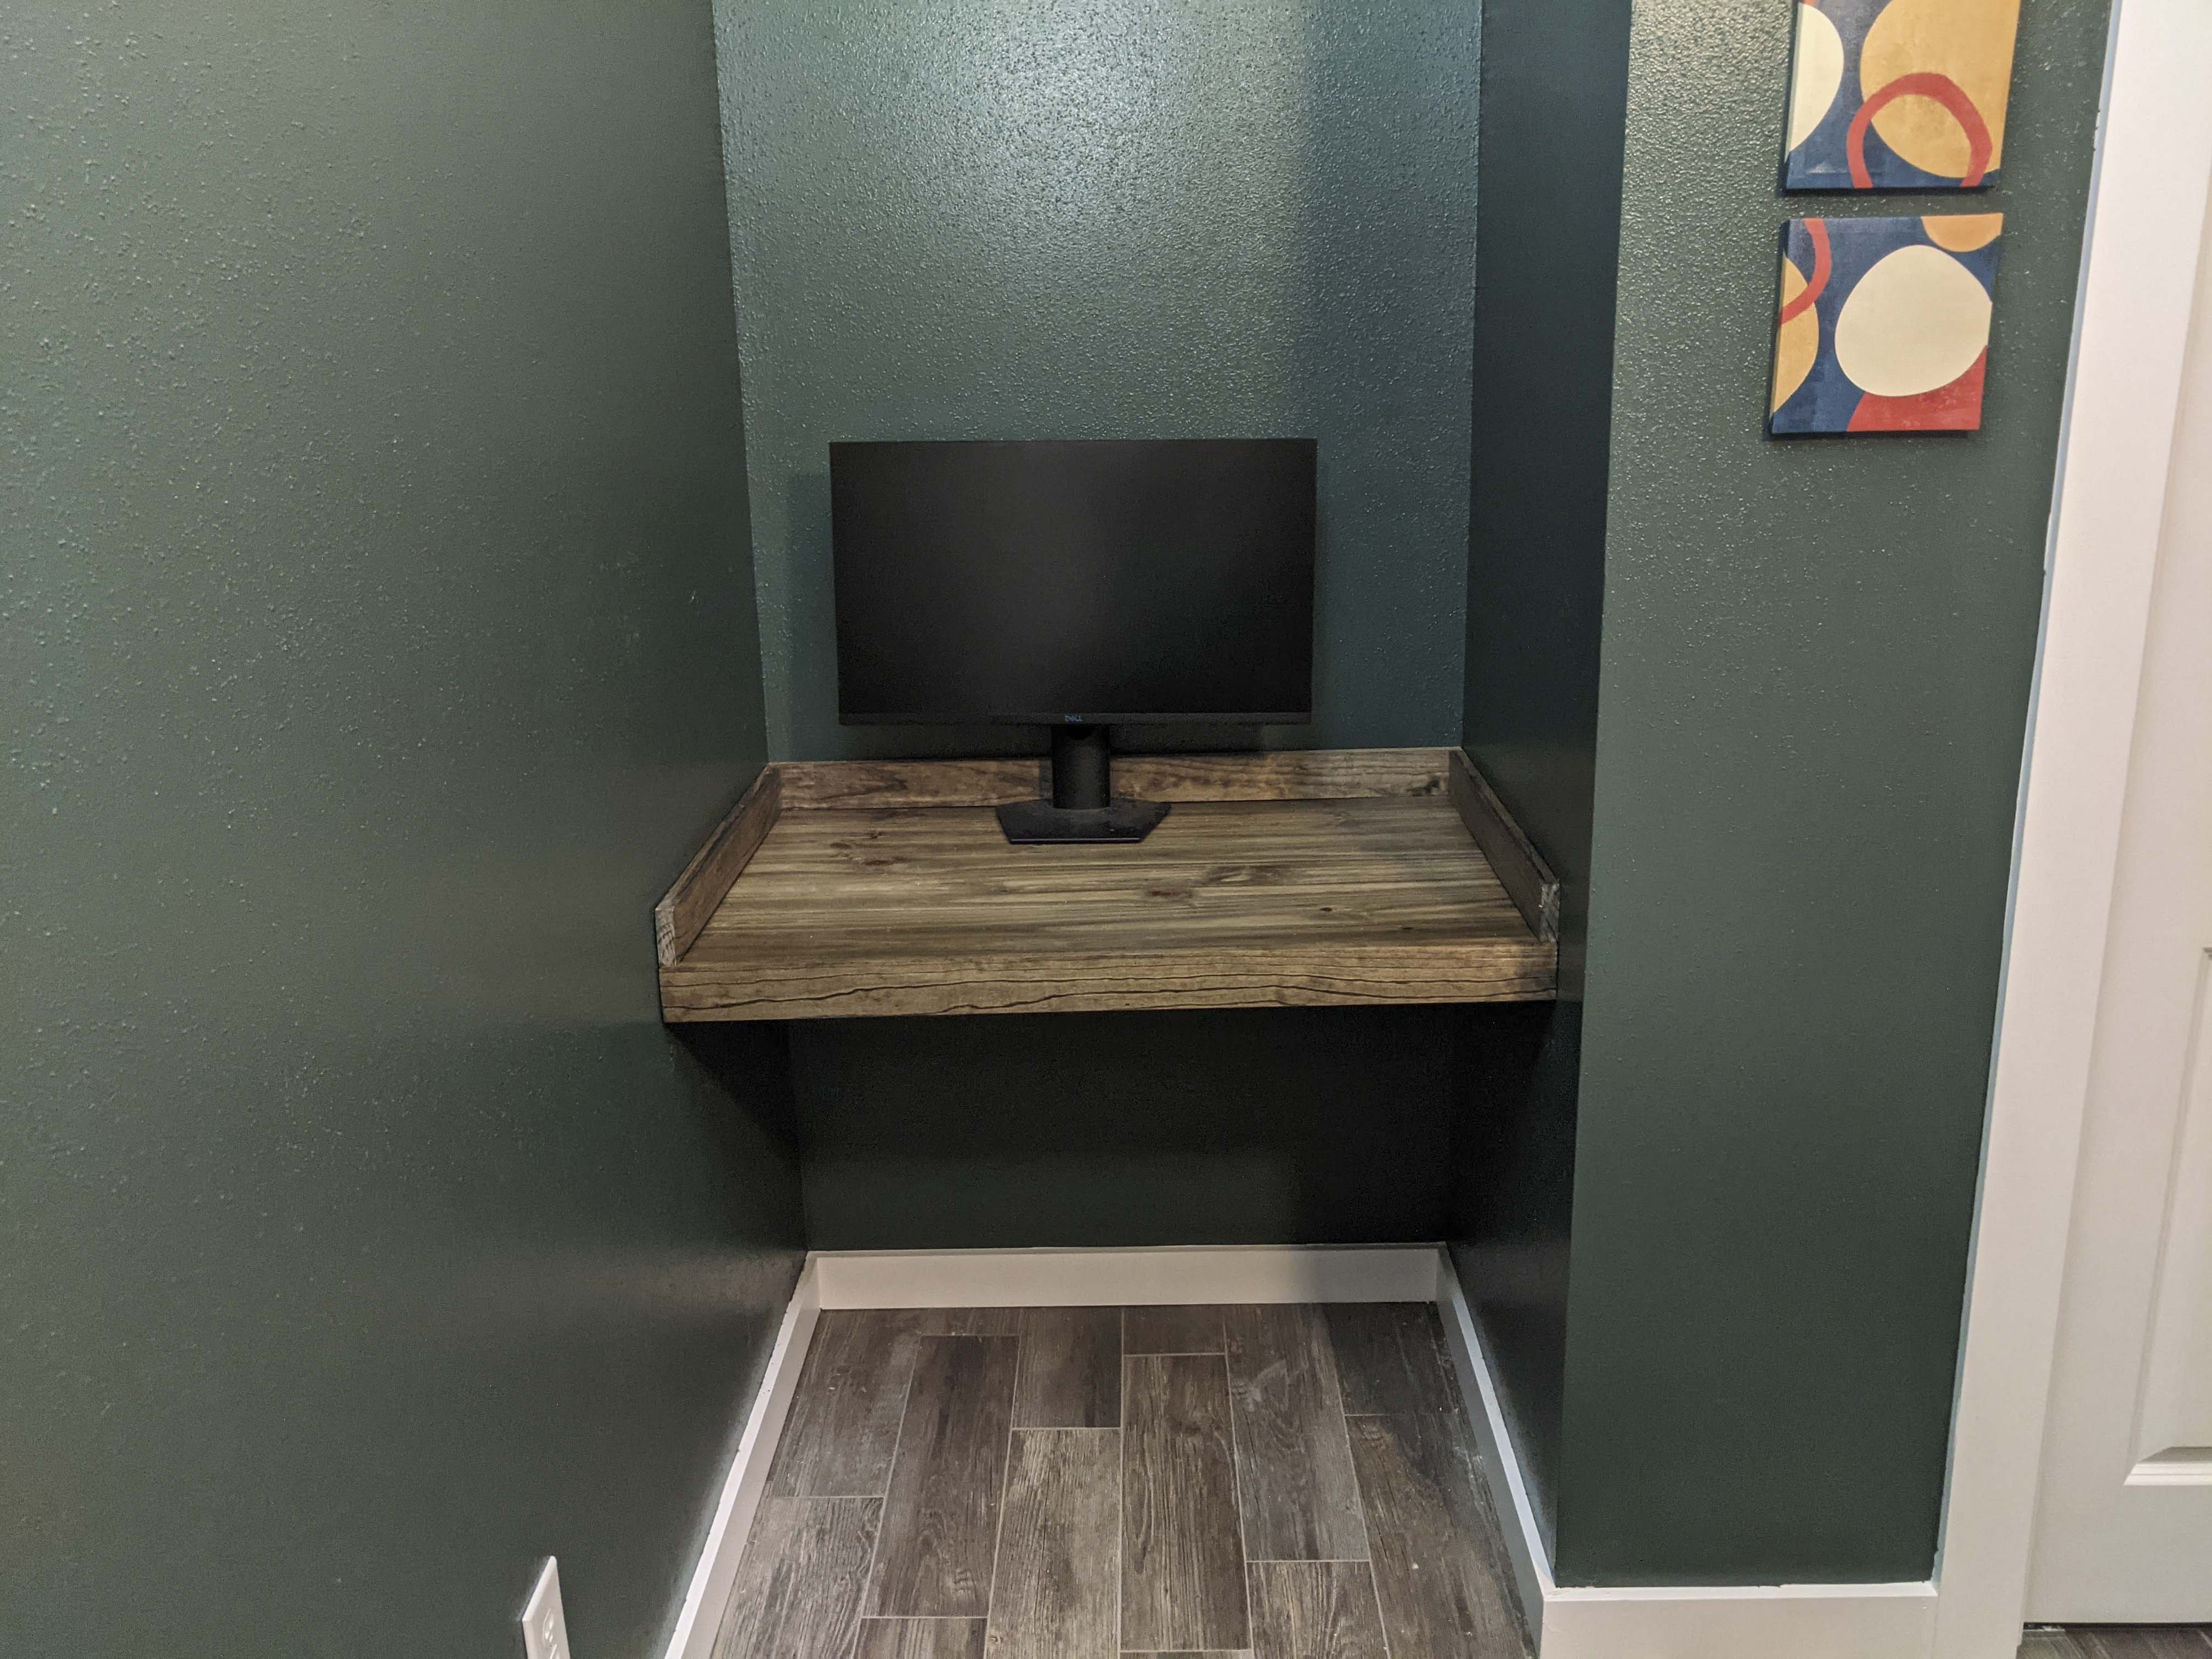
When we bought our house the guest room had a small nook by the closet with a plywood shelf and a curtain hanging from it to conceal…something. I never found out what that something was, but if I had to guess it was a litter box.
After we renovated, we were left with this small space that we weren’t quite sure what to do with. It fit a dresser just fine, but the guest room didn’t really need one. I had painted a larger one that was in there as well and has a nice, long tabletop for knick-knacks. We had a table right there for a bit and my folks liked being able to put their suitcase on it, but it didn’t really fit the room and was more of a functional piece. Plus, I re-painted it and moved it into the sunroom where it’s way cuter.
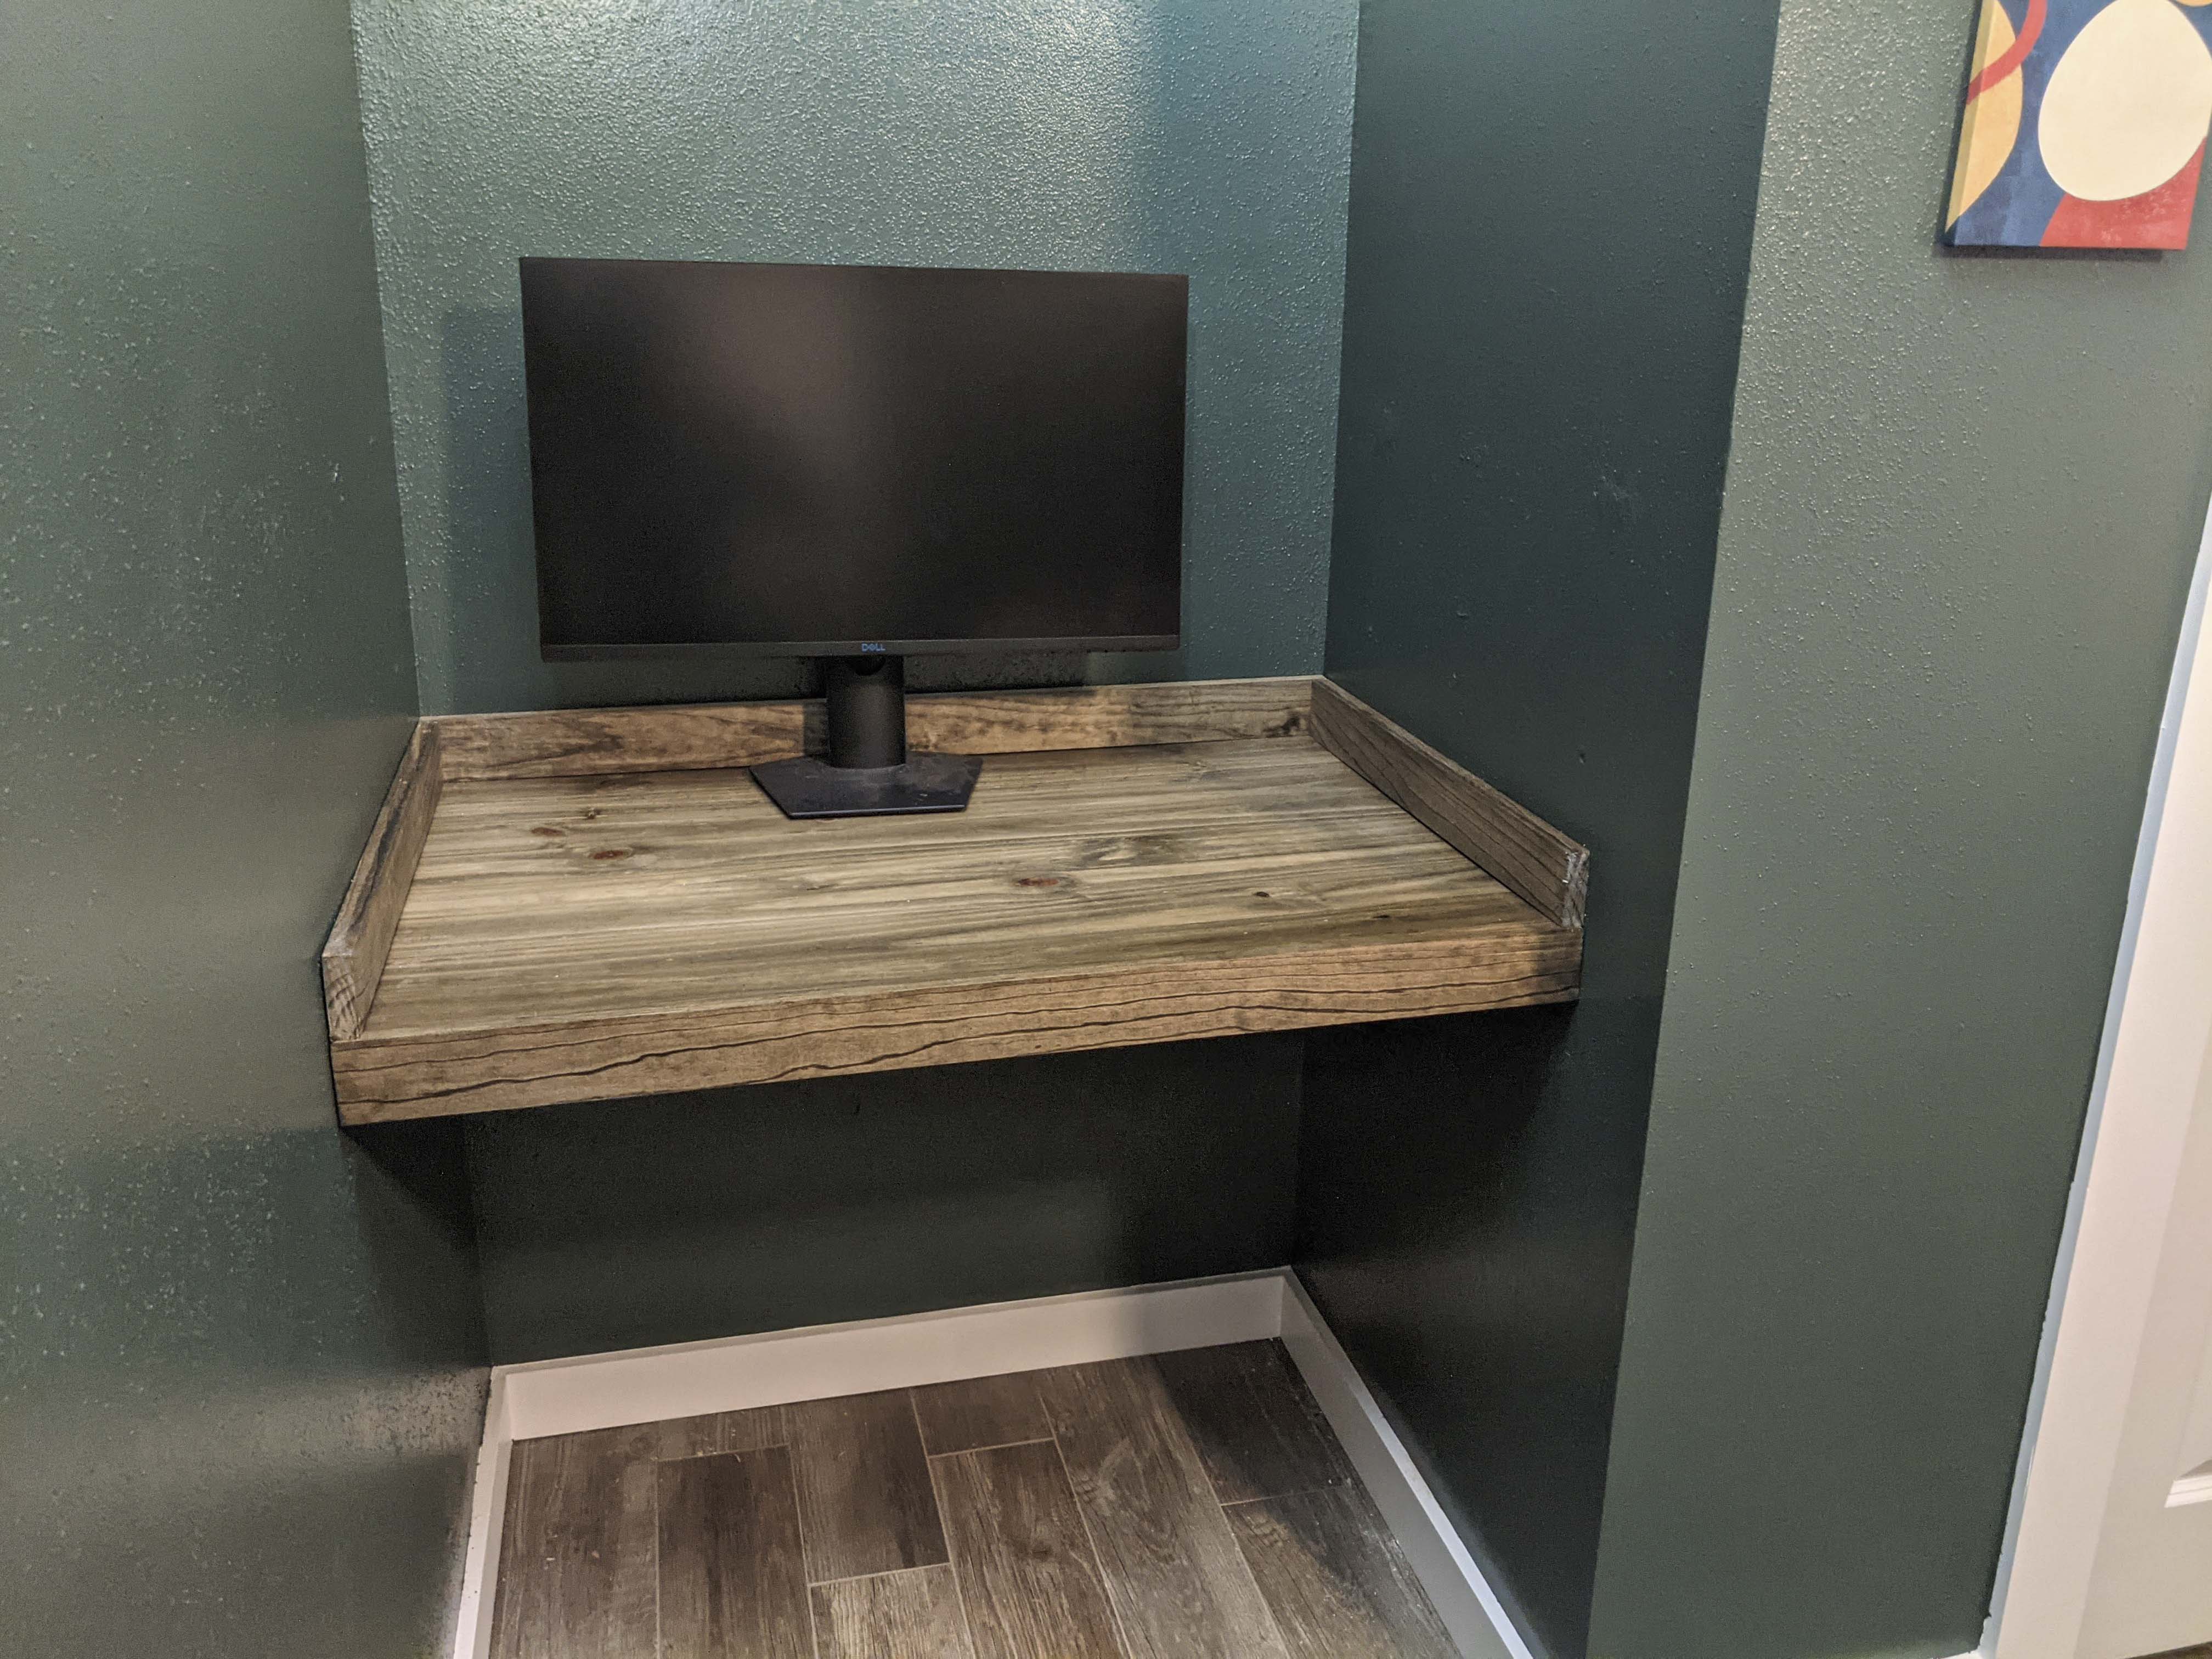
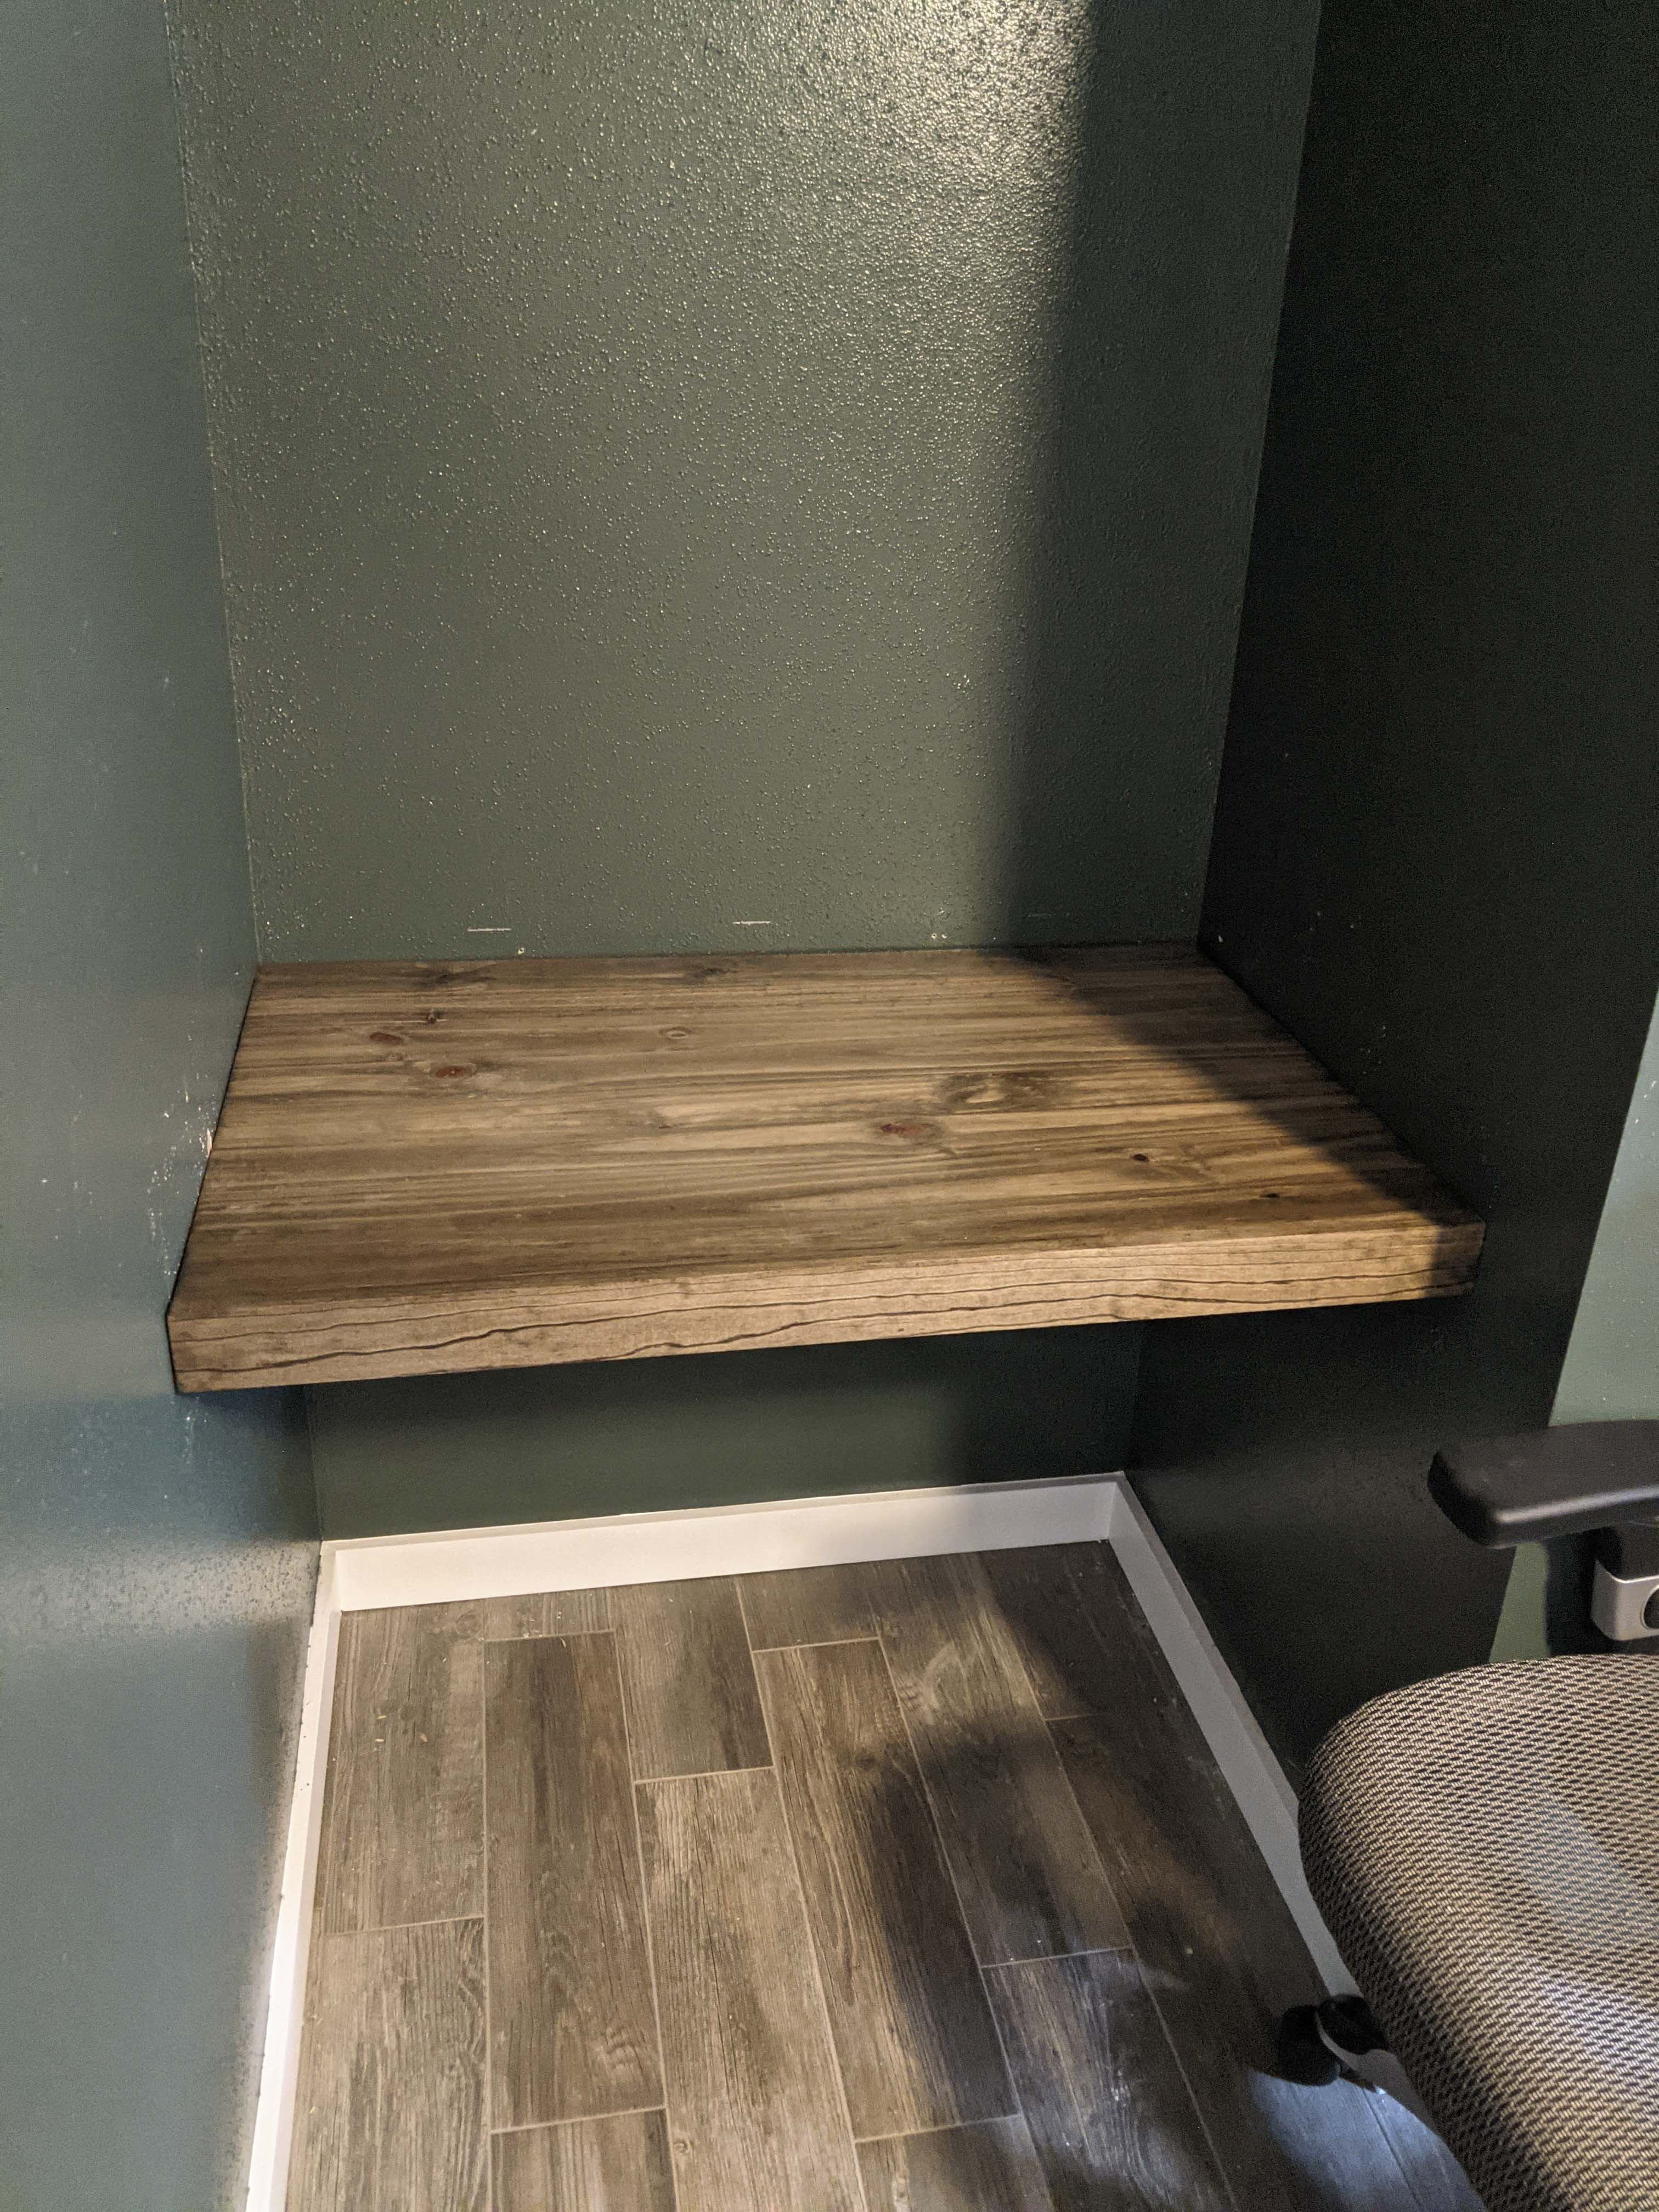
Then, when my husband made the permanent switch to a standing desk, we had an extra office chair that found its way to that nook. He had the idea of putting in a floating desk to take calls or do crafts on. We could hang shelves above it and give the room a little more personality than just a bed and a dresser.
Well, time to get to work.
Here’s what I did:
Supplies:
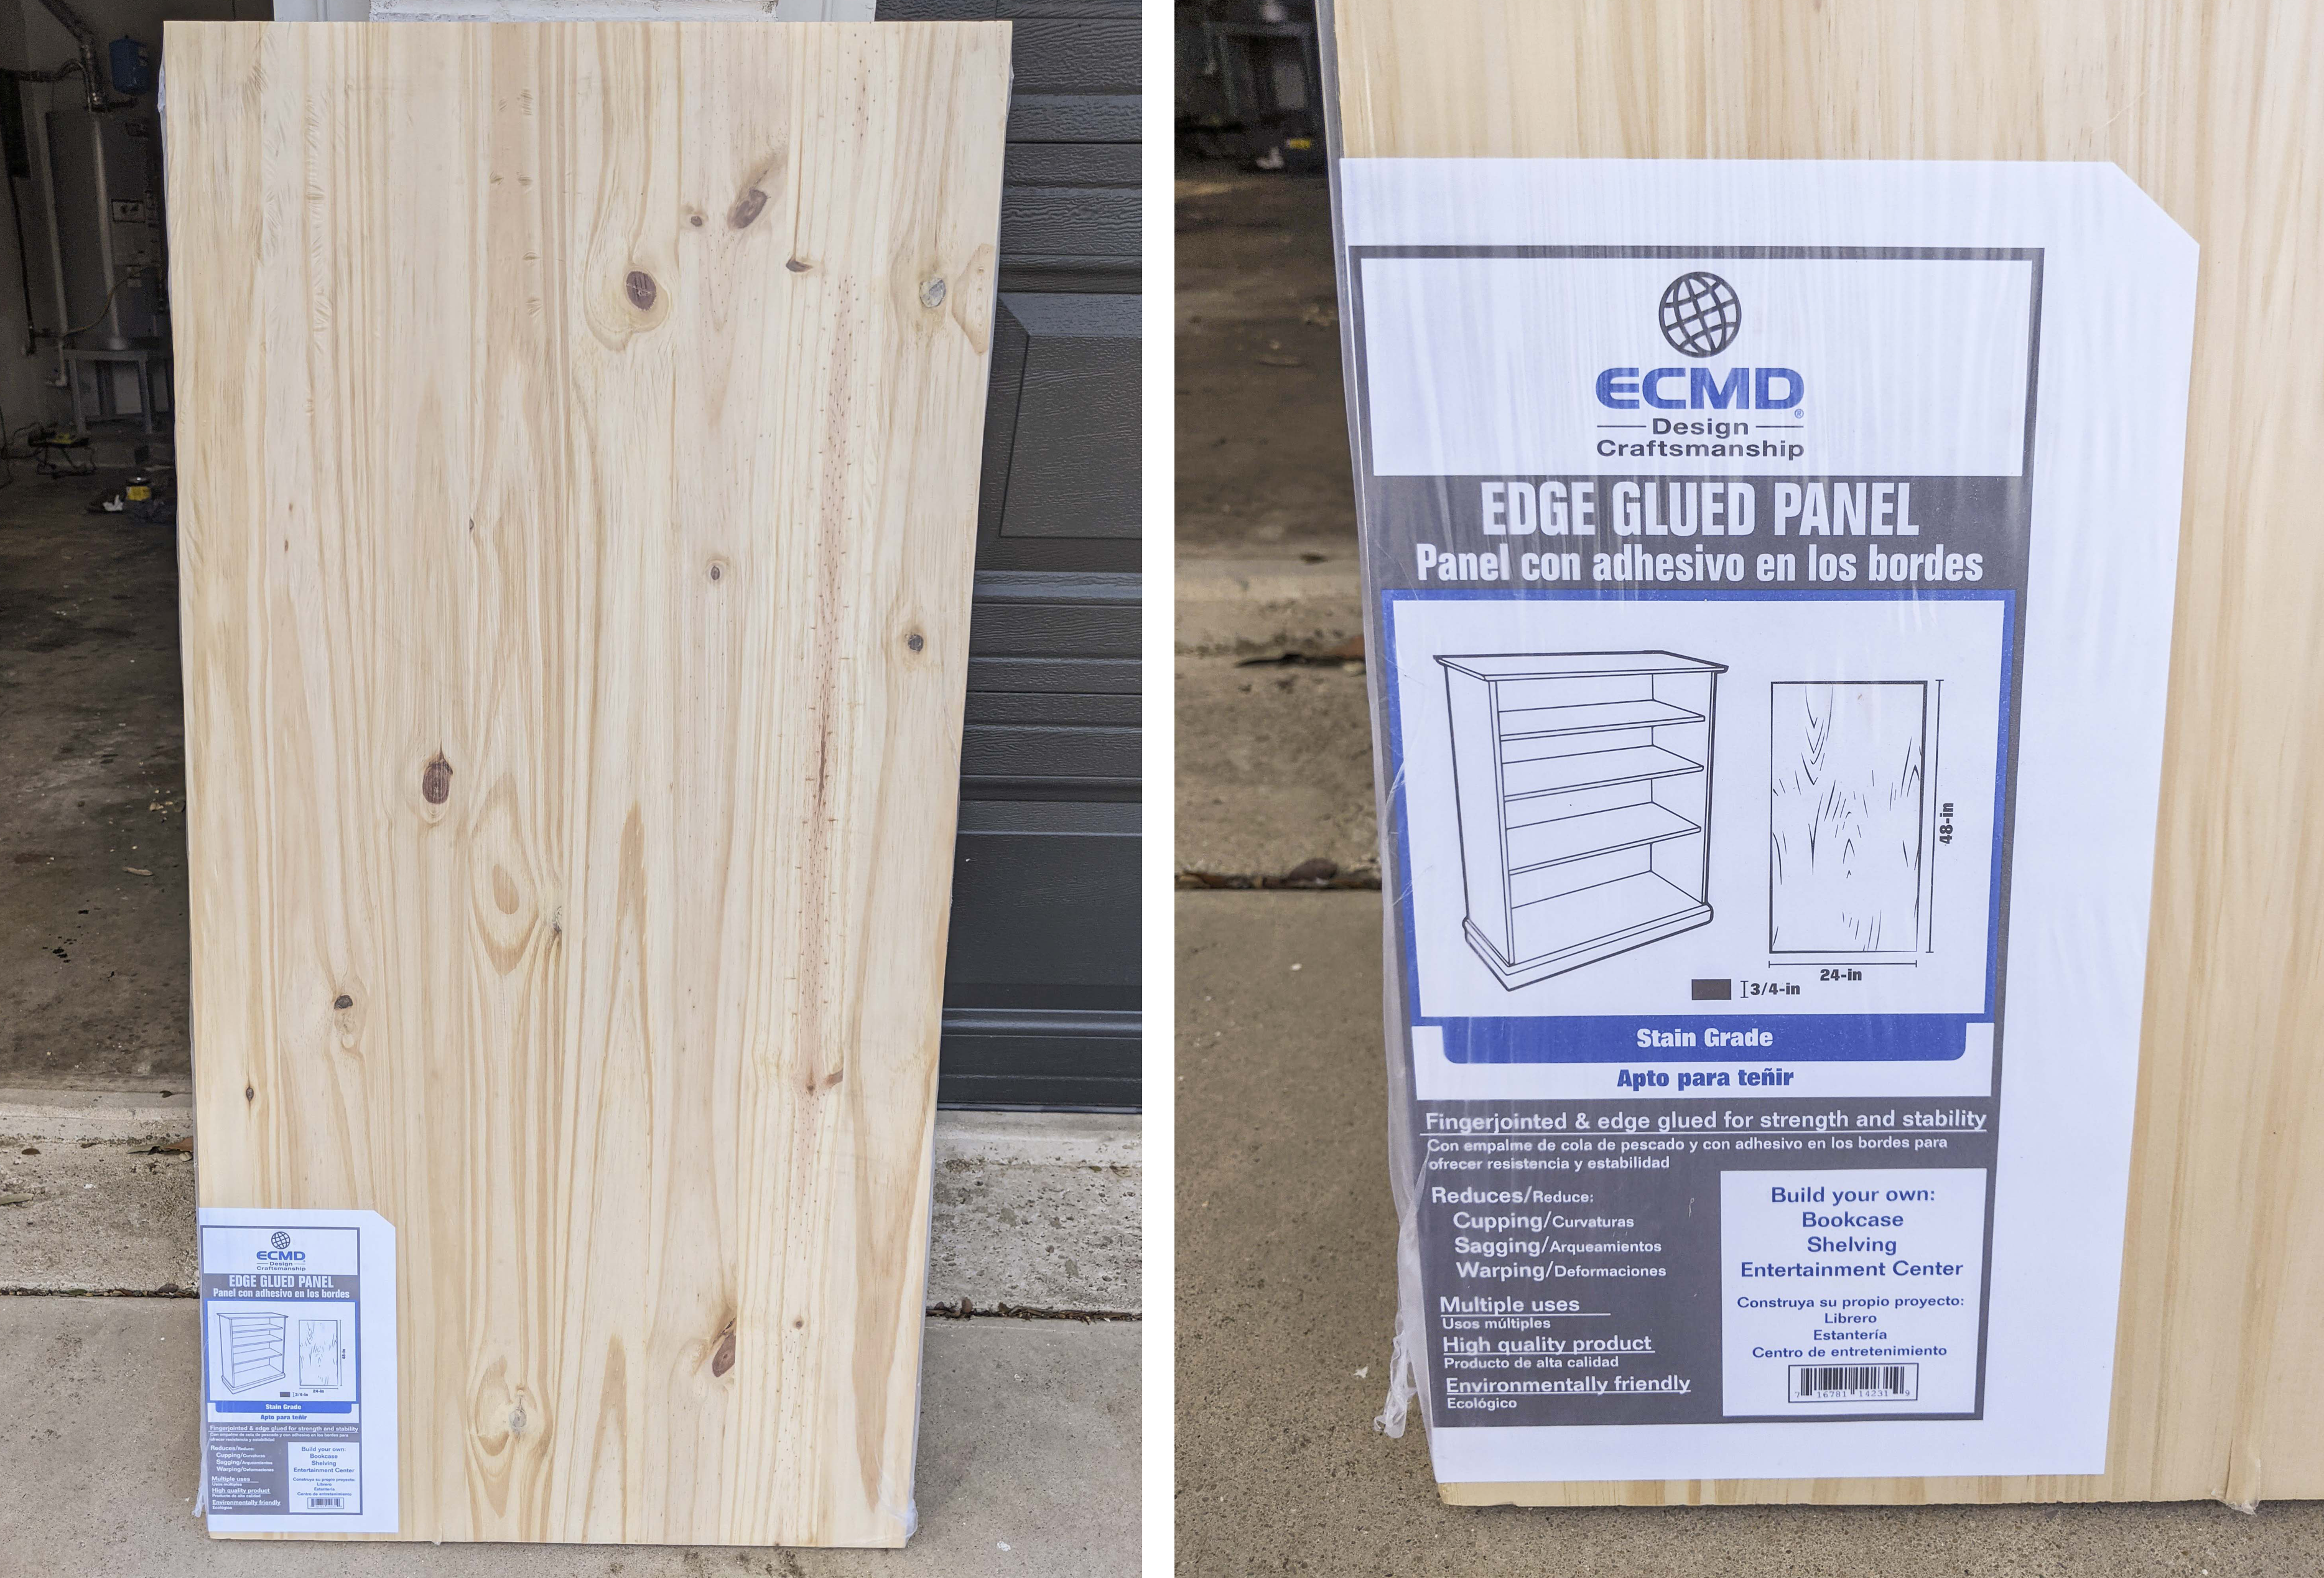
- Two 3/4" plywood boards (nice) for tabletops. This is if you want to glue them together for a thicker top. In retrospect, I would have only gotten one.
- 2x4s for mounts
- 1x3s for trim
- Screws (3-4in)
- Drywall anchors (if needed)
- Wood glue
- Jigsaw
- Drill/Impact driver
- Level
- Sander
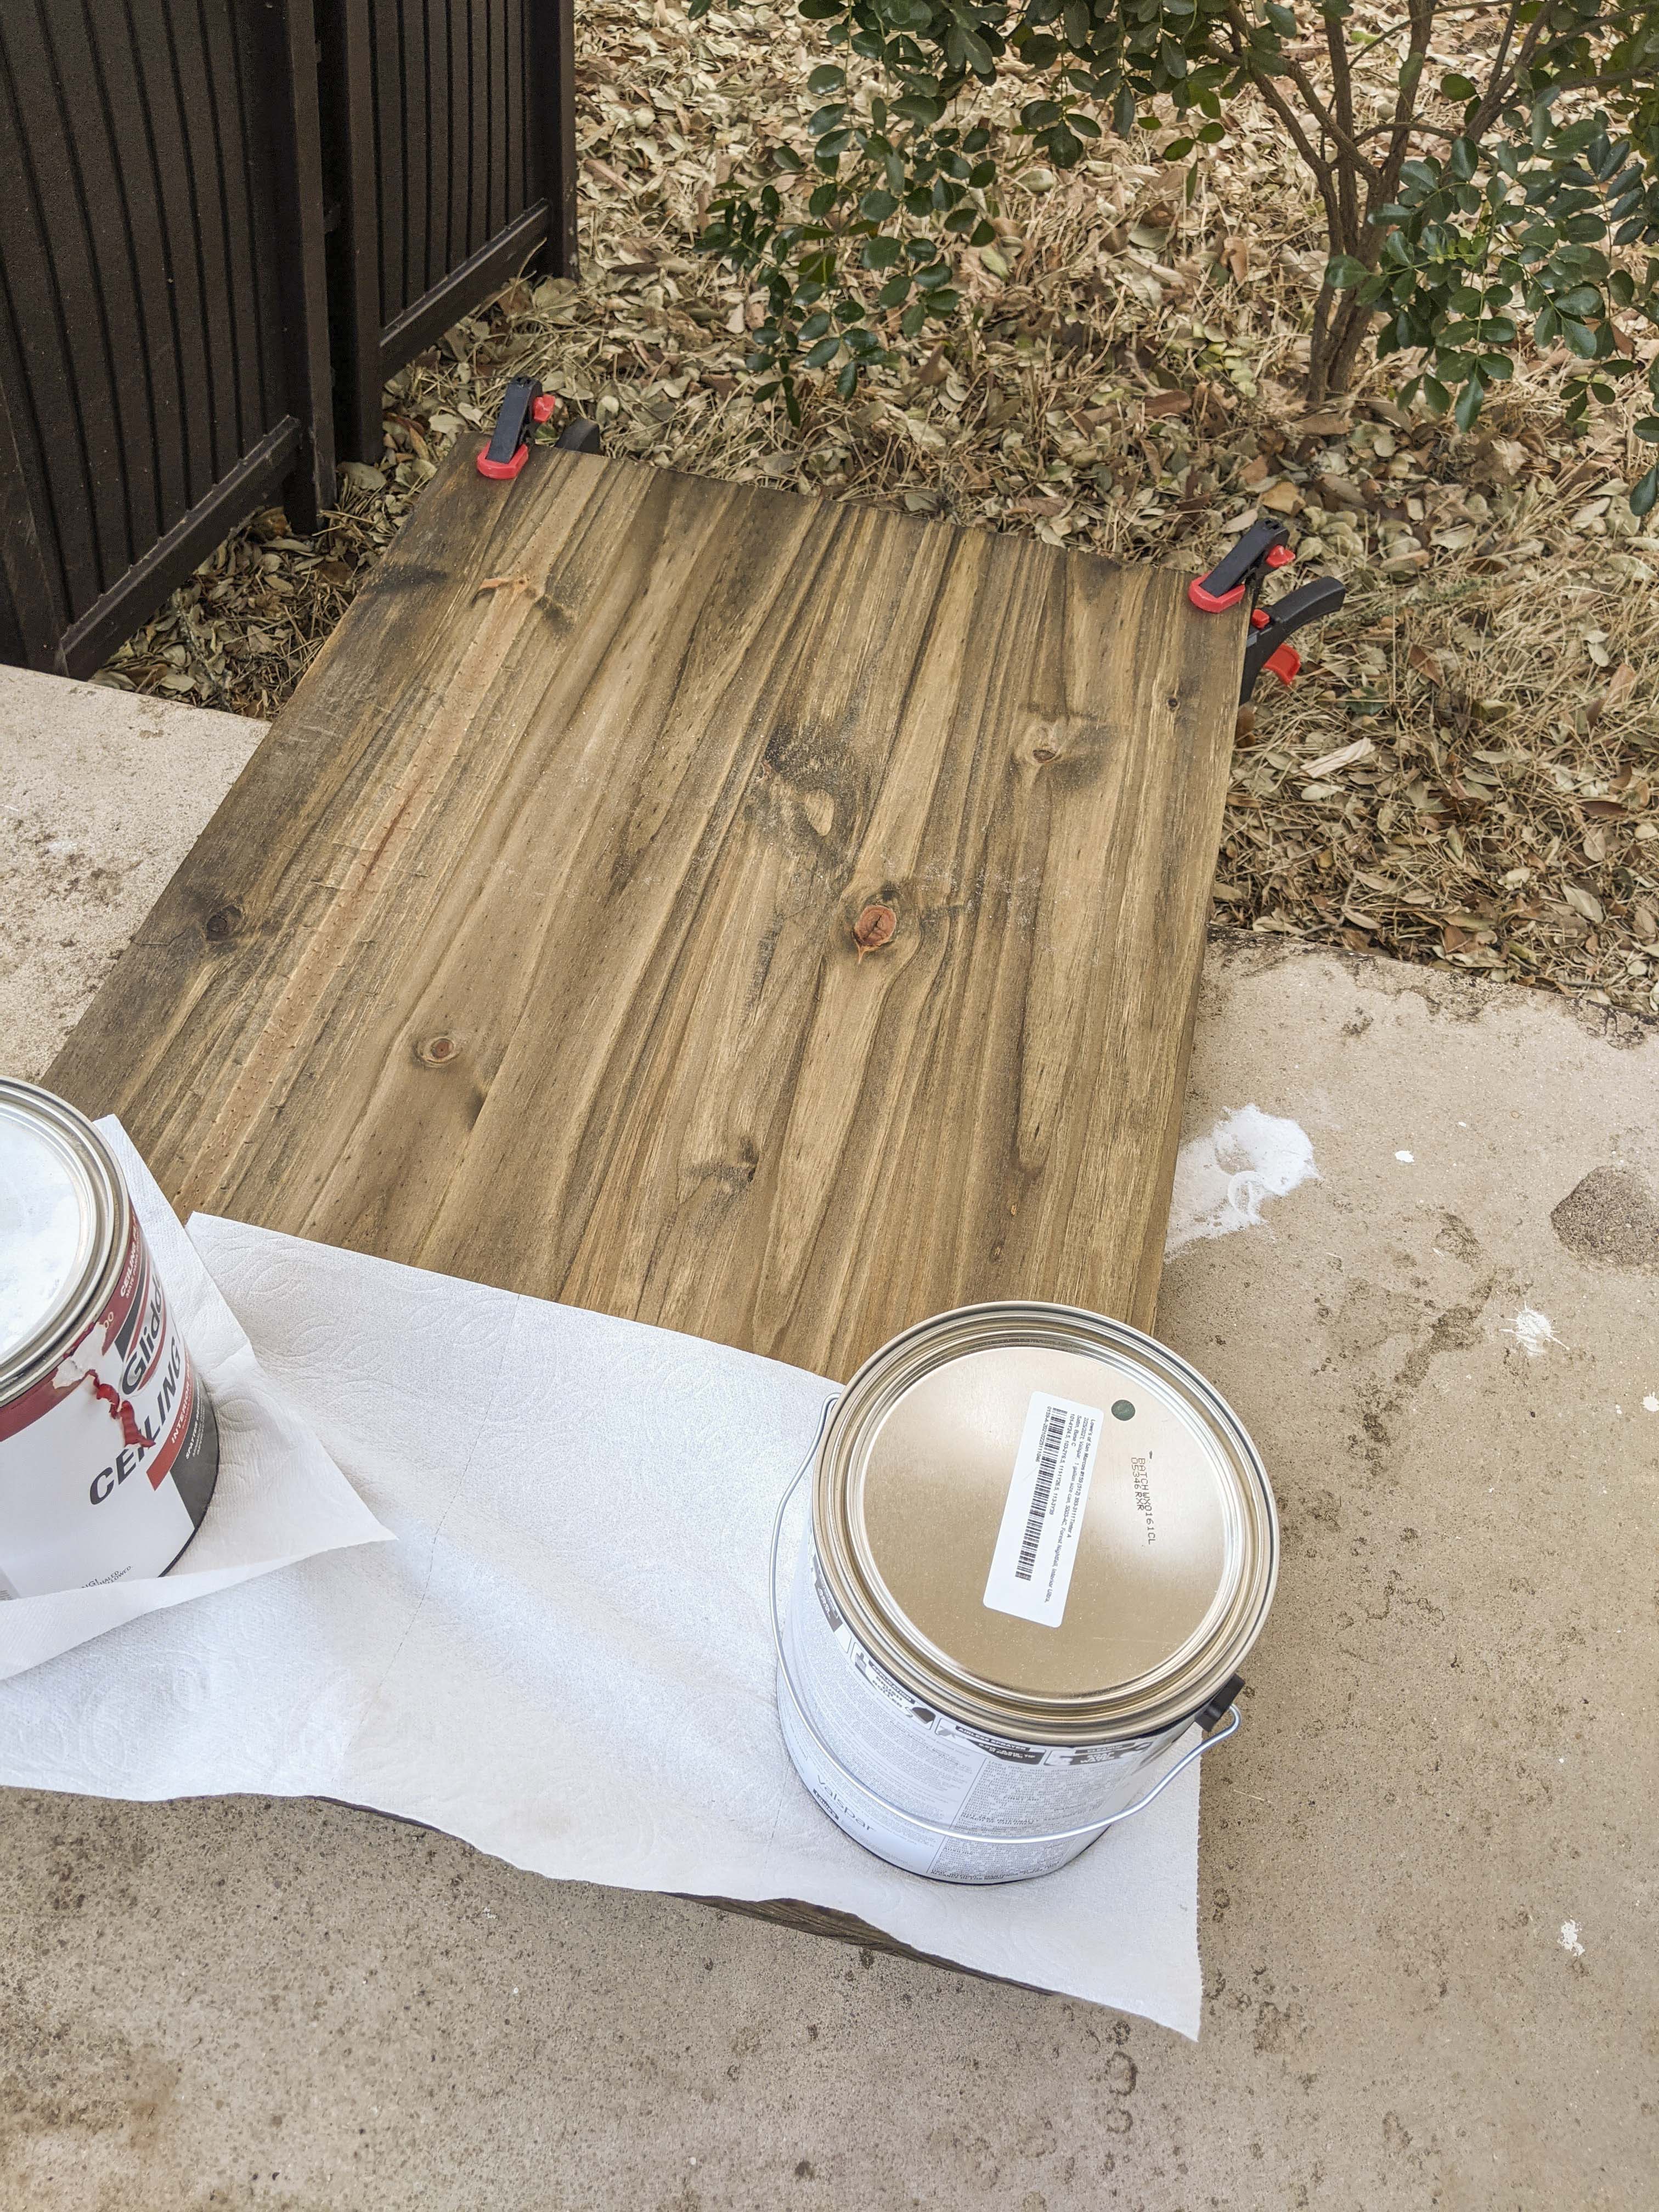
- Stain and brush (we chose “special walnut”)
- Measuring tape
Process
Measure twice, cut once. That will be the theme of this whole DIY. The width of my nook was almost 38 1/4" inches, but the right wall sloped in slightly meaning that the gap was narrower in some places. Great, thank you old house.
I cut my plywood boards a little shorter than I needed so they would fit snuggly against the back wall. Nothing went in straight. Everything went in at an angle to miss that narrow bit and was laid down at the back.
To cut a straight line with my jigsaw, I clamped some scrap wood so the plate of the jig could ride alongside it and not wiggle around. This got a pretty clean cut for me. I also drew all my lines with my new, longer level.
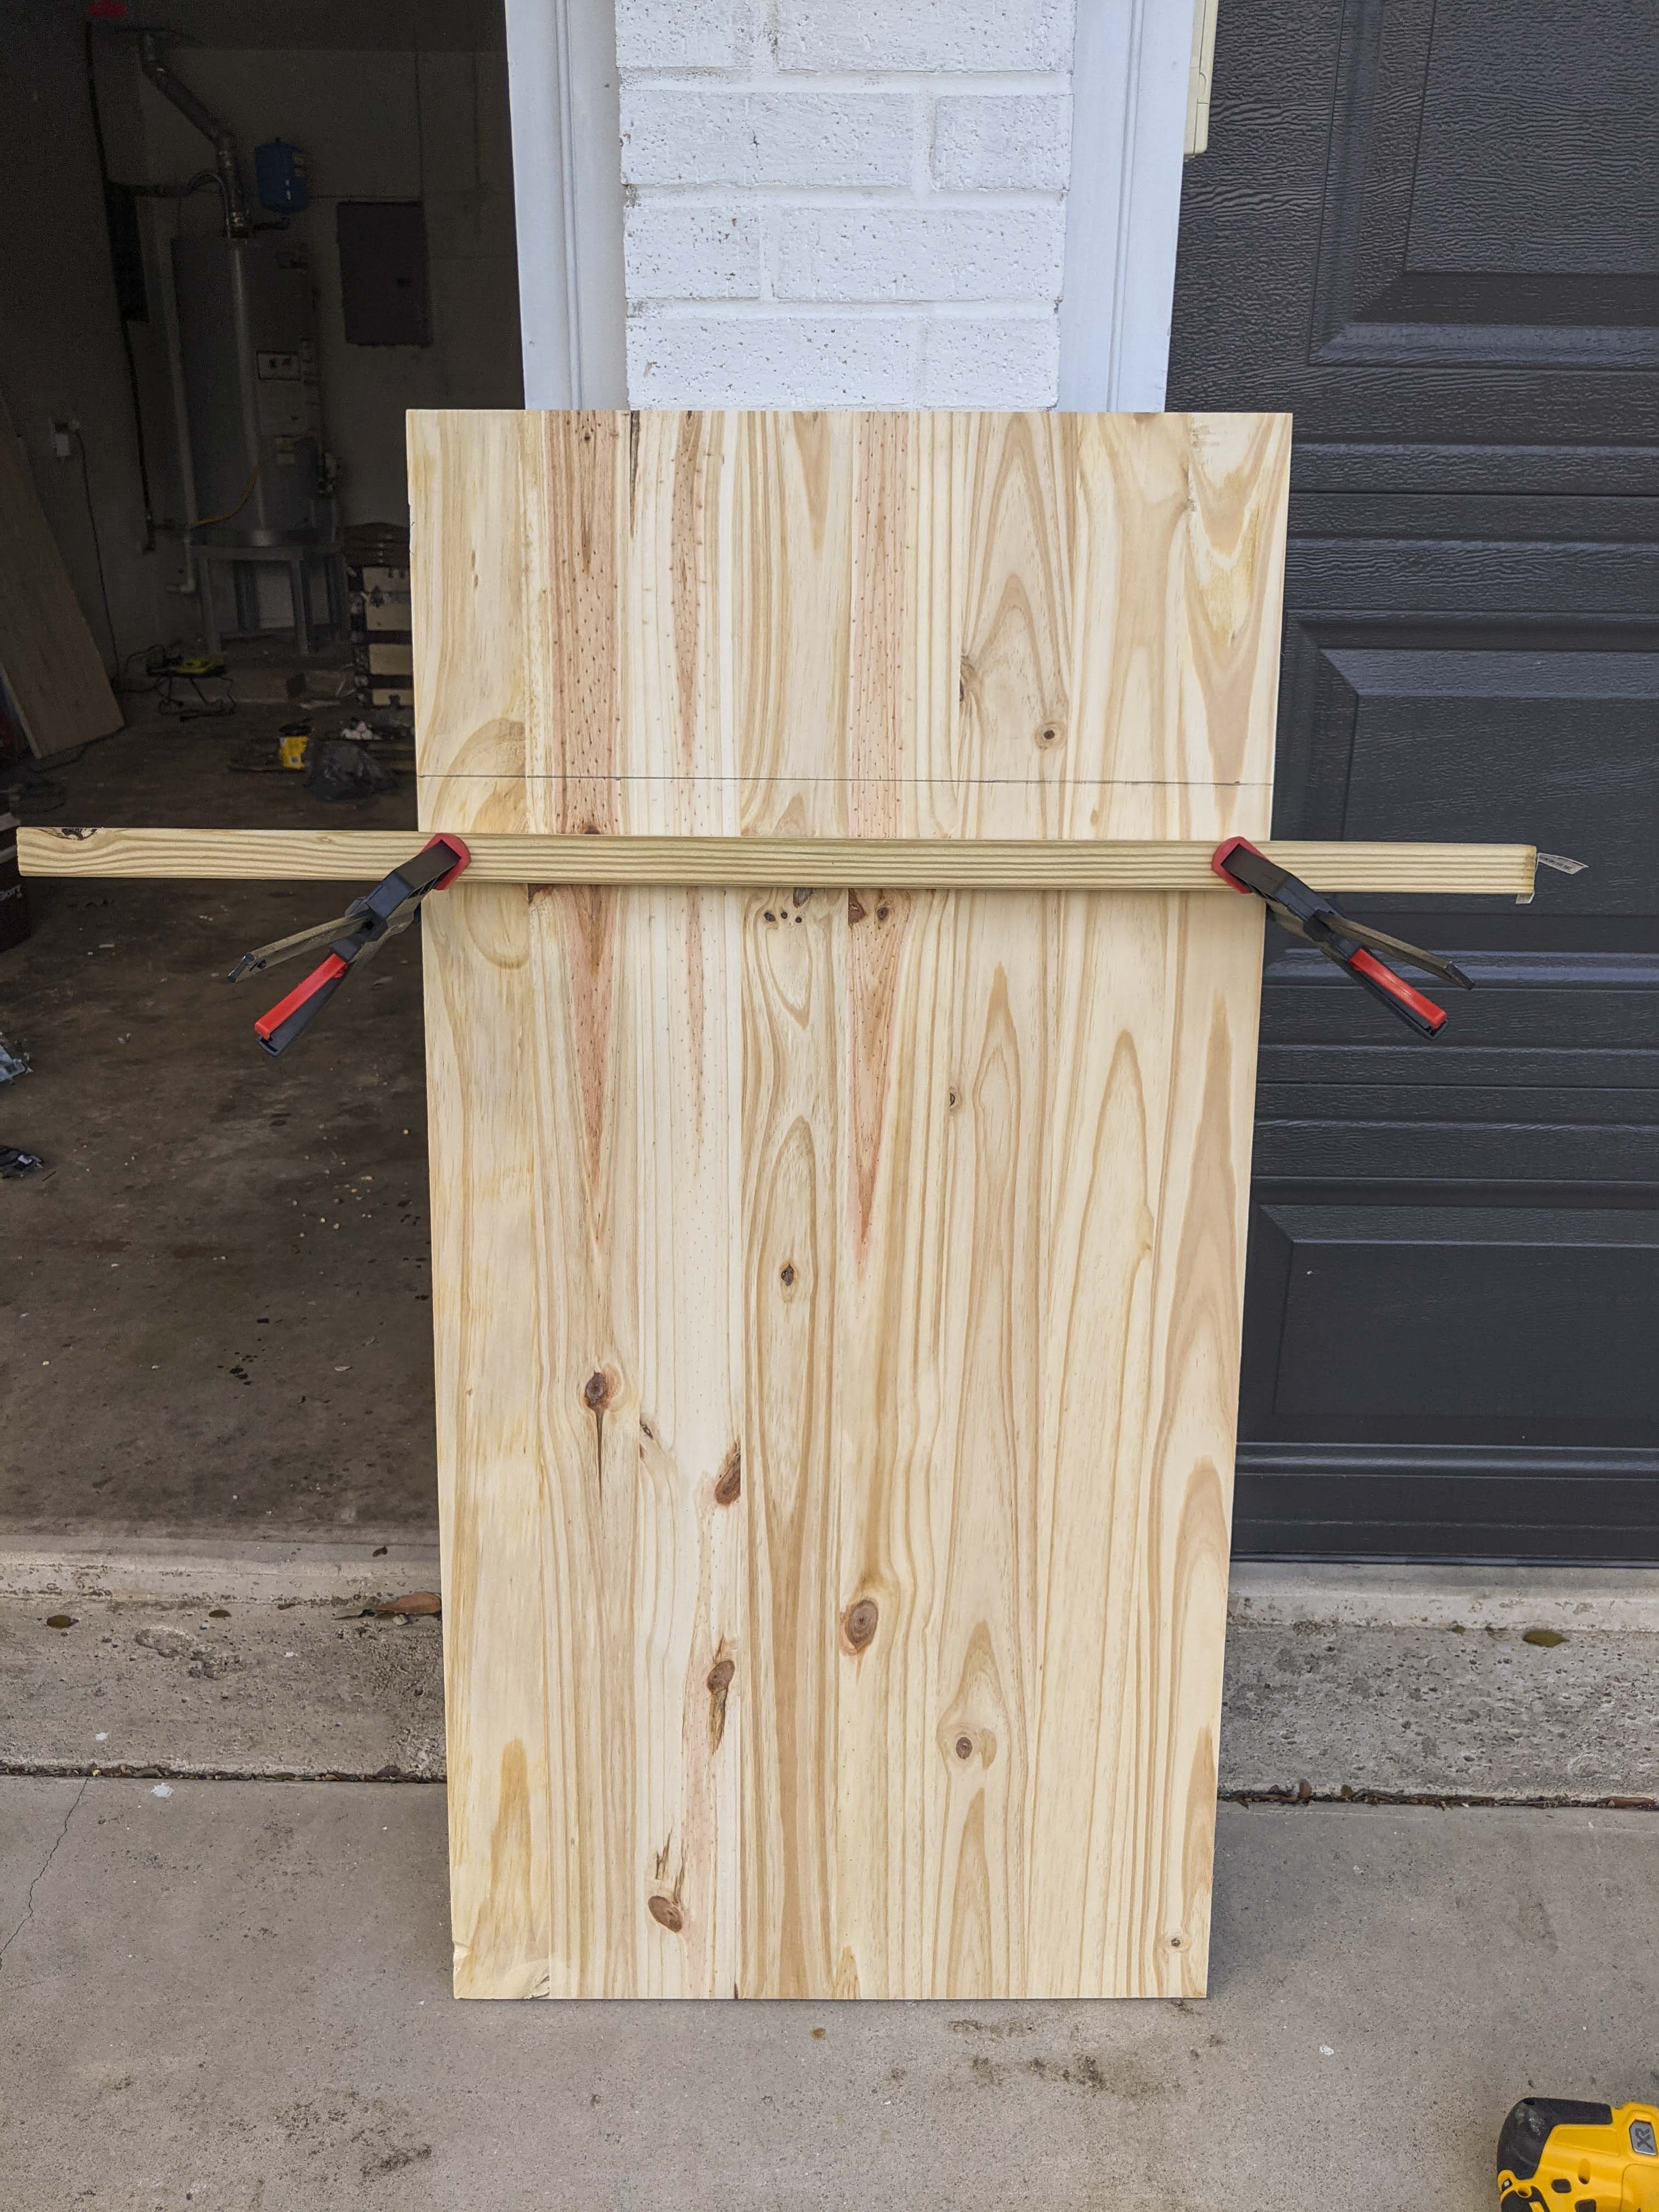
Once cut and stained, I glued the two pieces together. This is before I had the idea for trim, so if I did it over I would probably only do one piece of plywood.
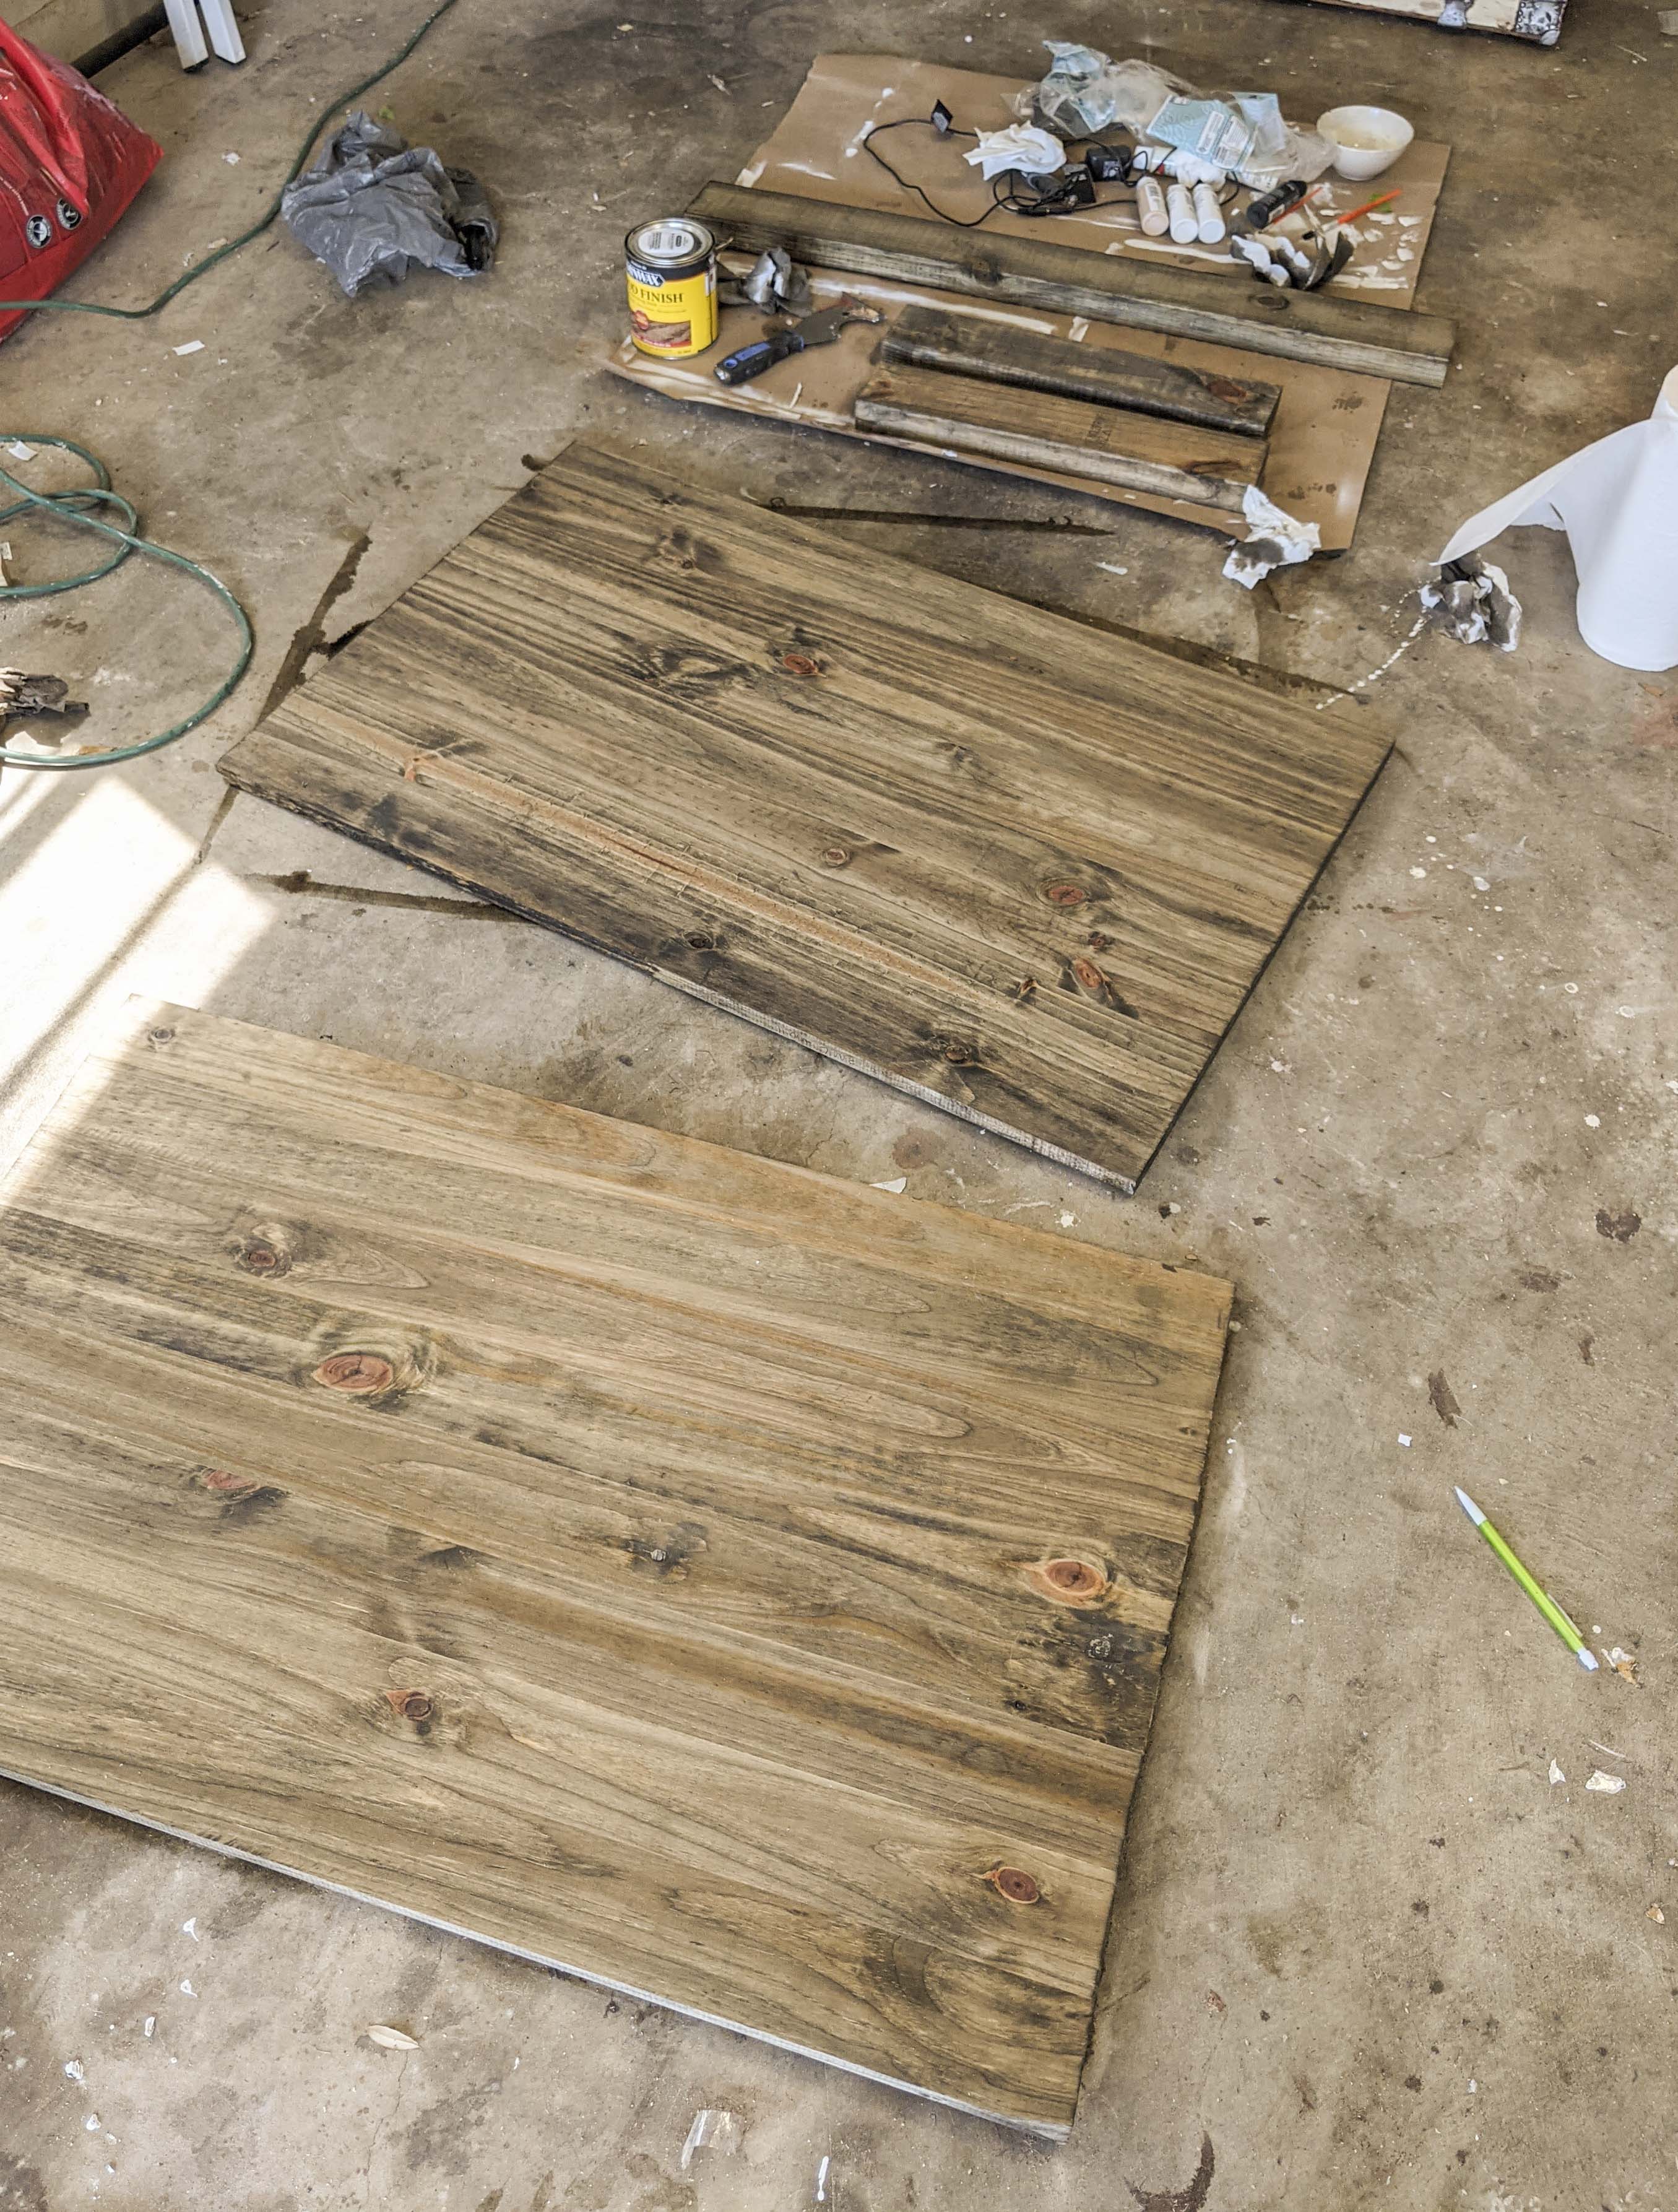
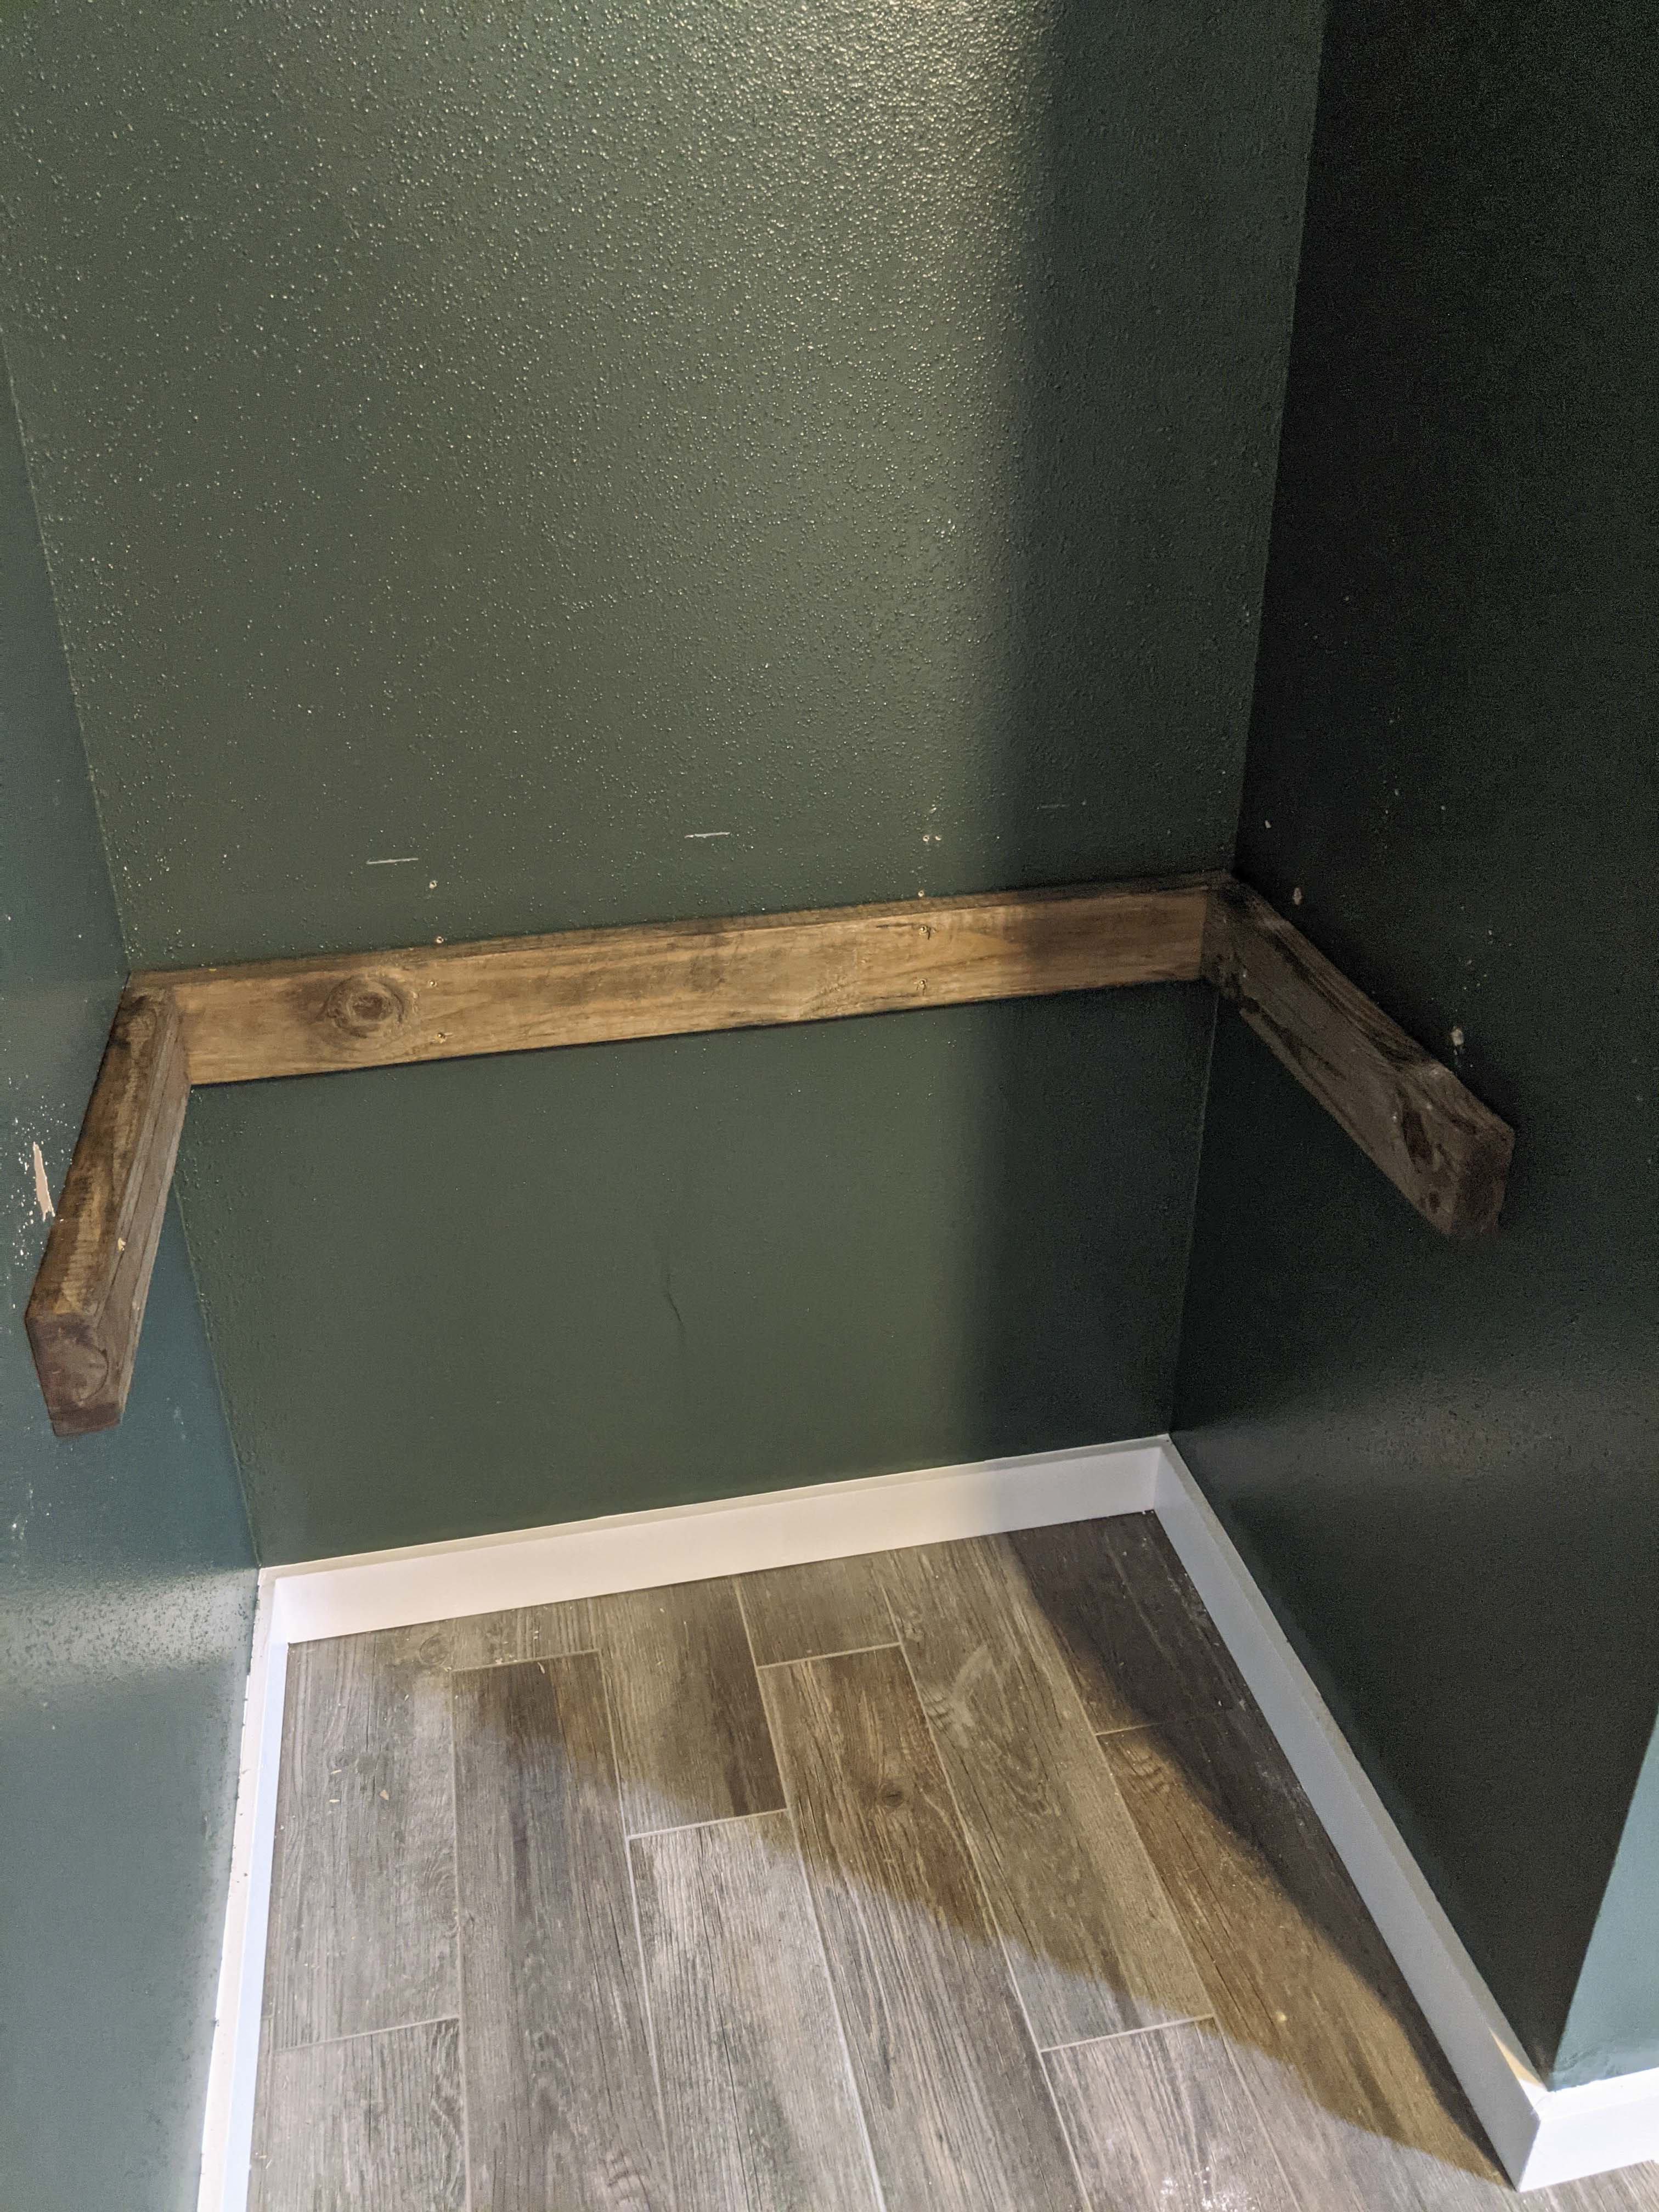
The 2/4s were much simpler since they’re only 2 inches wide versus about 24 inches like the plywood. First, I stained them and let them dry. Then, I cut one the width of the back wall and mounted it into two studs. This table will be heavy- find your studs! Use your level to make sure the board is going on the wall straight. The side pieces I cut shorter than the width of my tabletop because I didn’t want to be able to see them. The left side was able to go into studs, but the shared closet wall had nothing so I had to get some heavy-duty drywall anchors that claim to hold 75lbs each- so far so good! I drilled the screws through the 2x4 and into the wall a little bit to know where to put the anchors. It feels secure as if it’s in studs.
This is also the first time I’ve used Torx screws and oh my goodness I will never go back. Our contractors used them and I’ve read quite a bit about them in r/HomeImprovement over on Reddit. They don’t strip! They’re magnificent. I used this project as an excuse to get a jar of them. Hopefully, I’ll need 4-inch screws in the future!
We had the idea for trim around the edges and front afterward, so we ran to Lowe’s to get some nice 1x3s. I stained and cut one the length of the tabletop, then glued it to the front and clamped it down.
After that was dry, I ran glue around the top of the mounting boards, then put the finished tabletop on and let dry. Make sure everything fits and is the right height before you glue it down. I had to move my 2x4s down 3 inches because it was a tad high for the chair.
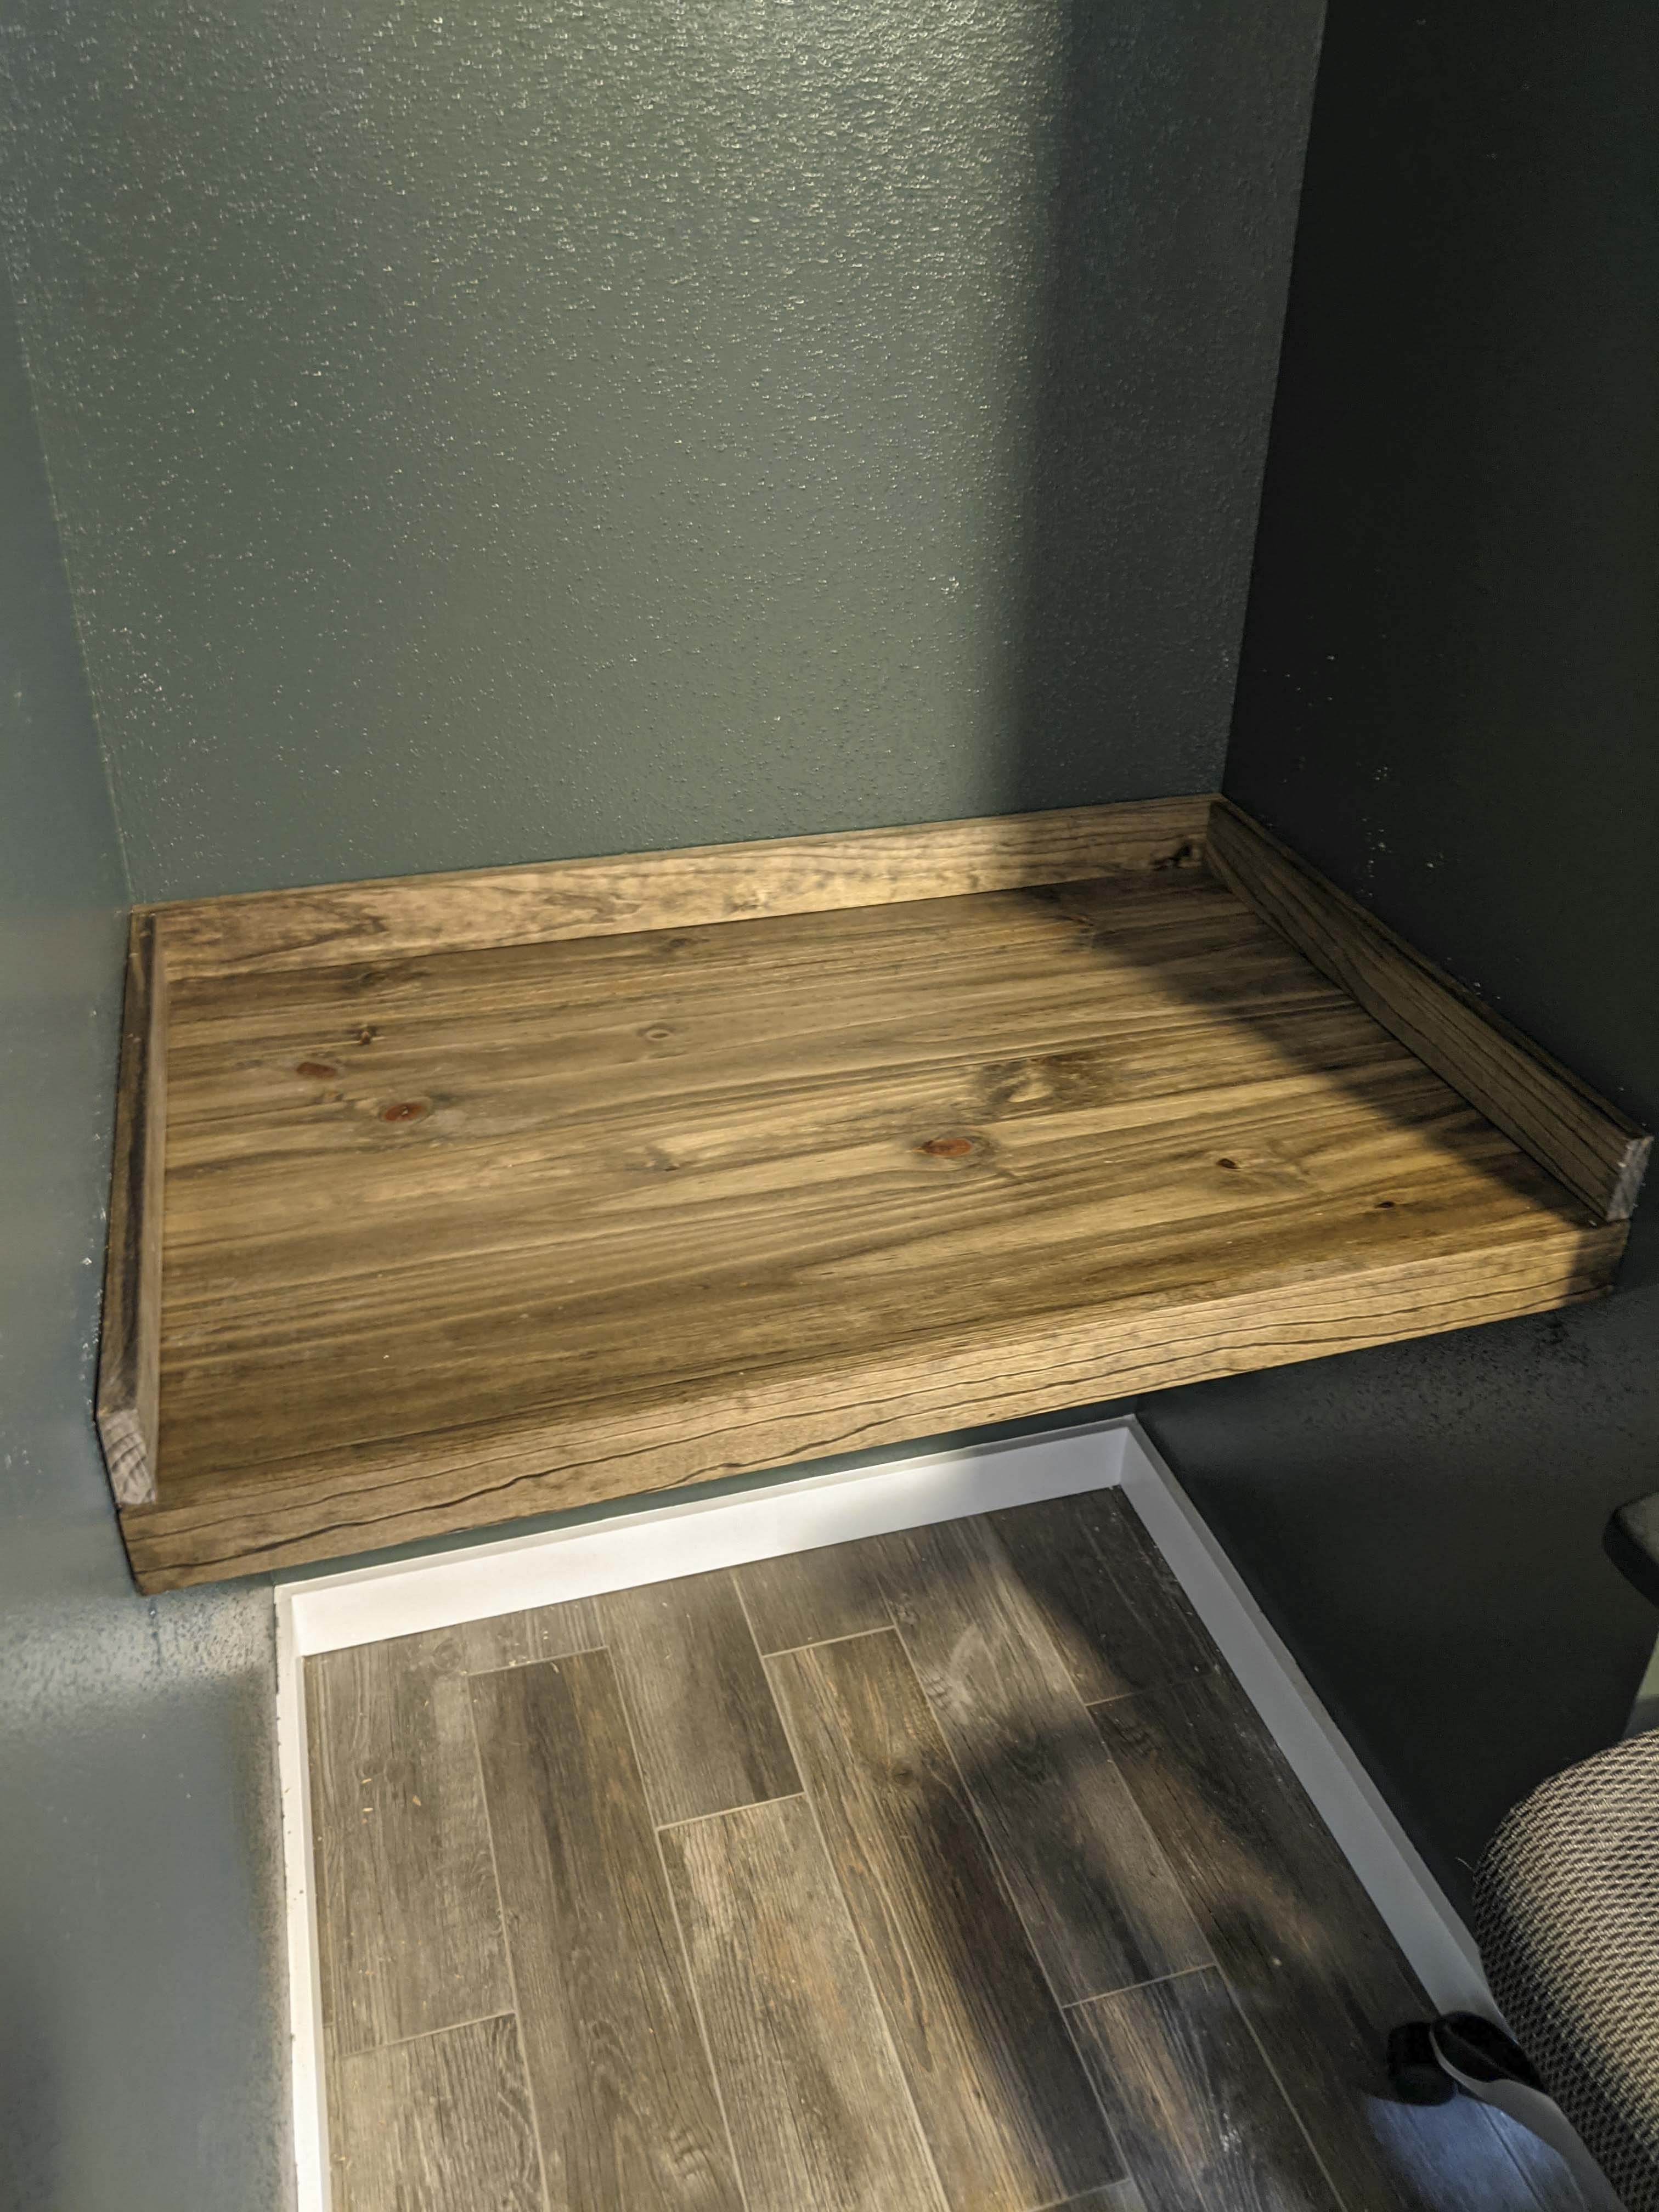
Then, I cut the back trim piece and glued it to the tabletop NOT the wall. If I ever want to take this thing off, I want it to be as clean as possible. I cut the last 1x3 in half and those pieces fit on the sides perfectly (a happy accident).
Voila! An extremely sturdy and cute desk that you can build and customize to your liking.