This post may contain affiliate links. I earn a small commission on your purchase, but there are no added costs to you.
Whew, it has been a minute!
I got busy with my day job and other pet projects i.e. designing templates for my husband and I’s Notion business.
But now that the weather has finally cooled down, it’s time to get back out in the shop and build stuff.
We recently went on an excursion to IKEA and found this serving board that we absolutely loved. It’s heavy-duty and has a lovely rustic vibe. However, it’s currently $40 which is a little steep considering we were going to use it as decor.
Luckily, I’m fairly crafty and have a big box of scrap wood. I started digging around after we got home and found several pieces that would work to duplicate this thing.
I don’t plan to buy anything new for this project, but I will update if I needed to.
Let’s get started!
Supplies:
- Scrap wood (I used 1x3s, a 1x5, and 2" balusters. Do NOT use pressure-treated wood if this is going to be used around/with food.)
- Miter saw
- Jig saw
- Sander and Dremel
- Planer
- Drill
- Spade bits
- Liquid Nails
- Wood glue
- Wood filler (if needed)
- Clamps
- Stain/Mineral oil (If you’re planning on using this with food in any capacity, be sure to get food-safe varnishes/stains/oils.)
- Polyurethane
- Ruler
- Speed square
- Safety gear
How-to:
Step one:
The first thing we’re going to do is pick out wood that will work. I mentioned it above, but do not use pressure-treated lumber if you’re planning on using this as a cutting board or putting food on it in any way. The chemicals used to coat it will seep into your food and can make you really sick.
I’m planning on using mine as decor and to put plants on top of so I used a piece of pressure-treated wood I had lying around. The rest of the pieces were scrap 1x3s and balusters.
Step two:
Now, we’re going to measure and cut all of our pieces. You can make your serving board as large or as small as you’d like.
The balusters I had were already cut fairly small, so I left those alone until shaping. I’m using them as the handle and the 1x3s as the platter.
I’m aiming for similar dimensions as the IKEA version, so mine is roughly 25 inches long and 10 inches wide at the widest part. I will bite into these measurements when I shape the board later so these numbers account for excess.
When all of your pieces are cut, give them a light sanding.
Step three:
Time to glue them together. I glued all of the platter pieces and all of the handle pieces together separately because they’re different thicknesses. We’ll put them together later.
Pick the sides you’d like as the tops, then run a thin bead of Liquid nails down one side of the board and attach the next board to it. I ended up also using wood glue. Continue until they’re all glued together. Use clamps to secure and let dry for about 24 hours.
To be honest, I let the glue dry for a couple of weeks! Not entirely on purpose, but it worked out we went on vacation in the middle of this project. When we got back, all the wood was super secure.
Step four:
I’m going to use an electric hand planer to level the wood. Make sure everything is dry or the planer will pop all of your pieces apart. Sand everything smooth when finished.
I was able to clamp my board to the side of my workbench and plane the sides of the board flat.
The balusters I used are thicker than the boards so I ended up needing to plane the handle part quite a bit to make it as flat as the board part. Something to keep in mind when you’re choosing wood.
If you haven’t already, glue the handle to the platter. I also drilled some pocket holes into the back of the board and secured the handle with screws. You’ll probably have to do more planing/sanding once it’s dry to make sure the serving board is level.
Step five:
Drill a hole for hanging your serving board on a hook. I used a 1-inch spade bit. I also used a clamp to hold the whole piece together as drilling with spade bits can be jarring for whatever you’re working on.
I took a pencil and lightly drew around the handle to create a rough outline. Then, I used my jigsaw to shape the handle. It isn’t going to be precise, but we can fix some imperfections with sanding.
This is where I used my Dremel (more precise) and sanded around the hole I drilled into the handle for hooks. I wanted to round off the edges to create a polished look. I used my actual sander for the edges around the board.
You could also use a Dremel to engrave and personalize this serving board.
I sanded over the whole thing, front and back, several times. I want this to be as smooth as possible.
When I finished, I used stainable wood filler to fill in the gaps between pieces of wood. This stuff is great because you can sand it after it dries and, as the name suggests, can stain it to match.
Step six:
For stain, I went with Minwax in Early American. I didn’t want it to be the same color as my table and this stain is very warm and lovely without being too red or too dark. I did one coat and I used a thin rag to apply the stain.
Once dry, you can apply polyurethane to seal it all up. Do a couple of coats and sand with fine-grit sandpaper before your final coat to get an ultra-smooth finish.
If you’re planning on using this serving board for food, be sure to look into food-safe oils that will protect the wood but won’t seep into your food. Again, I’m not using mine for food so I used regular stain and poly.
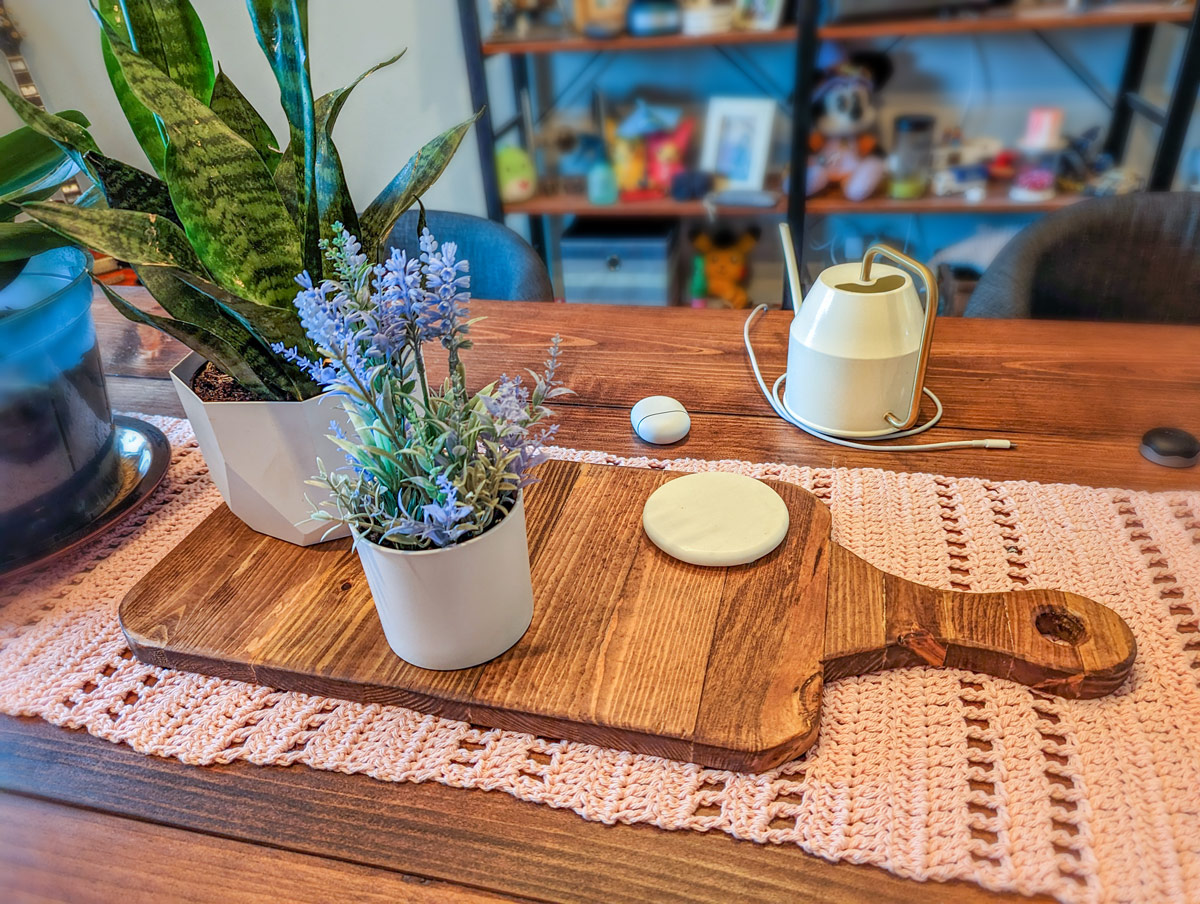
Finished project
Another IKEA dupe for the books! I couldn’t justify the price tag of the IKEA serving board and having so much scrap wood comes in handy. Play around with attaching your boards together as well- sometimes glue isn’t enough! This would be a great project to practice dowel or butterfly joints to secure the wood boards together. All you need are dowel pins and a drill bit of the same size.