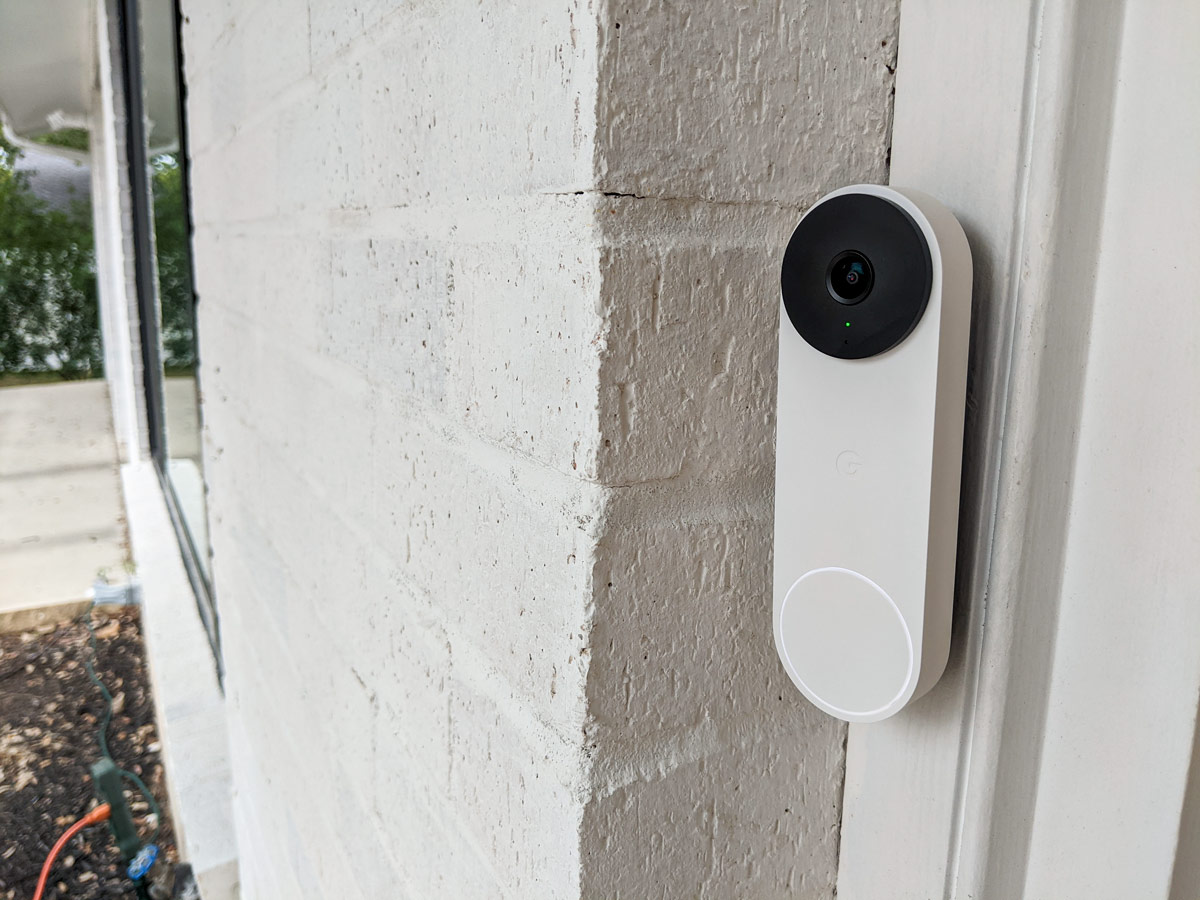
Google just released their updated version of the wired Nest video doorbell and my husband ordered ours on day one. Our current doorbell was definitely at the end of its life having made a couple of moves and just slowing down all around.
Plus it’s fun to get a new toy.
However, I’m always the one who has to install these things because I read the instructions.
All-in-all it’s a straightforward process and we didn’t run into any issues where we needed to call a professional. Let’s go through the step-by-step process of replacing your Nest doorbell with the new one and I’ll address a couple of issues I encountered that you may face too.
Supplies:
- Google Nest Video Doorbell (Wired)
- Drill
- Screwdriver
- Needlenose pliers
How-to:
Step 1:
The instructions say that we’re going to start by disconnecting our old chime and replacing it with the included one. I wish we could just use the chime we had since it was all hooked up, but I guess they won’t talk to each other.
Start by turning off all of the power at the breaker box. We went ahead and flipped just about every switch just to be sure because Lord knows which circuit the chime is connected to. Is it the hallway lights or the hallway bathroom? Both, off as well as the actual doorbell’s circuit.
Once the power is off, pop off the chime box cover. Our old Nest chime was hooked up, but the new chime has fewer wires so we had to reattach the white and red wires back onto the chime box.
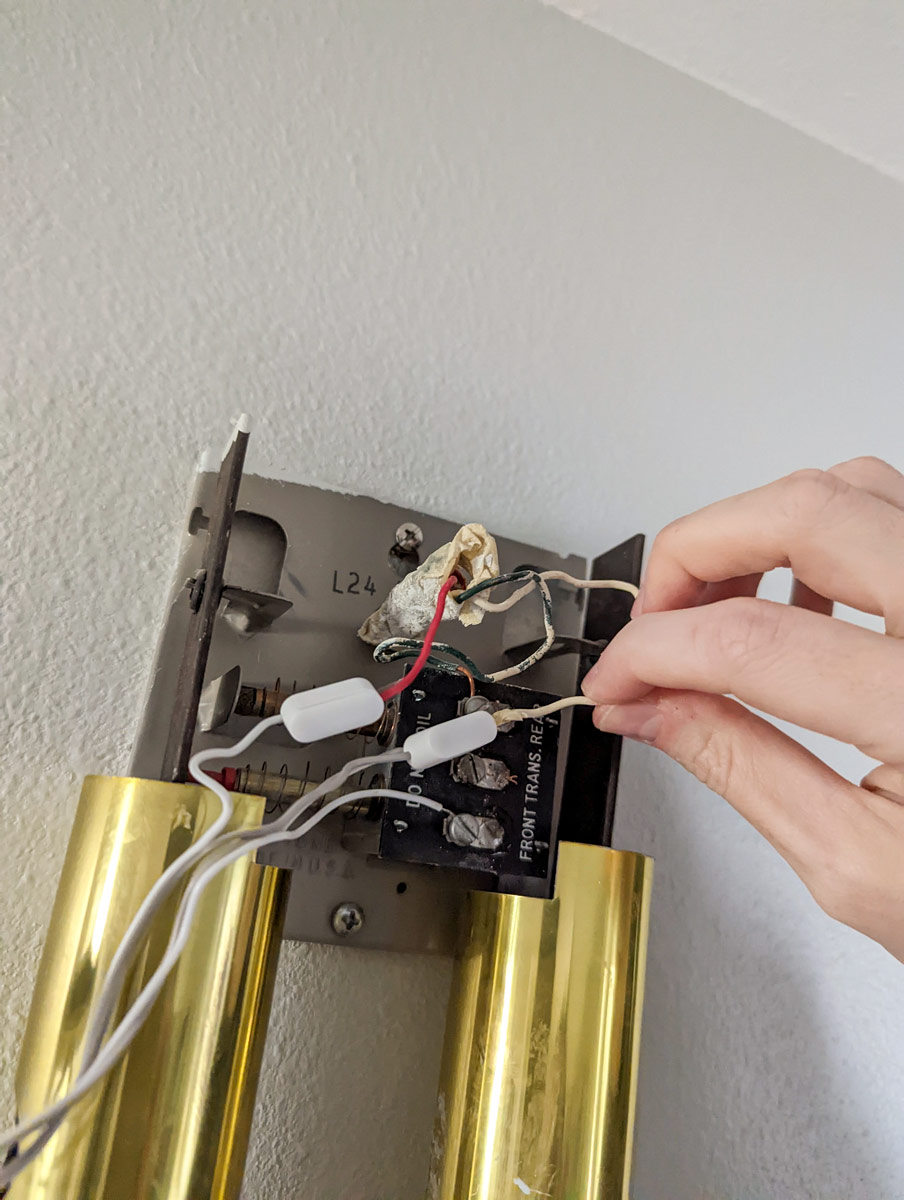
(Above is a photo of the old Nest chime hookup.)
For us, the red goes around the TRANS screw and the white goes around the FRONT screw. It doesn’t matter which screw the Nest’s chime wires attach to so long as one is on TRANS and the other on FRONT.
Step 2:
Now let’s move on to the actual doorbell. To remove an old Nest video doorbell you need to insert a skinny “key” into the bottom and it pops off. If you’ve lost that key as I have, then a thumbtack works great. Push the pin into the tiny hole on the bottom of the doorbell and it should pop out. Then wiggle it loose and disconnect the wires. Set aside.
Go ahead and remove the old doorbell mount as well. I kept the screws and used them on the new mount. The new mount also lined up nicely with the old mount’s screw holes which was a win.
Step 3:
Let’s screw in the new mount to the wall. We had to use the included angle mount since we have brick protruding that would interfere with the doorbell’s view.
If you need the angle mount too, then the angle mount goes on first and the flat mount goes on top. Thread the wires into the large holes in the middle of both mounts and then screw both mounts into the wall. The flat mount has a tab that should be at the top and facing toward you when mounted.
Step 4:
Now we’re going to attach the wires to the doorbell. It doesn’t matter which color goes on which side. You can use the included wire extenders, but they aren’t necessary. We went ahead and used them.
Step 5:
Once the wires are attached, smoosh them back into the mounting plates and back into the wall as much as you can. We had some difficulty here because our wires are old and stiff, but we managed eventually.
The doorbell clips into the mount and then you pull it down to secure it. So it’s up and in, then down.
Step 6:
Tighten the security screw at the top of the mount with the included hex key. This is how you will detach the doorbell when it’s time to replace or move. No more thumbtacks!
Step 7:
Turn all the power back on and your doorbell should have a blue light. You should be able to complete your setup.