Plumbing is scary. What can seem like a minor problem can quickly turn into thousands of dollars and a jackhammer breaking up your foundation to access the pipes. I think plumbing is an essential skill for homeowners to learn and, thankfully, there are many Youtube videos on the subject.
However, it’s still scary. What if you mess something up? What if you flood your bathroom?
What if…?
Well, that’s why we start small, right? Start with easy, cosmetic fixes and move up from there.
I replaced my showerhead several months ago and it hasn’t leaked at all so I guess I did a good job. This was purely a cosmetic fix. Our old showerhead what cheap and had lousy water flow- you never felt like you rinsed all the soap off and forget about washing your hair. I bought a new one with a magnetic arm and replaced it in about 5 minutes. It’s literally unscrewing the old showerhead and then screwing in the new one.
But I was still proud of it.
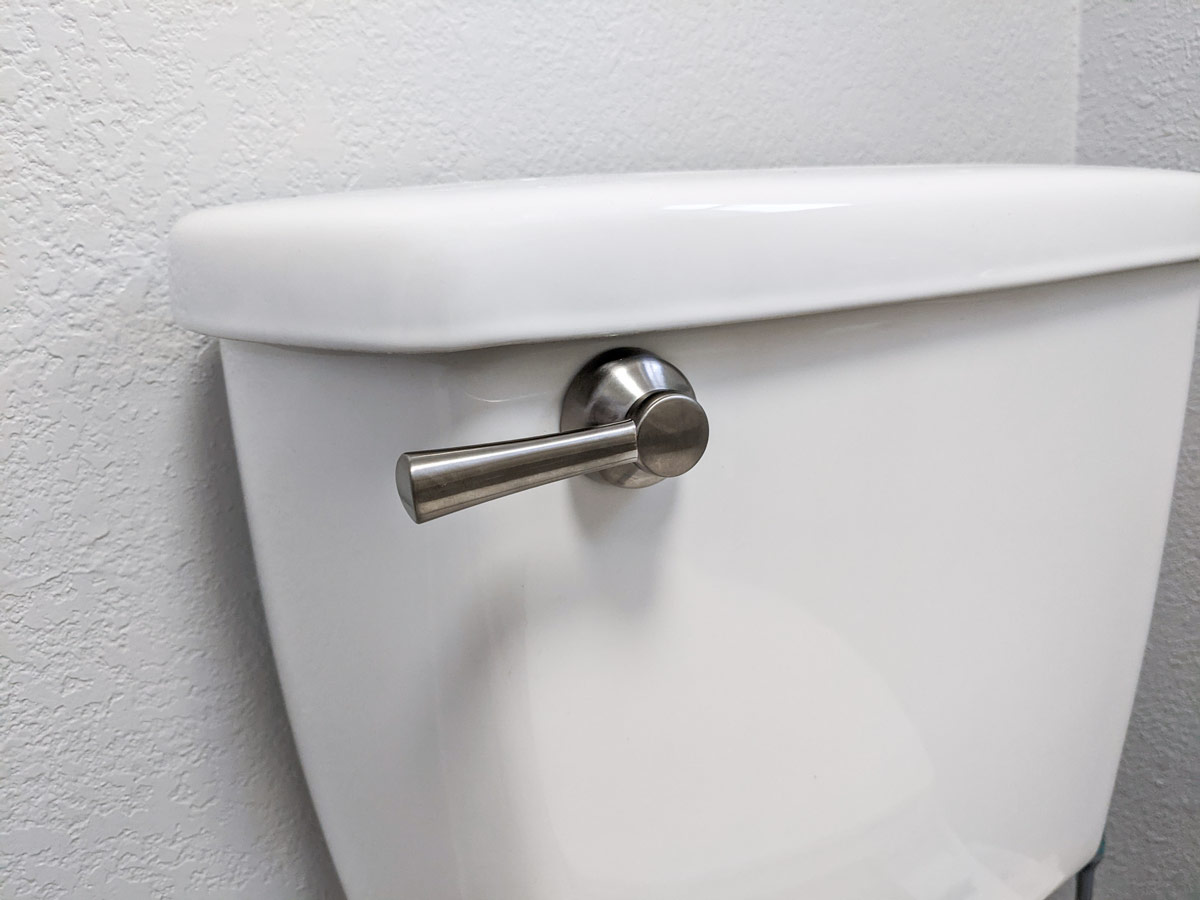
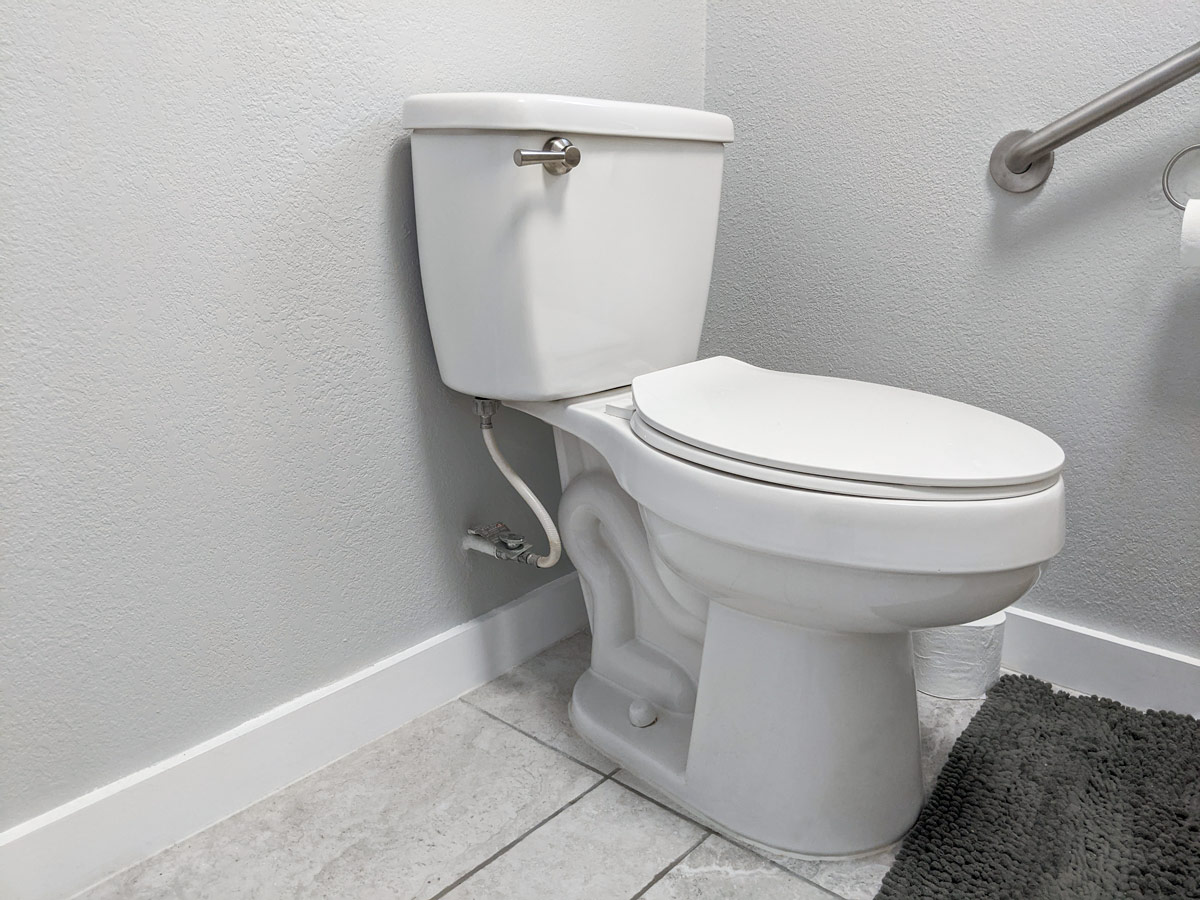
Fast forward to a few days ago when my husband broke our toilet lever. I think it was on the outs for a while and he just happened to initiate the final flush. It was just a plastic lever so it was never going to be long for this world anyway, Still, it’s annoying. It’s one of those things where it quite literally has only one job and it’s failing at it.
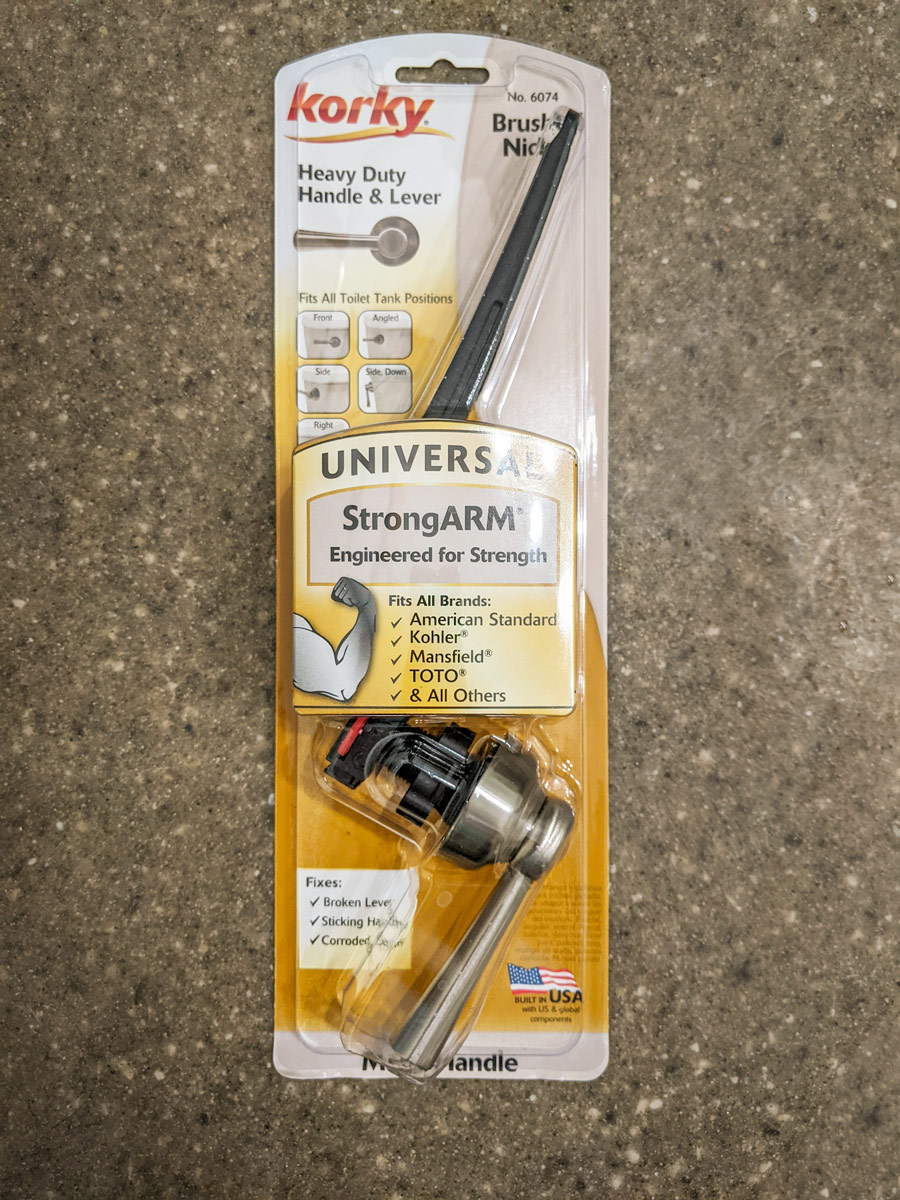
So, I went to Lowe’s and bought a new toilet lever by Korky. I wanted to get a metal one with the intention of it lasting for a long, long time. I found one I liked and grabbed it. A little expensive for what it is, but since our old plastic one snapped off I figured it’d be worth the price. It promised to be fast and easy, and it delivered thankfully.
I’ll walk you through the steps below.
Supplies:
- Korky StrongARM Toilet Flush Handle (or whatever replacement you’d like)
- Wrench (if needed, I did not use one)
How-to:
I went slow when replacing my toilet lever and was also filming while doing it. When I turned off my camera, the timestamp said 11:36, so about 11 and a half minutes from start to finish.
First, we’re going to take off the tank lid and remove the old lever. Mine popped off, but you might have to unscrew yours. Detach the chain from the lever and set the old parts aside.
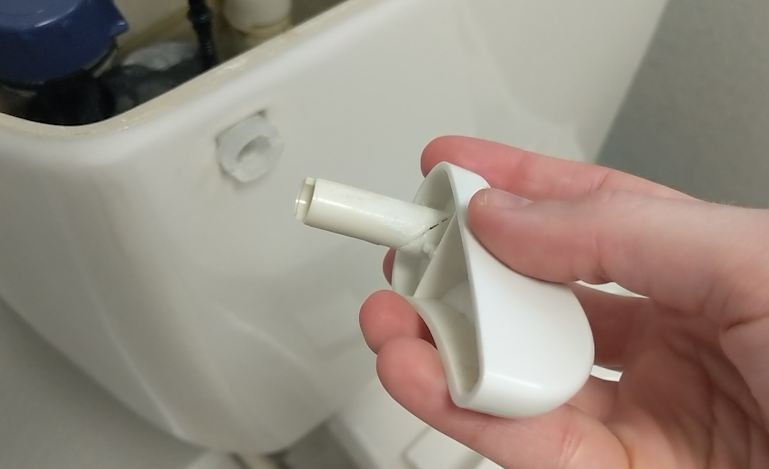
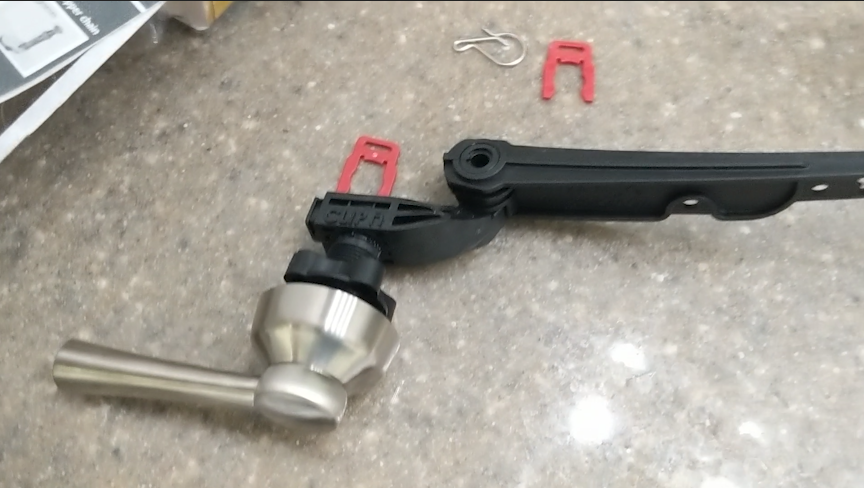
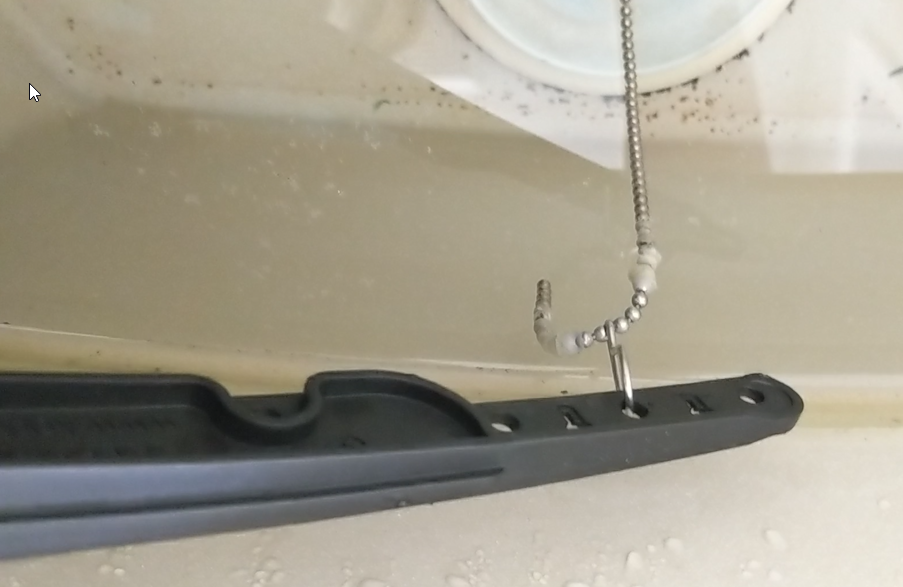
Take apart the new lever because we’re going to need to adjust it as we put it back together inside of the tank. Pop the two red locking clips out and also detach the hook, set all that aside. Remove the arm, elbow, and handle from one another then unscrew the mounting nut from the handle. Keep in mind the nut is reverse-threaded.
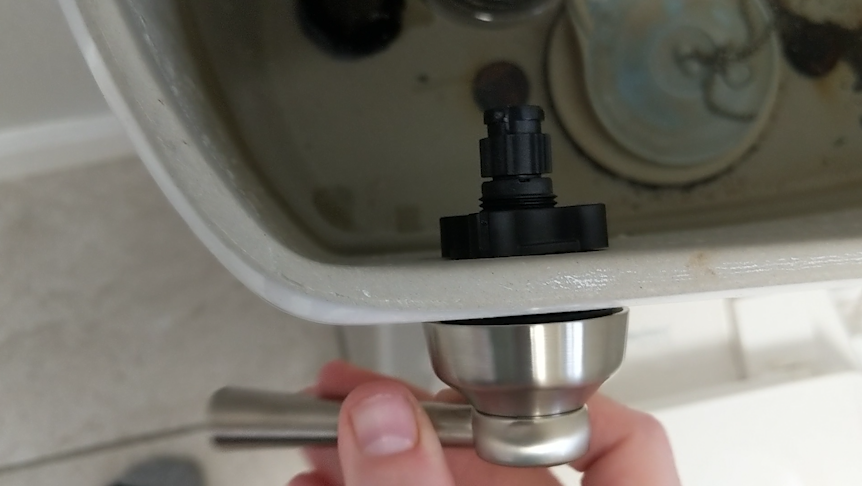
Take the handle and insert it into the tank hole (where your old lever was) and secure it with the mounting nut. You can mount the handle in several different ways.
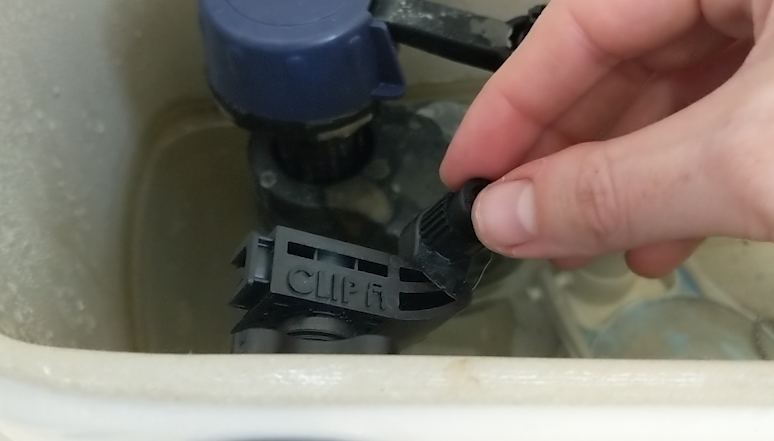
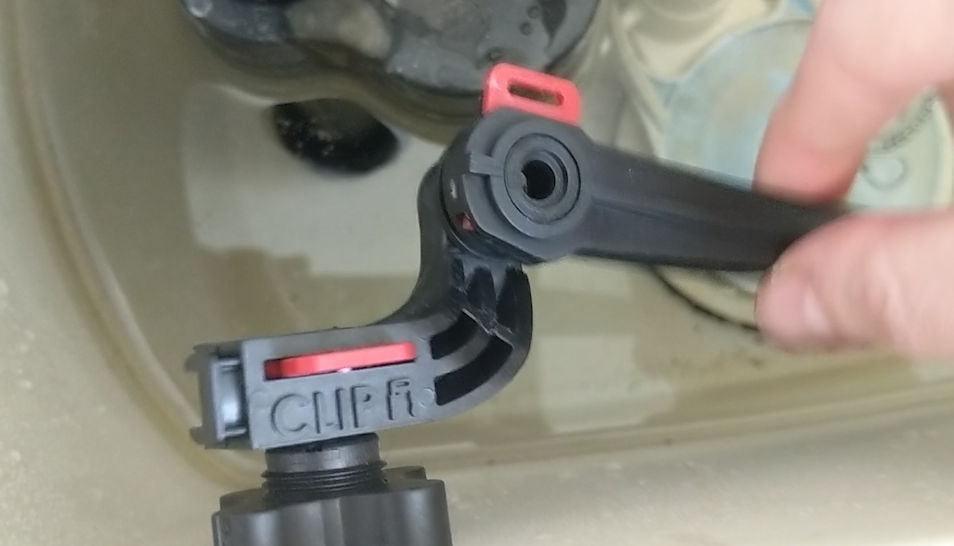
Next, attach the elbow to the lever mount at 30 degrees. Then, attach the lever arm to the elbow. Grab those red clips and insert them back into their locking positions on the arm and elbow.
Remove the old hook from the chain and attach the new, provided hook to the chain. Hook it into one of the holes on the lever with minimal slack in the chain. You can adjust the elbow if your chain is too short.
Replace the tank lid and flush making sure the arm does not hit the tank and clears properly.