I recently acquired a beautiful waterfall vanity. I’ve been wanting one for a couple of years now and have kept an eye out on Craigslist. Finally, I found one that was both reasonably priced and close by.
However, to use a vanity you need a seat and I did not have one. That became quest number two.
On a trip to Dallas, I went with my mom to an antique market. I love this place so much. I figured if anyone was going to have an old chair, it would be this place.
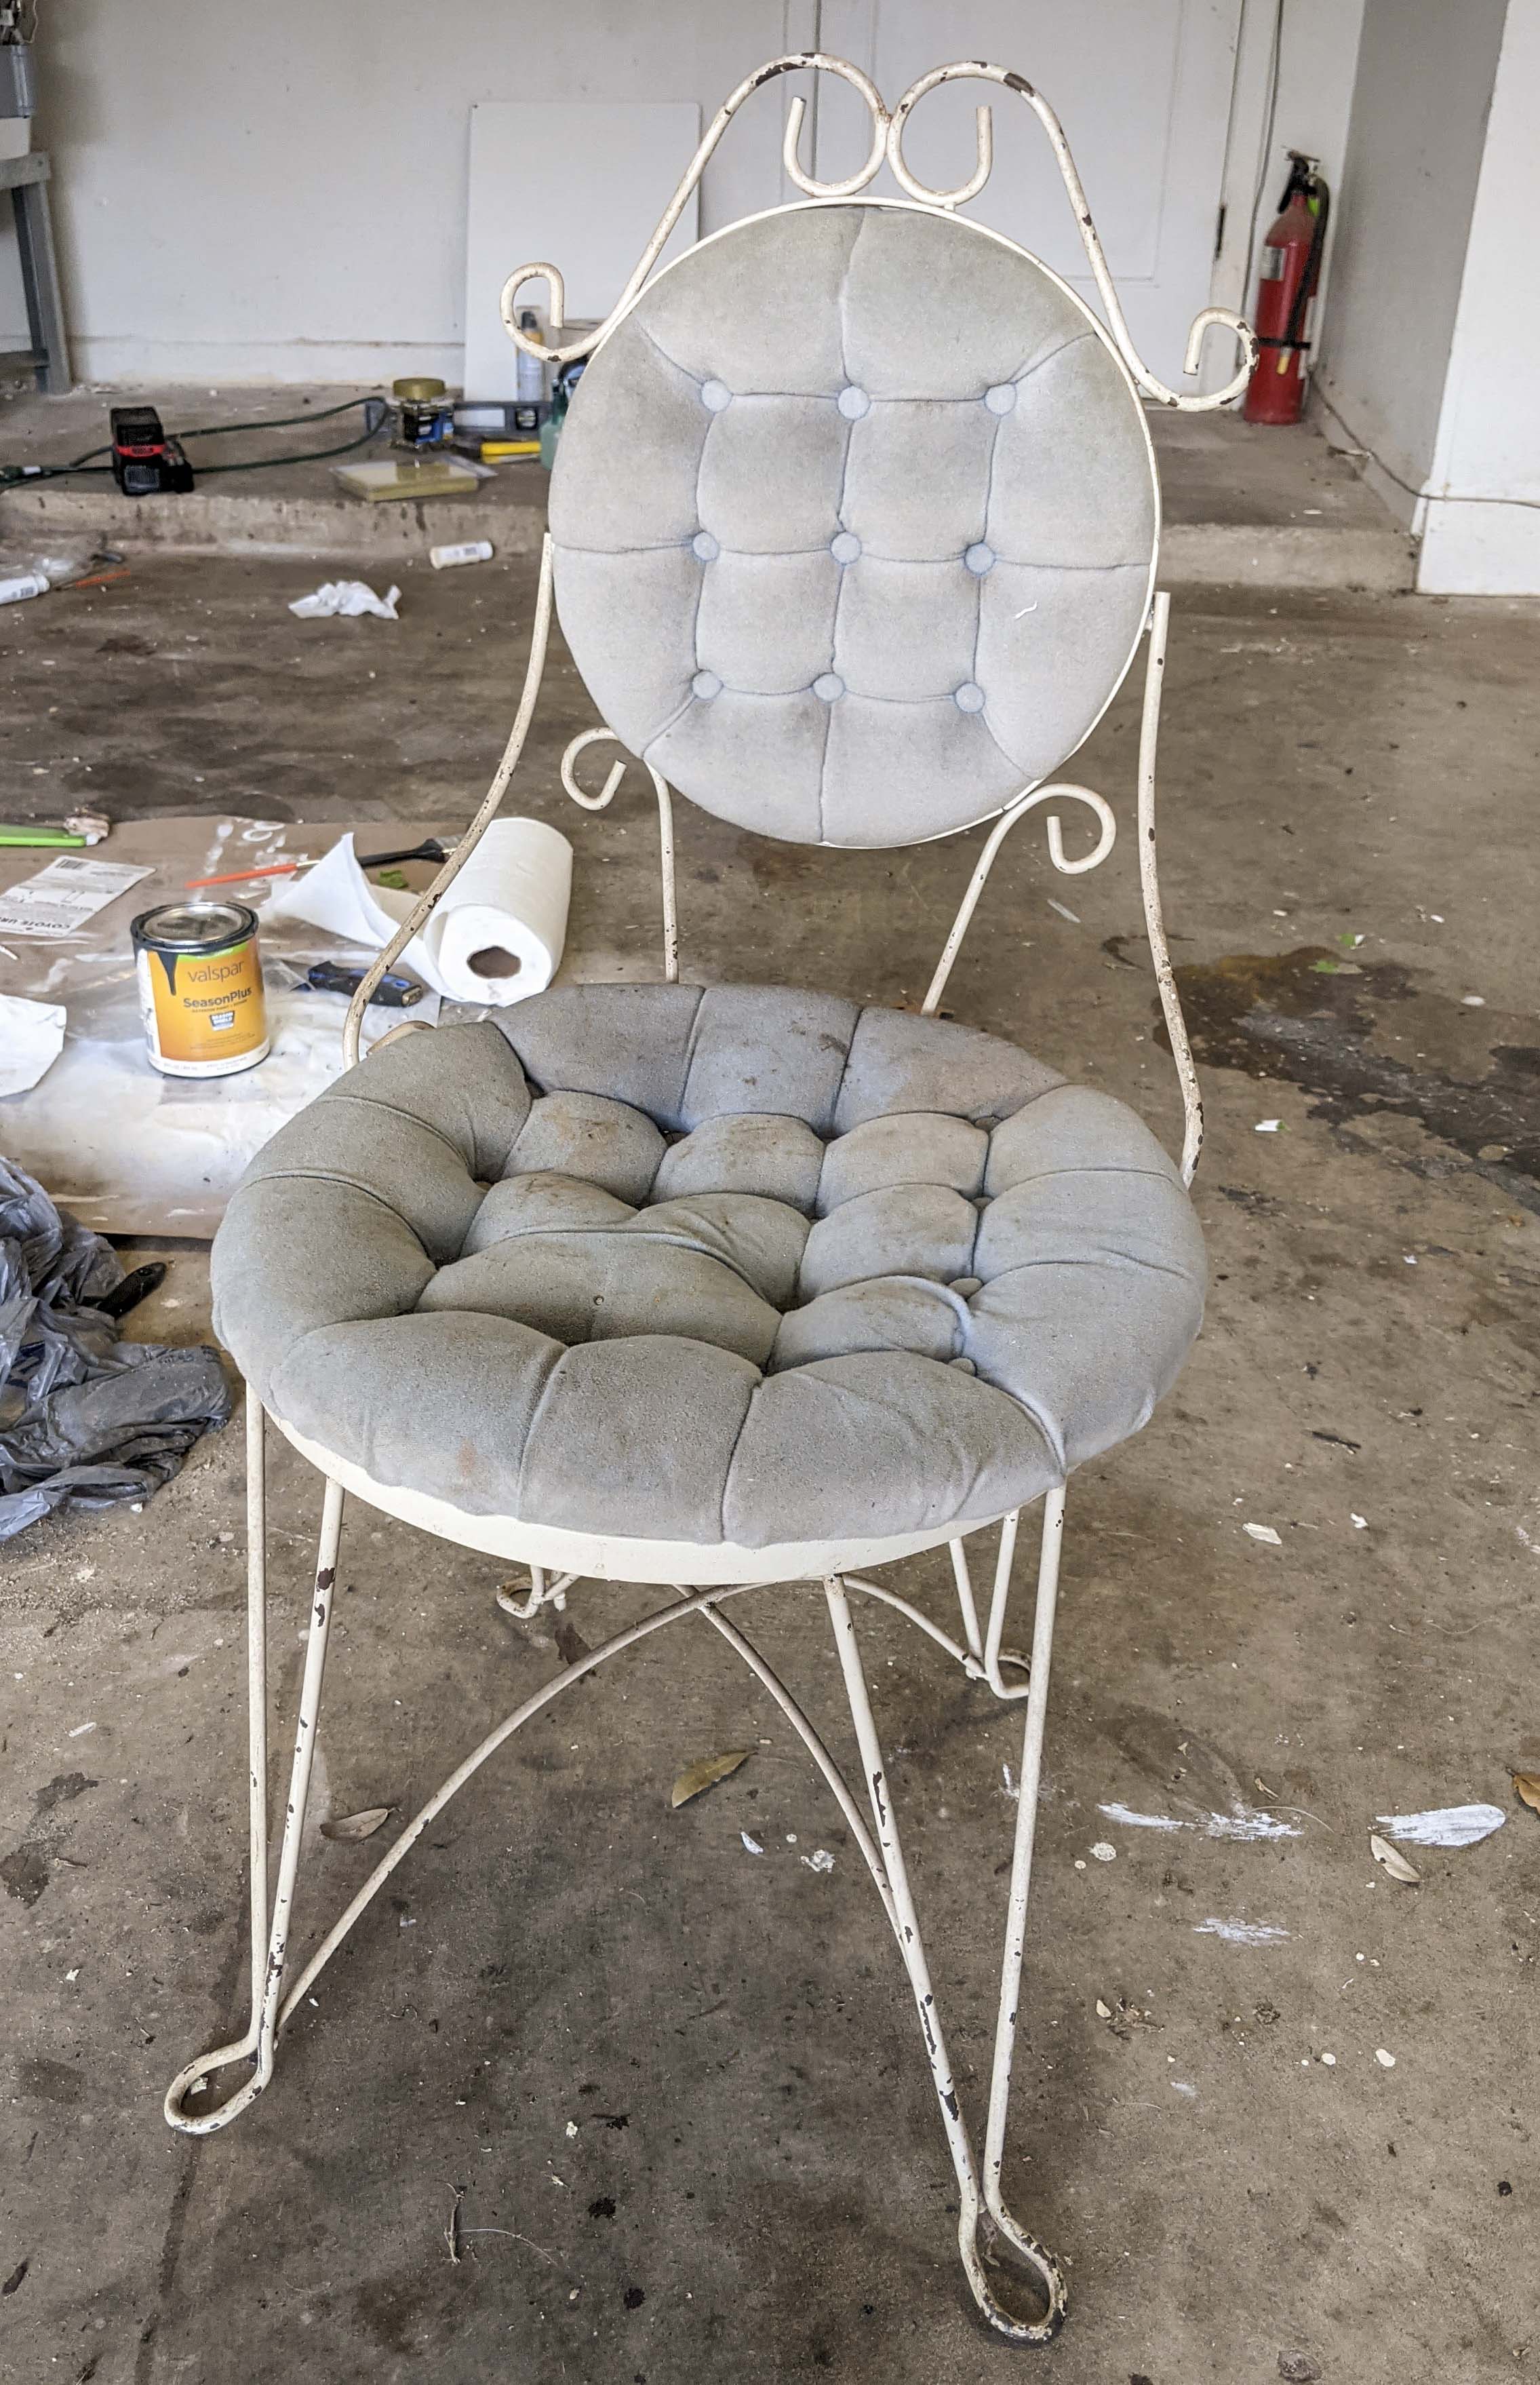
Lo and behold, I found one. The seat was broken, the fabric was dirty, and the paint was chipped, but it was perfect. It was also pretty cheap, which helped.
I had no intentions of doing anything to the vanity itself, but the chair I could do anything to. So I did.
Here we go:
Supplies:
- Jigsaw
- Drill
- Sander
- Pliers
- Plywood
- Fabric
- Stuffing
- Buttons
- Decorative cord
- Needle and thread
- Glue gun
- Spray paint
- Ruler and pencil
Process:
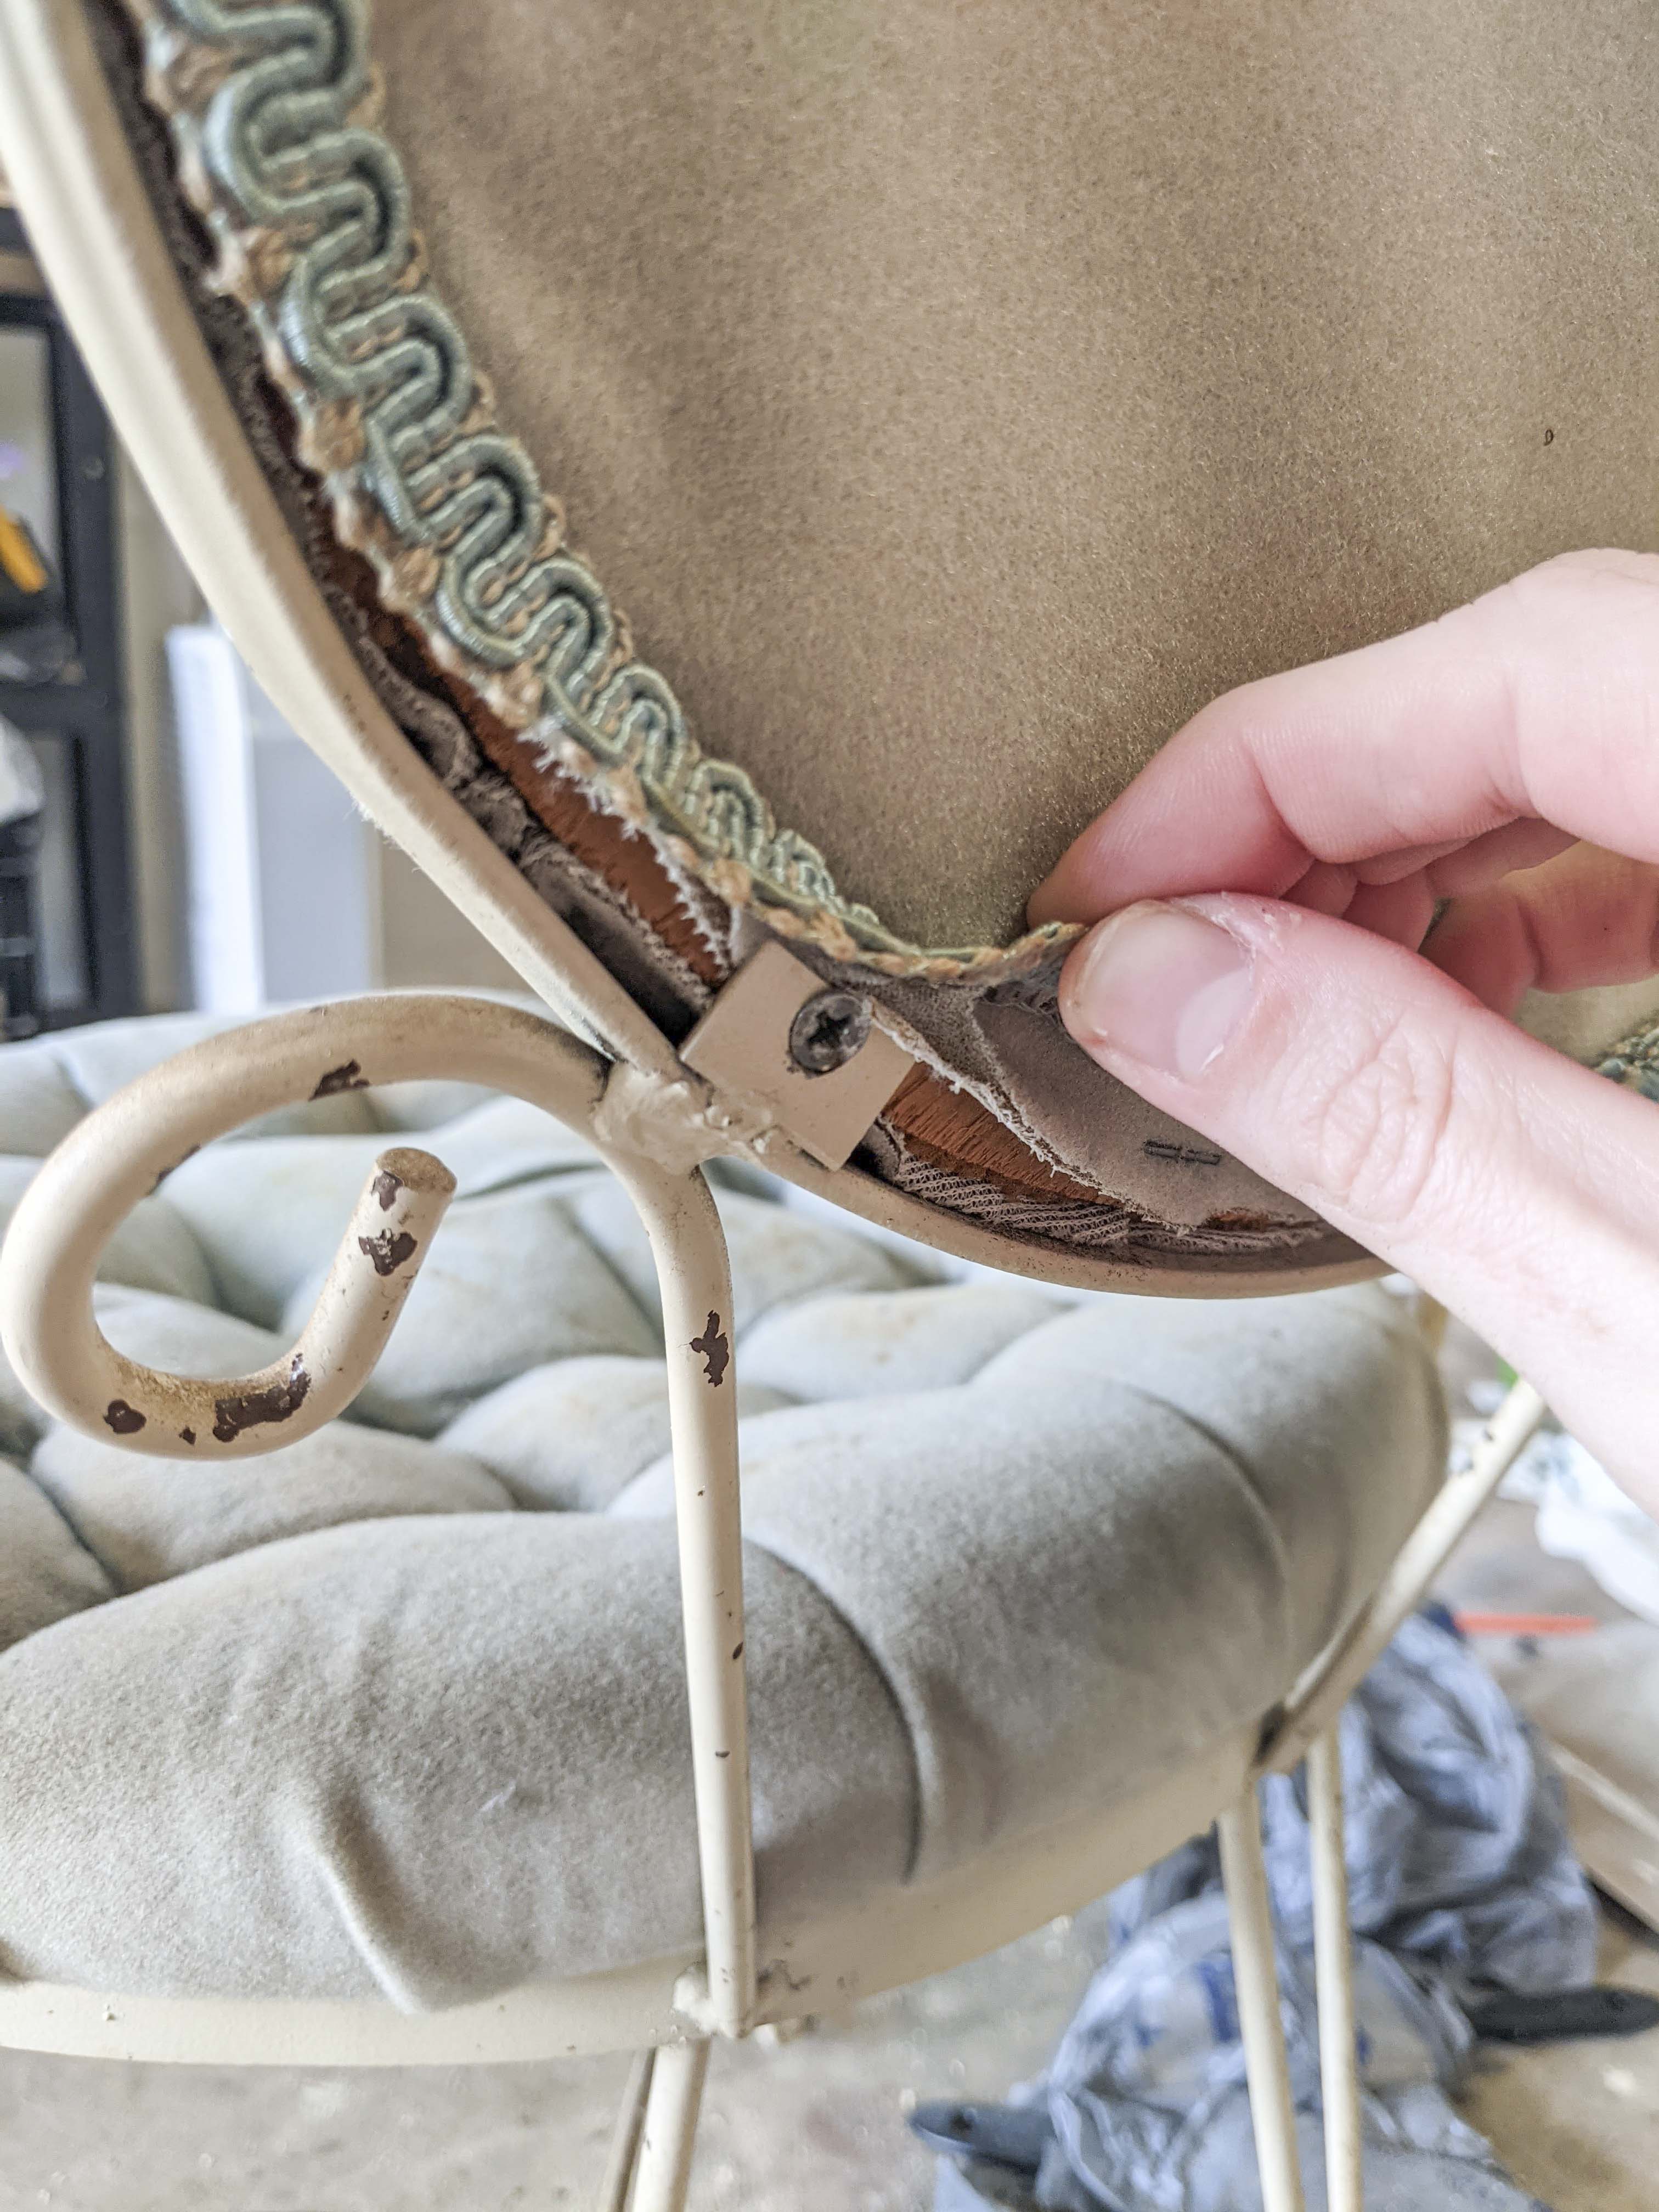
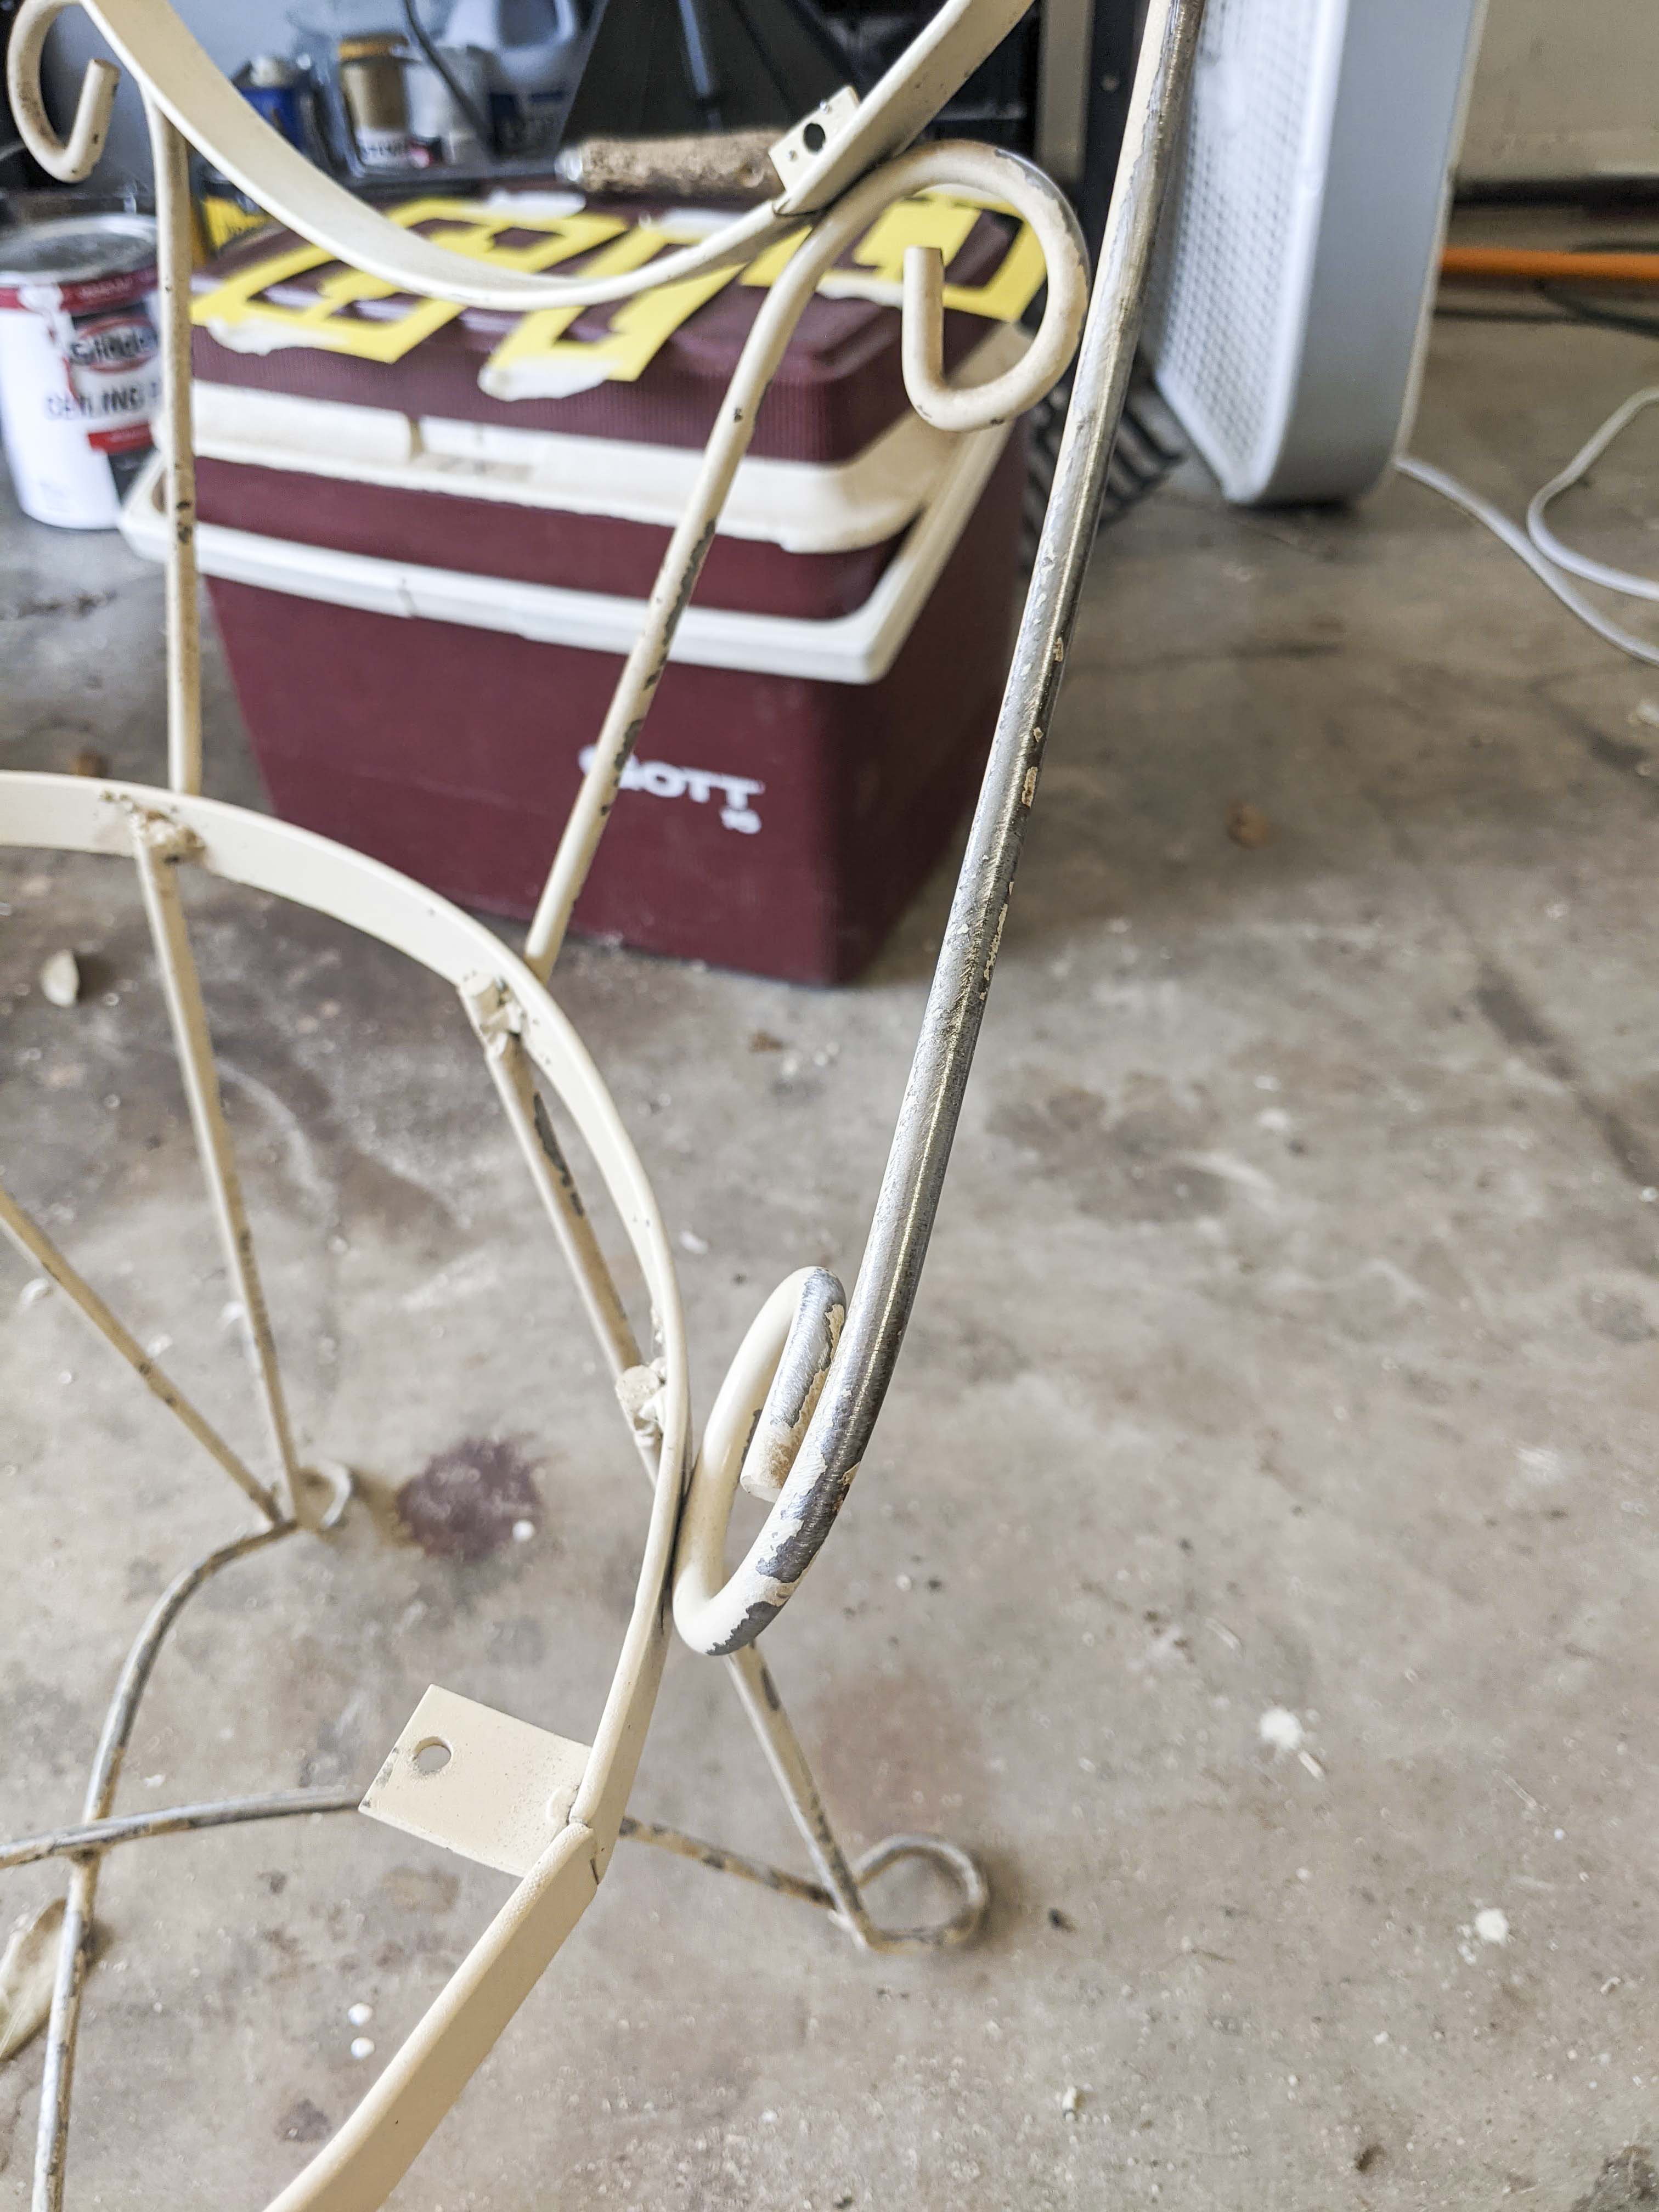
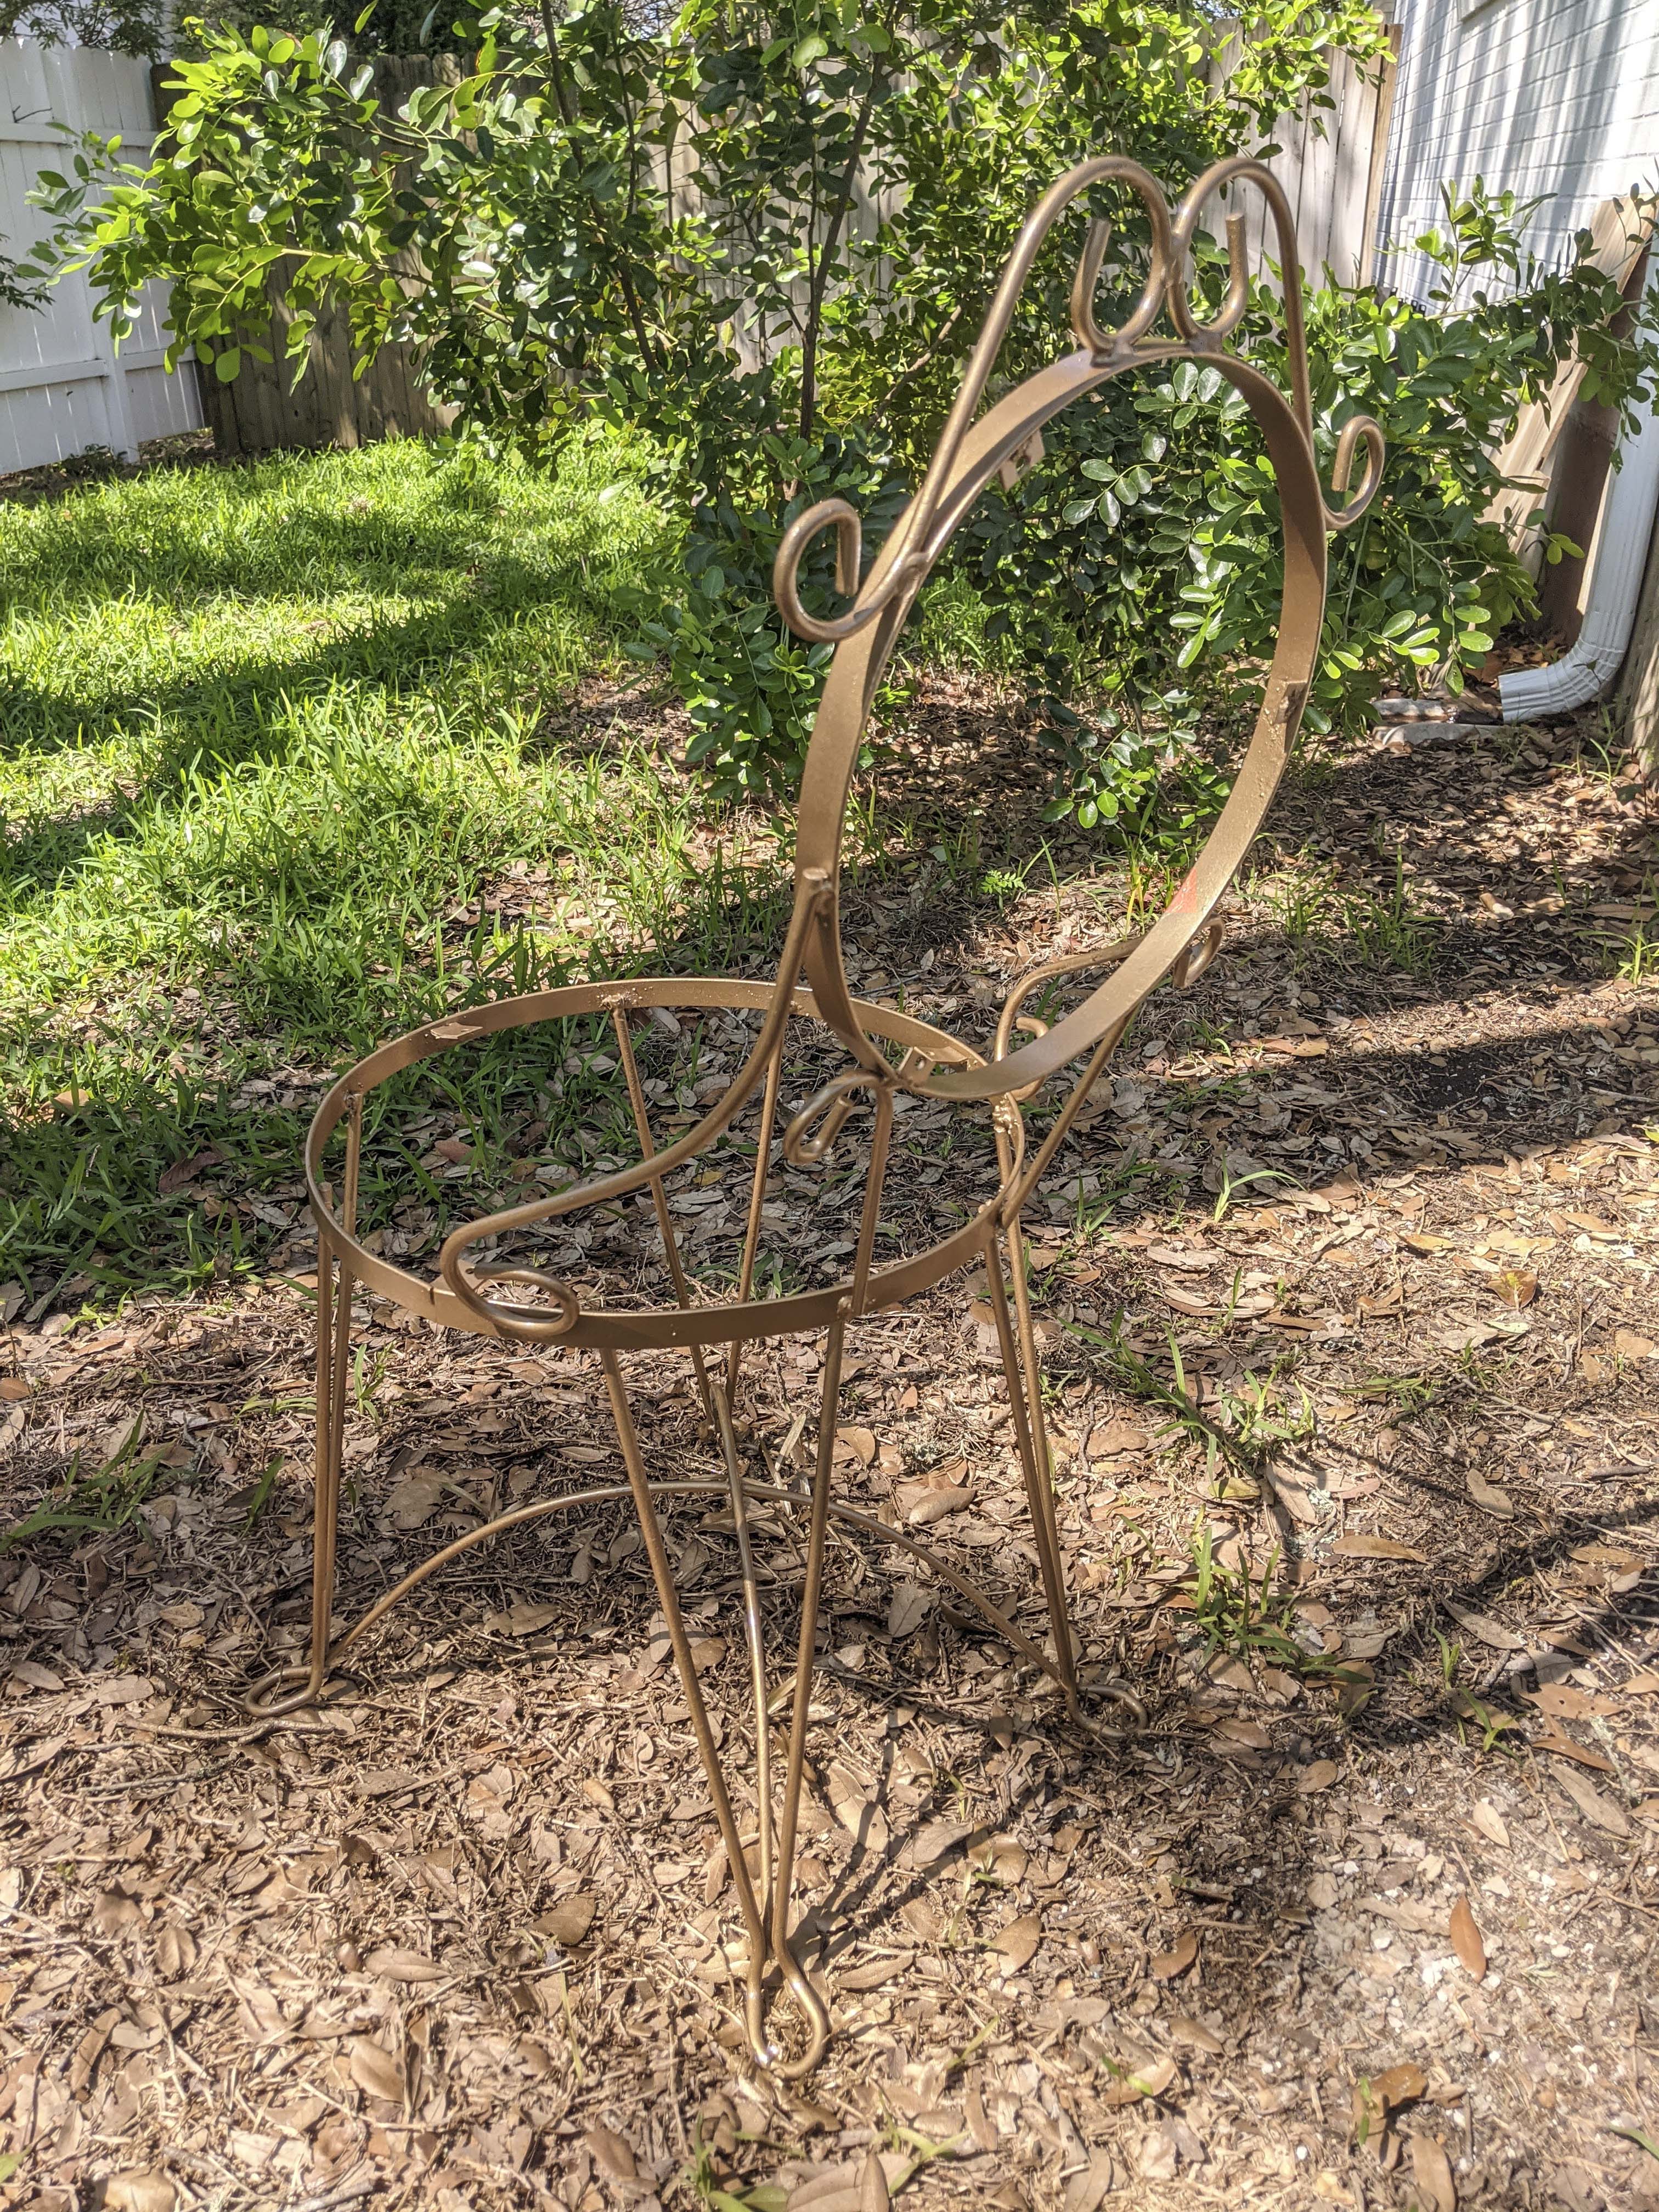
The first step was taking the cushions off of the chair, which is easy enough. Each one was attached with three screws, so I used my drill to quickly unscrew and detach them. Now, I could take my drill with my rust/paint remover bit and go over all the rusty bits on the metal frame. This made cleaning it much easier than going over everything with a cloth first.
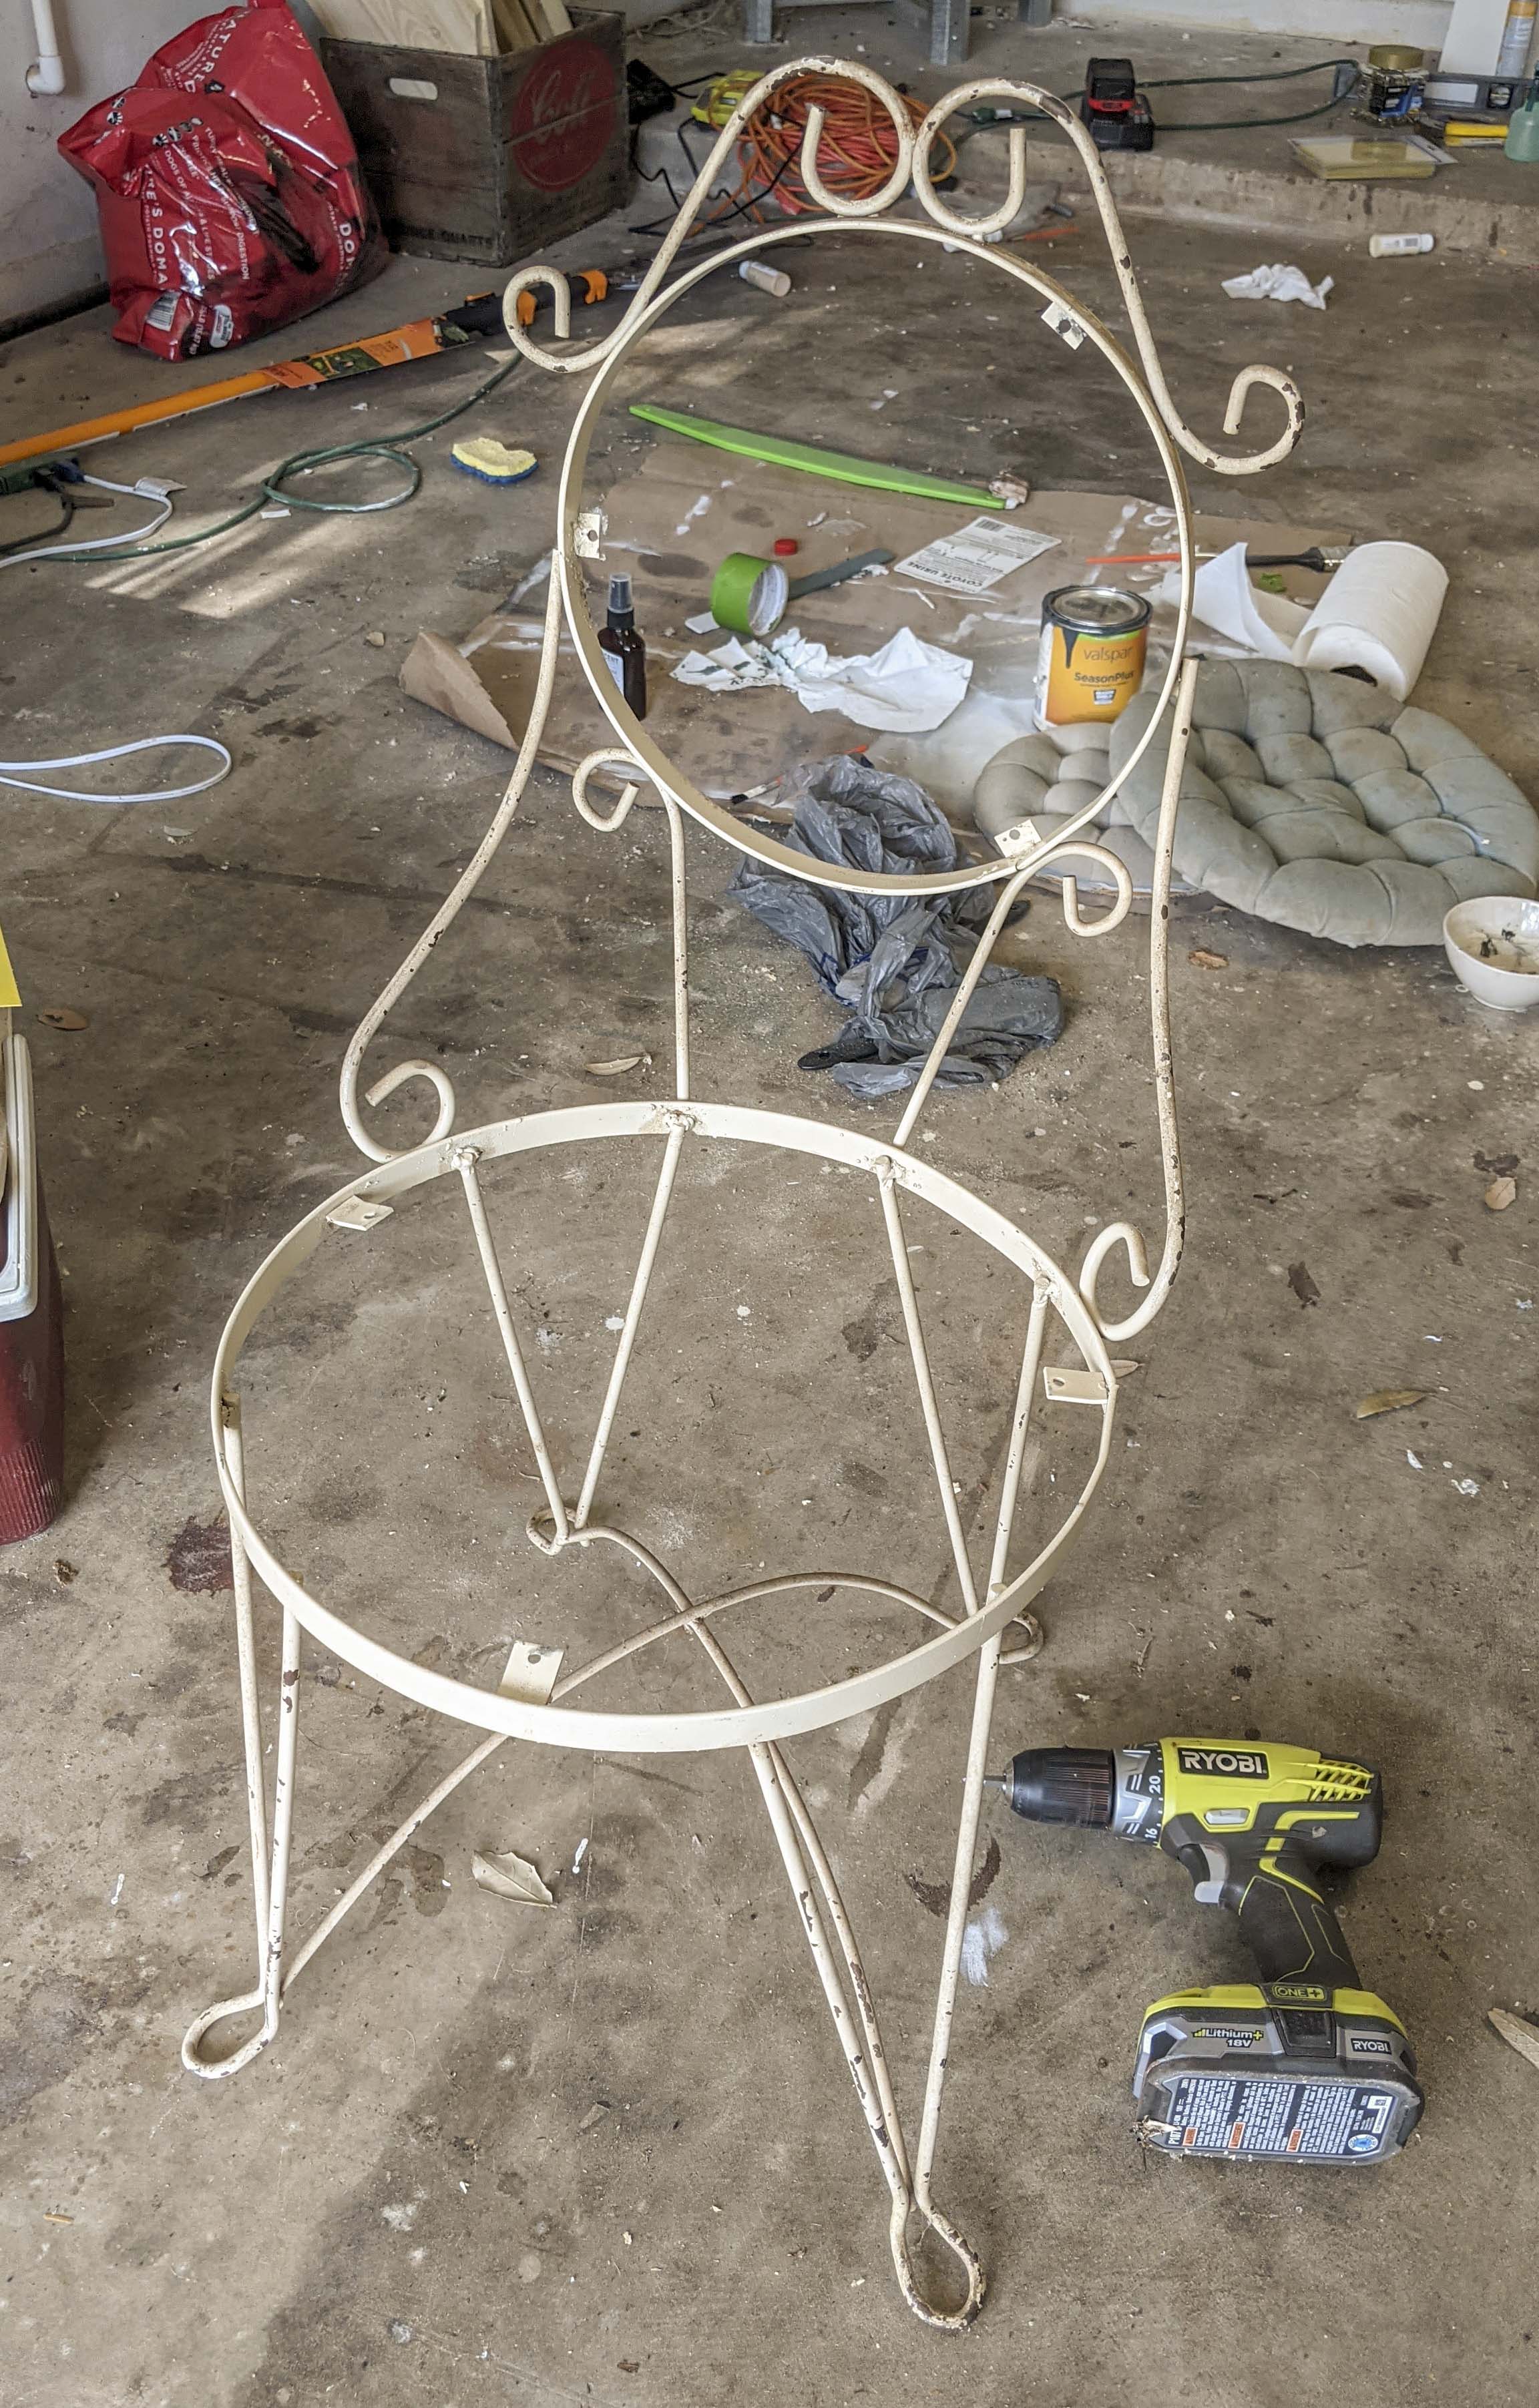
I chipped away all the rust and dirt I saw, gave it a light clean with some bleach, then it was time to spray paint. I went with matte gold.
While the chair was drying, I needed to make a new seat. The particleboard (or whatever it was) completely deteriorated and was unusable. I measure the diameter of the seat then halved it for the radius. I cut a piece of string that was the length of the radius and attached one end to a pencil. I held down the tip of the string on my new plywood and drew a circle around. It isn’t a perfect science, but how I learned how to draw a pretty good circle in elementary school.

I used my jigsaw to cut out the circle. This is the first time I’ve used it to cut curves, which is was it was made to do. It did a great job. I did have to trim the circle down a couple of times since it was a little too wide for the chair itself, but it wasn’t too bad for a first attempt. Then, I sanded the sides, top, and bottom of my new seat.
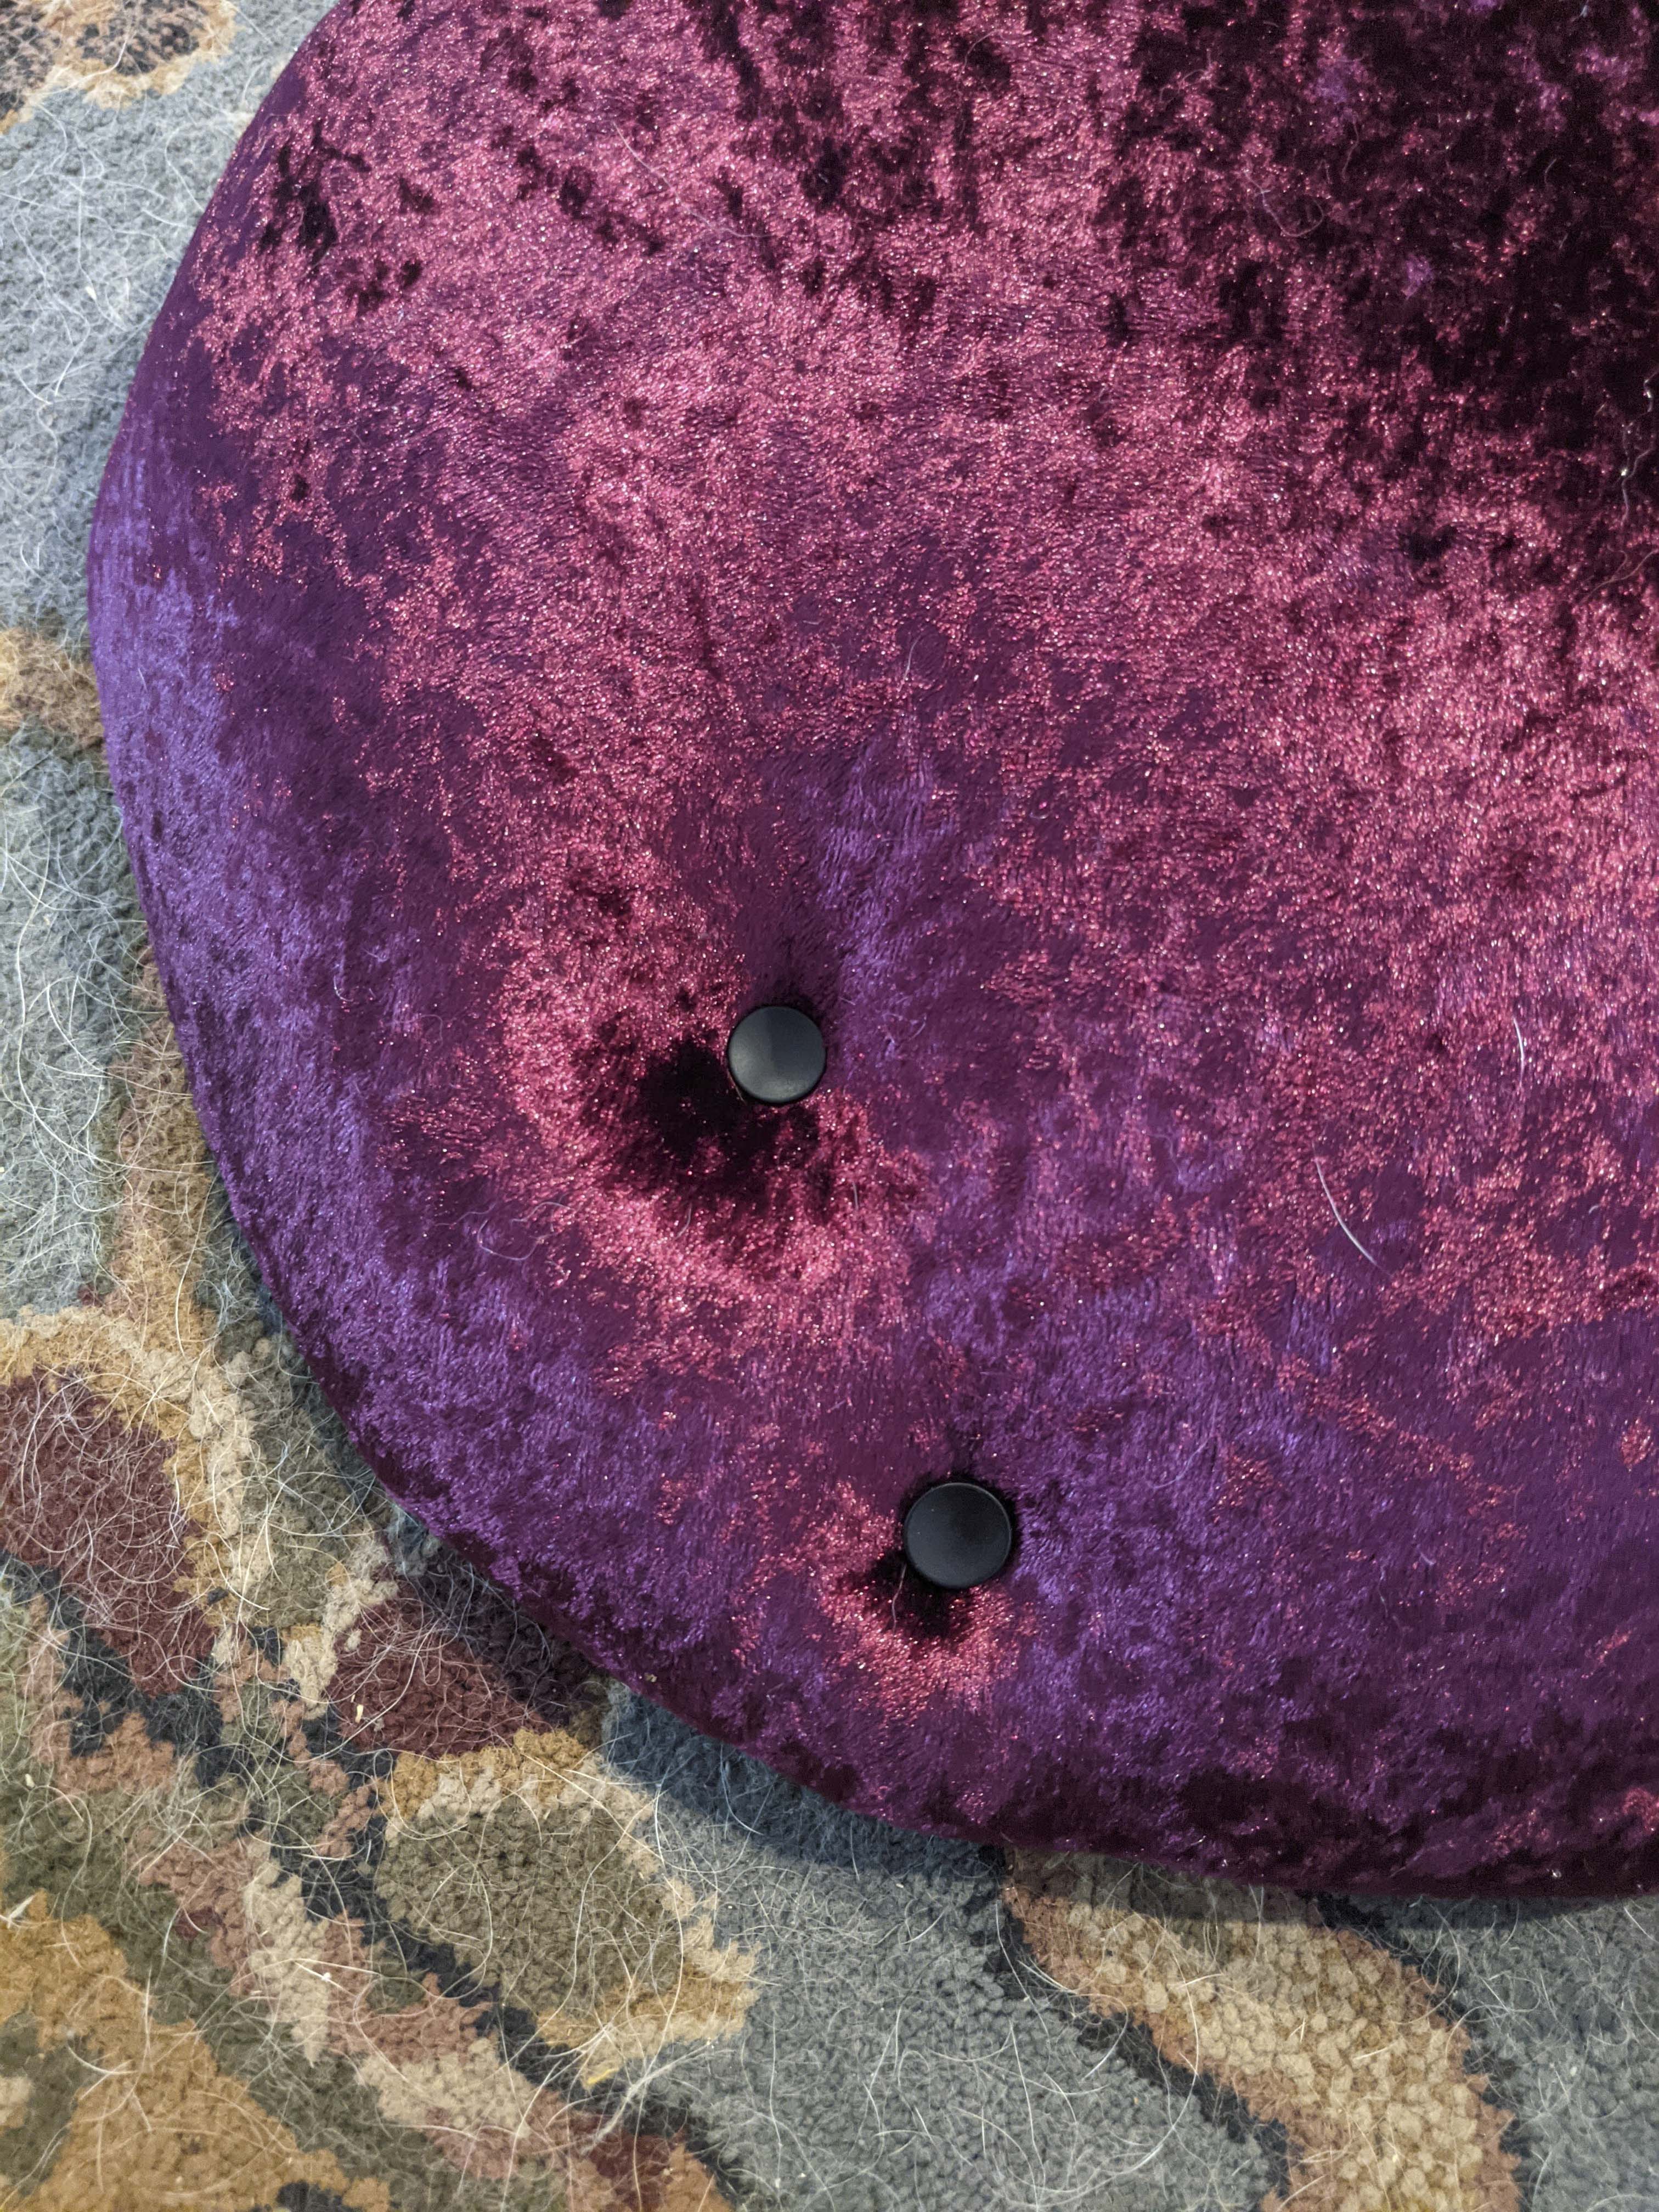
I taped off the sides to make a square and labeled the spots where the new buttons would go for tufting. The original had 16, so this one would too. I drilled 2 small holes per button that would be used to feed the string through and tie-down.

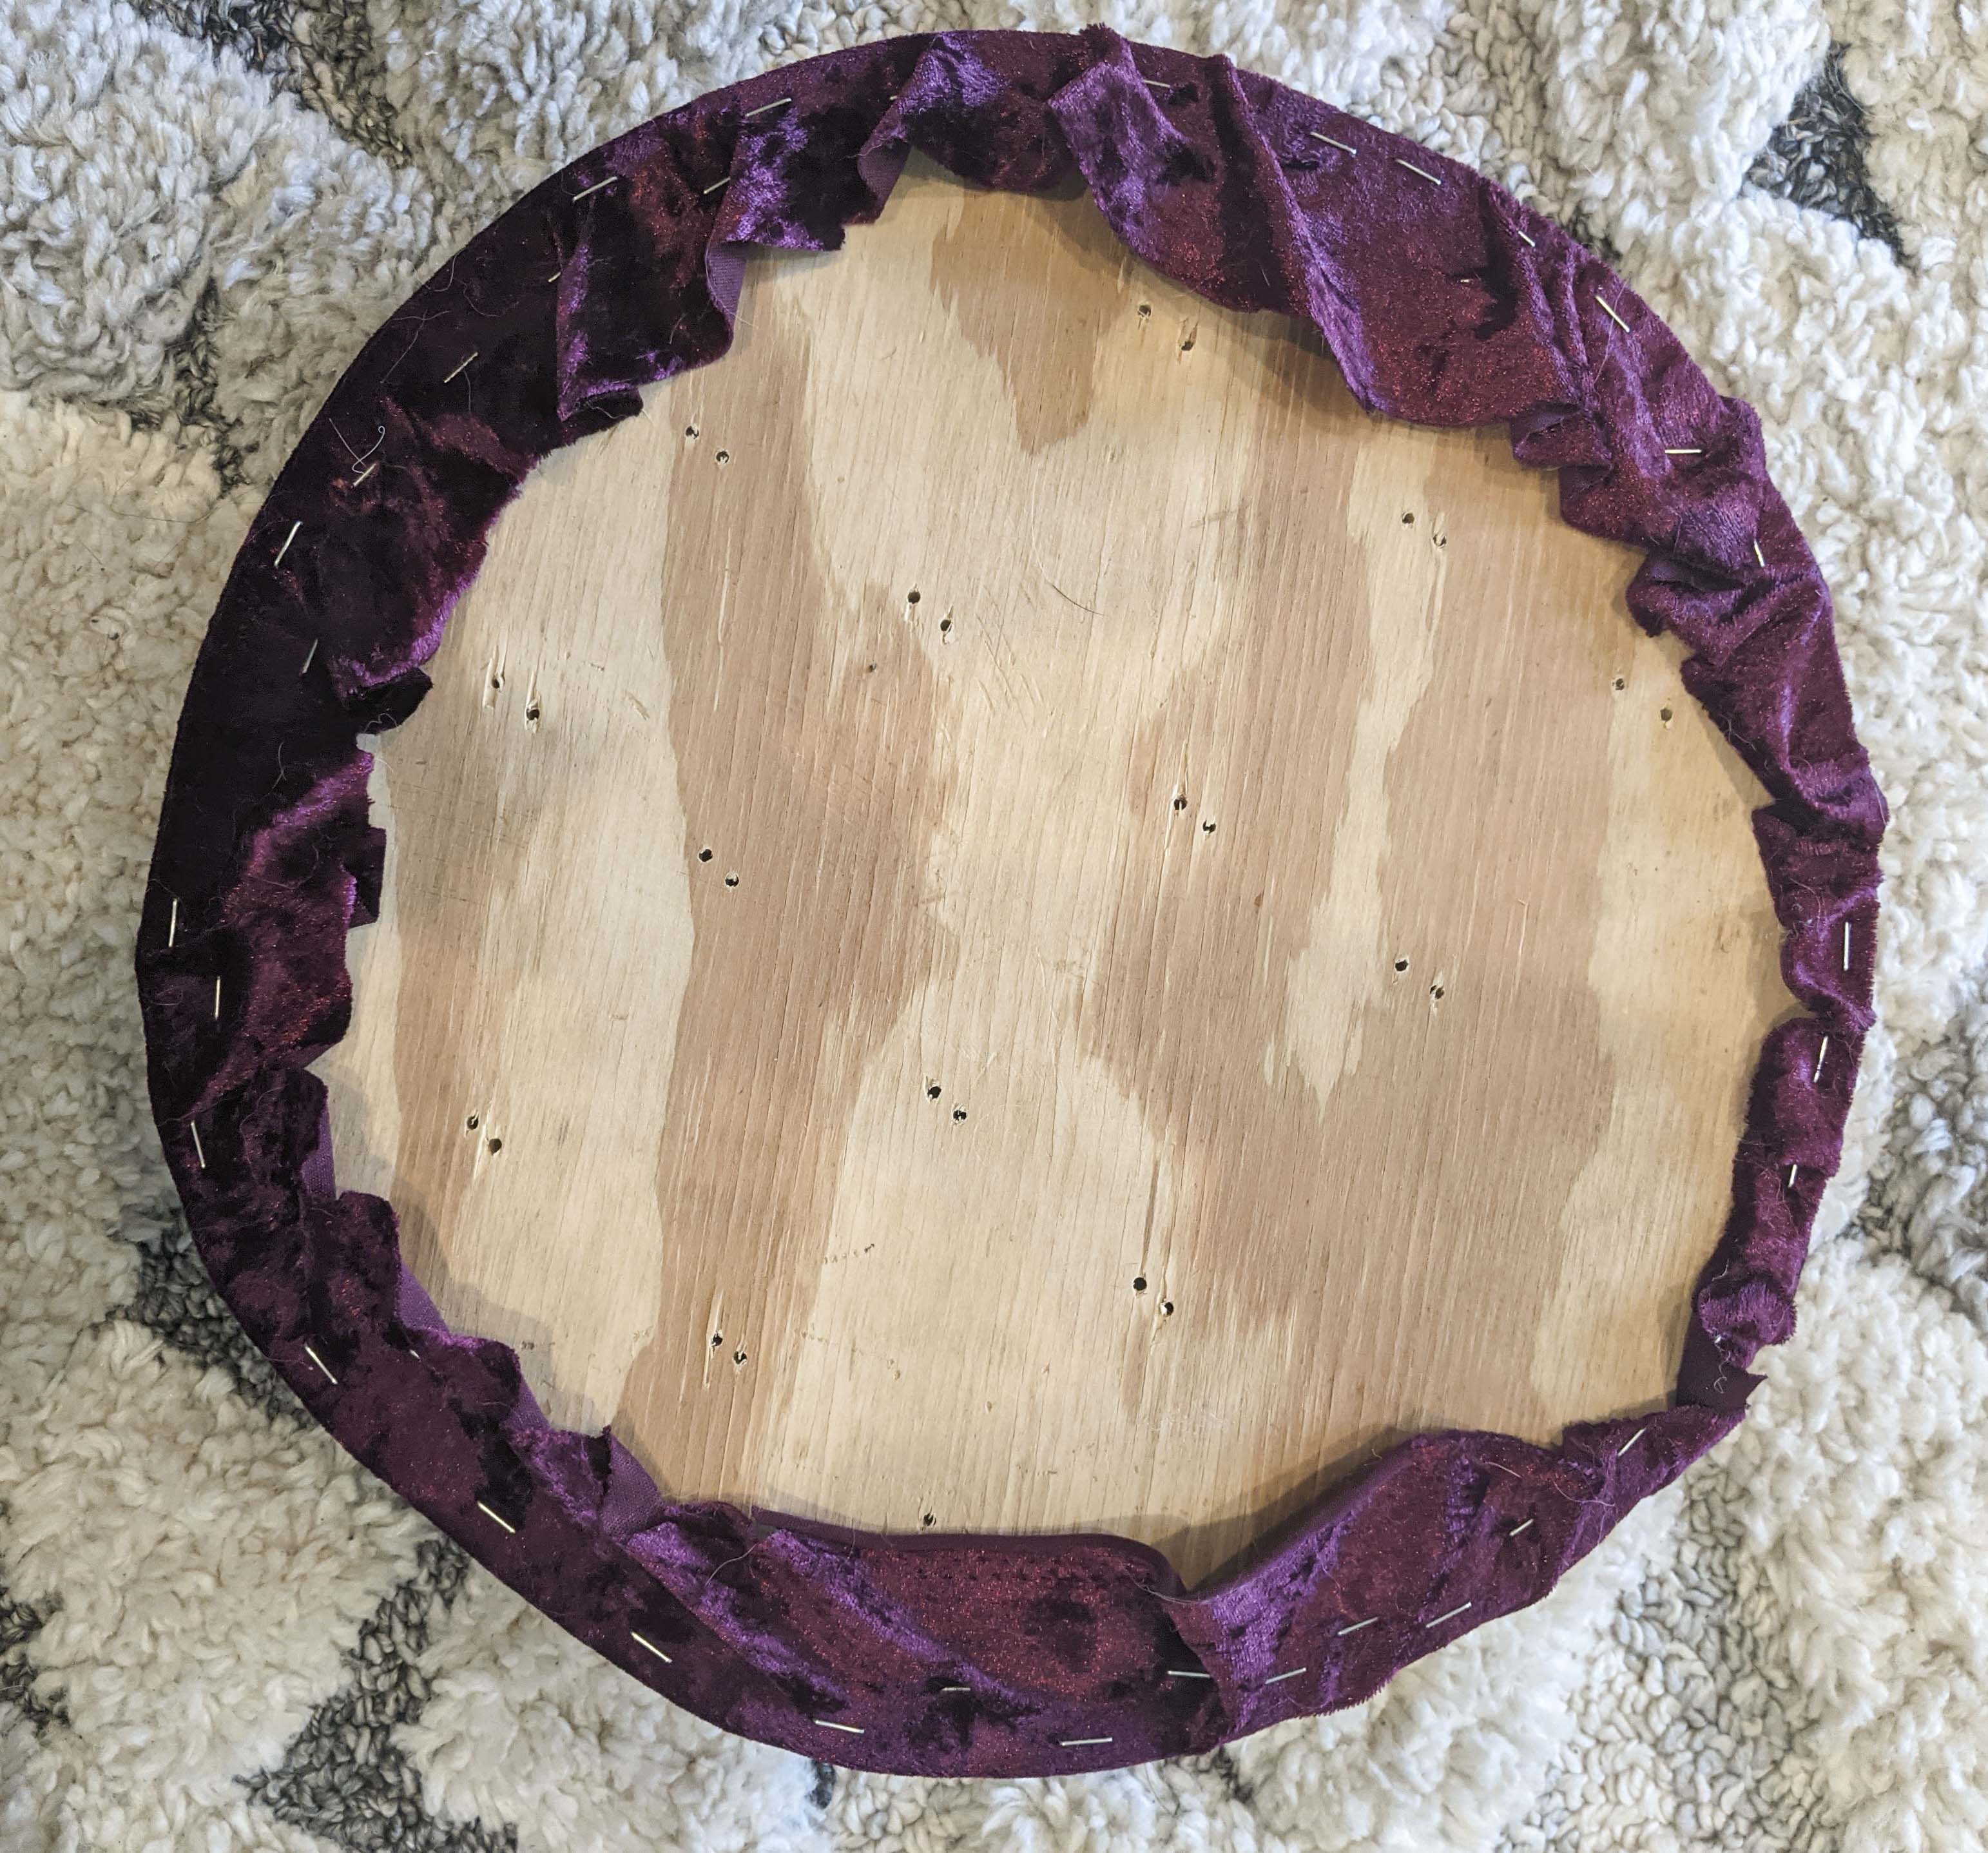
The picture above has the fabric already on, but you can see the holes that were drilled for the strings and buttons.
Now, onto the actual upholstery part.
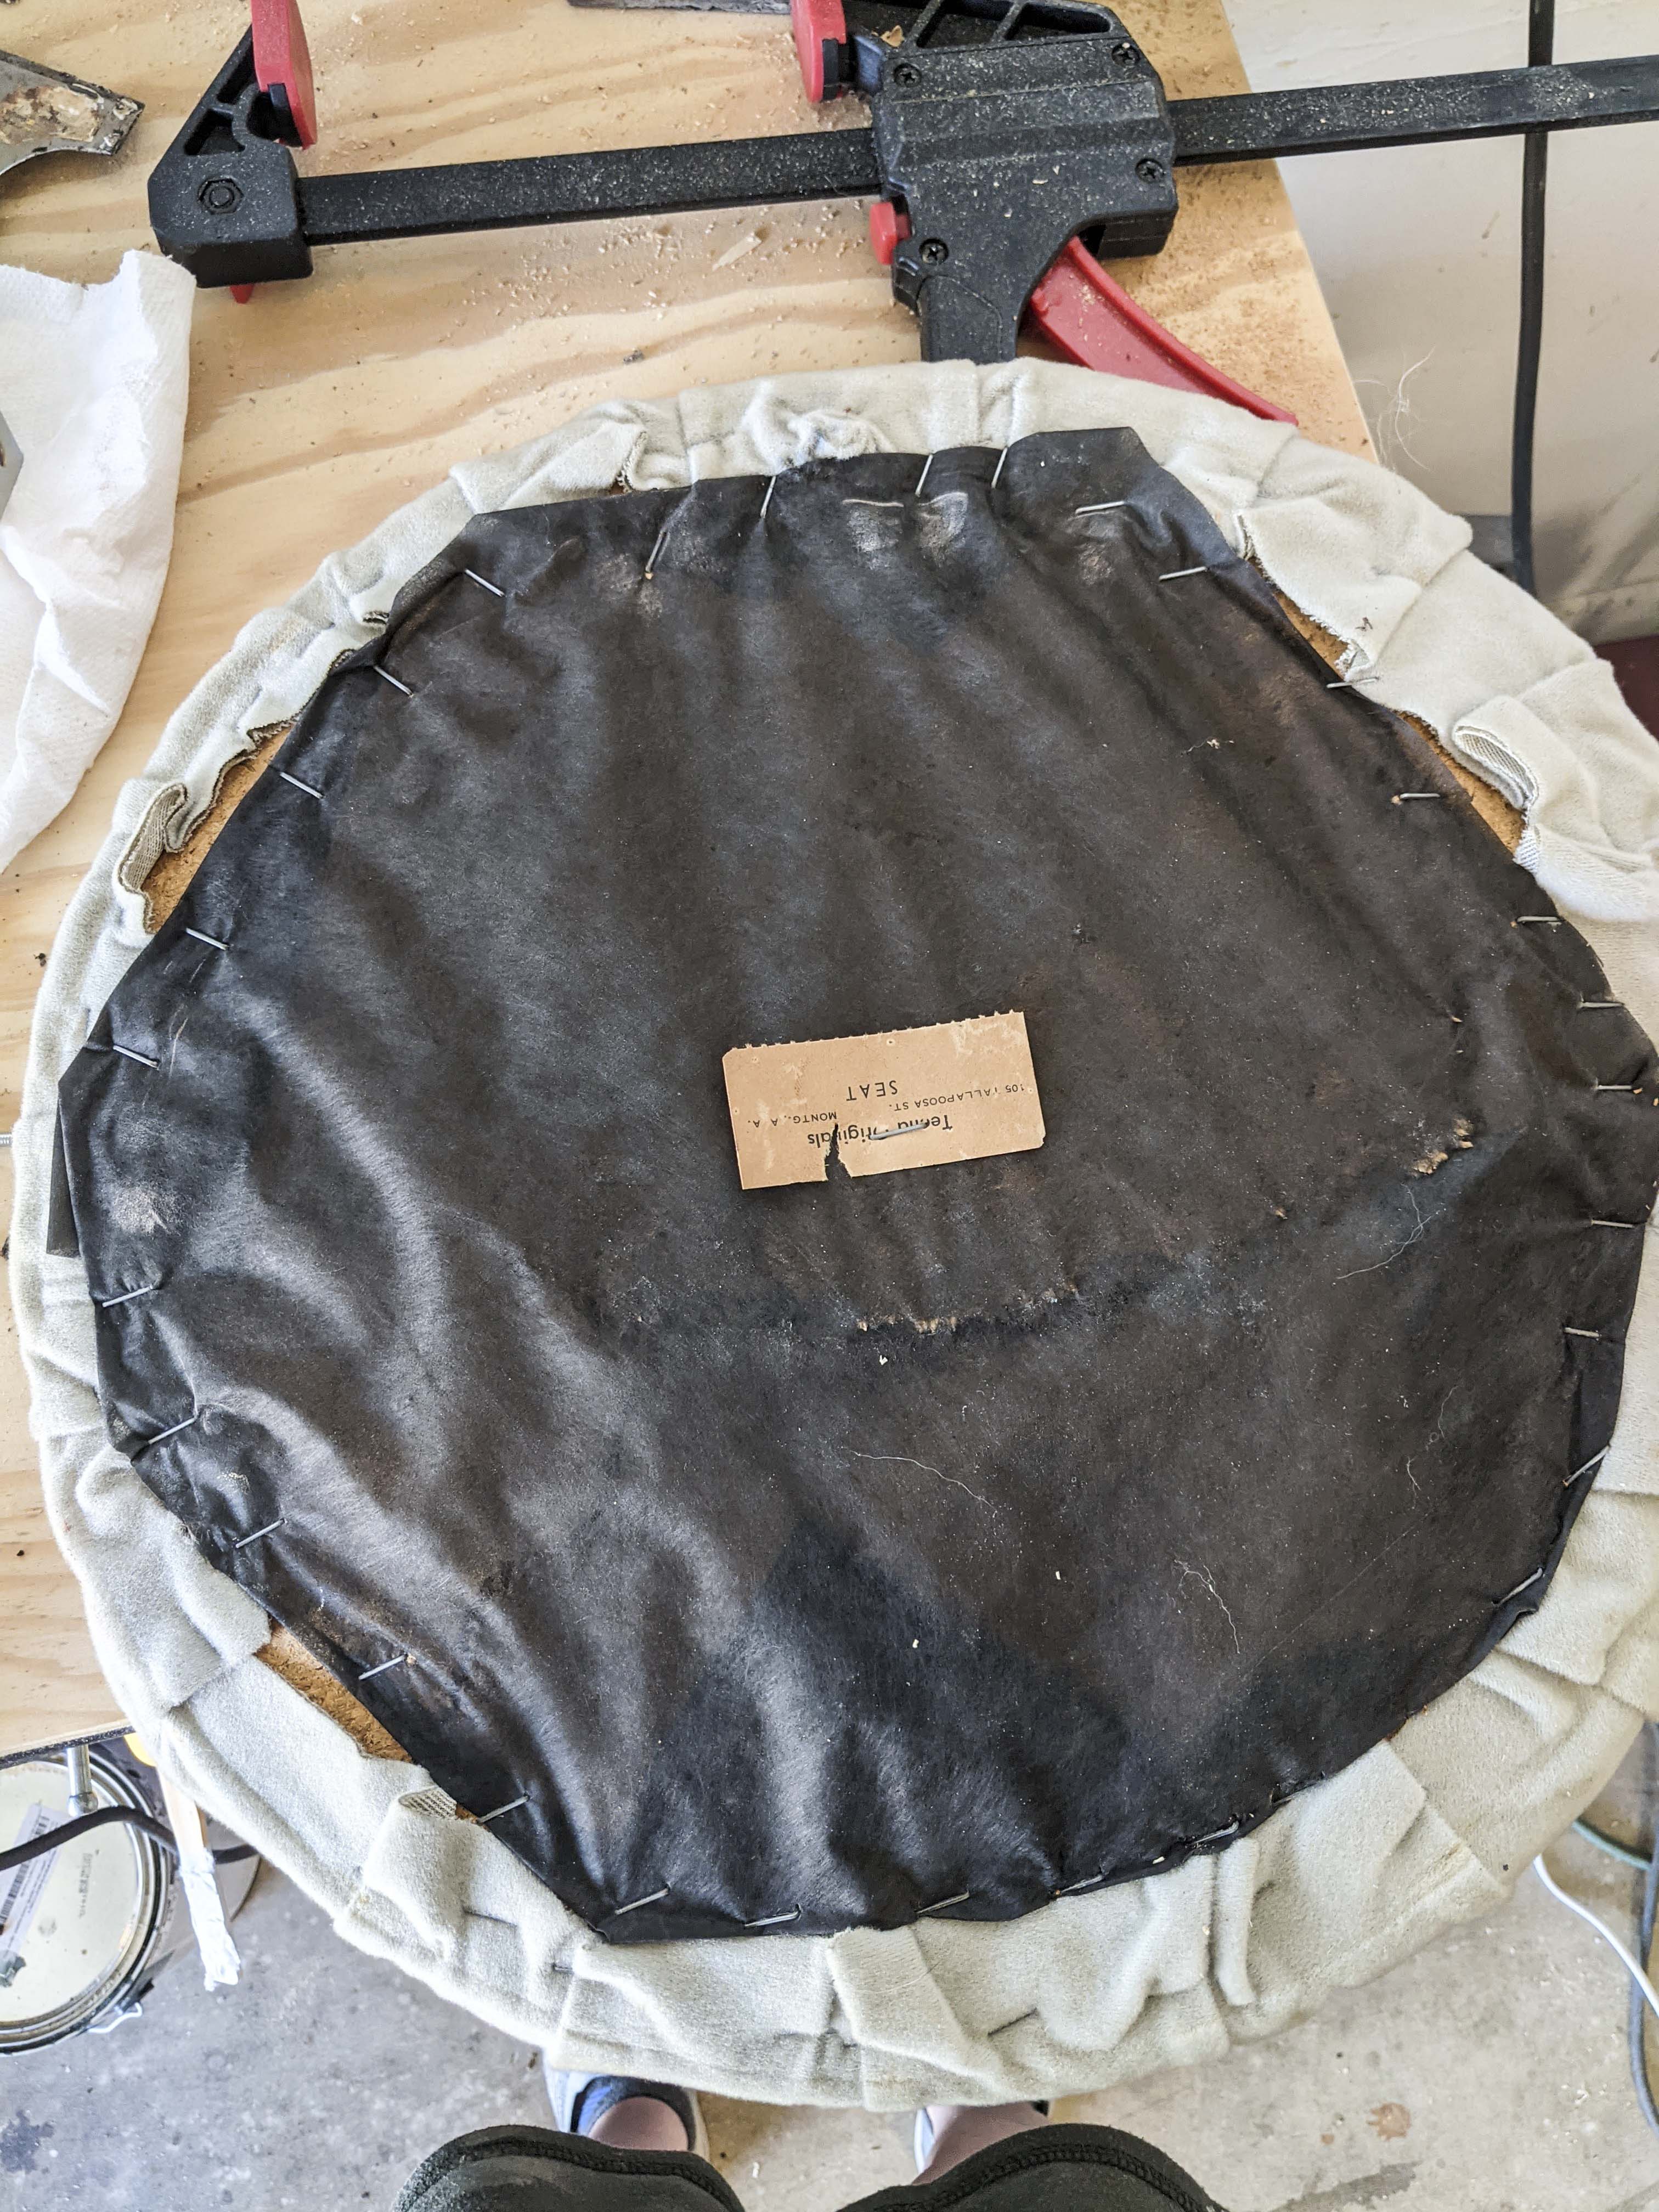
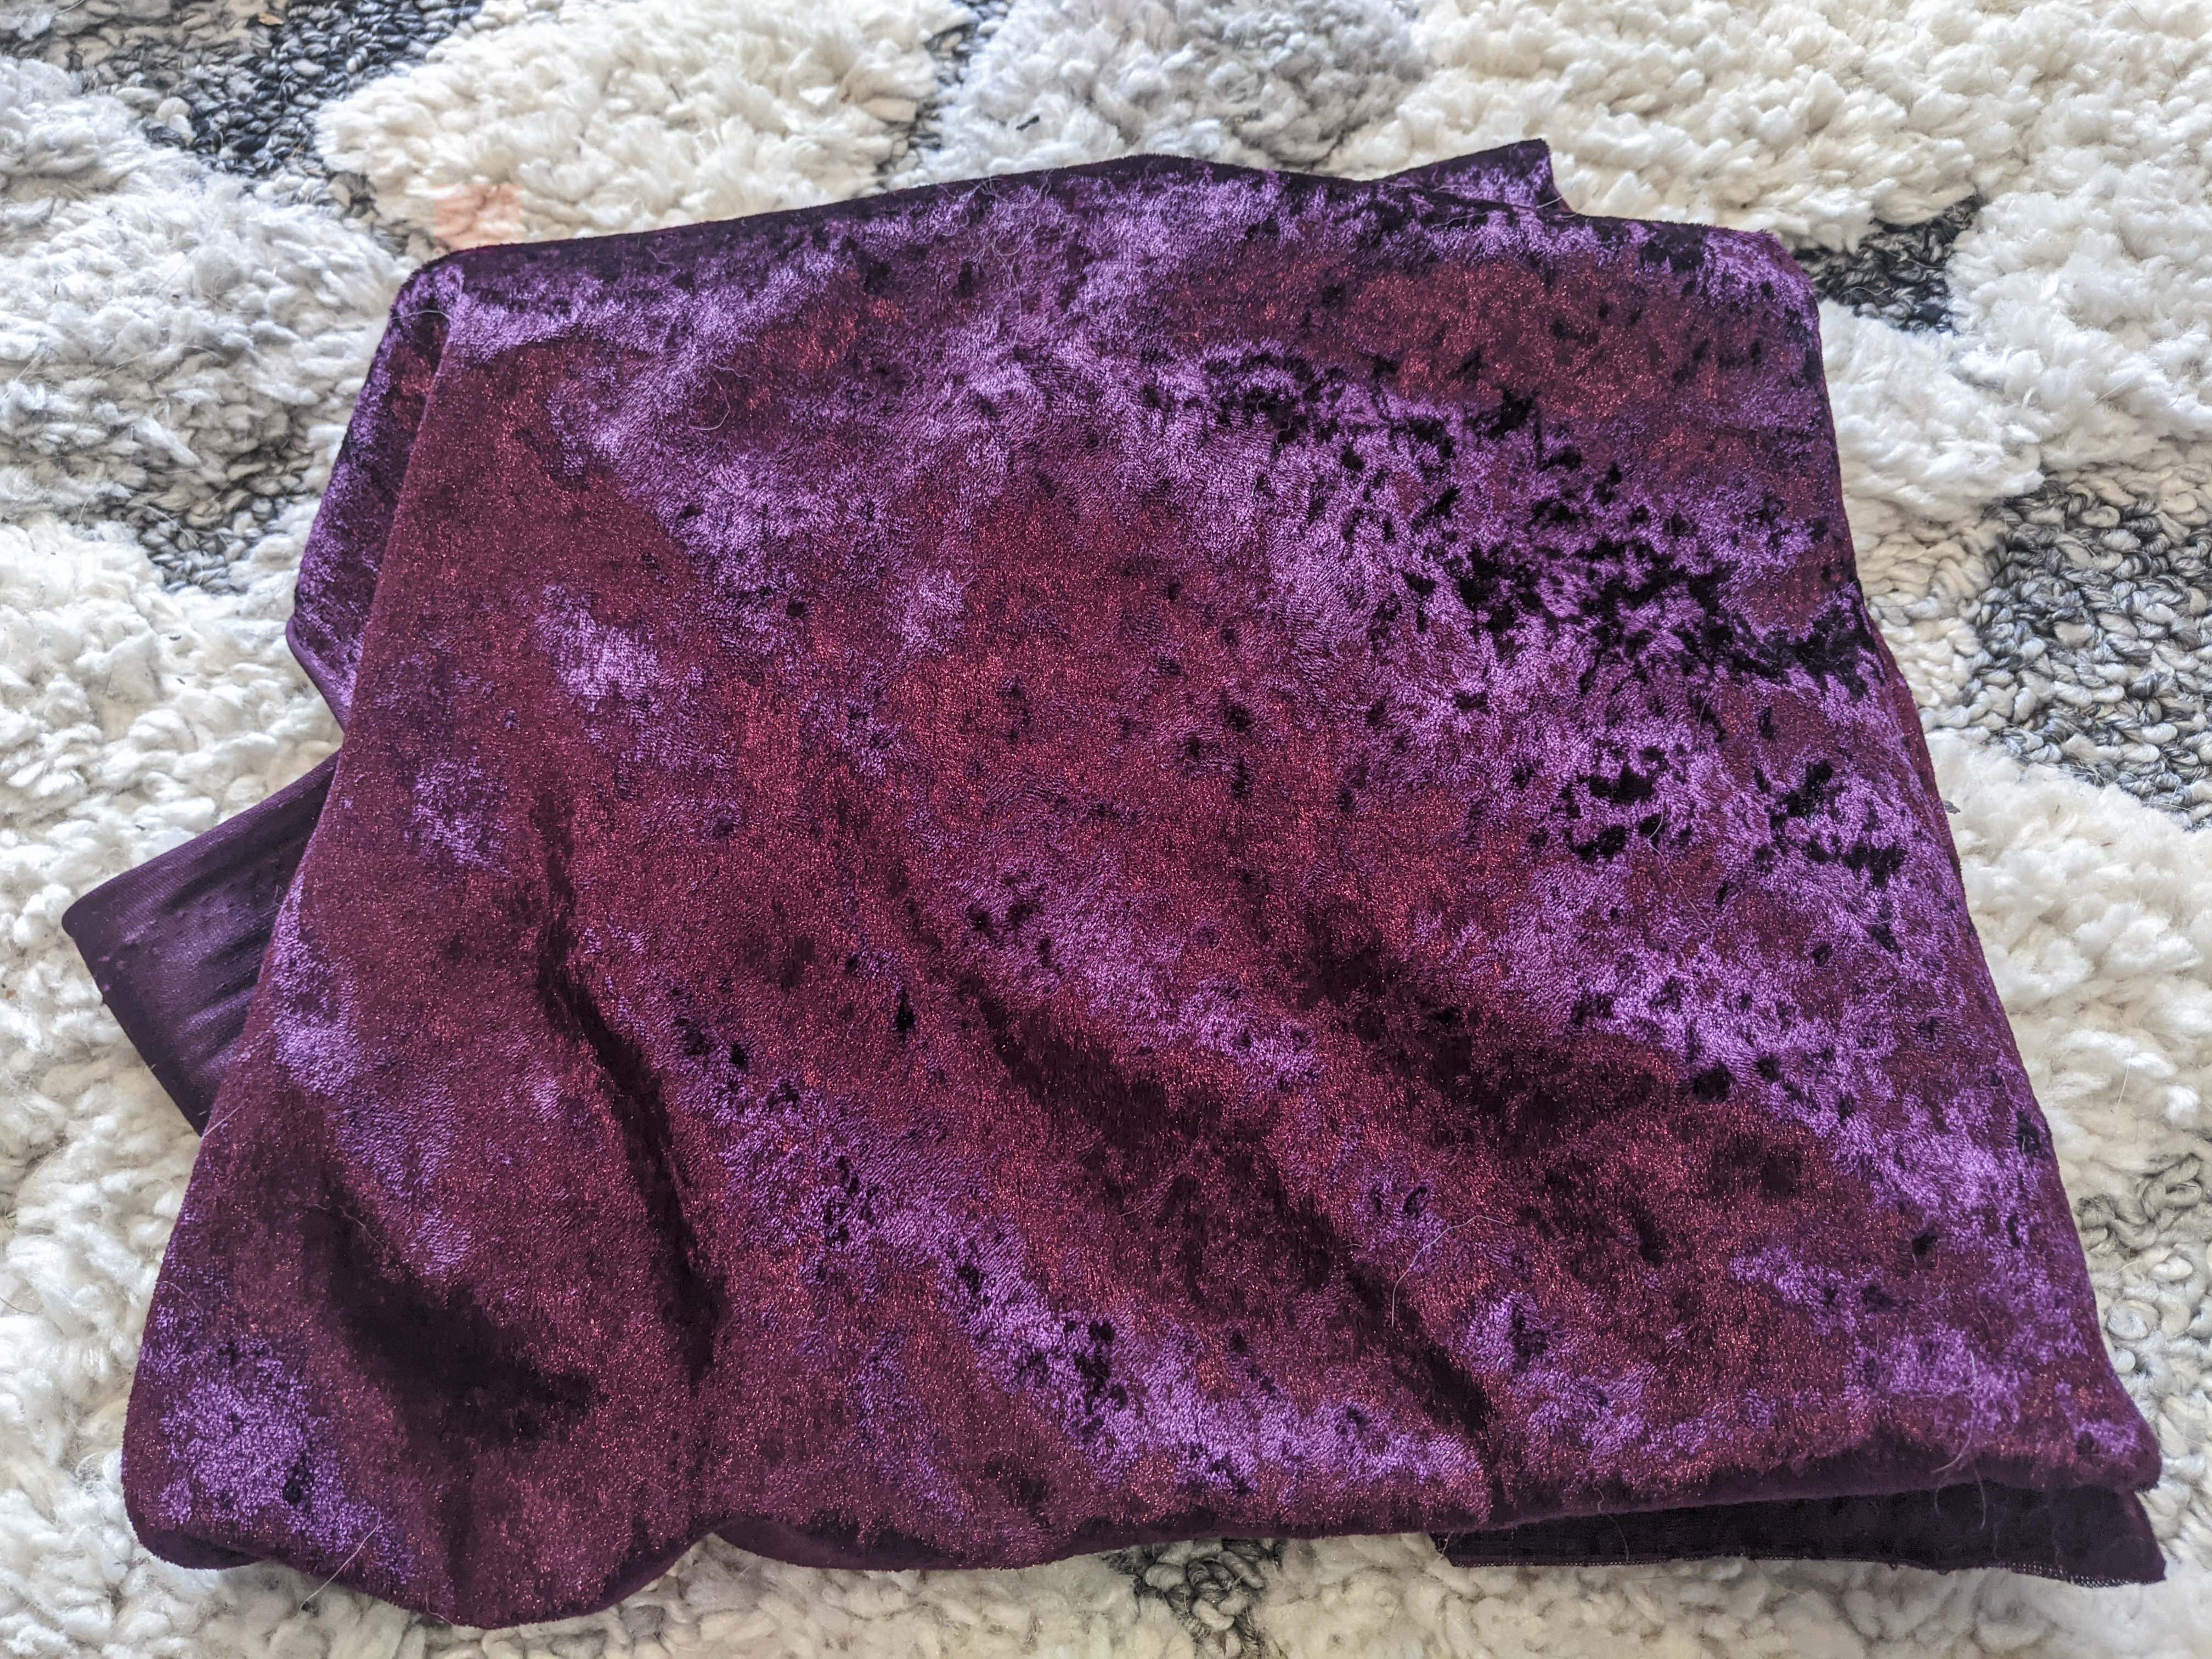
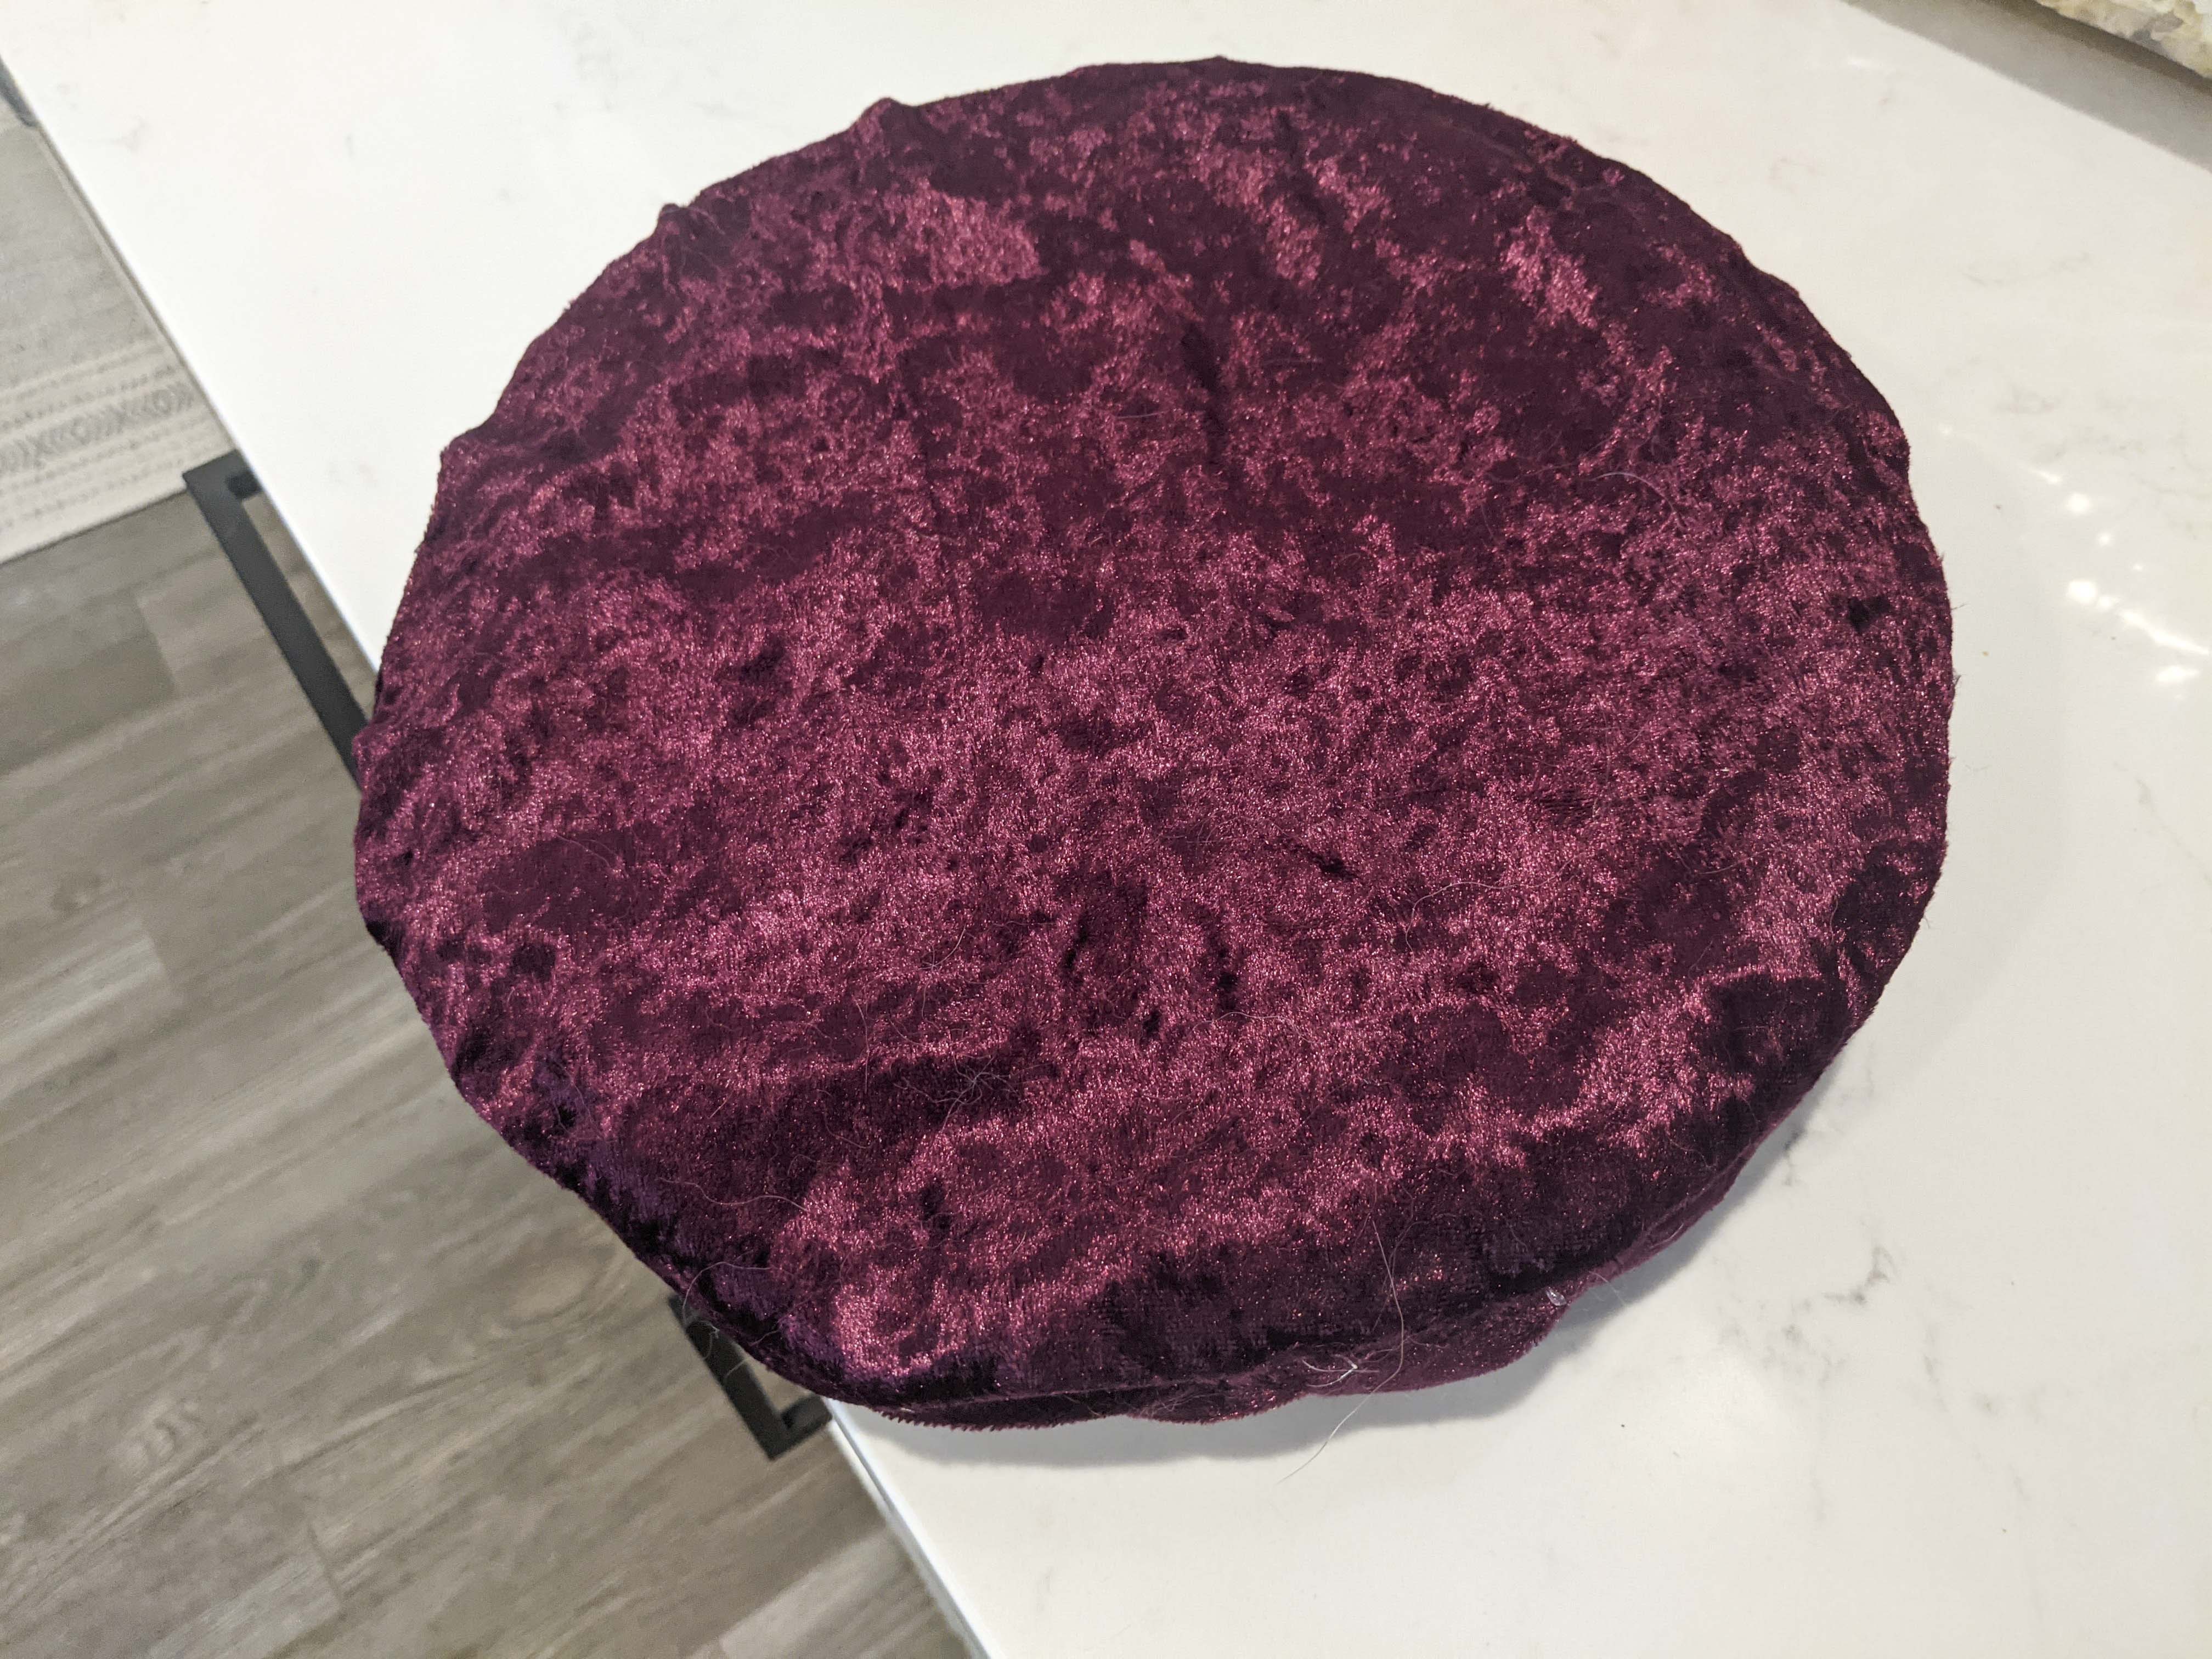
The original fabric was fuzzy, maybe a chenille or velvet blend, and I wanted to emulate that look. I found this crushed velvet fabric in bordeaux at Hobby Lobby and bought one yard.
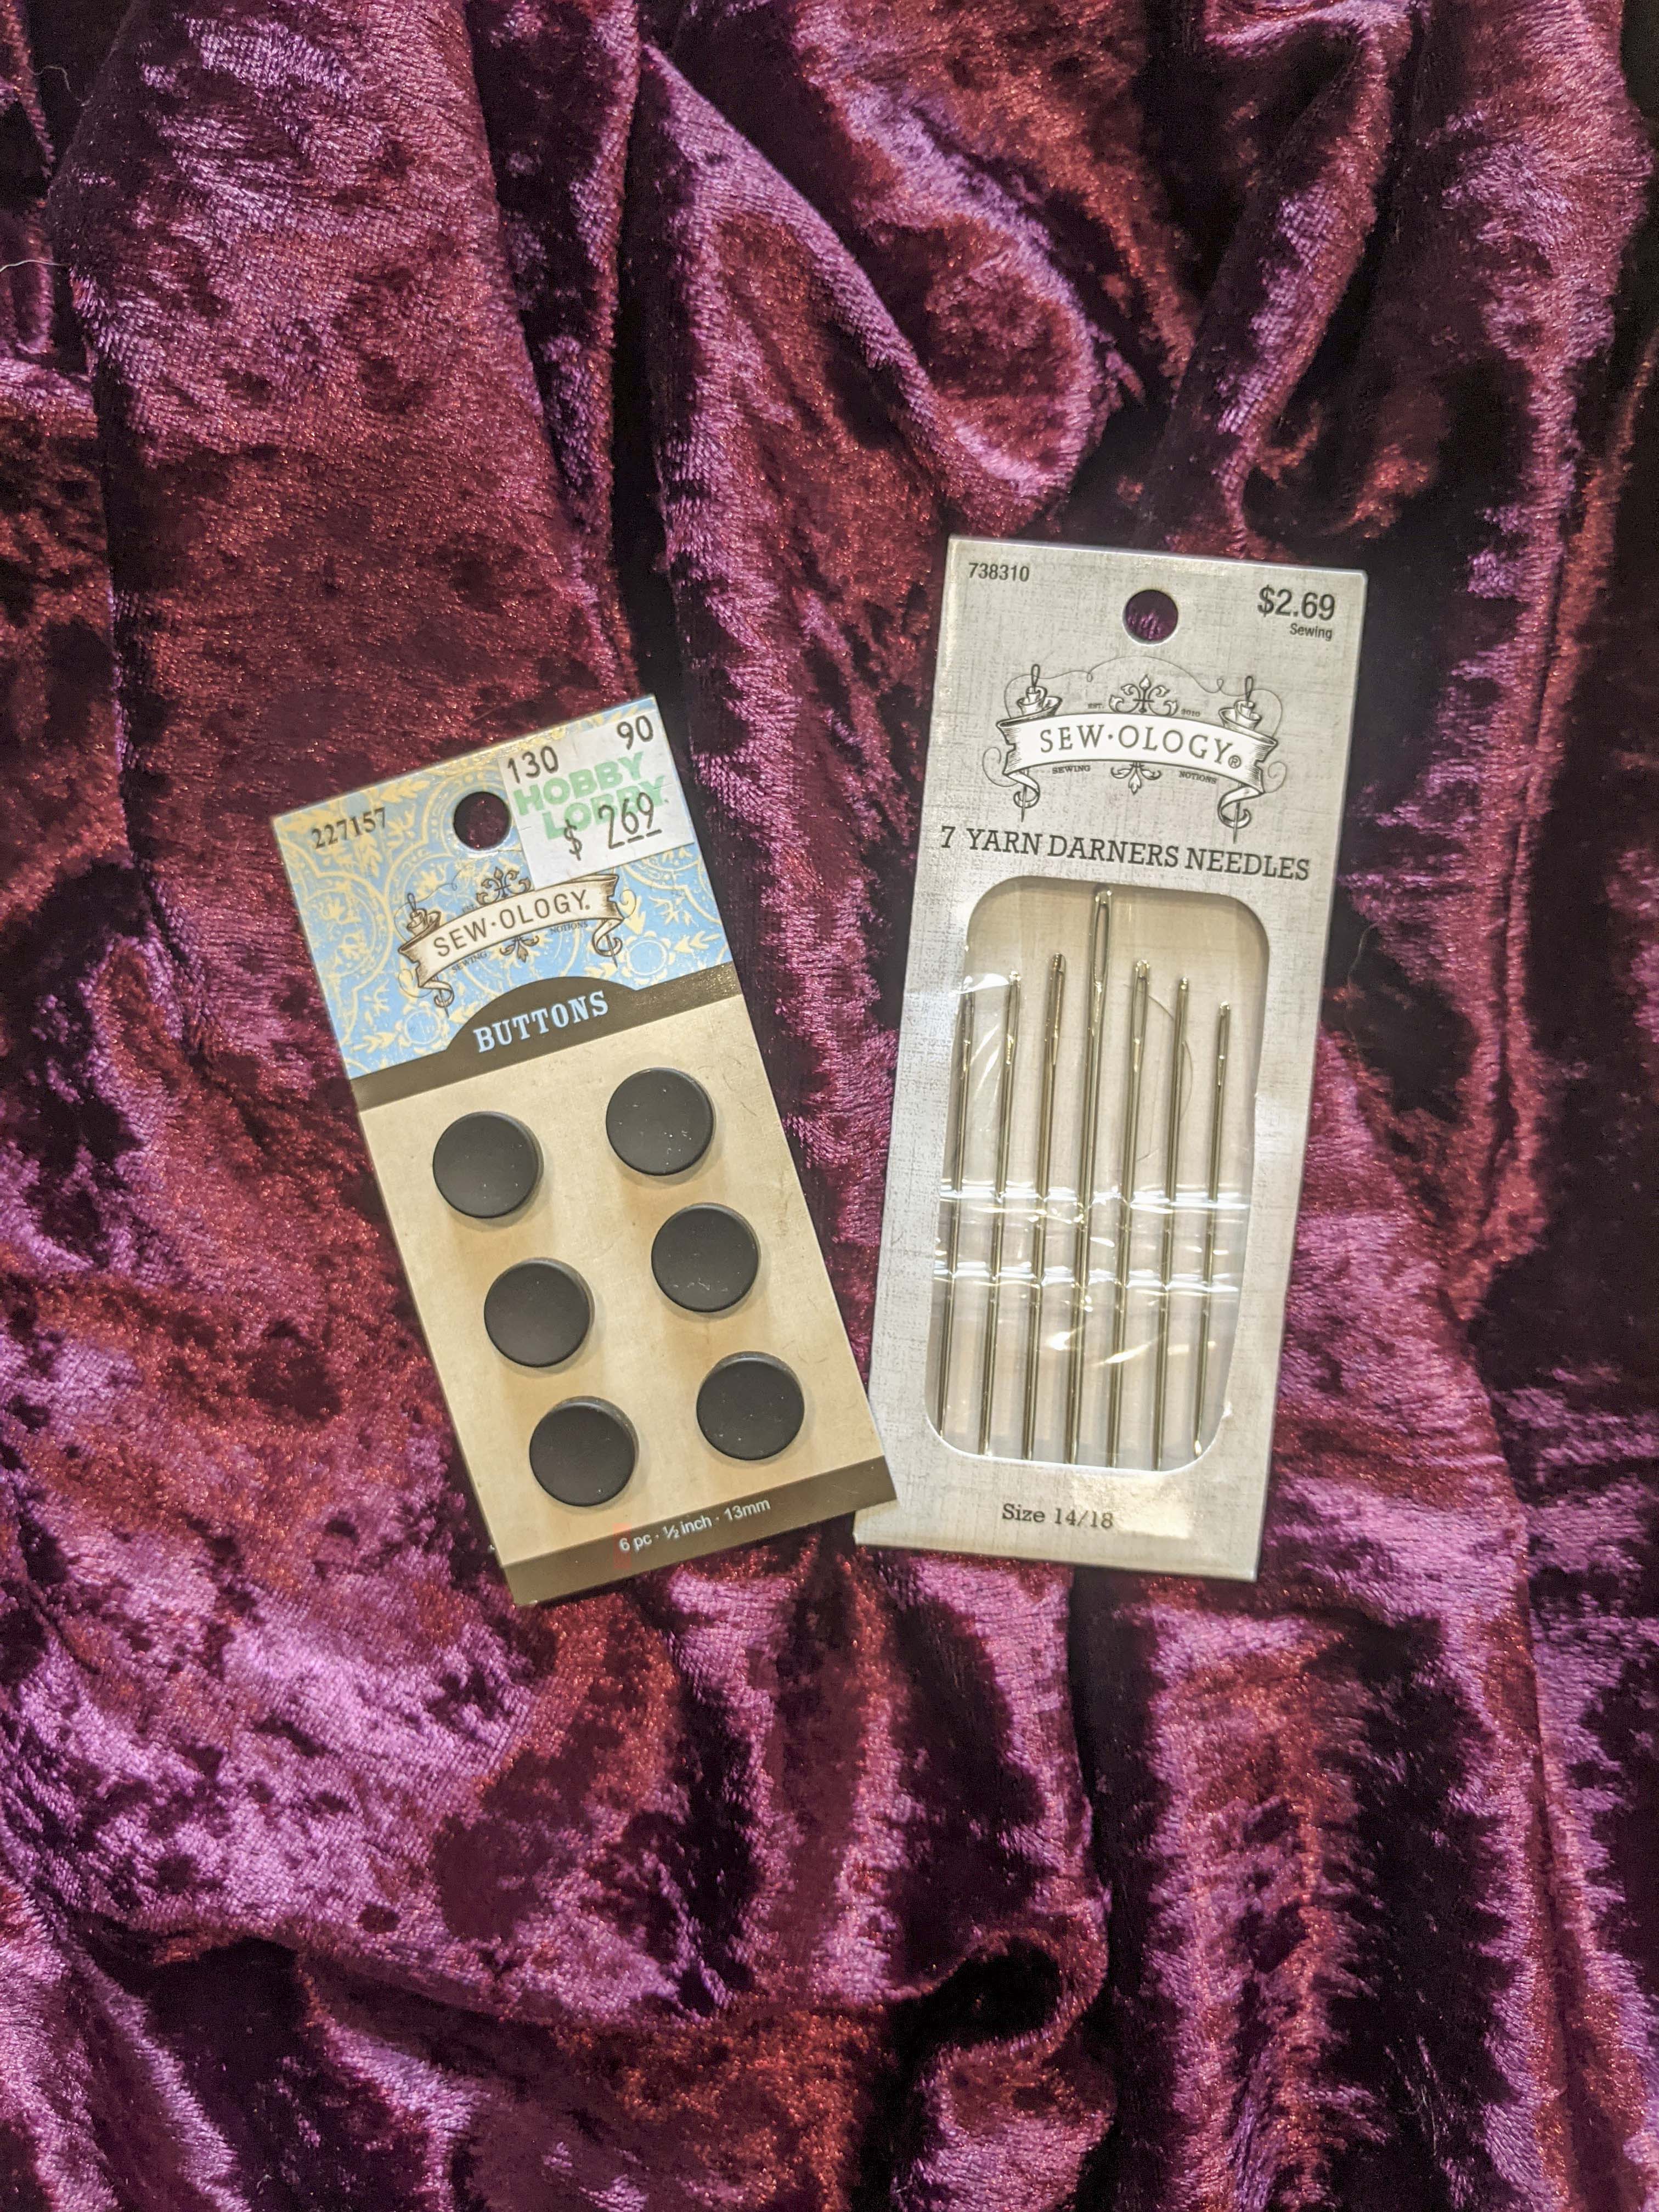
I also had a heck of a time finding enough buttons. I needed 16 for the seat and 9 more for the back of the chair. I was lucky to find 6 packs of the above style in black, which is what I wanted. I also got some larger darner needles to weave the embroidery floss through the wood, stuffing, and fabric.
The first task was to stuff the seat. I took my newly sanded wood seat and laid it on my fabric. I cut a wide birth around it then used a stapler to secure the fabric to the wood. Once I was halfway around, I began stuffing as I went. I used quite a bit of stuffing because I knew it would flatten out when I added the buttons.
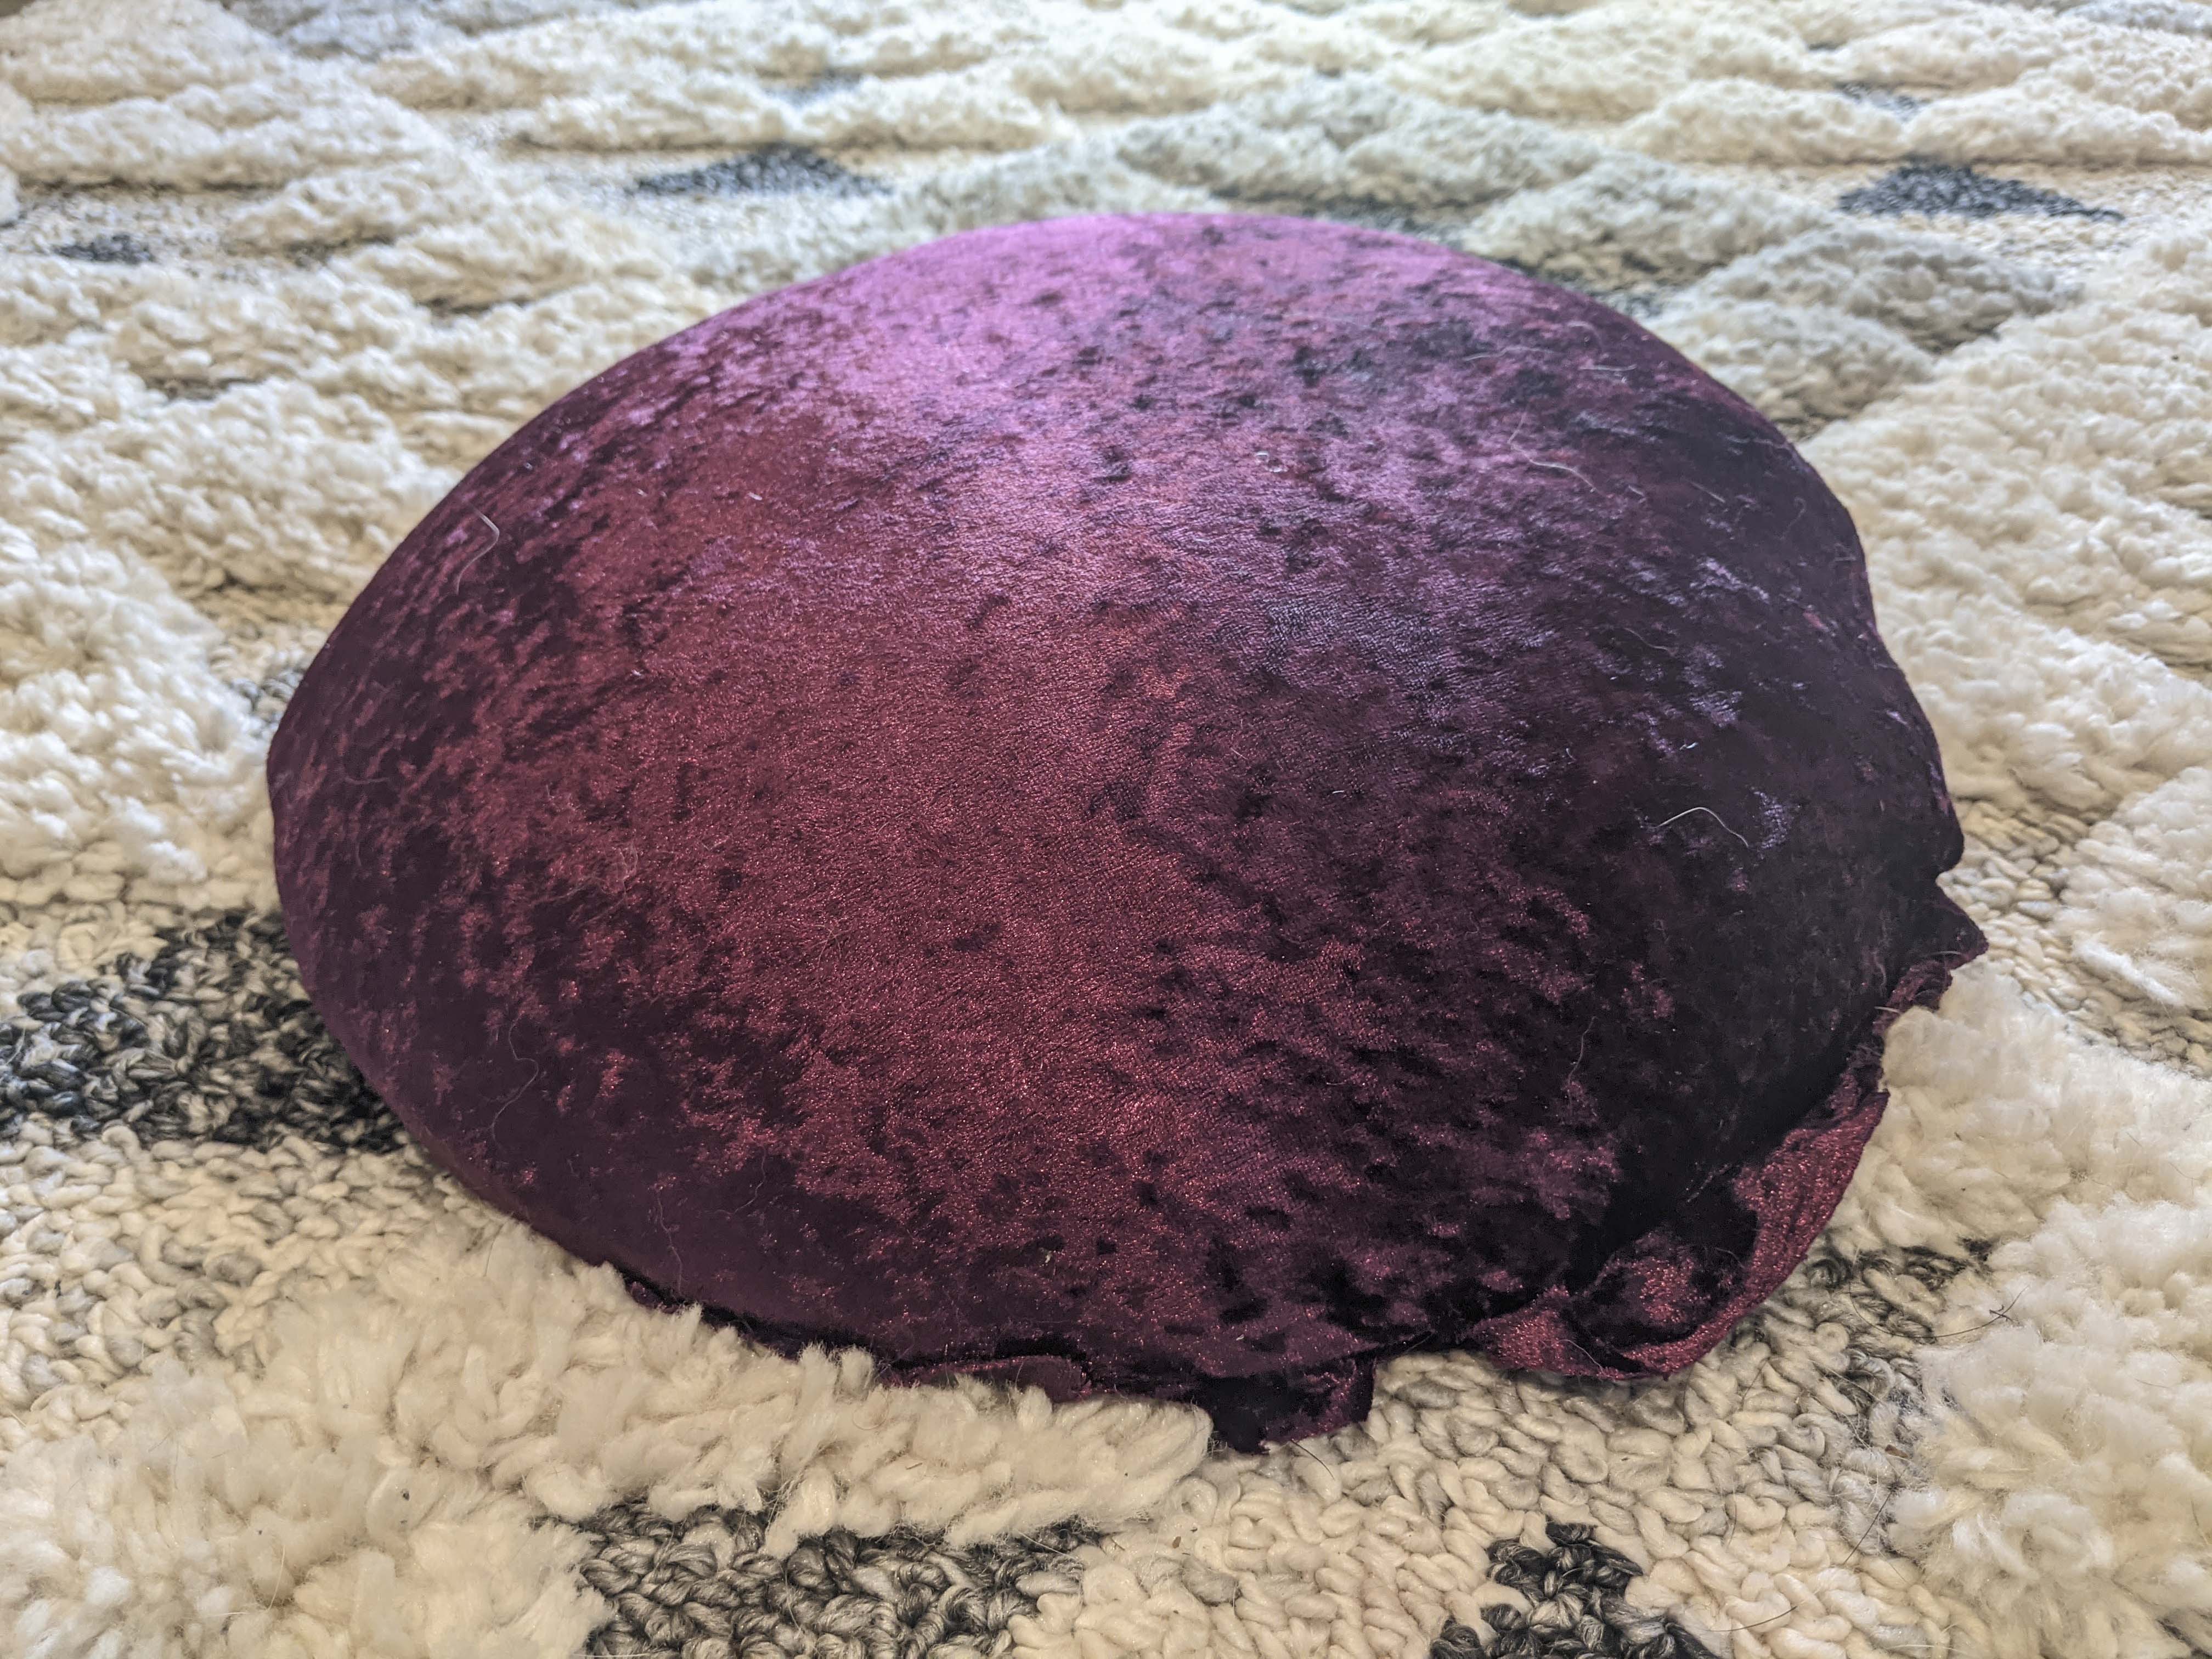
When I was done, I had a big, poofy seat. Now came the tedious process of tufting.
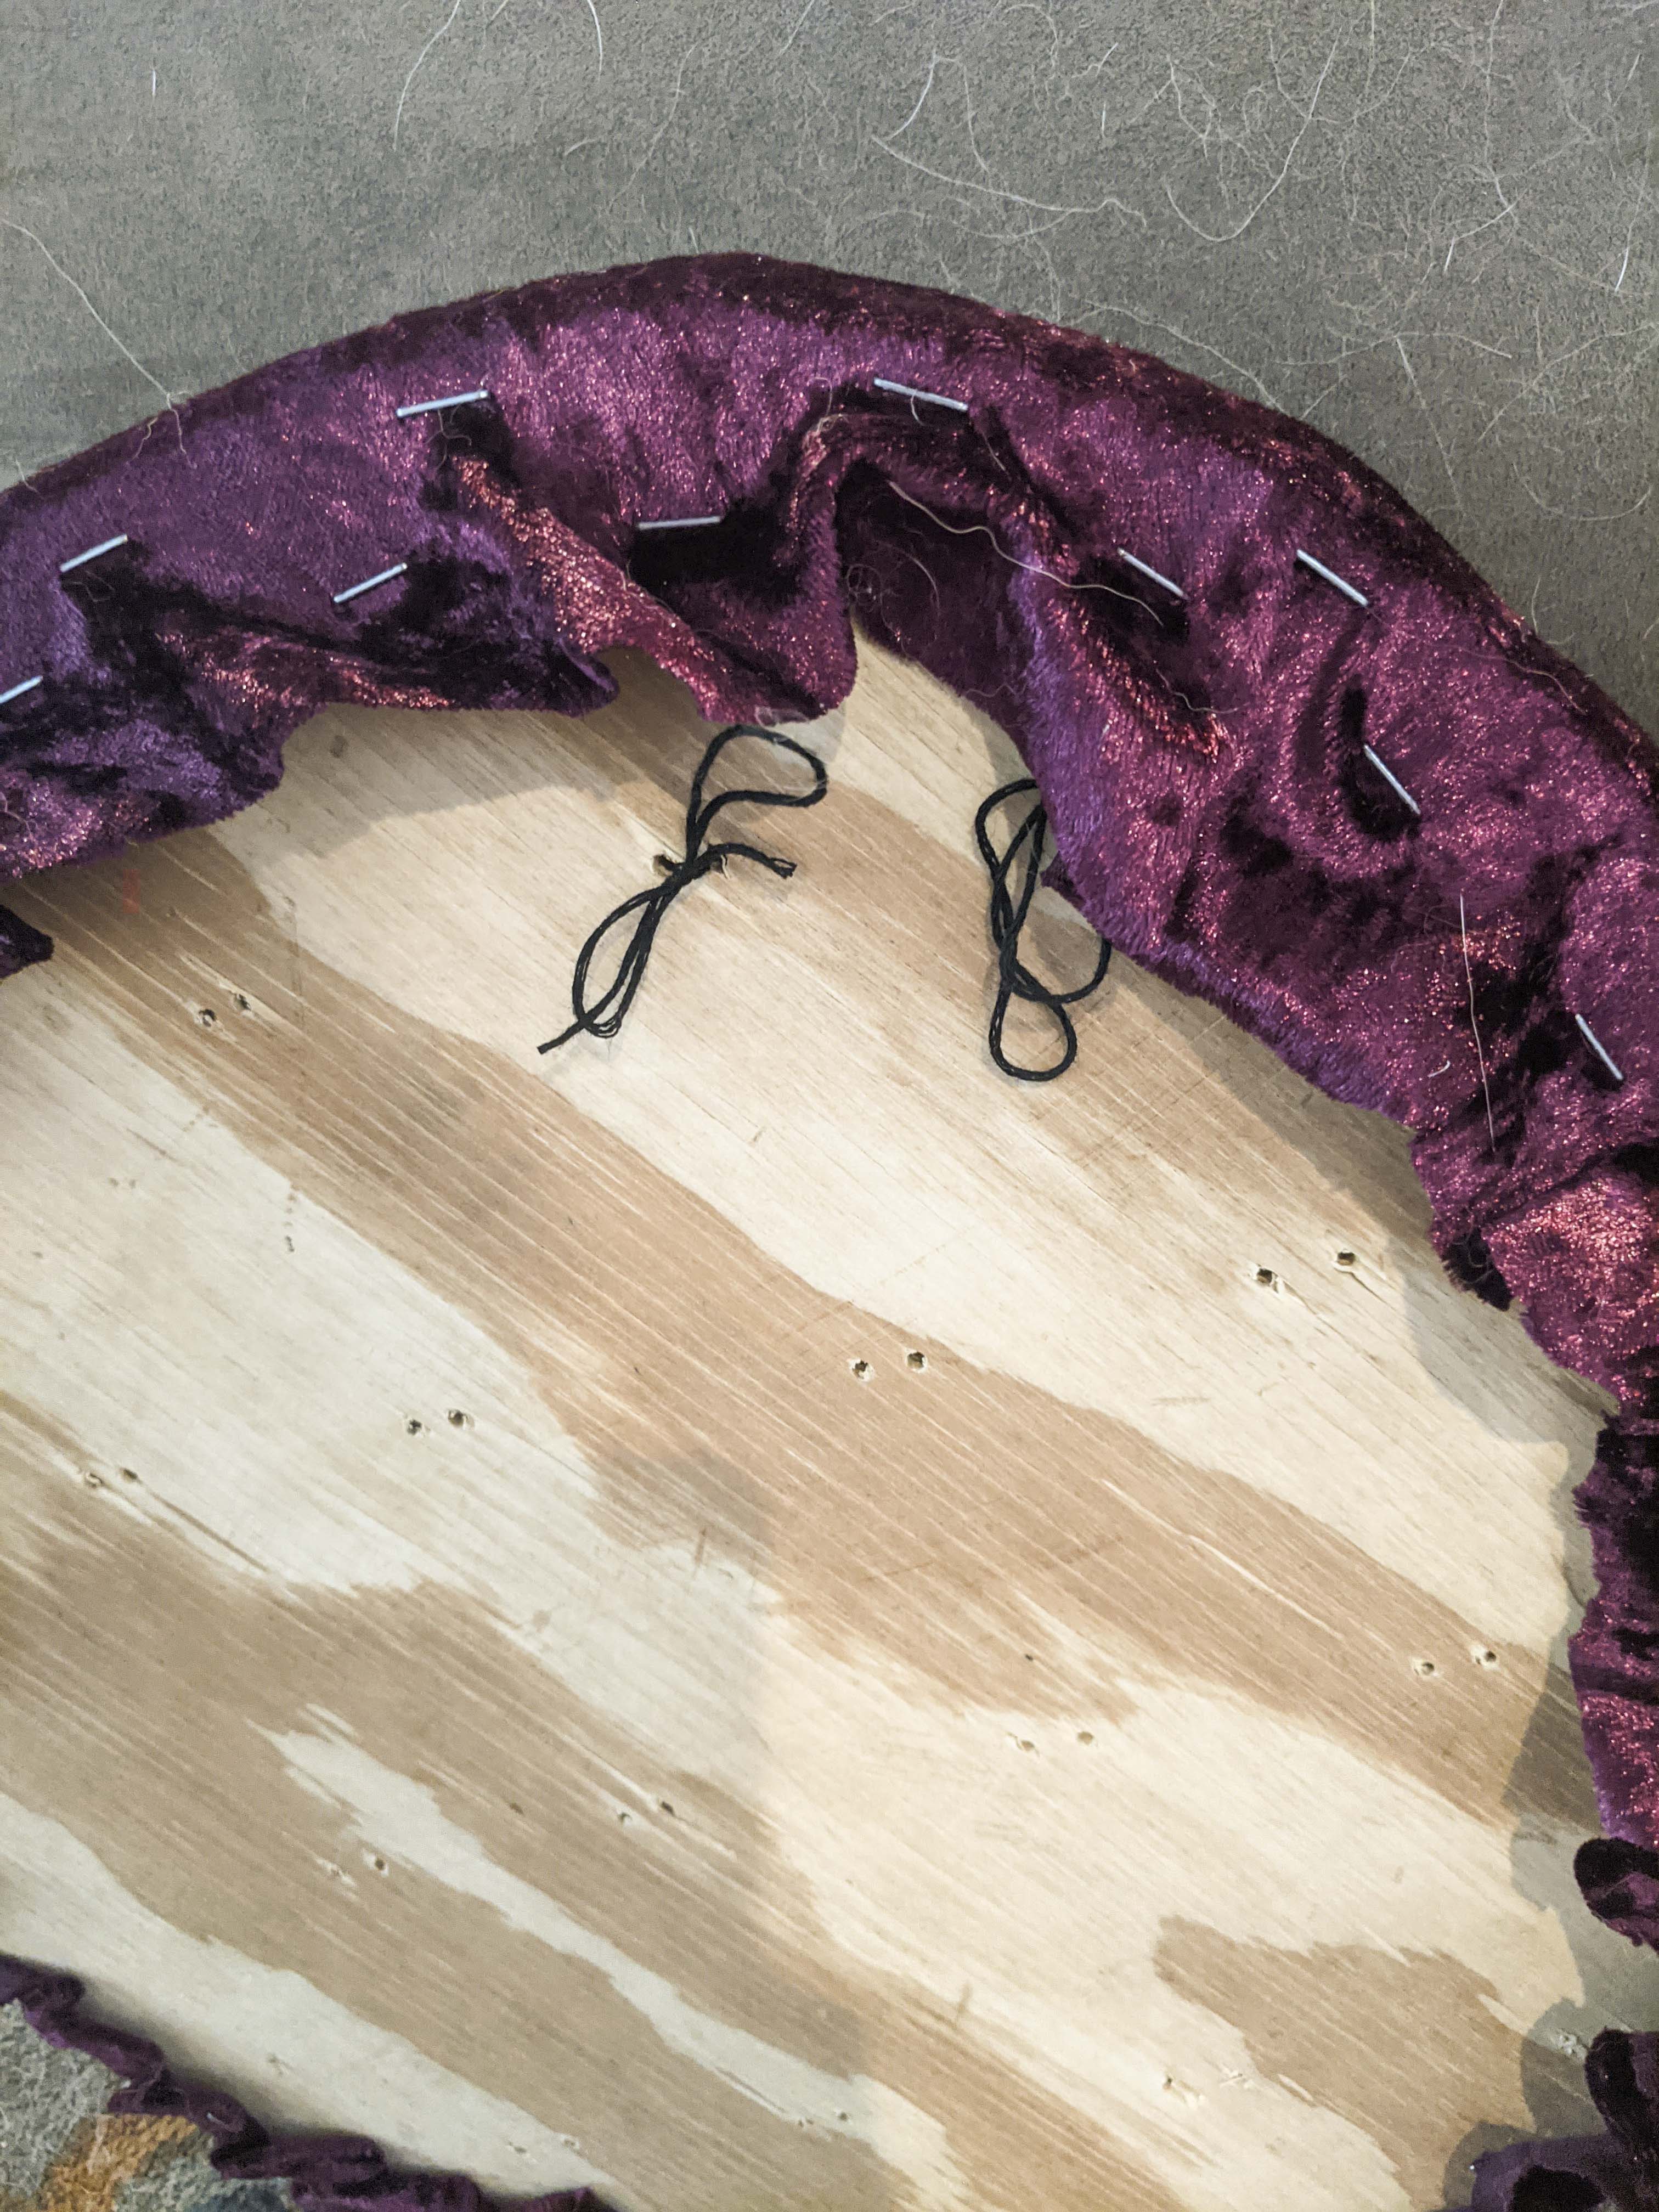
I cut a long length of embroidery floss and threaded it onto one of my needles. Then, starting from the back of the seat, I pushed the needle through one hole and out of the fabric. I took the needle off and threaded the floss through a button, then attached it back to the needle. Next, I stuck the needle back through the fabric and, as best I could, aimed for the second hole. Once I found it, I pulled the needle through and detached from the floss.
This is where I needed a second set of hands. I hand my husband push the buttons firmly down while I pulled the floss slack through and tied it into a knot on the bottom of the seat. This was much easier than doing it myself and made sure the button was as low as it would go.
Did that 16 times, then it was time to do the (smaller) chair back. I repeated the same process as above: measure the back, drew out a new circle on wood, cut, sanded, made sure it fit, cut the fabric to size, staple, stuff, staple, and then the tufting. It went a lot faster because I knew what I was doing and it was about half as many buttons.

The seatback was raw wood and tied strings and that looks ugly. I placed my extra fabric over the back and cut a tight circle all the way around. Then, I used hot glue to attach. This will hide all those dangling strings and give a finished look.
Now that the cushions were done and the chair was dry the only thing left to do was put it all back together.
I had my husband sit on the chair to hold the seat down and I screwed the 3 screws into the bottom. Be careful to move excess fabric out of the way as the screws/drill will eat it up and could cause tearing.
The seatback was a little trickier for this reason. I had to cut some small holes into the fabric to expose the wood so I could screw it on without messing up all of my work.
My cushions didn’t quite cover the gaps between them and the metal chair, which I figured might happen. I bought some black cord and went around the cushions with it, shoving it into the gaps as necessary. I used hot glue to secure.
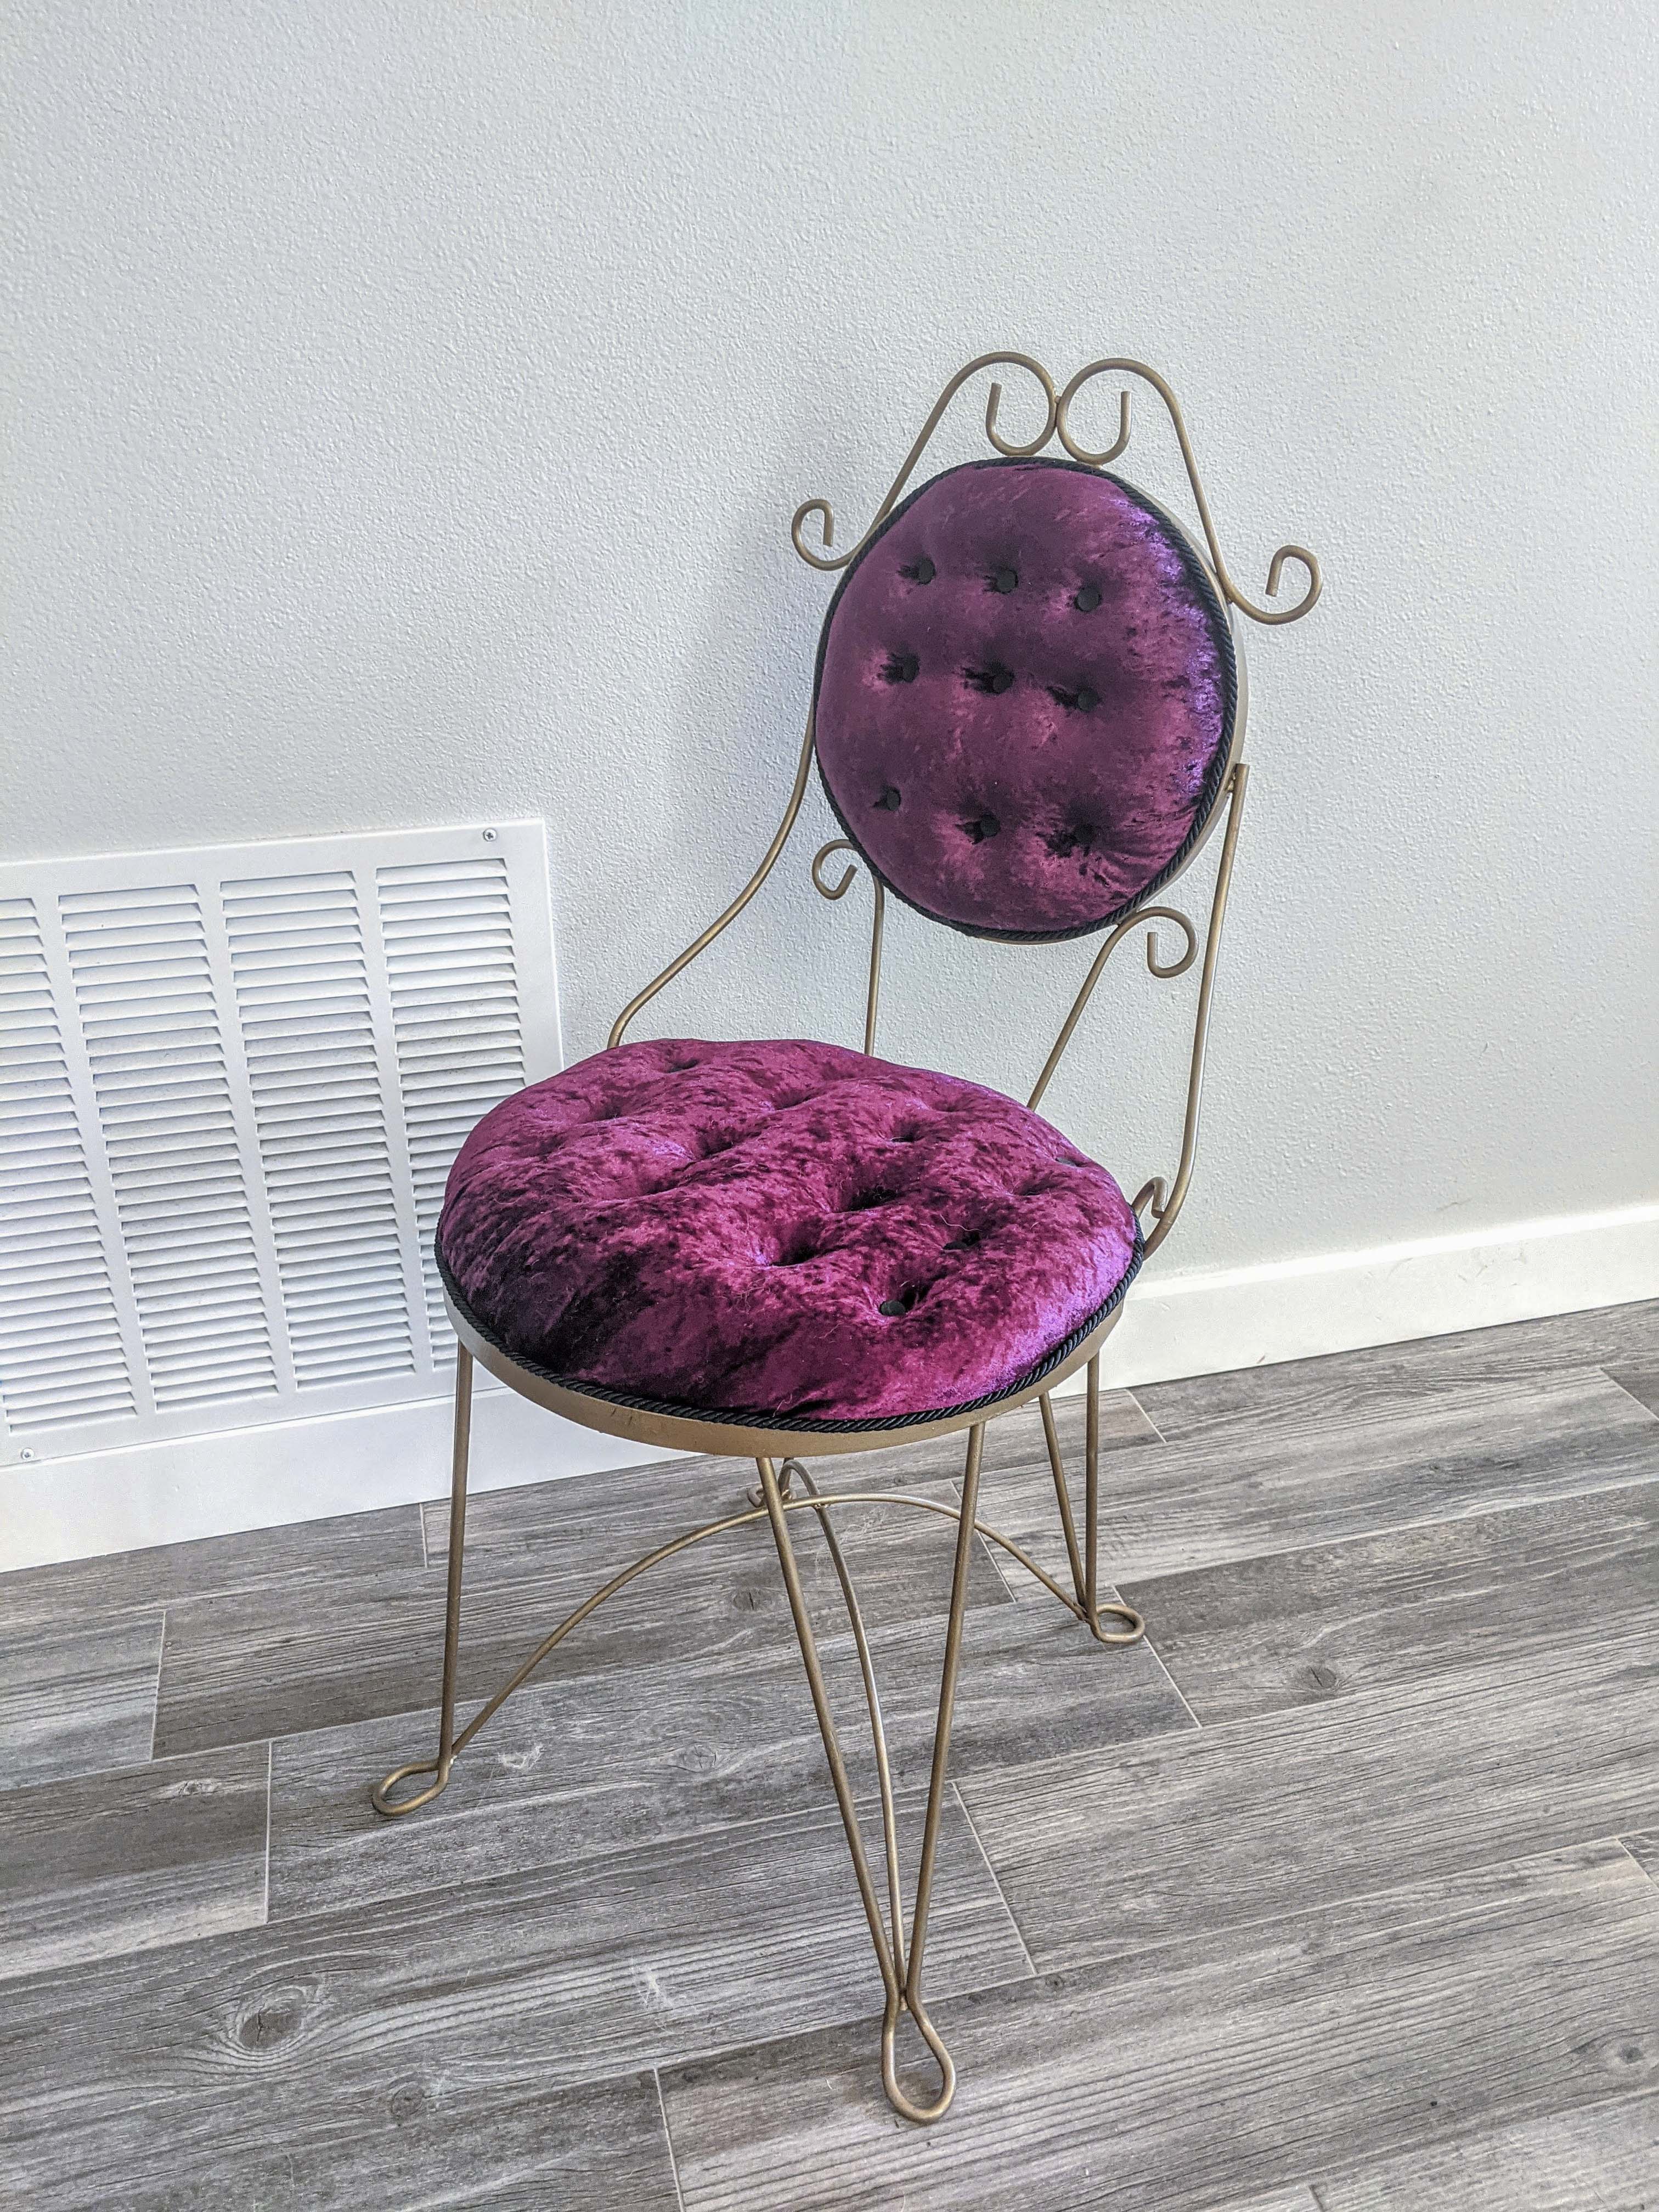
And all done! This project took me about 3 days because the tufting was annoying and I didn’t want to work on the second cushion after I finished the first.
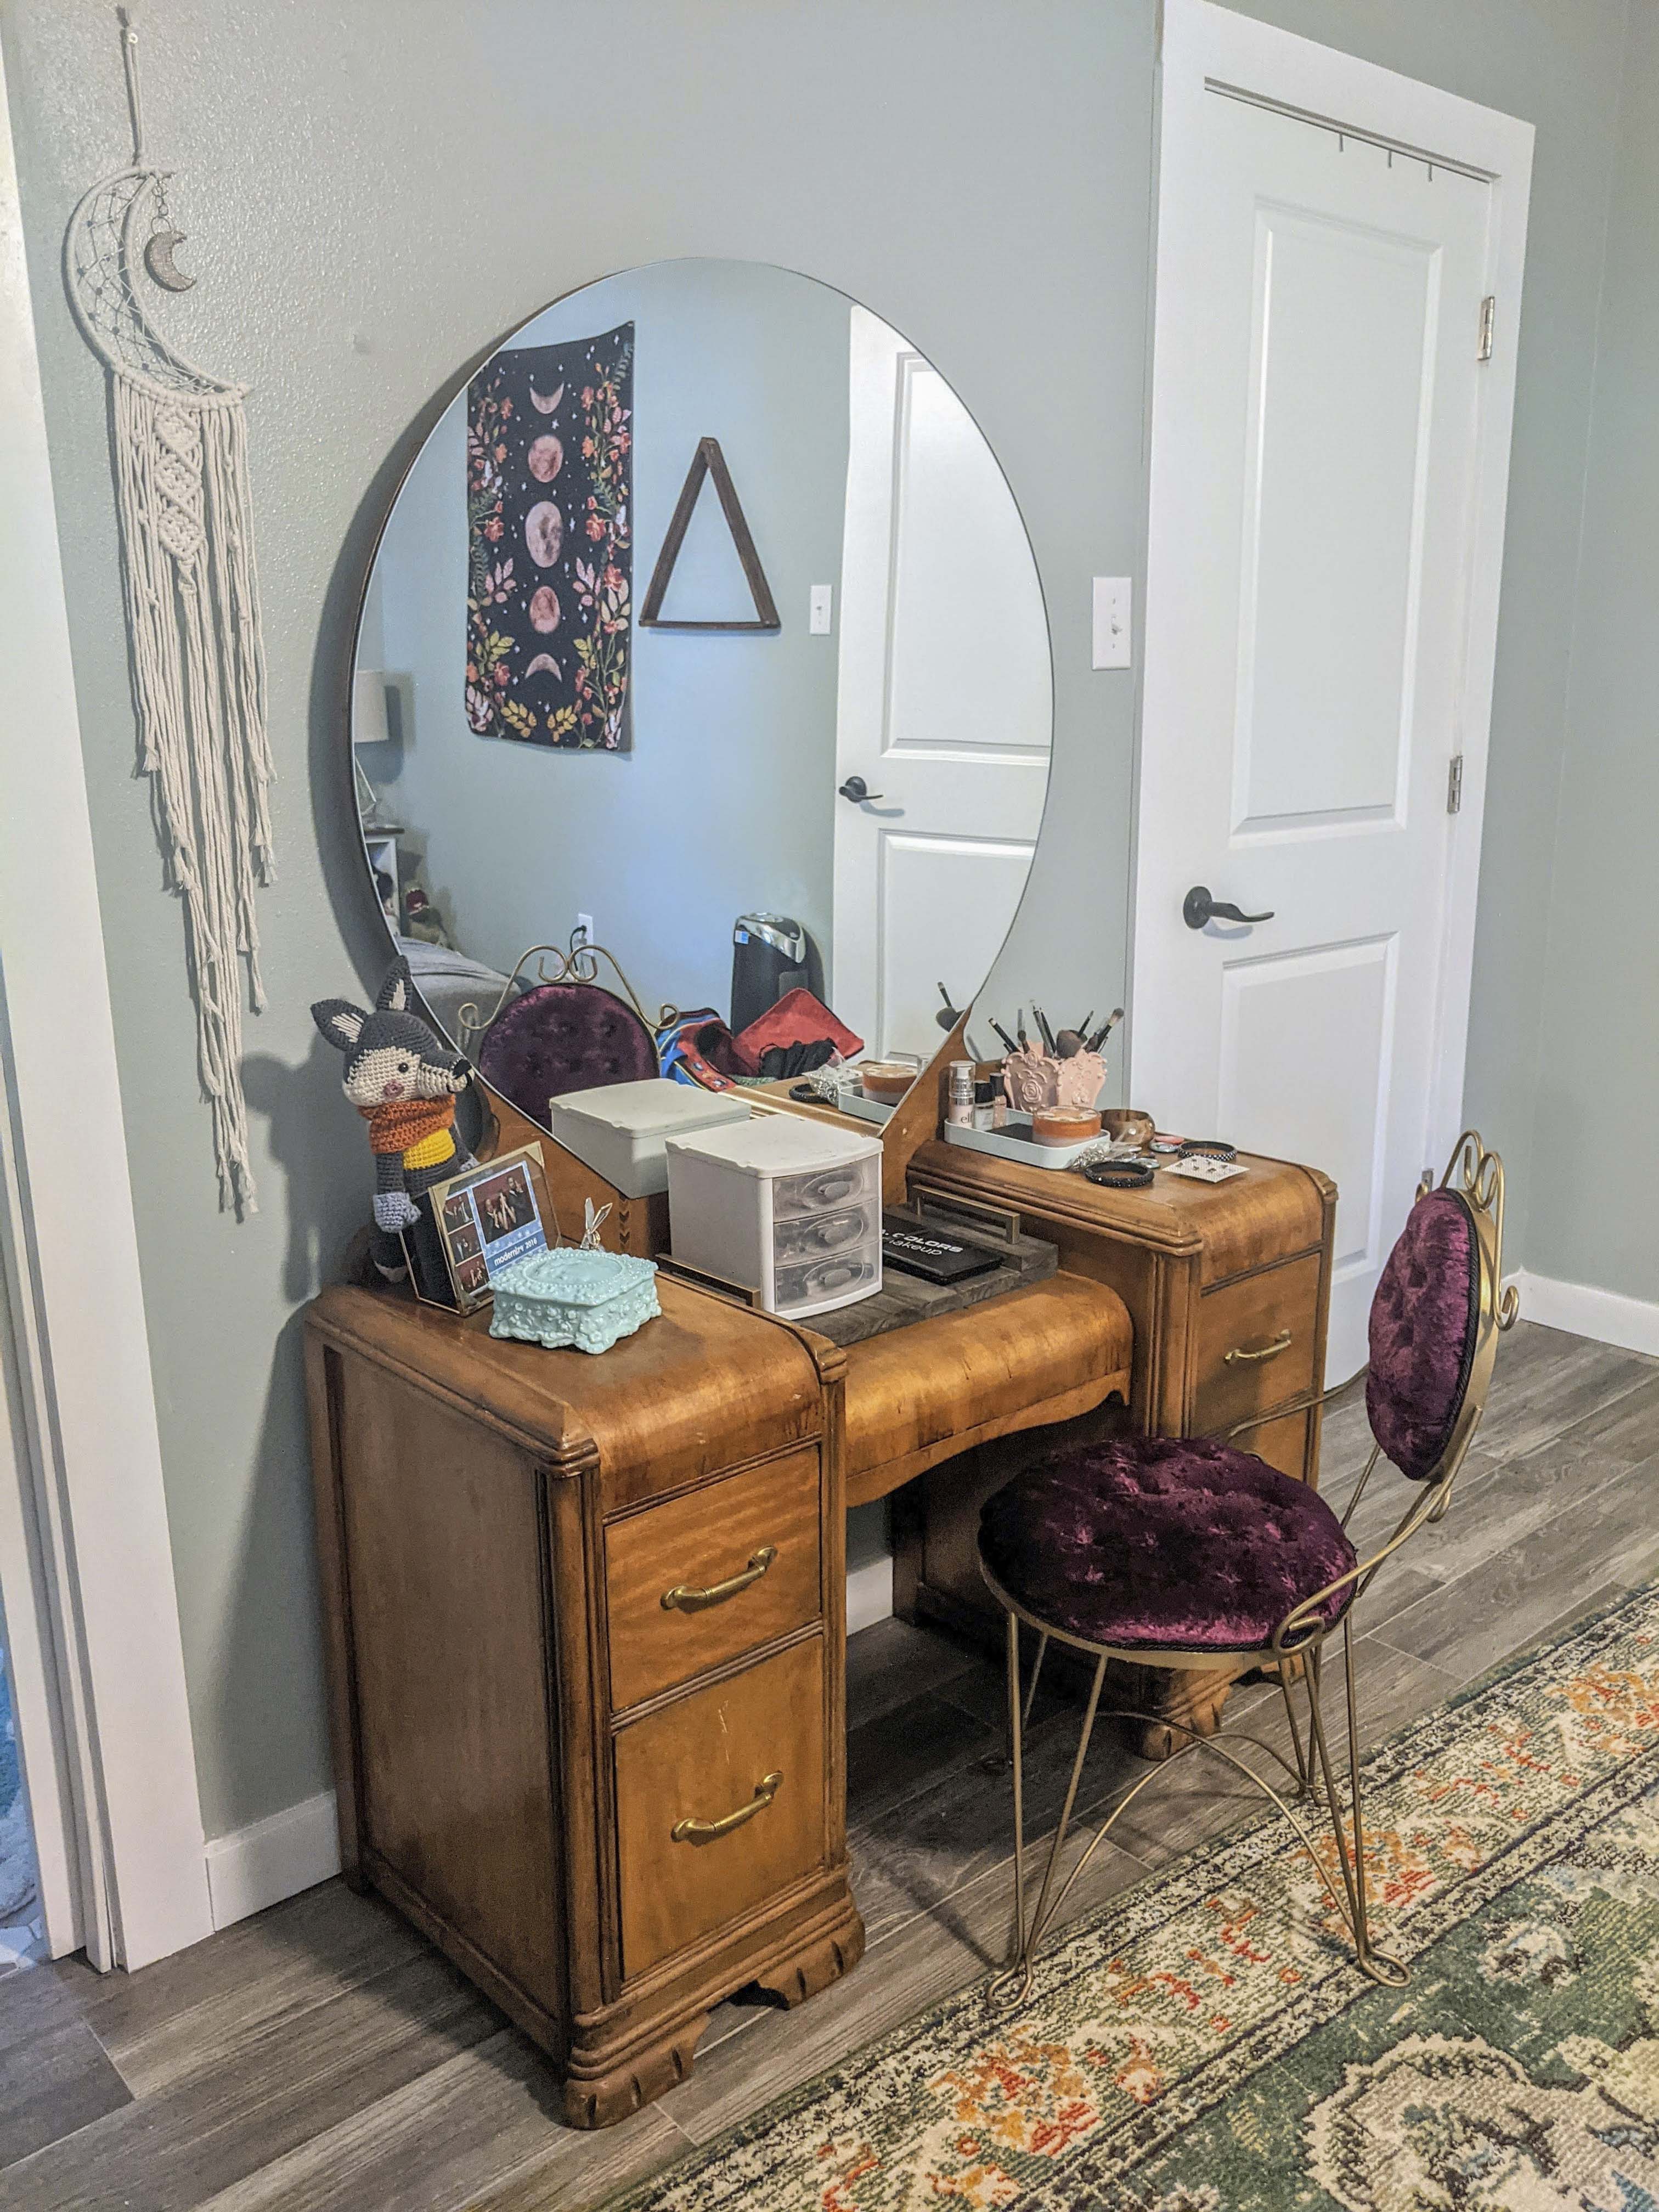
Here is my chair in its new home!