This is going to sound silly, but I’ve been hunting for placemats for a couple of months now. They either don’t fit with the vision I have in my head or they are too expensive. I only need them once a year so I didn’t want to blow a bunch of money on pre-made junk.
So I decided to blow money on crafting.
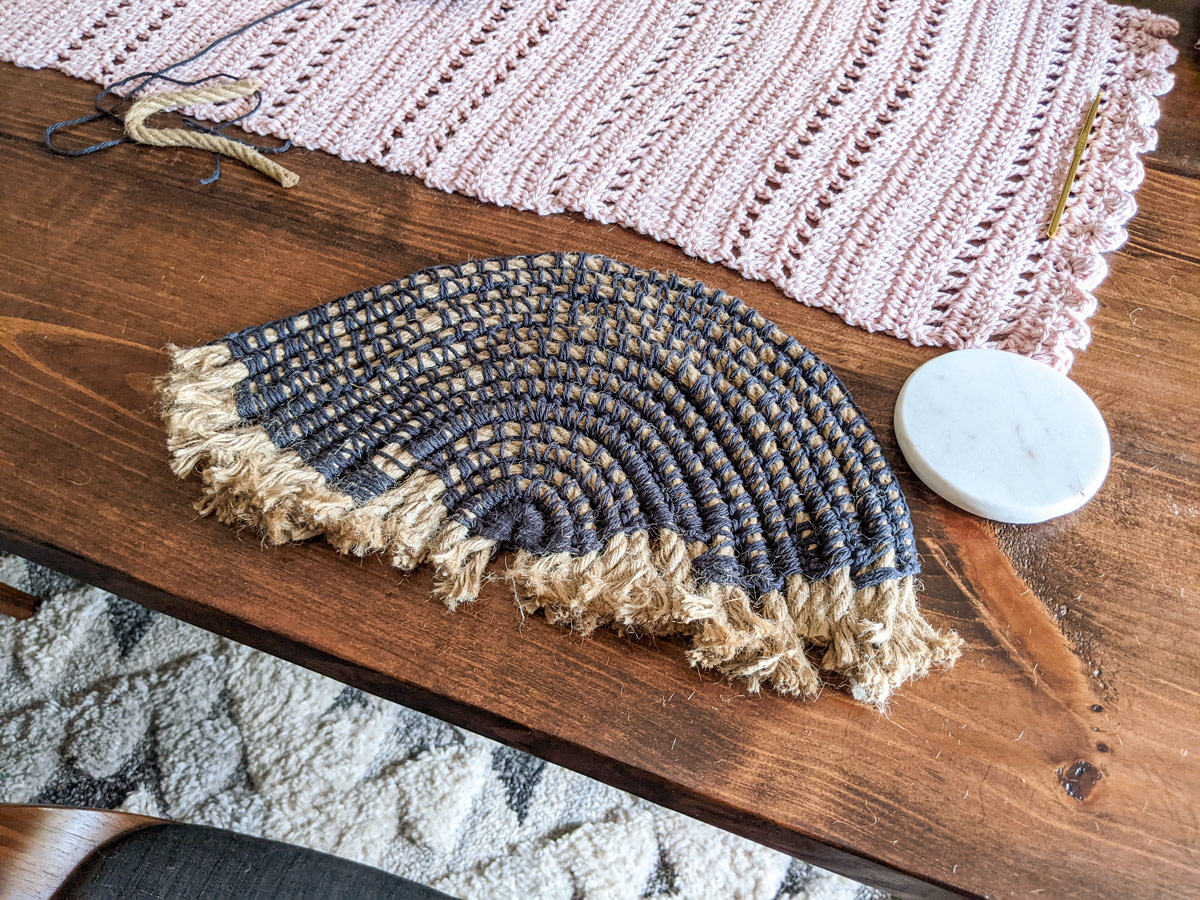
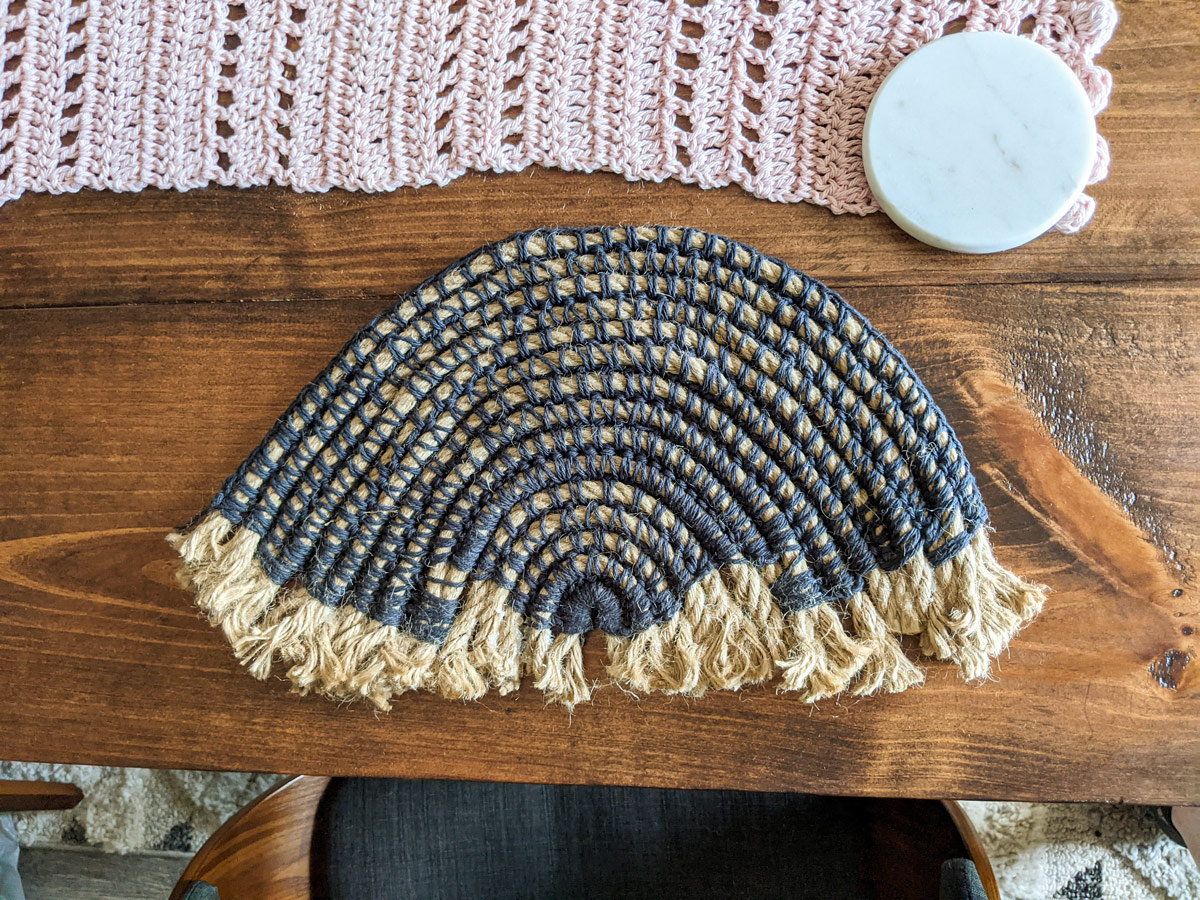
I had an idea in my head that I wanted a boho vibe with a little rustic thrown in. Neutral-toned rainbows are popular right now and I have to admit that I agree with the trend. I think they’re super cute so that’s the shape I decided on for my placemats.
I will note that doing a circle or rectangle would have been a lot easier so keep that in mind as you read.
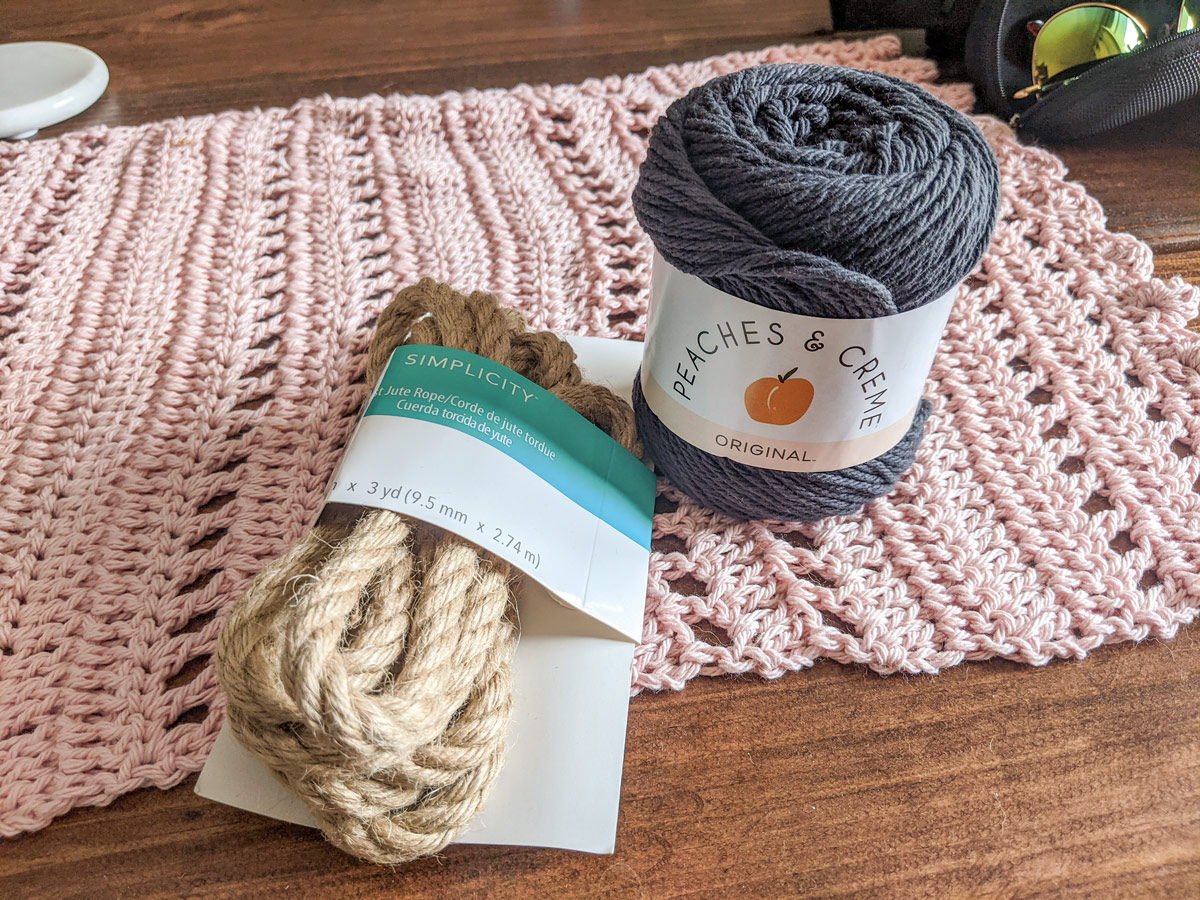
I admittedly went to Walmart because I knew they would have all the supplies immediately ready. The rope was about $5/package (I bought two) and the yarn was about $1.60 which was a lot more reasonable. I would suggest ordering in bulk on Amazon. You’ll get a way better deal especially if you need to make several of these.
I’ve also never done coil crochet but thought it would be the best way to join the rope strands together. I watched about two seconds of a video to learn how to start the coil and all it is is a magic circle and I thought I could wing the rest.
And I did okay for the most part! :P
This post and accompanying video will lay out the trial and error I went through making this placemat. It’s really too bad I need five more.
Supplies:
- Rope (6 yards, 3/8in thick)
- Yarn (Cotton, weight 4, dark grey)
- Crochet hook (H-5mm hook)
- Scissors
- Hot glue
How-to:
You can use any thickness of rope and color of yarn you’d like. Also, be aware that 6 yards might not be enough to get the desired size. This was a total experiment for me, so learn from my mistakes!
Start with a magic ring and place the end of the rope on top. I started with 14 single crochets in the magic ring. We’re going to be single crocheting around the rope from start to finish. When you yarn over and pull up a loop, you will pull it up past the rope so it’s even with the loop on your hook then finish the single crochet as normal.
Pull the ring tight and your rope will fold in half. This is the beginning of the rainbow.
Instead of crocheting in a spiral and working in the round, I’m going to be working in rows. So, chain one and turn your work, and then single crochet across as normal. Remember to always crochet around the rope.
We are going to repeat this process until we’re done basically.
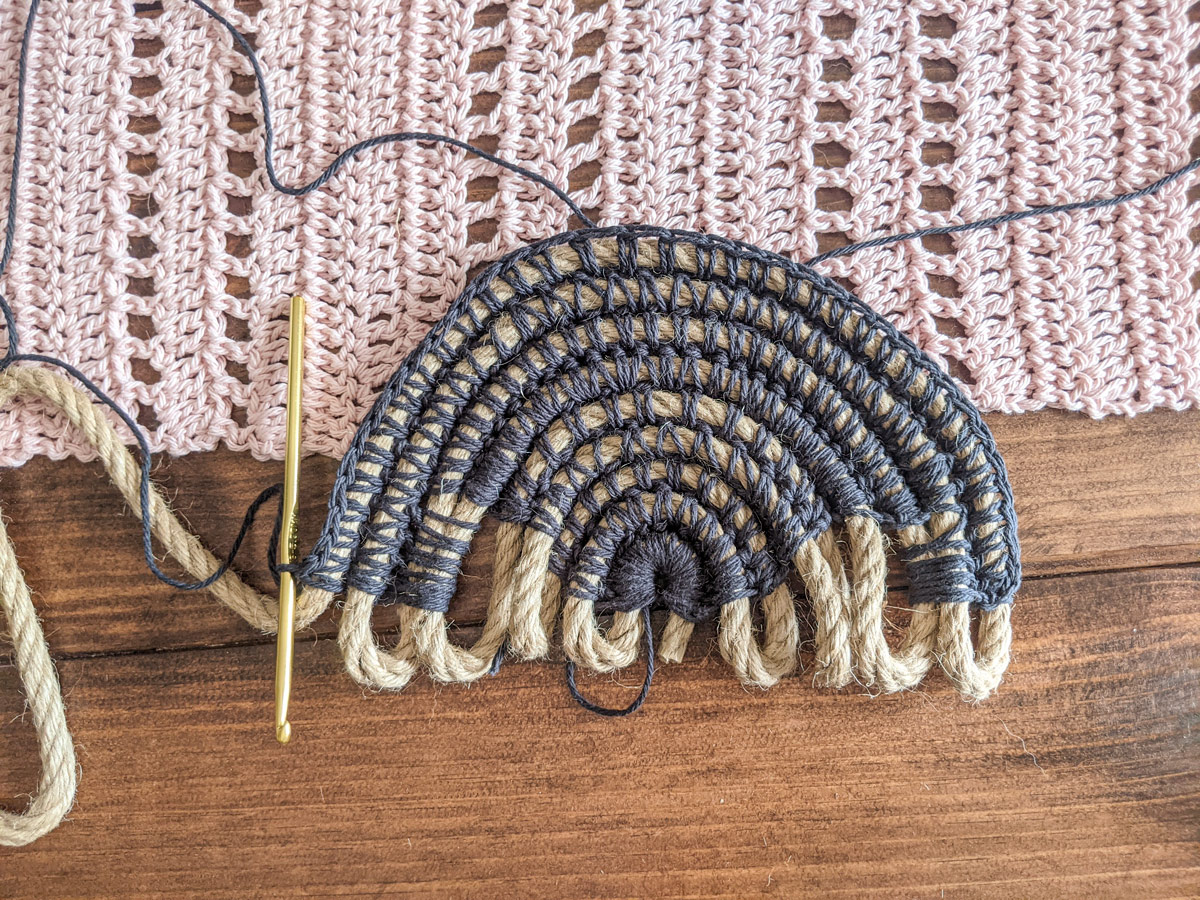
I noticed that my rows were getting shorter as the rope strands were getting longer. To mitigate this, add a few stitches to the end of each row. I did mine by crocheting around the bottom AND top piece of rope I was working through. This binds the ends of the rope together and will help the rainbow take shape.
When I used all of my rope, I finished off the yarn and cut all of the rope loops. I glued the ends together to bring in the rainbow a bit.
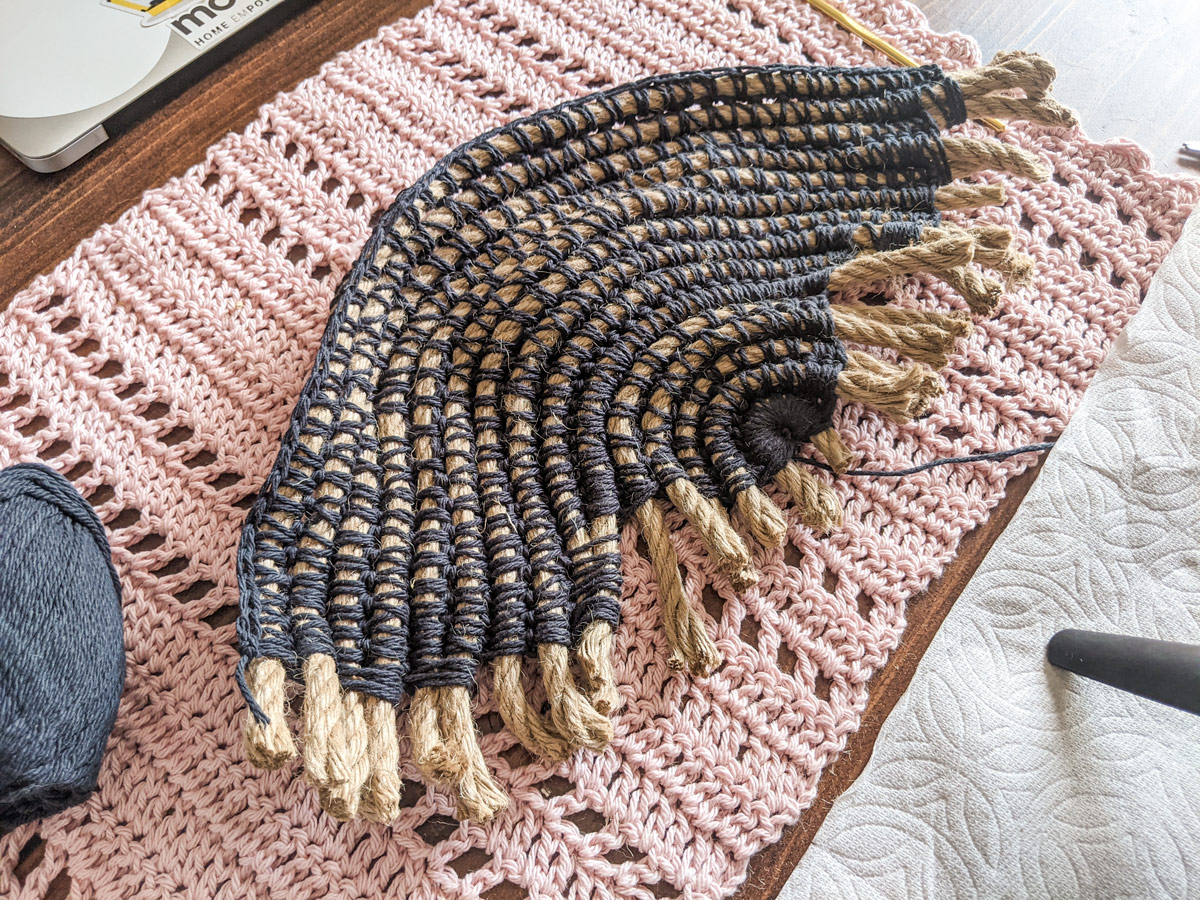
After burning my fingers a few times and letting the glue dry, I frayed the ends of the rope with my fingers to give it a more finished look. And to hide imperfections.