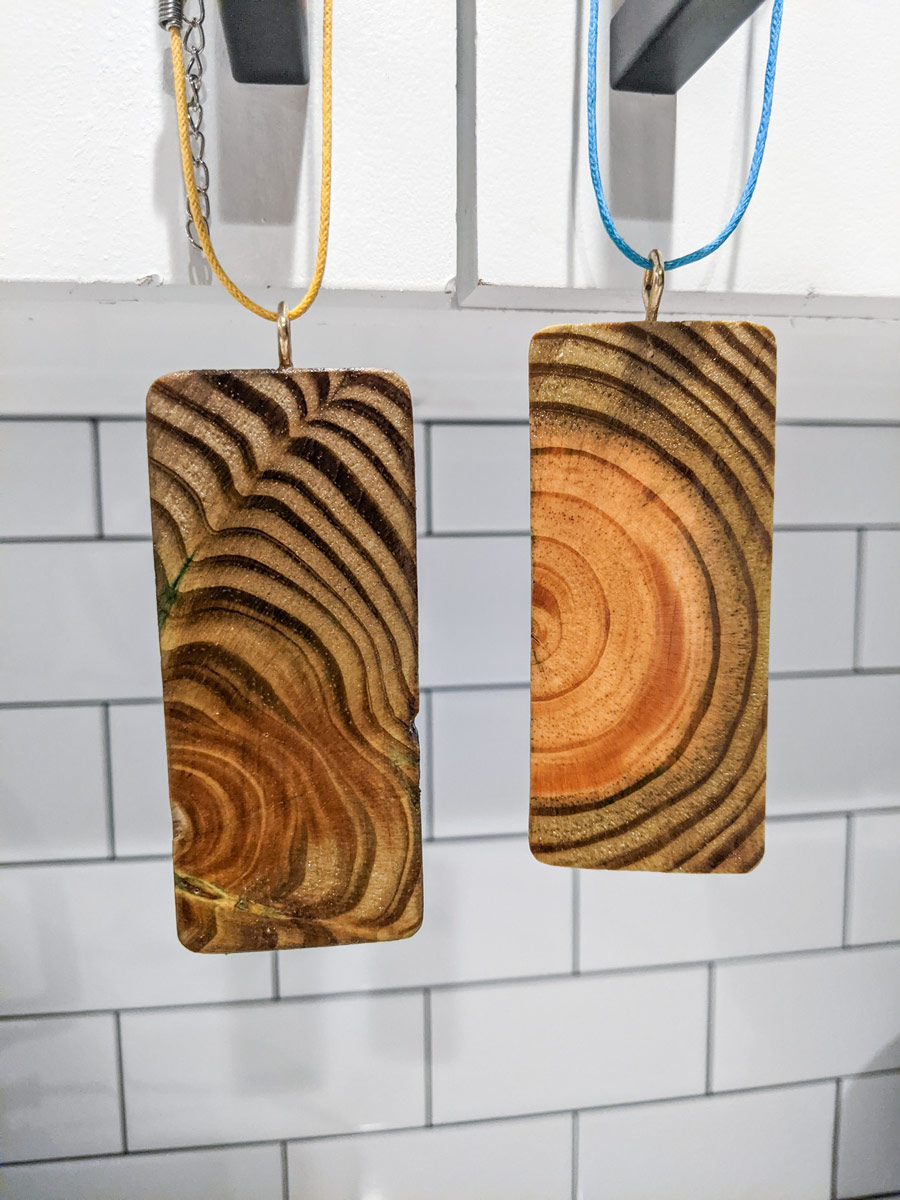
I think I’ve said this a million times in the last week about the origins of these pendants, but for those in the back who couldn’t hear, I got the idea while I was working on my deck insert. I was shaving down some 2x4s and the slices looked like they’d make great pendants, so I got to work.
Supplies
- Wood slices (I used 2x4s)
- Sander
- Drill
- Eye-hooks
- Boiled Linseed Oil
- Polycrylic
How-to
This DIY is going to be short and sweet, which is how I like it.
I sliced a few millimeters thick pieces off of a 2x4 and sanded them down so they were nice and smooth. I also rounded off the corners a bit. Be sure your pieces are thick enough to put an eye-hook in and not split, but not too thick that they’re heavy.
I cleaned them up and decided to seal them with boiled linseed oil. I tried stain at first, but it was going on too dark and I don’t get to use my bottle of oil too much so it was a good excuse to try it. The oil will help protect the wood and add a nice finish.
Using my tiniest drill bit, I drilled a pilot hole into the tops of the pendants so I could screw in the eye-hooks. The pilot hole helps the hook go in as well as prevents splitting.
When the oil was dry, I dipped the pendants into polycrylic and used a foam brush to wipe off excess. After the first coat is dry, I sanded them off with 220-grit sandpaper and applied another coat. You’ll want to repeat this process for however many coats you decide to do, but I settled on two (I think three would be better though).
I had some extra necklaces I got on eBay and used those so I can wear the pendants around my neck. I think a leather strap would look really cool with these.
And there you have it! Really simple, unique, and beginner-friendly necklaces!