Update: I now have nice PDF plans available on Etsy for these cabinet doors!
There are tons of “Ikea hacks” out there that help spruce up Ikea furniture and probably none more than the Kallax shelving unit. These things are super affordable and versatile. So much so that we have three of them.
However, over the years, I’ve been getting a little tired of them and the stigma that comes with having a lot of Ikea pieces. Some are really good-looking and look like you bought them anywhere, but some have that “cheap” vibe and I think the Kallax falls into the latter category.
They look nice, but scream Ikea and don’t really have any personality of their own. I think that’s the main issue for me. It’s so plain.
I’ve moved ours around the house giving them several jobs each. I’ve landed on an arrangement I like, but they needed sprucing up. I painted out 2x2 one a lovely shade of light green and it was our entryway table for a while before moving into the office where we could use the cubbies more efficiently. Our bright, red 2x4 one has become the home of all of our board games and some books as well as having plants all over the top of it. It looks really cute filled up. We got this one when we first moved in together in 2014 and I insisted on the firetruck red, so it gets to be a big statement piece now.
The last Kallax we own is another 2x4 that has been our tv-stand for years. We actually found it by the dumpster at our old apartment complex and it was in perfect shape. I guess someone just didn’t need it anymore. We grabbed it and brought it home.
However, now it’s kind of sad. The cubbies house electronics and wires that I don’t like looking at and it looks like a disorganized catch-all.
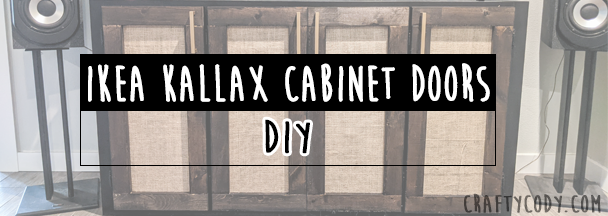
So, I figured, why not cover it up by adding doors?
It would create a new look without having to buy a new tv-stand (which are ridiculously over-priced, btw) and give me a little DIY project. I haven’t built anything in a bit and feel rusty, so I didn’t want to take on some over-the-top furniture piece. Four simple doors should be just fine.
Supplies
- Wood (1x3s)
- Miter saw
- Drill
- Sander
- Flat L-brackets or corner braces
- Wood glue
- Clamps
- Ruler and speed square
- Burlap
- Stapler
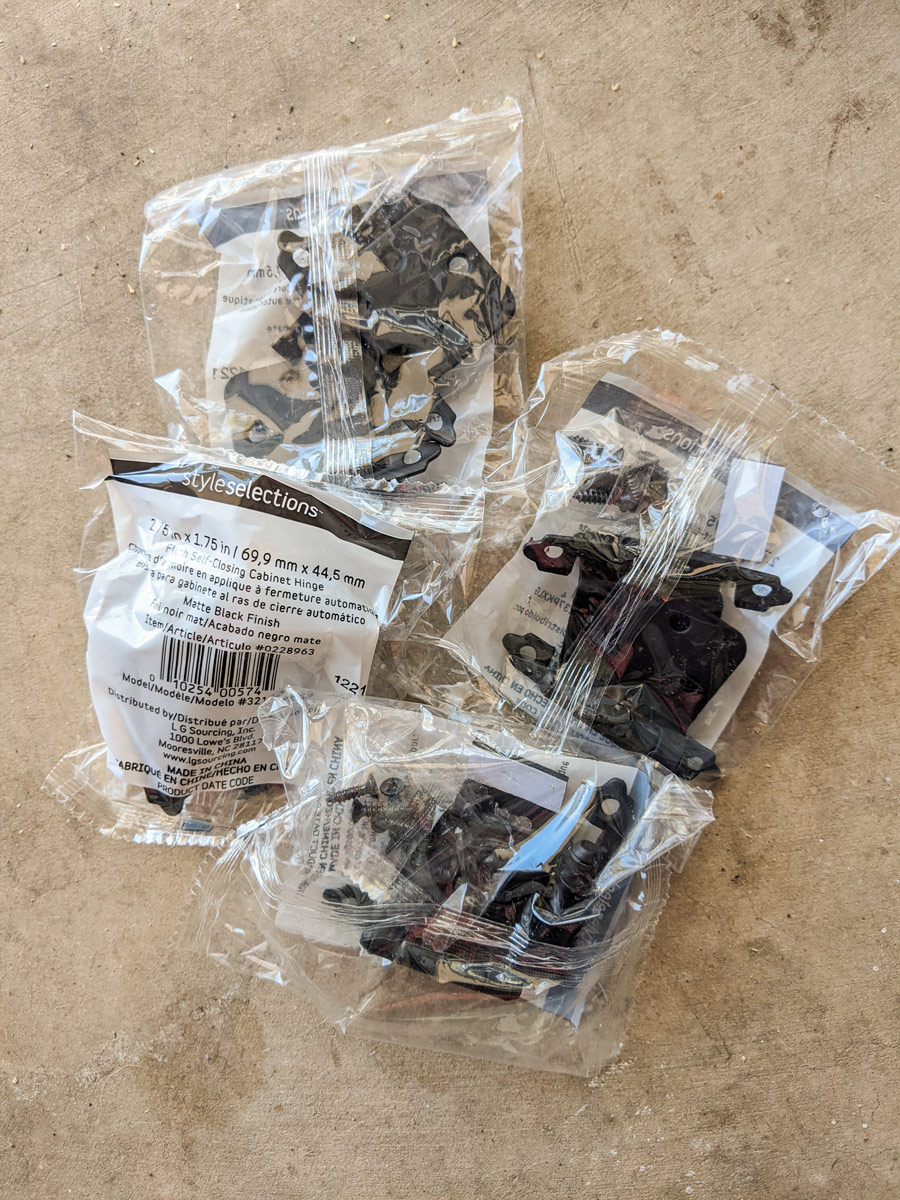
- Hinges
- Stain or paint
- Cabinet pulls or knobs
- Safety glasses and earmuffs
How-to
Step one, as always, is to draw out a plan. I’ve been toying with this idea for a while and finally decided to just do it.
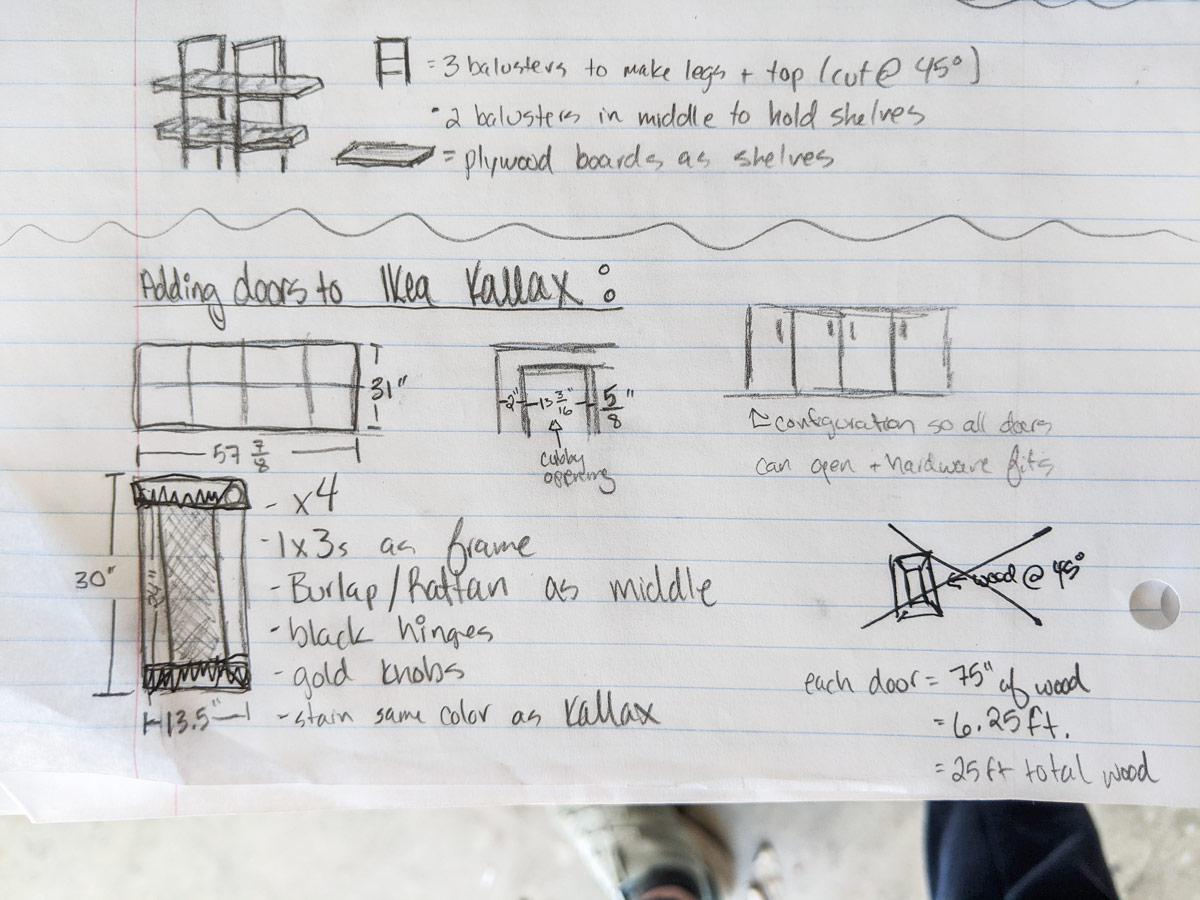
They’re a relatively simple design. Four cut 1x3s make up the frame and the middle will be covered with burlap to add a boho/mid-century look.
The kallax itself is 57 7/8" long and 30 3/8" tall. The cubbies are 13" square and the dividers between them are about 5/8" thick.
Each door consists of two 24" boards and two 13.5" boards with the smaller ones acting as the top and bottom to keep the doors narrow enough to fit across the cabinet.
Step two is measuring out all of the pieces and cutting. This is usually a quick process and I finished in about 15 minutes. I also spray painted some cabinet pulls I had from an old project versus buying brand new ones. I painted them an antique gold color because I thought it would look nice with the dark wood.
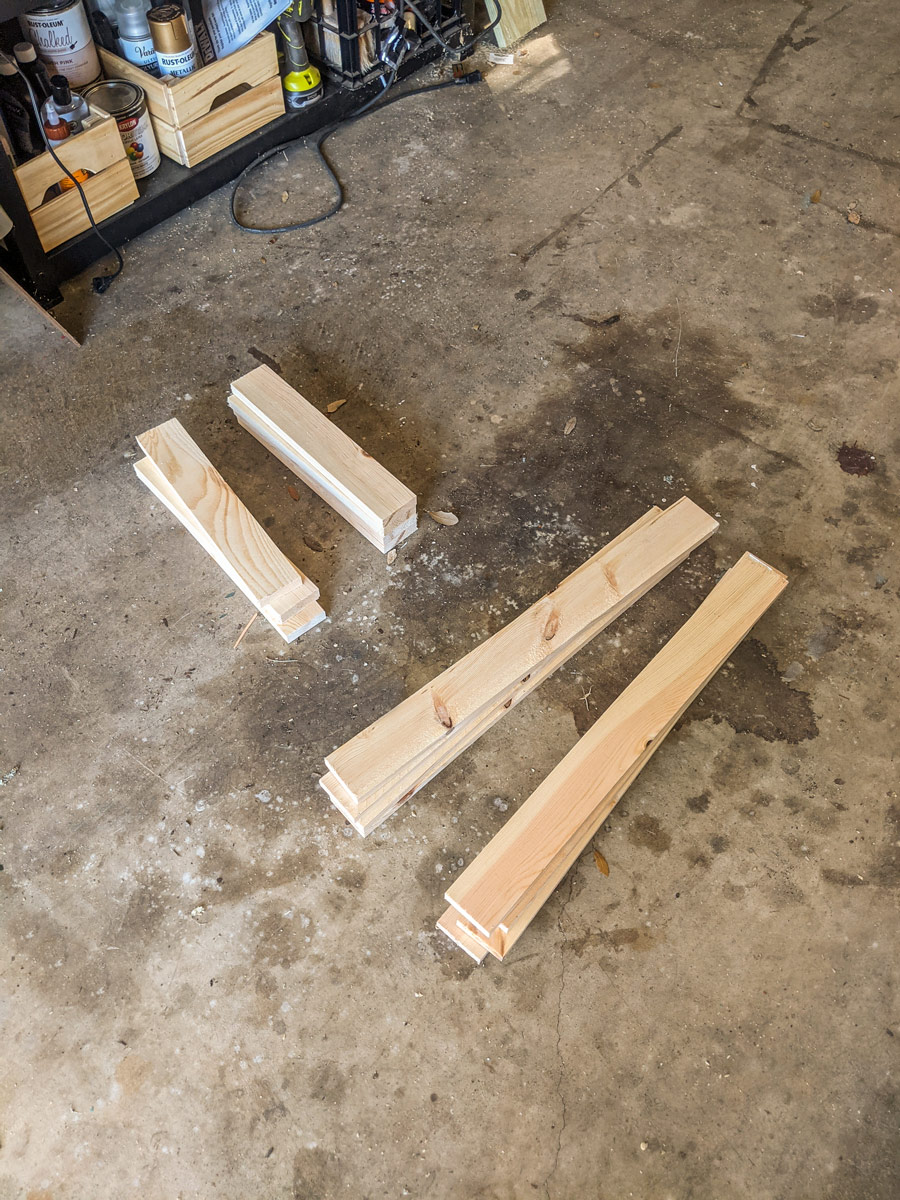
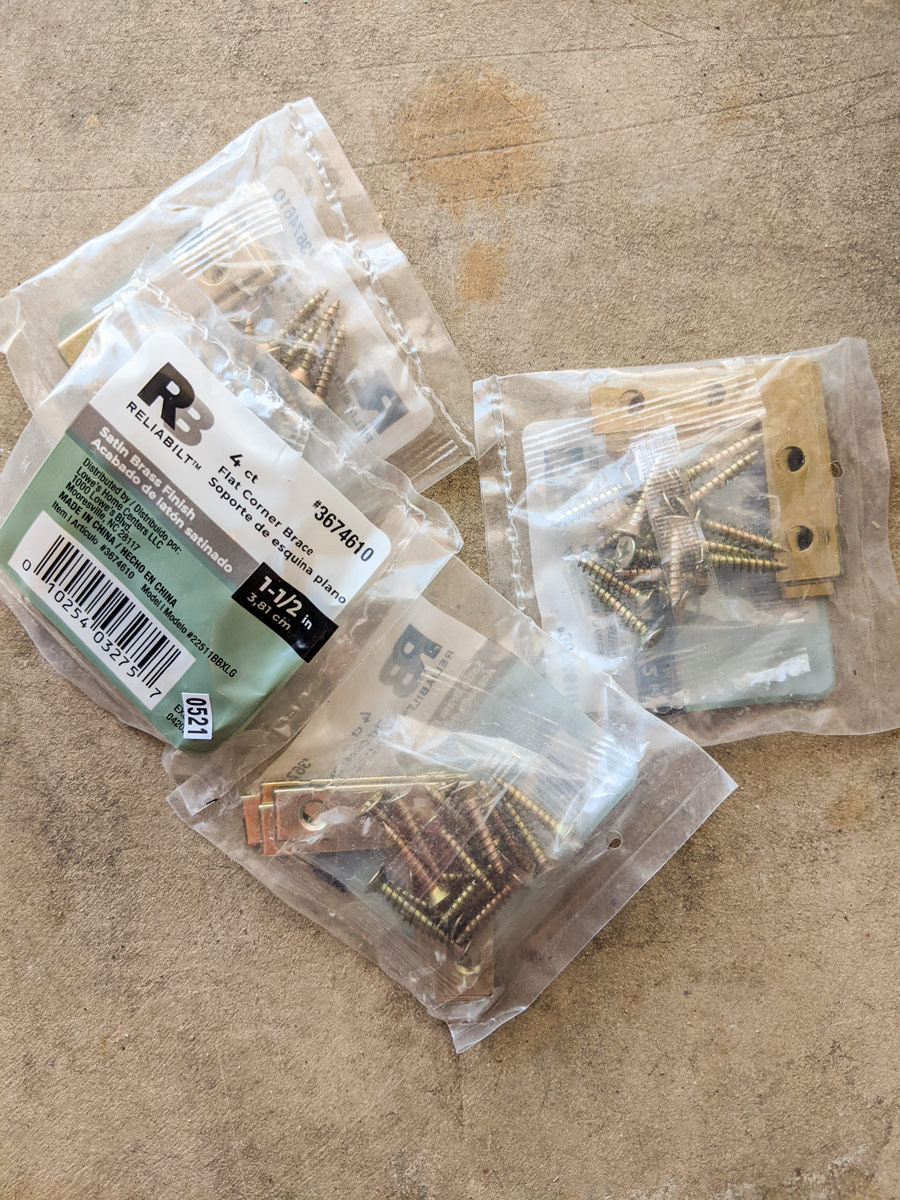
Once all the pieces were cut, I started gluing the boards and holding them together with clamps. Welcome to step 3. I also mounted the L-brackets to the backs of the doors during this step. I put them more in the middle of each join because I wanted to leave room for the staples I’d be using to attach the burlap. Pick the prettiest side to face outward.
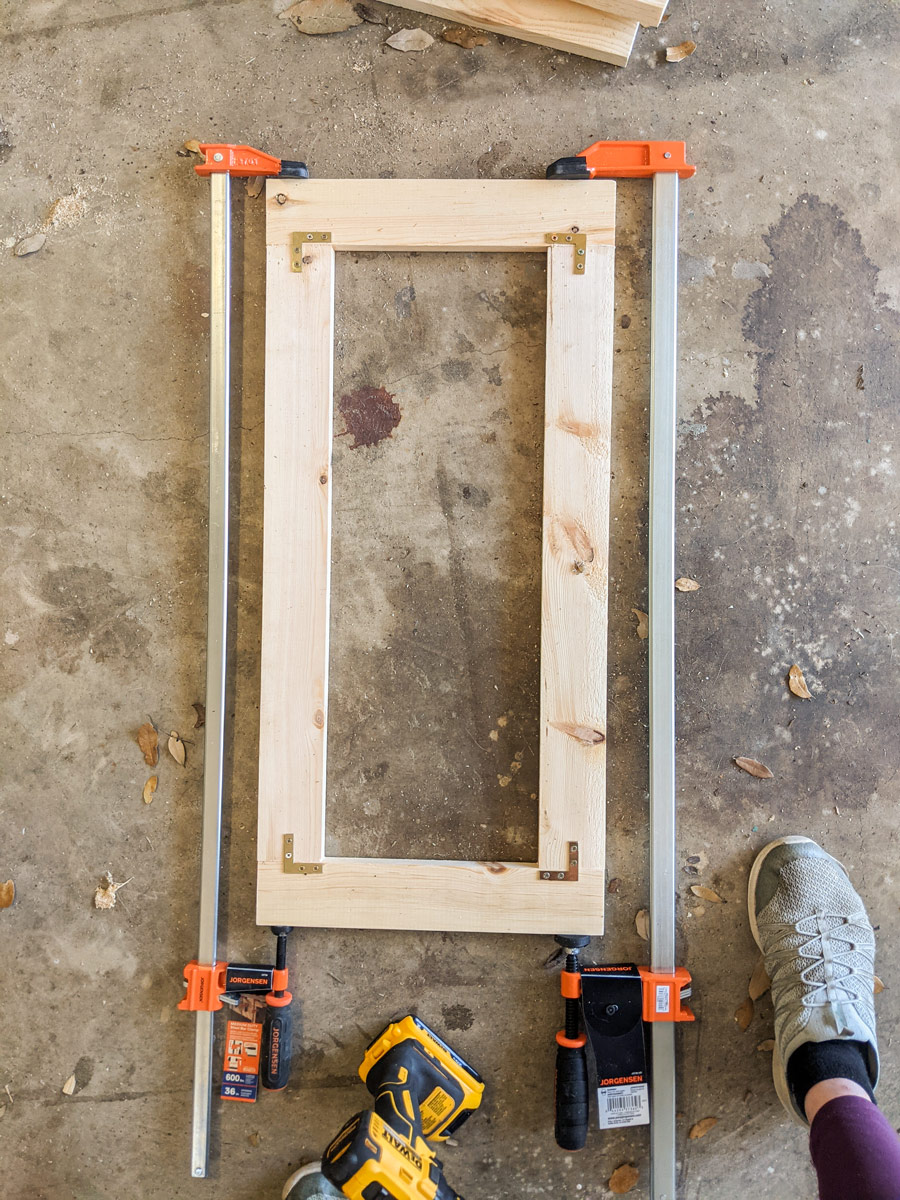
Drill your holes for your knobs or pulls now so you can sand them smooth. I used a 5/32" drill bit, but use an appropriate size for your screws. Make sure they’re all even by doing one door then line it up with the next one and drill through. This is quicker as you only need to measure one door and make it a template for the rest.
Literally waiting around for glue to dry takes forever as does step four which is staining. If you have any gaps in your pieces, now is the time to use some wood filler or sawdust to get rid of them. I used a dark stain (jacobean) that matched(ish) my kallax.

After I waited about a million hours for the stain to dry, it was time for step five: stapling on the burlap. You can use any fabric for the middle, but I was going for a boho/mid-century look without the cost of rattan. It’s a little bit of a pain, but pretty simple. I stapled down one side of the door, then pulled the burlap taut and stapled across the bottom, up the other side, and finally across the top. Again, always pulling it tight as I go.
Then, I attached the hinges to the top and bottom of each door and screwed on the cabinet pulls. I put the hinges so they would be touching the bottoms of the L-brackets.

Step six is lining up the doors on the kallax and seeing where I needed to drill to attach them. I held the door up and marked where the hinge holes hit then pre-drilled pilot holes so I wouldn’t split the cabinet. Then, all that was left was to drill them in place. Use a level to make sure it’s even.
My husband helped immensely with this last step. I really needed the extra hands. Once we got one up, it was easy to line the rest up and screw them in. The trickiest are the two that mount on the inside boards- it’s a skinny piece that you have to line up just right to avoid gaps.
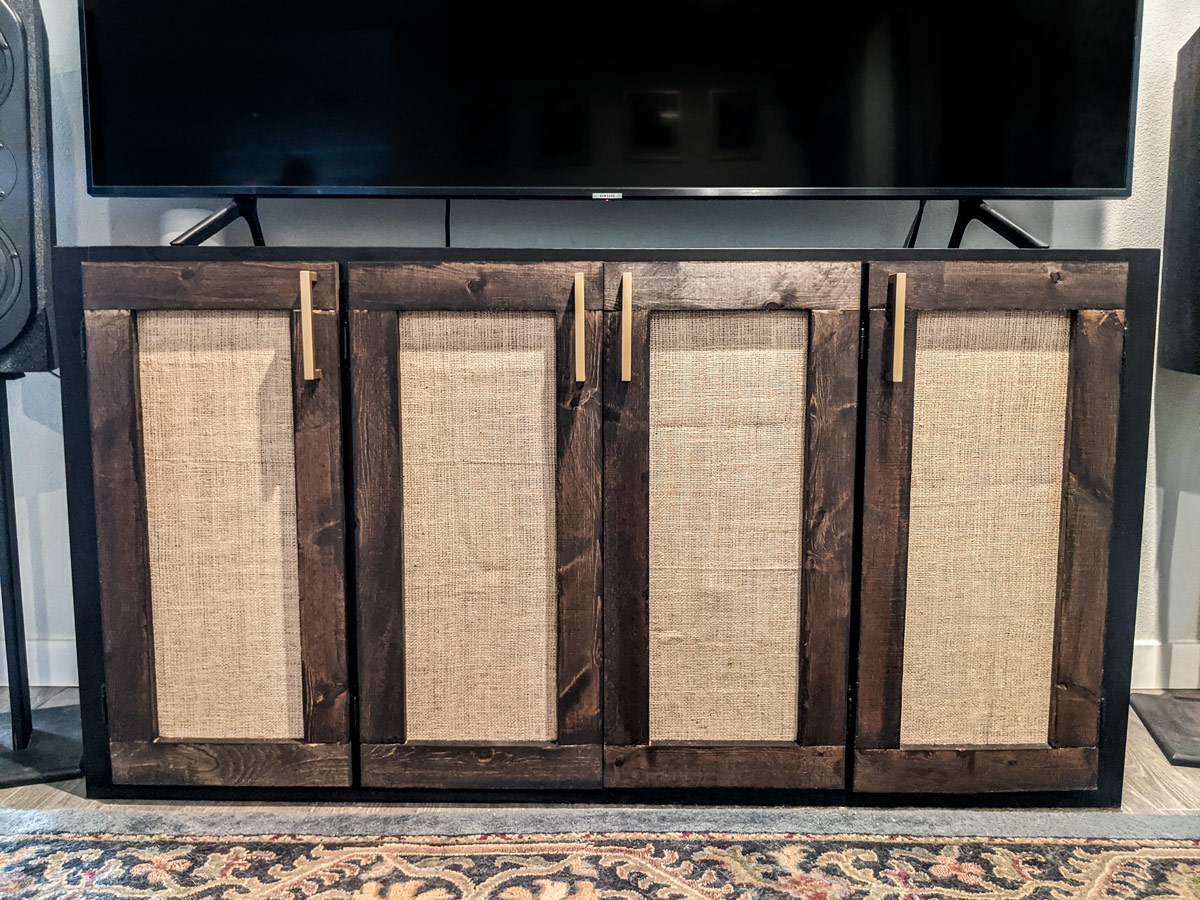
And here it is all done! I don’t know if I’ll be doing many of these Ikea “hacks”, but I was bummed not finding a tutorial for adding doors that I liked. Hopefully, you like these and will try them out too!