I get a lot of craft and DIY-related video recommendations from Instagram and Youtube. Over the last few months, I’ve gotten an influx of painting videos. I think because they teach you how to paint a thing, but they’re also very soothing to watch.
Recently, I’ve seen more and more people using a fresco technique. I don’t know if that’s what they call it, but that’s what it is. Fresco is paint added to plaster and painted onto a wall essentially making the painting part of the wall. The frescoes in the Sistine Chapel by Michelangelo are some of the most famous.
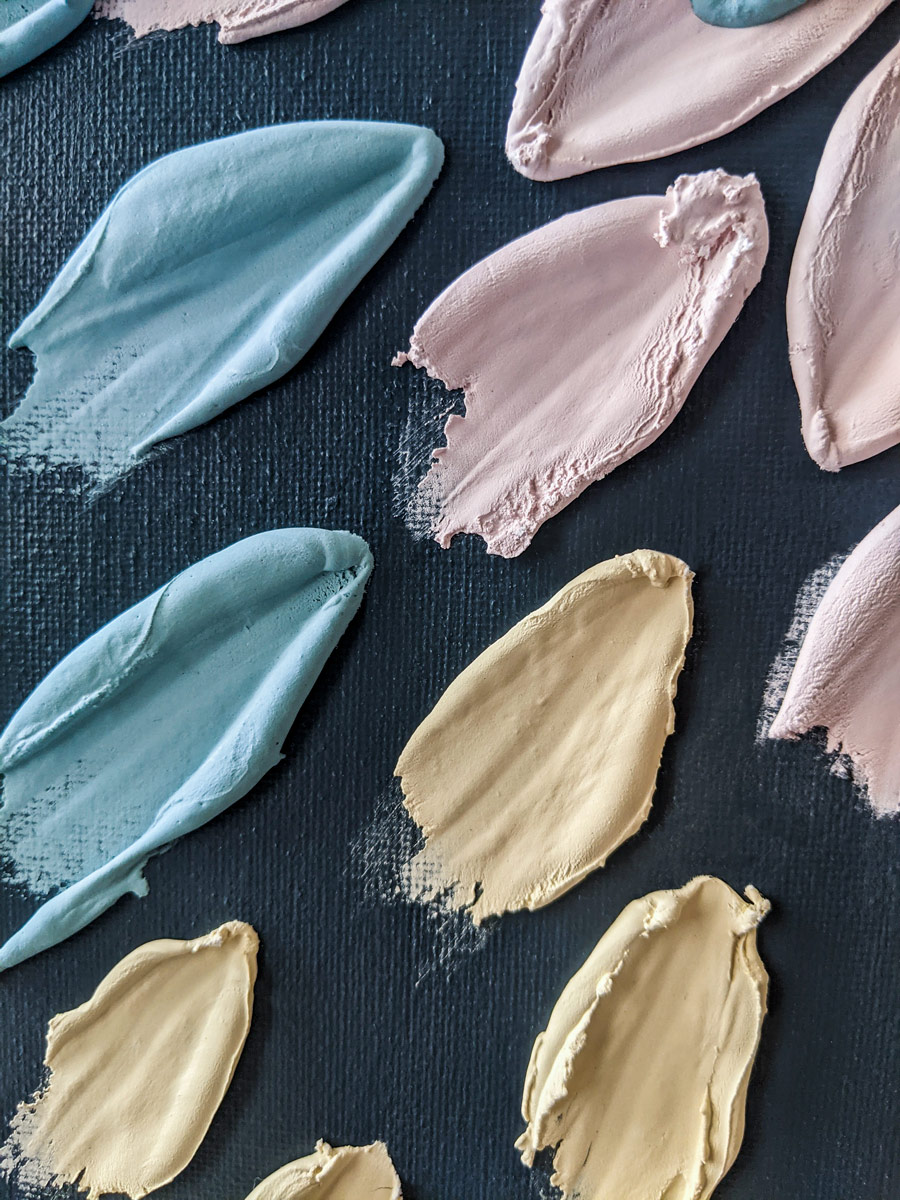
I’m not much of a painter, but I thought it was an interesting technique. Really what people are doing is just making plaster blobs on canvas and shaping them a little with a pallet knife. Nothing too complicated, but the end result is a textured, 3D painting that’s unique. It’s definitely a fun way to add color to a space.
So, this week I decided to try it. There isn’t much detail to go into, but I’ll share my successes and mistakes so you can have a jumpstart with your art.
Supplies:
- Canvas
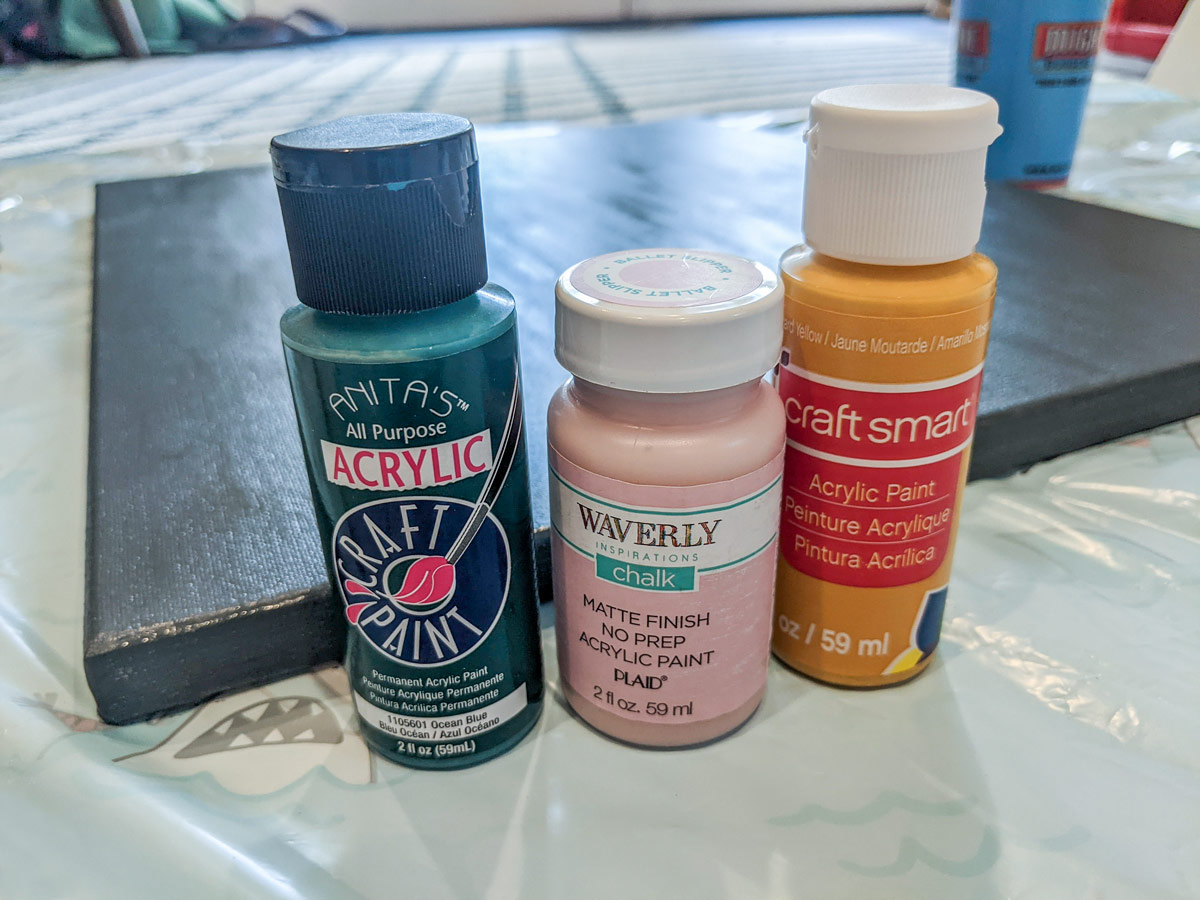
- Acrylic paints
- Pallet knife
- Spackle or Plaster (tip: use Plaster of Paris dry mix)
- Corn starch to thicken plaster if needed
How-to:
What’s nice about this project is that it’s fairly inexpensive and doesn’t involve sawing anything. I’m trying to keep out of my shop since it’s 100+ almost every day. I’ve set up an impromptu art studio in my sunroom and have been enjoying being inside and learning something new.
I got all of my supplies at Walmart in one fell swoop. I got a pack of five 16x20 canvases for around $15 which is great in case I really messed up. I decided I was going to make art for a wall in my living room and would use three of the canvases to fill the space.
Painting the Canvas
I decided to paint my canvas first as white was just a little boring for me. I went with a dark, blue-grey color. This will help the plaster pop. To be honest, I actually used an old paint sample we had. It’s called calligraphy by Behr.
How I prepared my plaster:
At first, I was worried I bought the wrong thing. When I opened the plaster bin, it seemed really runny so I gave it a good stir but it was still pretty thin- at least in comparison to what I’m used to. I also bought two jugs of it so I was especially upset. However, I decided to run a little experiment and added some corn starch to help thicken it up and it worked! You may want to look into other options for this because foodstuffs have a chance of going bad, but I’m going to risk it.
I spooned some plaster onto a paper plate, mixed in my desired paint color, then added the corn starch to thicken it.
Instead of buying ready-made plaster, next time I’m going to get Plaster of Paris dry mix. This way I can thicken as needed with the powder and don’t run any risk of mold.
Loading the pallet knife
I had to watch a video on how to do this because I messed up several times when starting. I scraped up a lot of plaster from my canvas. Don’t feel bad doing this, you can always paint over it- I did! You can’t even tell.
Anyway, the video I watched showed how to load the pallet knife. Scrape a little plaster onto one side and then do the same for the other side. This seems to help the plaster “roll” smooth onto the pallet knife otherwise you’ll be stuck with a big clump that won’t spread nicely onto the canvas.
Painting
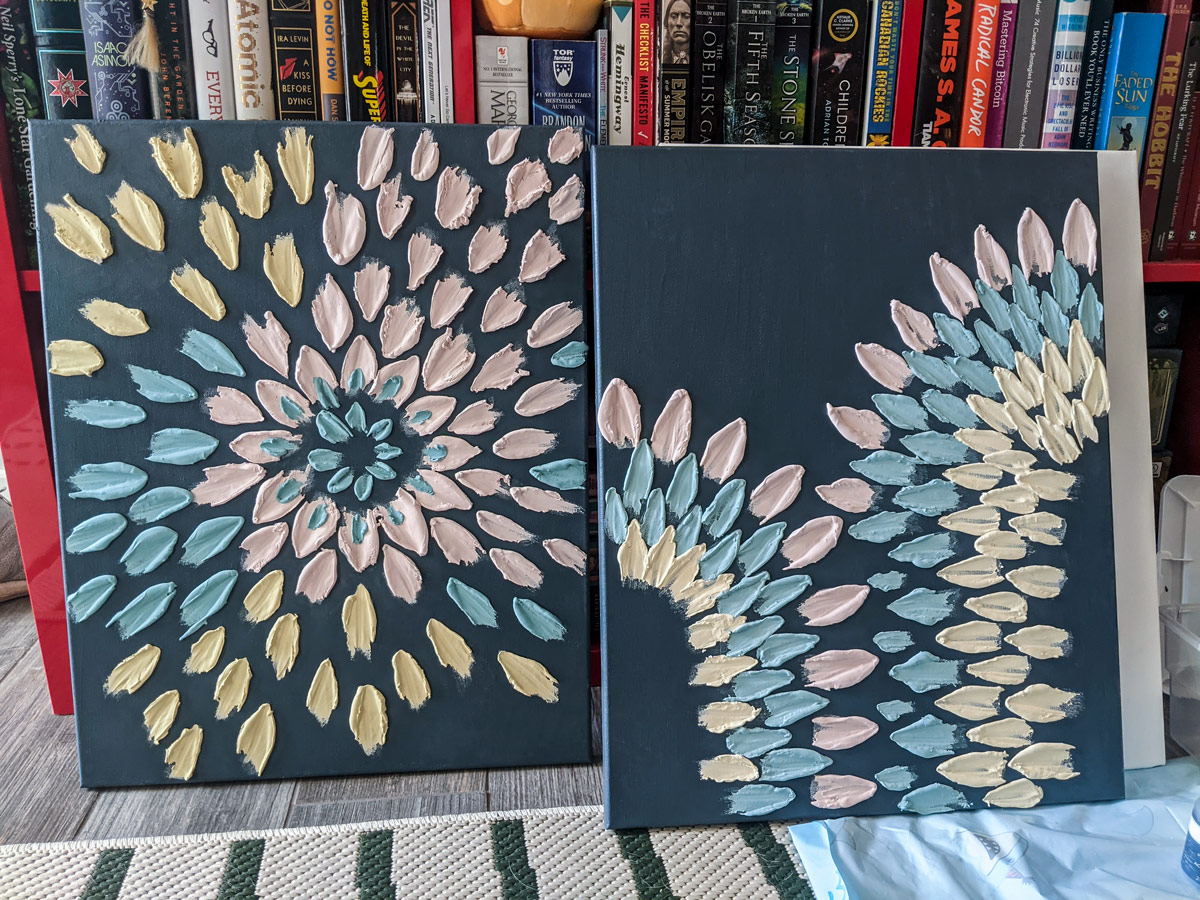
All that’s left is to get creative! I tried starting in the corners but restarted several times so I changed tactics and started with a flower shape in the middle then worked my way out. Eventually, I found my rhythm and each blob of plaster looked better and better. I won’t say they ever looked great, but by the end, I kind of had an idea of what I was doing. I’m hoping my second painting will look even better.
I’m going to make each painting quite a bit different than the others. I toyed with the idea of making them continuous, but I don’t think I’d be able to execute that how I’d like. It always looks better in my head! So, I’ll keep the same color pallets for consistency, but the designs will be different. It’ll still be quite striking on the wall.