There are Amazon affiliate links for the products I use at home. I make a small commission with your purchase, but there is absolutely no charge to you.
I get nervous when mounting anything to the wall. I always feel like it’s going to come crashing down in the middle of the night. However, that’s literally never happened to me (yet) because I always drill into studs.
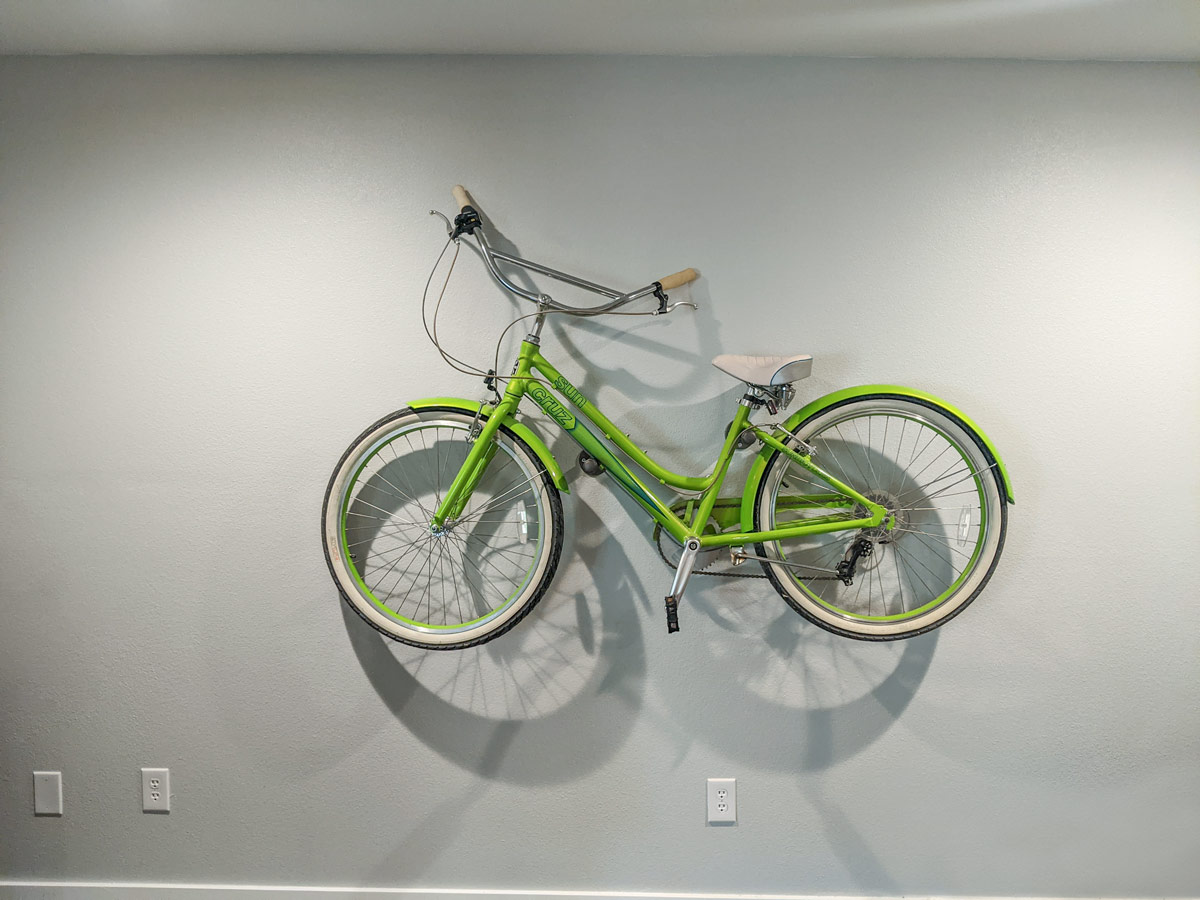
It doesn’t matter though because I felt the same when my husband suggested we mount my super-cool, lime green beach cruiser on our living room wall.
It’s a large wall that was previously taken up by acoustic panels and store-bought art pieces. We didn’t really know how else to fill it so it became a catch-all of sorts. The acoustic panels did help since our bedroom is right behind the living room and this big wall has the hallway on the other side of it. The space was definitely functional but lacked any kind of personality.
Enter my bike. It was a birthday present from my folks back when I still lived with them. Yikes, that was a long time ago. It’s made a couple of moves with us and I just don’t use it as much as I should. We keep moving to hilly areas and it’s really suited for flat terrain i.e. a boardwalk at a beach.
We’ve been doing a little spring cleaning and selling unused furniture on OfferUp and my husband wanted me to add the bike to the list. It’s been living in the garage and getting in the way of my makeshift workshop. The thing though is that I love this bike. I love how beach cruisers look, I love that it’s my favorite color, and I love it because it was a present from my parents. I have a really hard time giving away anything that has the slightest bit of meaning which is why most of my stuff is still at my parent’s house.
Imagine my surprise when he suggested we should mount the dang thing onto the wall so we could display it properly. Very exciting.
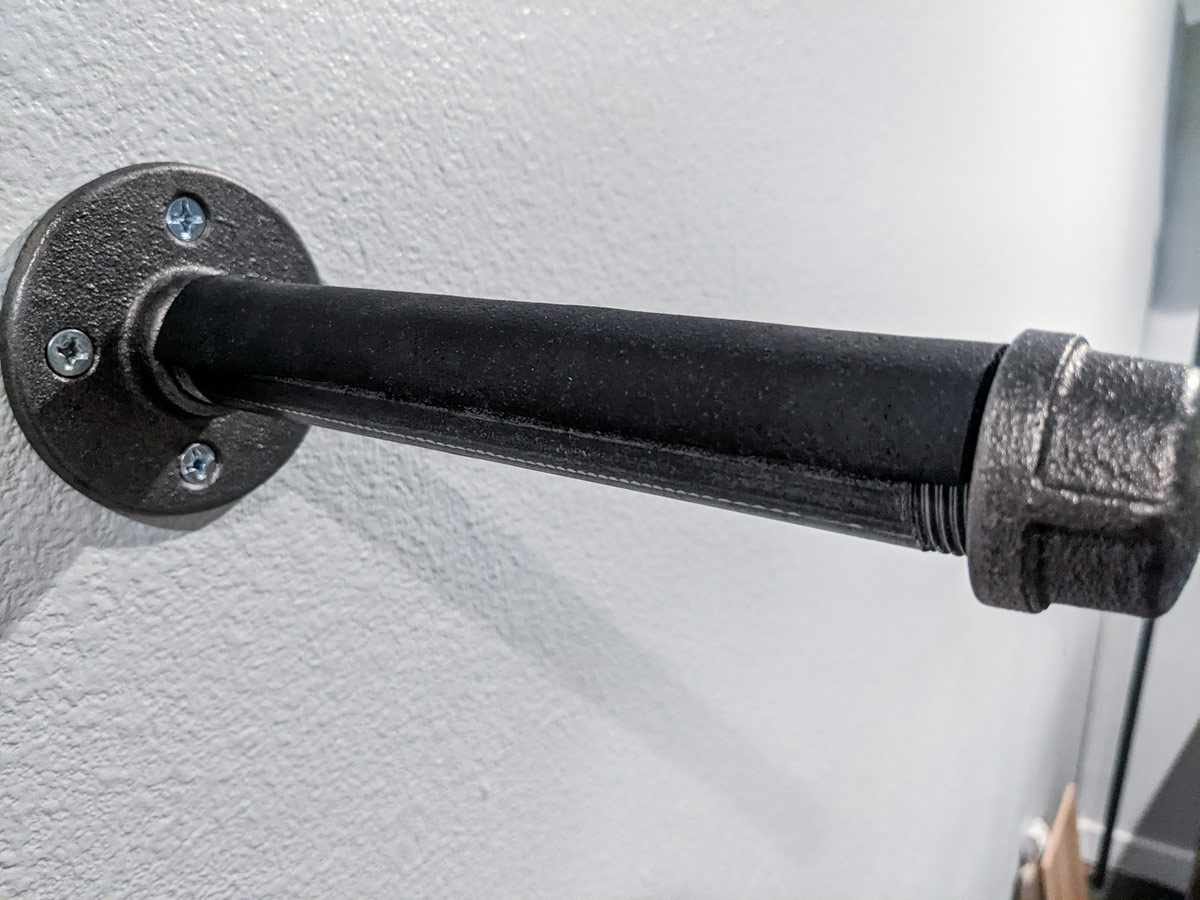
I searched around online to try and find mounts I liked and nothing was really grabbing me or were way too expensive. I did find a few that were basically pegs in the wall and it clicked. I would use the same shelving brackets we used on our kitchen shelves! They’re 8-inch iron pipes that can each hold about 80 pounds. The bike doesn’t weigh that much, but it is a lot heavier than normal bikes so I was happy to overcompensate on the weight requirements.
Let’s get started!
Supplies:
- Drill
- Impact driver
- Pipe shelf brackets (x2)
- Screws (x8)
- Stud finder
- Insulation tape (helps reduce scratches)
- Bicycle
How-to:
Setting Up
For my bike to fit up against the wall, we had to pivot the handlebar around 90 degrees and remove one of the pedals. It sits flush against the wall this way and they’re easy fixes. My pedal was stuck on there really well and I watched this video which worked like a charm. The only tool needed is a 15mm box wrench. You’ll probably need a large hex key to loosen the handlebars and turn them then tighten them into place.
We took everything off our wall and removed all the hooks/nails. My husband lifted up the bike and I directed him around until it was level and centered(ish) on the wall.
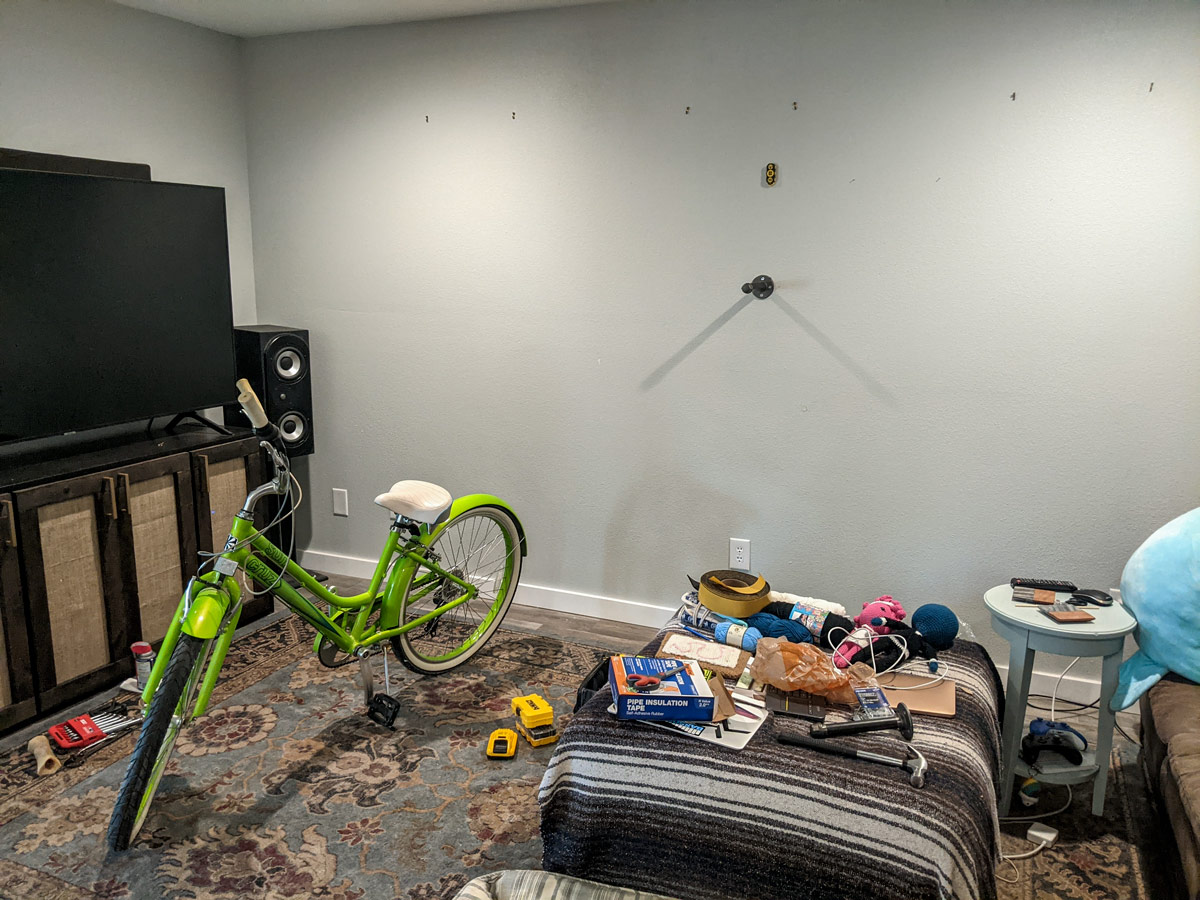
When we found the right position, he lifted it back up and I placed each pipe bracket on the wall and in the spot where it would hold the bike. I used a pencil to mark where the holes were so I could predrill them without anyone having to hold anything up. Remember to use the appropriate size bit for the screws you’re using. I bought this screw/bit size checker so I always know which bit to use.
Drilling
Once I predrilled all eight holes, I put the brackets back on the wall so I could mount them. This is where I used my impact driver. It does a great job drilling into the studs. I used #12 1-1/2 inch screws to mount the pipe shelf brackets. These were the recommended screws labeled on the brackets themselves.

There wasn’t too much trouble mounting these. It’s important to predrill since that’s like a guide for the screws and helps them go in straight. Predrilling also helps you determine that your holes are in fact going into studs. If there is no resistance then it’s probably just drywall. I had to adjust a few of the holes for this reason but it’s better to figure it out before you’re actually mounting the brackets. You want at least two screws on each bracket going into the studs.
Mounting
The last thing we did was to wrap a little rubber insulation tape around the pipes. This will, hopefully, help in reducing scratches on the bike itself from the metal brackets.
Now, onto the moment of truth! All that’s left is to pop the bike up on the wall and hope for the best. It’s been a few days now and she’s still up there. I’m also not seeing any hairline cracks on the wall so I’d call this a success.
It’s a fun way to put some “art” up on a large, lonely wall and a unique way to store your bikes.