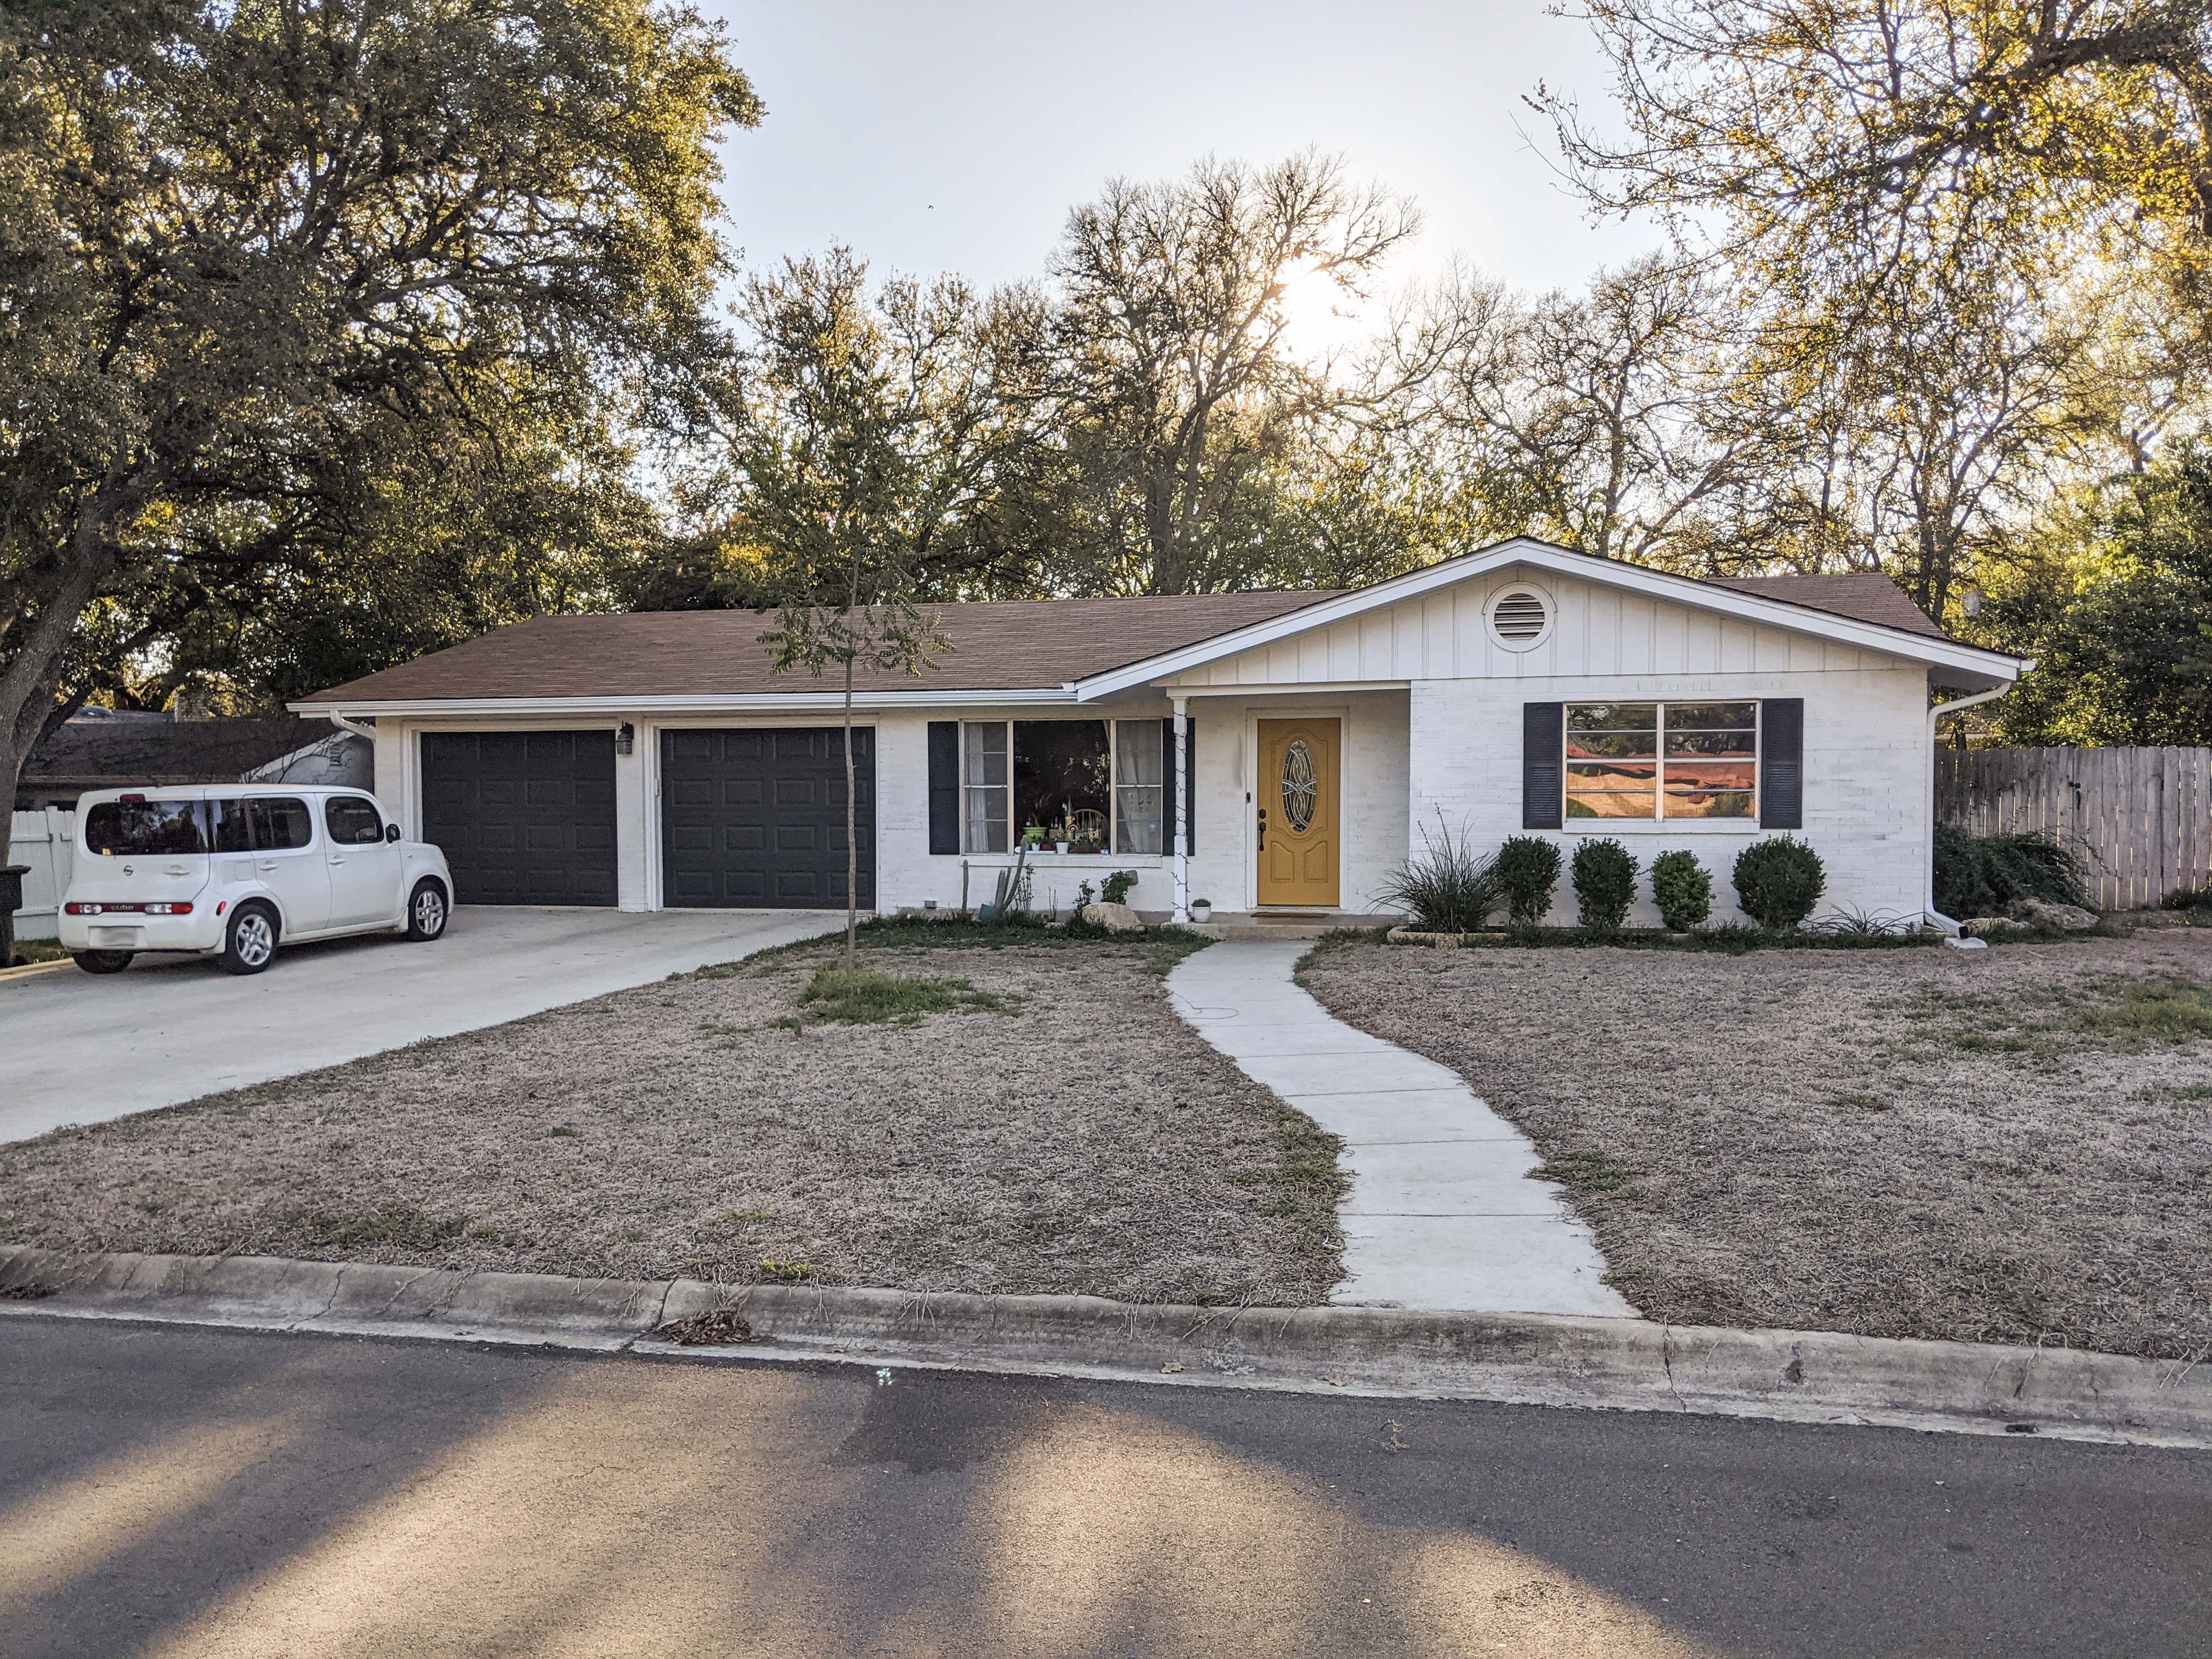
The previous owners of our house took meticulous care of the lawn.
We did not.
After we closed, we immediately started renovating the interior and therefore stopped running the sprinklers since we weren’t even living here yet. That obviously killed the yard and doubly so since we renovated during the summer.
However, we just learned that we have some of the most expensive water rates in the state of Texas, so we were pretty happy we stopped watering during that time. A couple of our neighbors have told us their first water bill was over $1000 because they didn’t know. It was ridiculous.
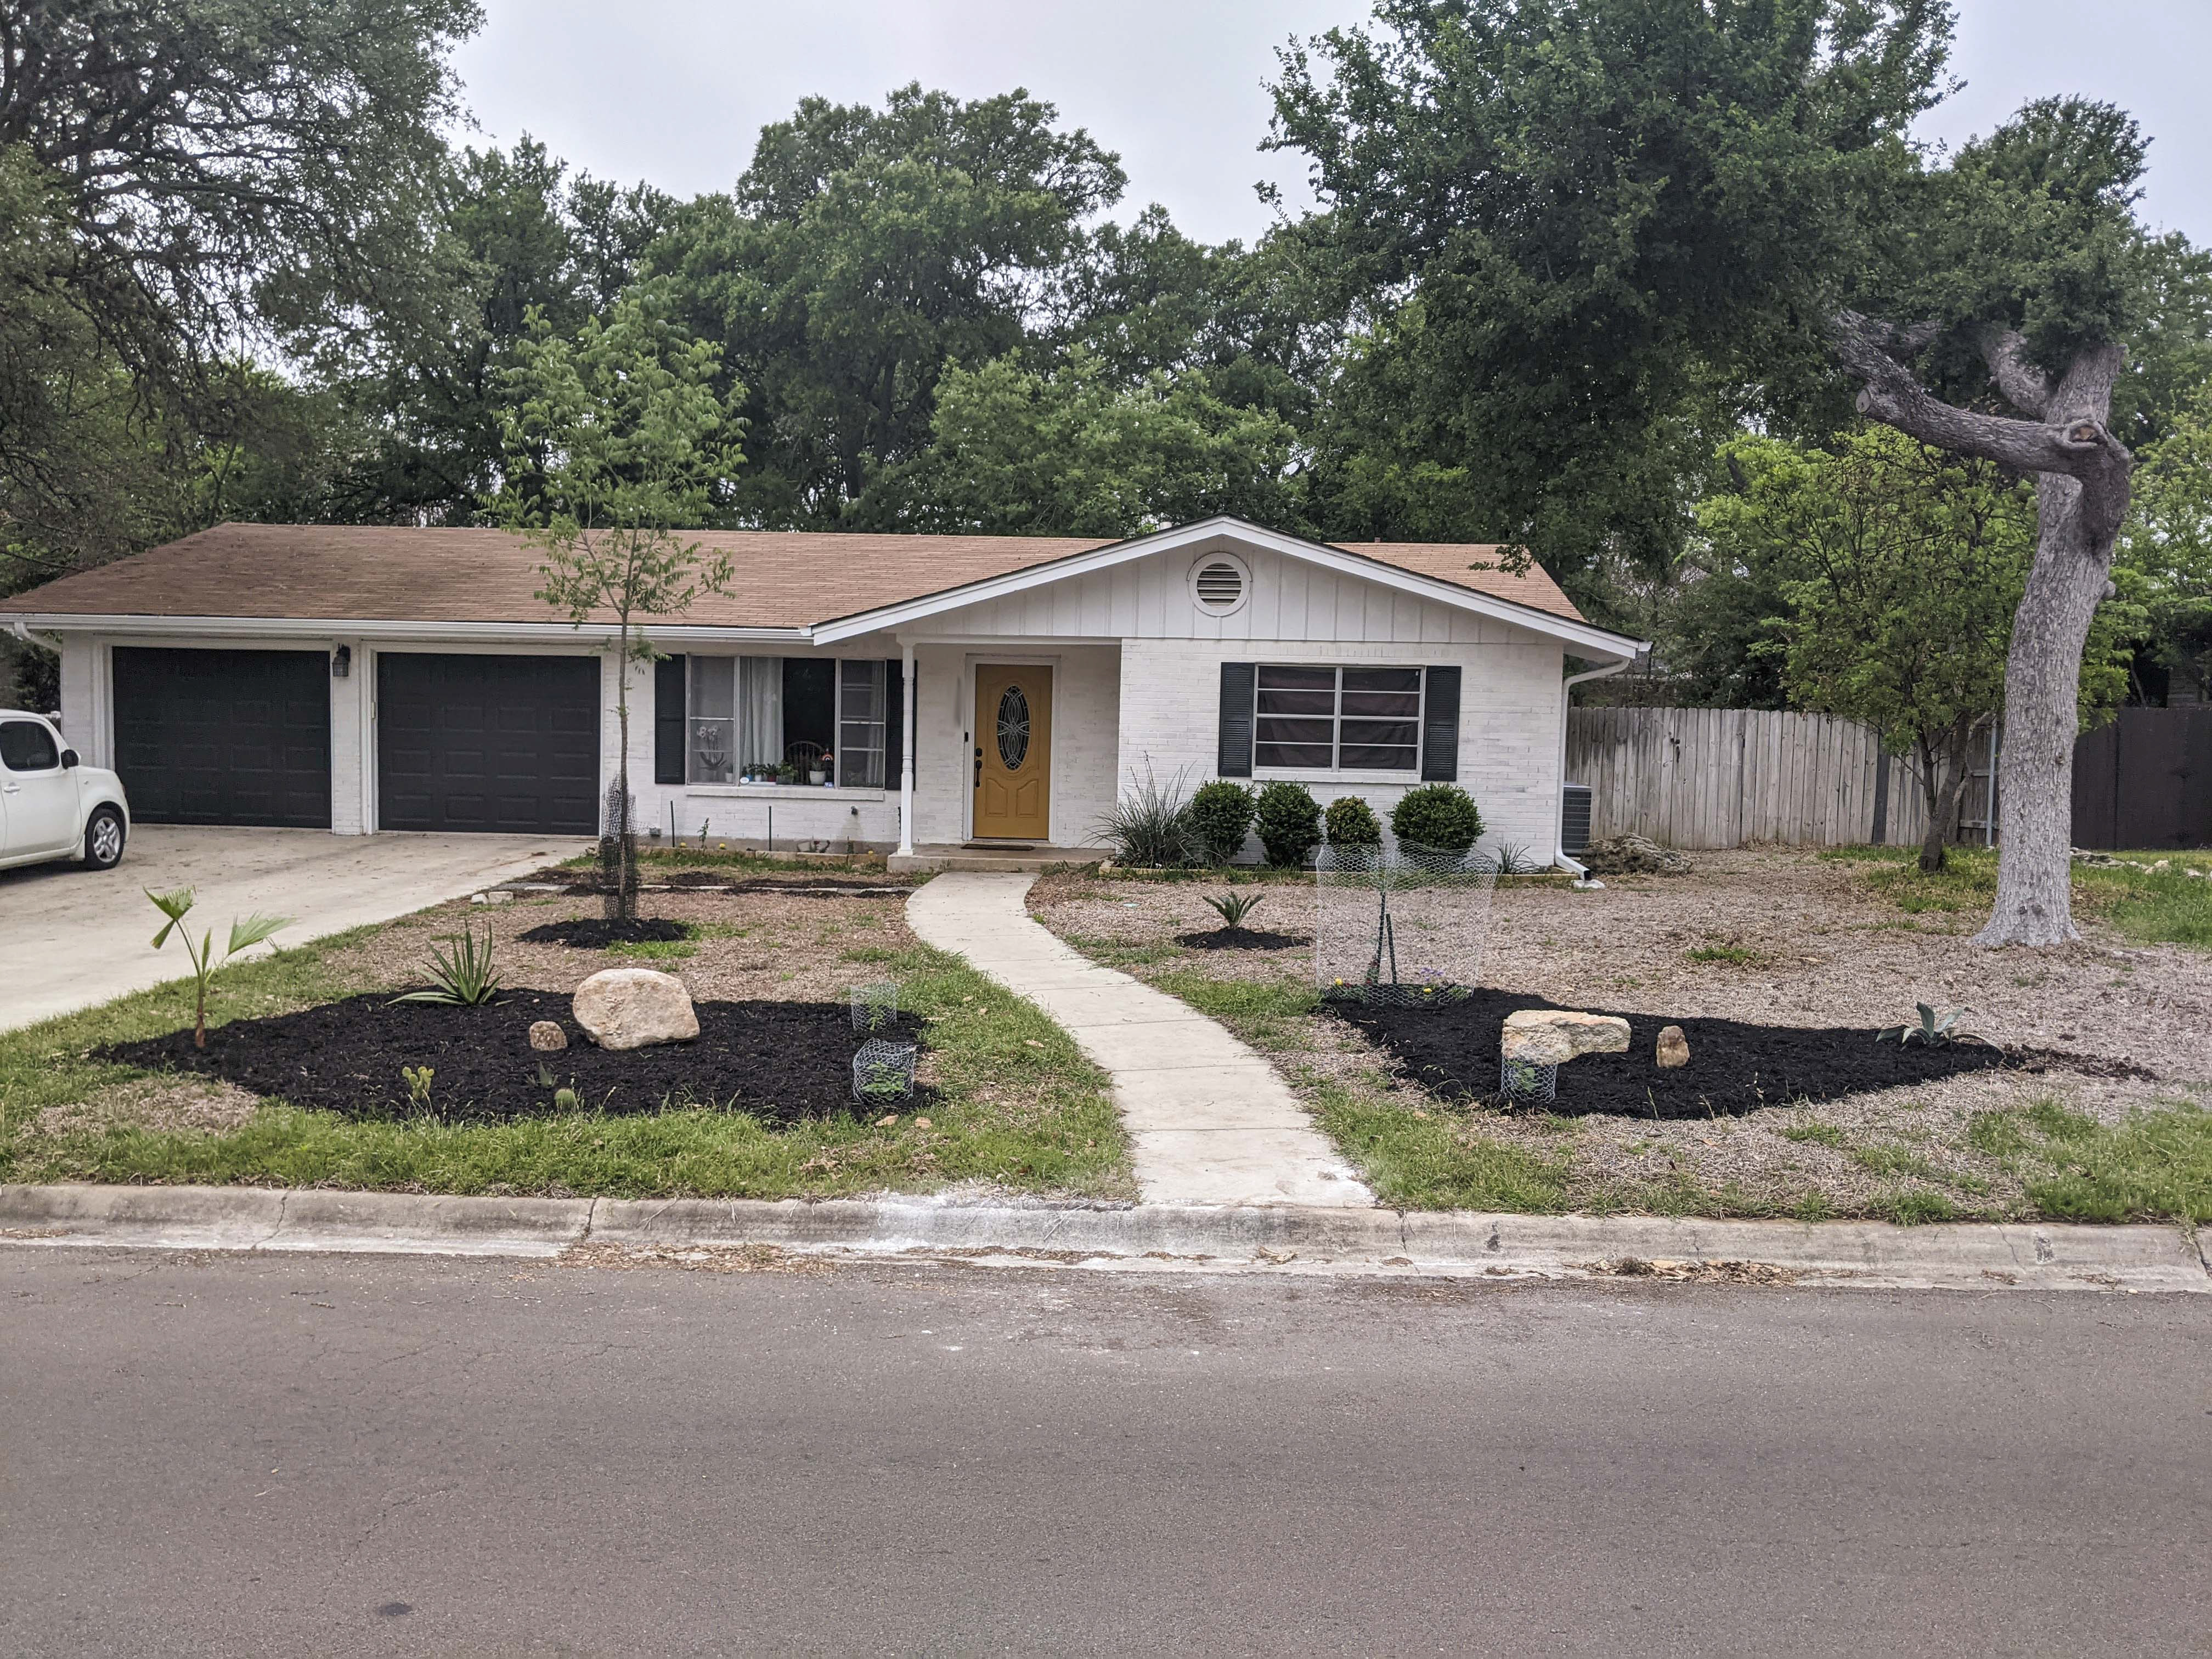
But, because of all that, our front yard looked like hell. Just a bunch of brown, dead grass and two rather sad trees. One looks like it was hit by lightning at some point and the other is a sapling- so not really sad, just small.
We tried for a moment to bring the grass back and it worked well in the backyard, but the front yard would not get going no matter what we tried. Some patches returned, but it wasn’t spreading as we had hoped. So, we decided to look into xeriscaping and cover it all up.
What is xeriscape?
Xeriscaping is “a style of landscape design requiring little or no irrigation or other maintenance.” I love it. I love that it’s better for the environment and I love that it saves me a small fortune on my water bill.
I’ve always enjoyed interesting landscaping, but never really got to try it out as we’d been renters for so long. Now that we own a home, we’ve both been eager to try lots of DIYs, including the yard which would be our biggest one yet.
I suggest perusing Pinterest for ideas for landscaping and figuring out what you like. We decided to get rid of all of our grass, but you may want some as accents. I wouldn’t have minded some grass, but you still have to take care of it and it might be a hassle to mow around rocks. Pick what works for you.
Ideas
The first step was to draw out some ideas in my notebook. We mocked up several iterations, but there was honestly a lot of winging it as well.
I wanted a lot of drought-tolerant plants because I didn’t want to baby anything. We also like going on vacations so I didn’t want to come back to a dead yard either.
Another problem we have is deer. They are magical creatures until you live with them. Then the truth comes out: they are giant rodents who will devour and poop over all of your hard work. Finding deer-resistant plants is imperative and let me tell you, a lot of plants that tell you they are deer resistant are not.
Plants I’ve found that deer actually won’t eat: lavender, cacti, century plants, lantanas (they still might get the flower buds though), mealy blue sage, and more cacti.
Dethatching
Dethatching is an important first step when you have a ton of dead grass as we did. It was super, super thick and would have made anything on top of it lay crooked.
The process is simple but laborious. We took a normal, metal rake and ripped up as much of the dead grass as we could throughout the yard. You’re just looking to get it a little flatter and maybe expose dirt underneath.
There are also dethatching tools that can make this job easier. Our front yard isn’t that large so we used the rake we already had.
Landscape Fabric
Wherever you plan on putting rocks or beds, absolutely put down landscape fabric. You don’t want to get stuck unsteadily walking over rocks while pulling out tiny weeds. We rolled it out over our entire yard. Be sure to get landscape pins to secure it into the ground.
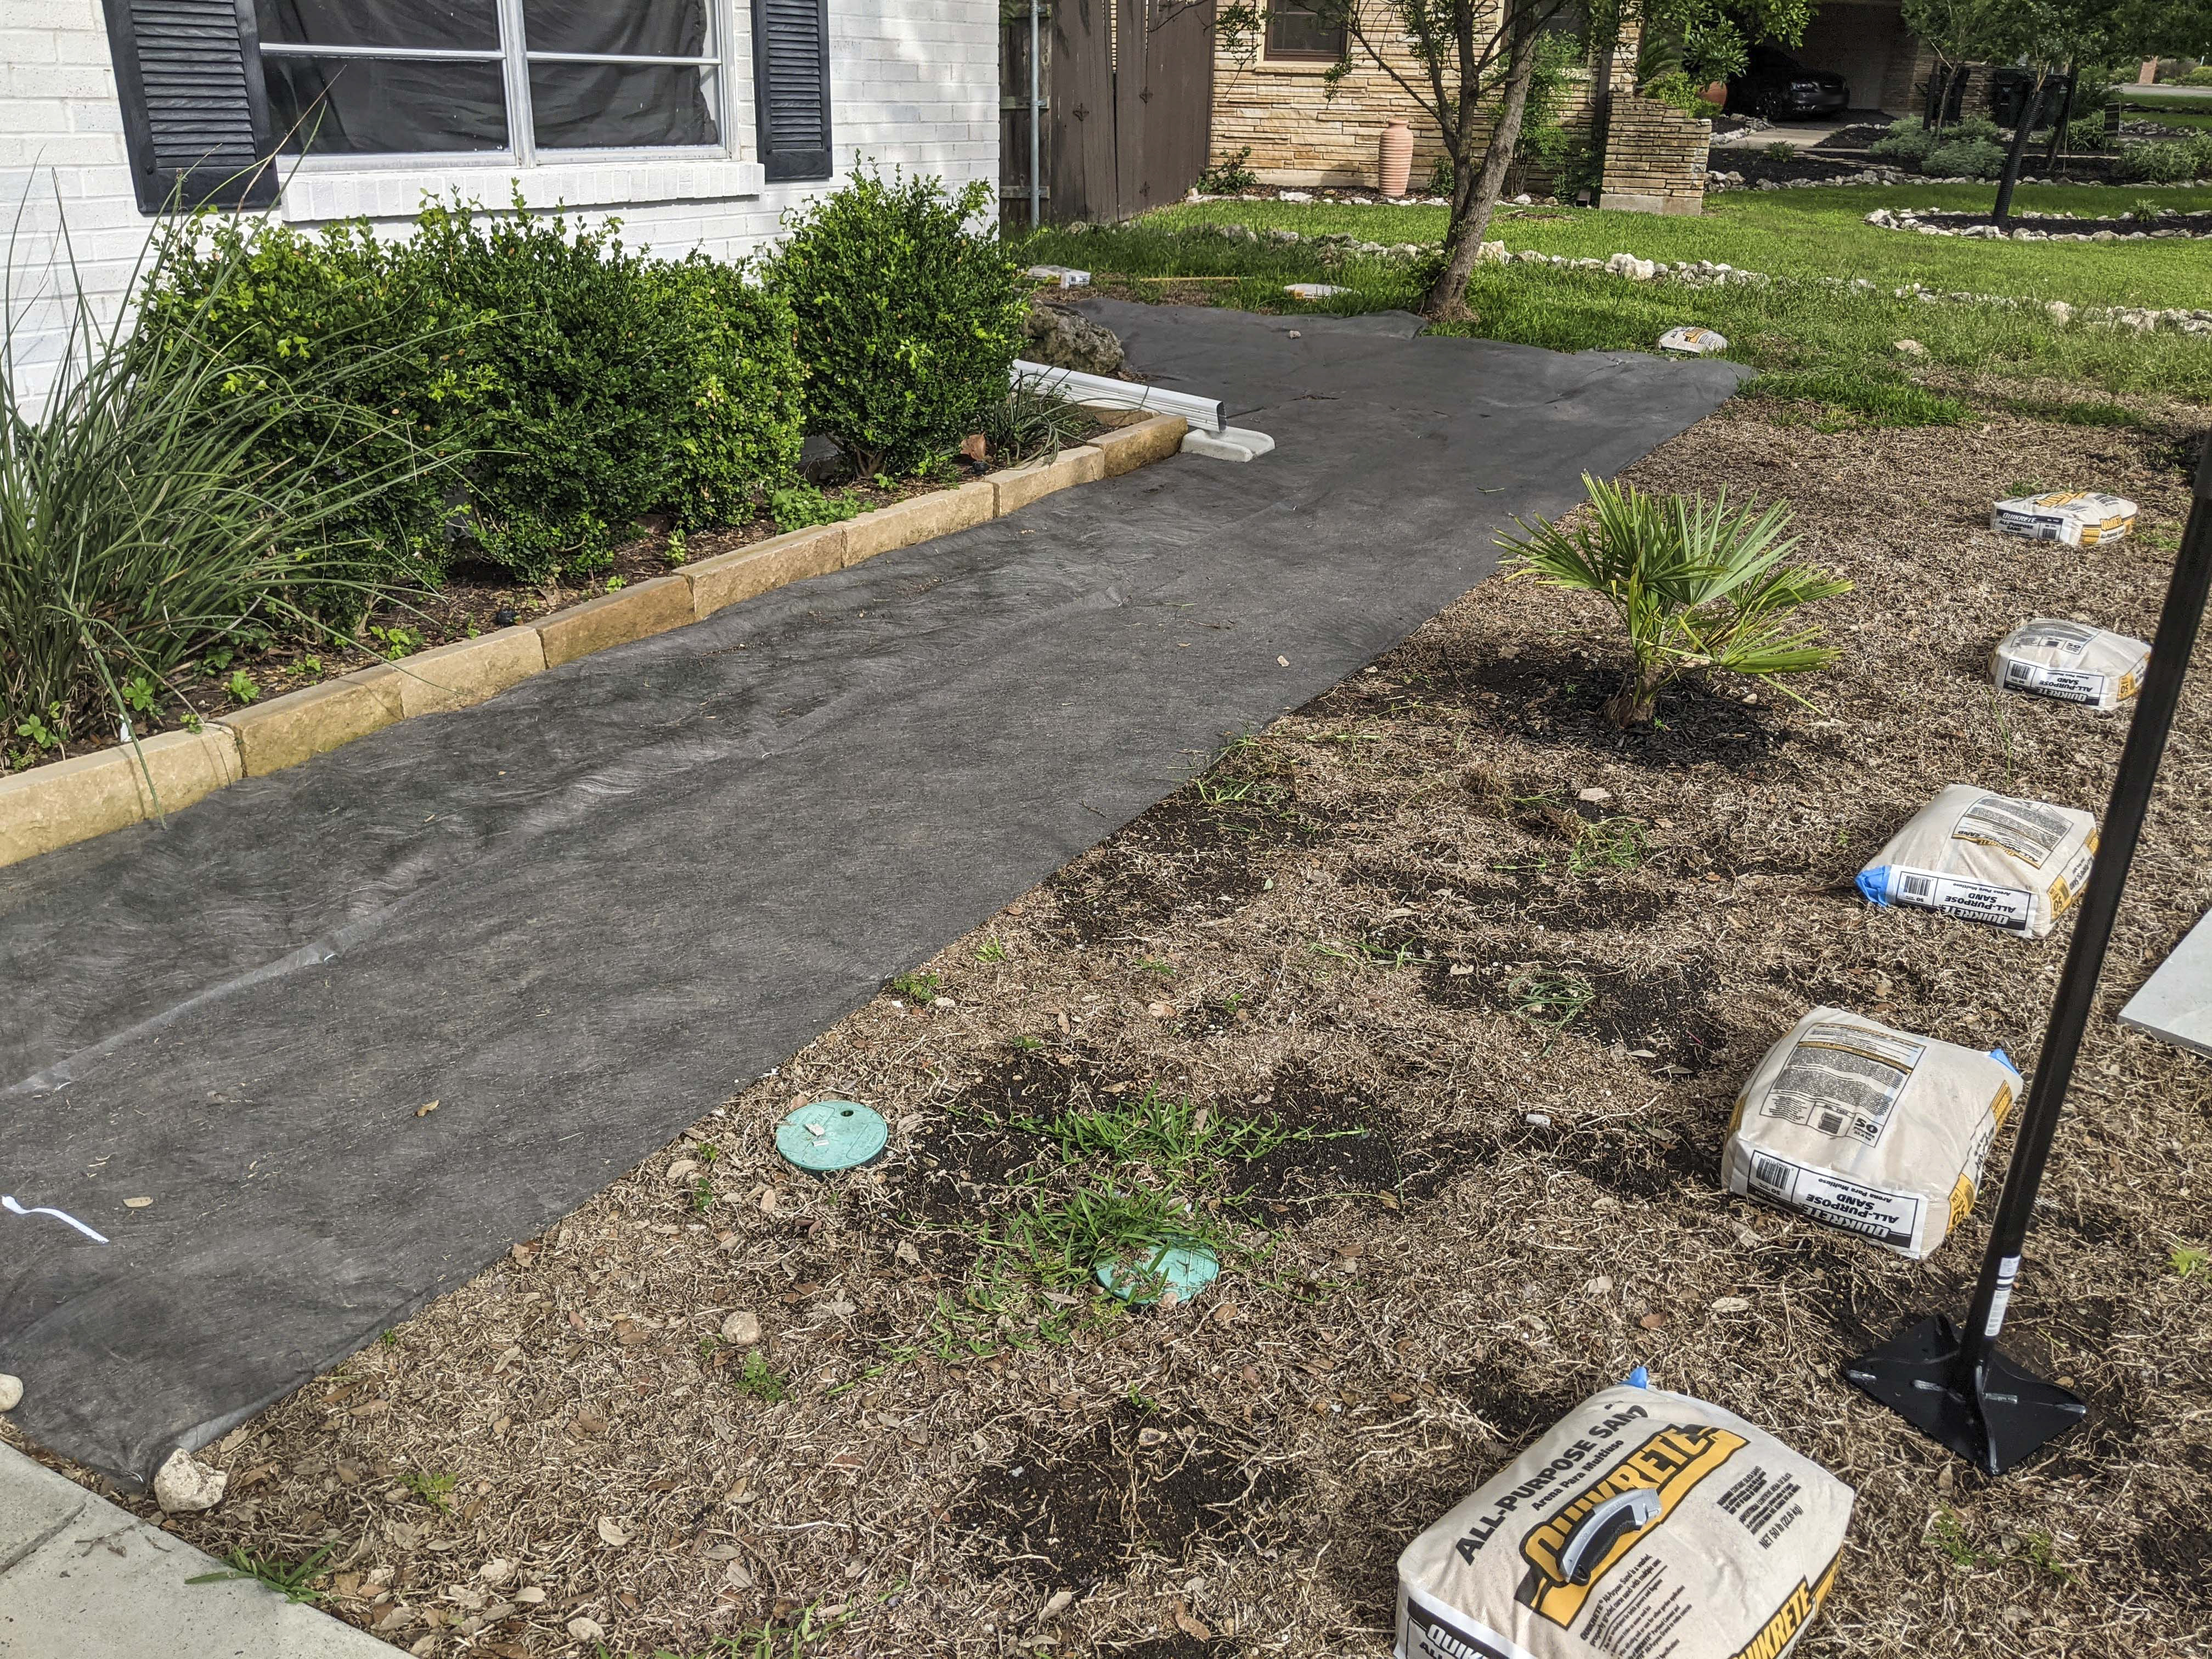
We did it in sections as we worked, but the whole yard was inevitably covered.
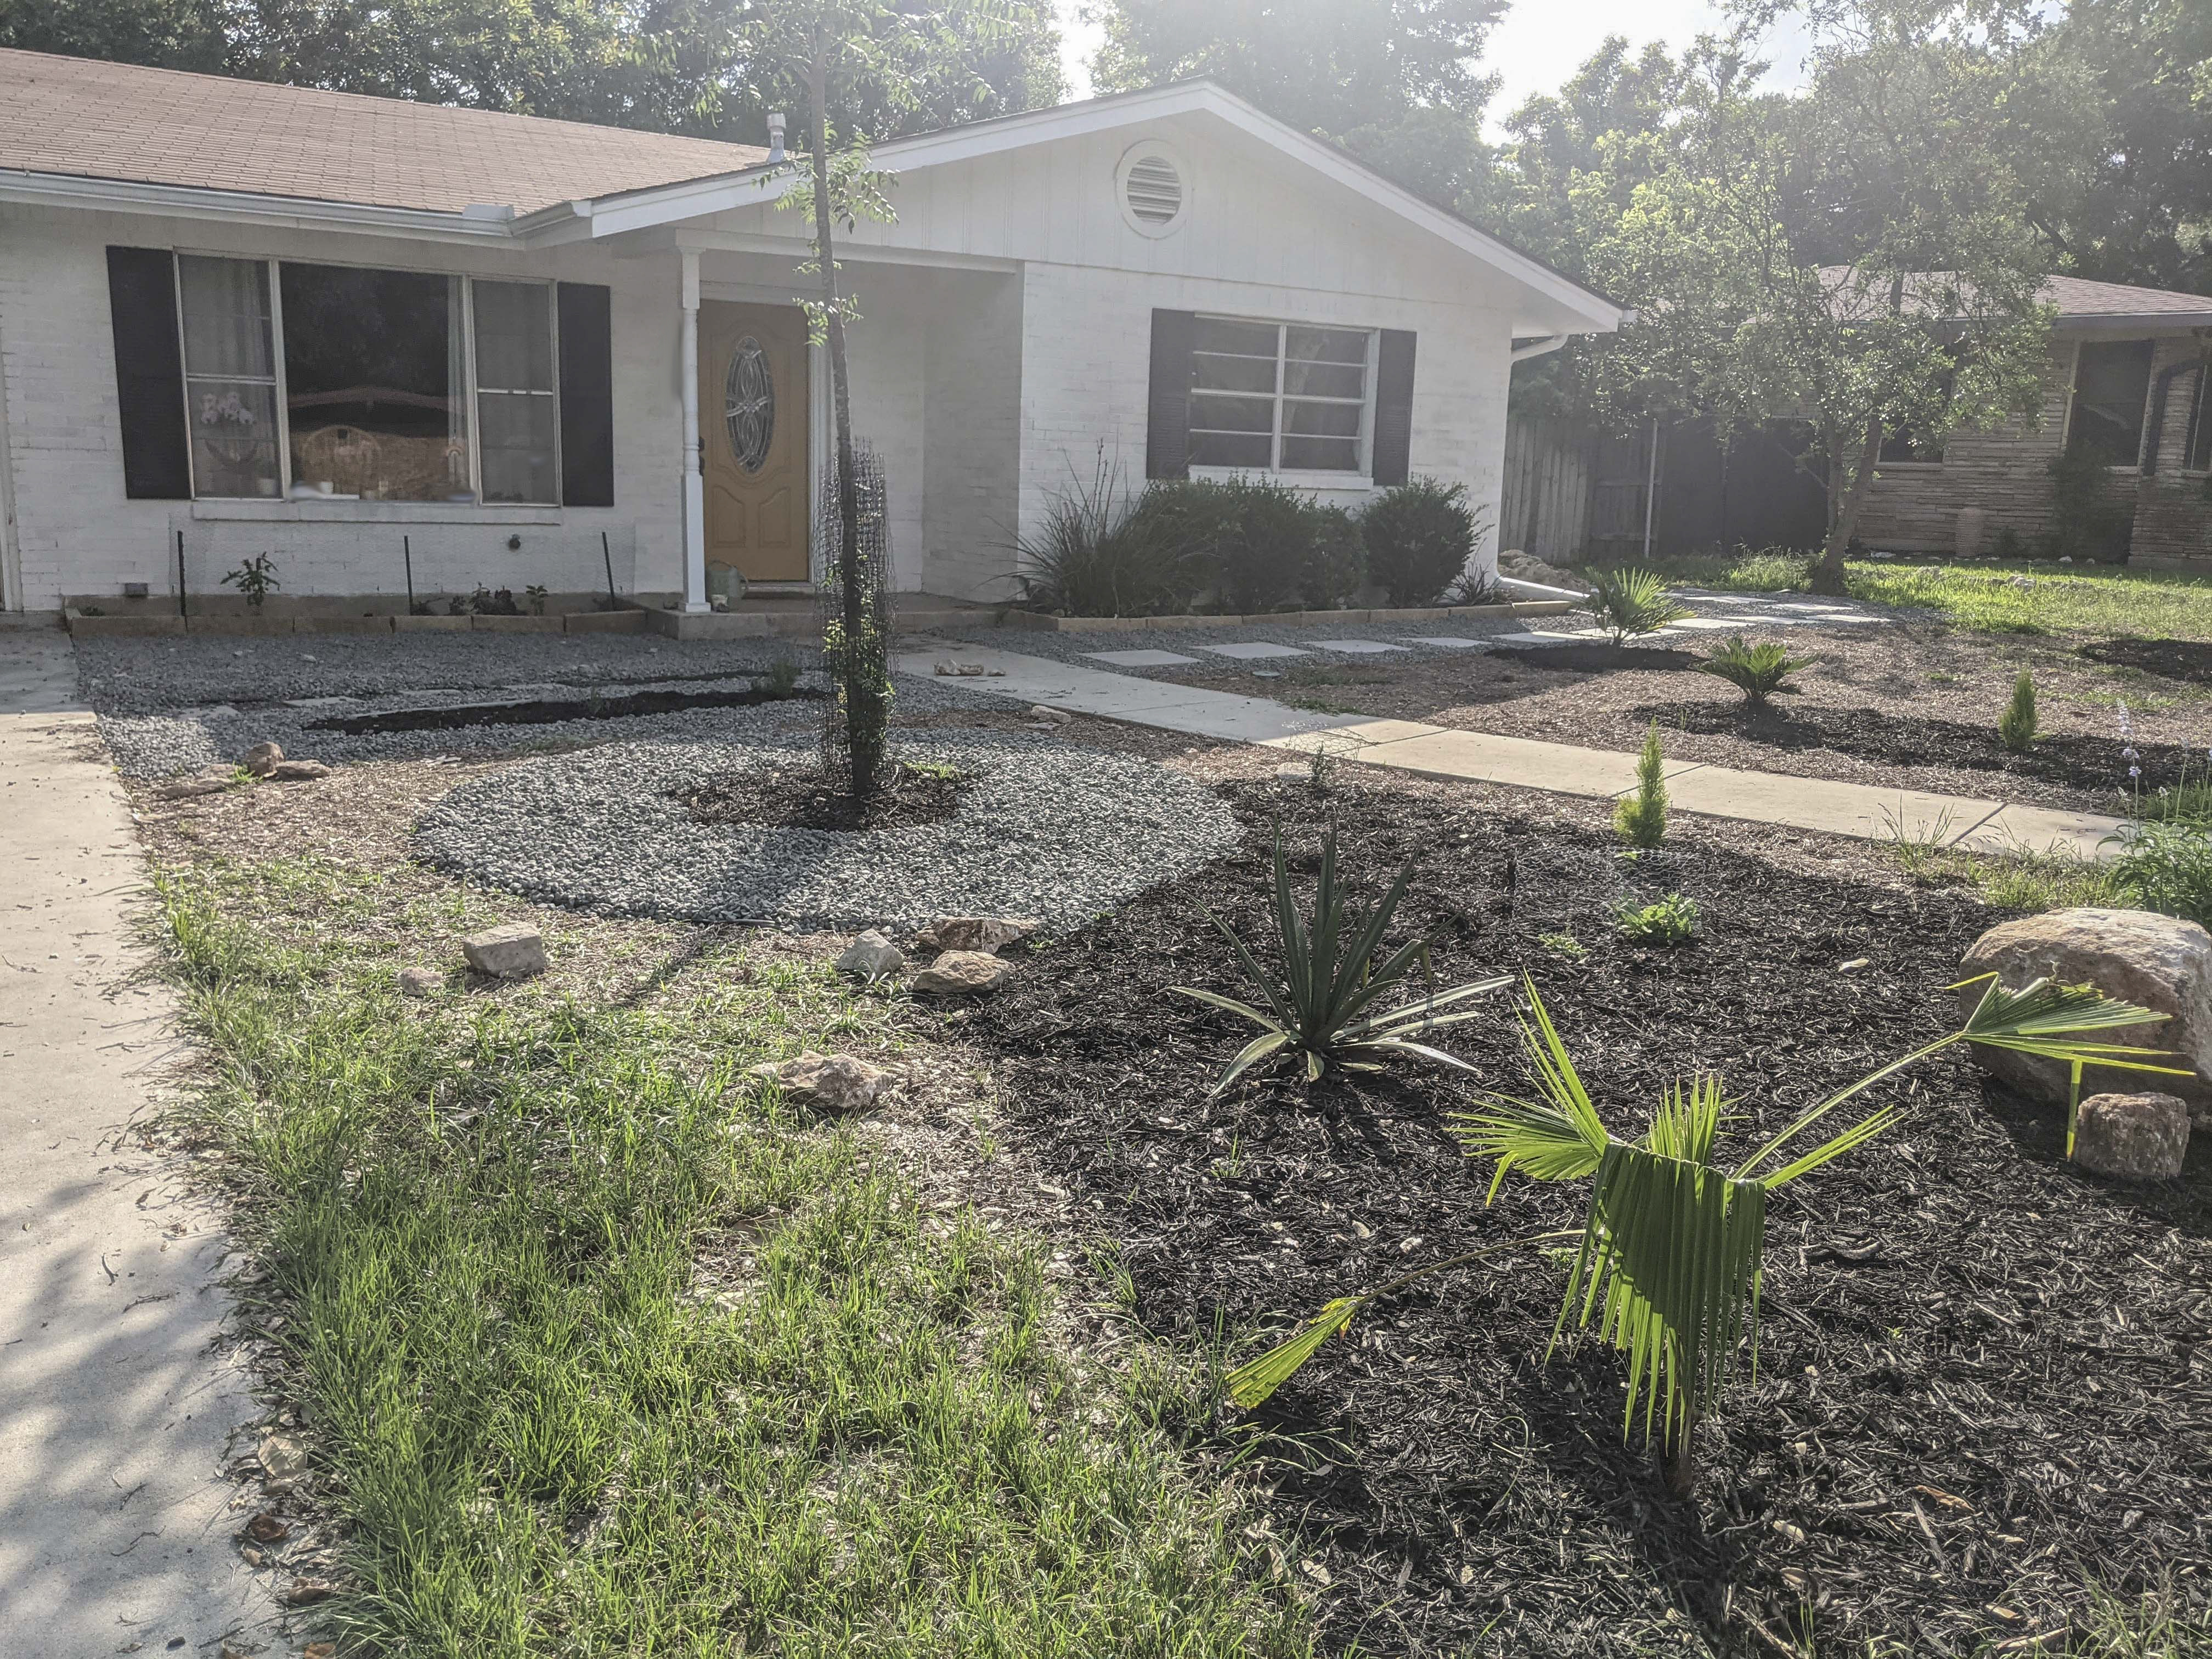
Garden Beds
This is where a lot of the “winging it” took place. We made two large garden beds out of mulch on either side of our sidewalk and planted several drought-tolerant plants in them.
Most plants were from Lowe’s, but several we got from our local discovery center’s semi-annual plant sale. Nurseries around the metroplex donate to them and they sell them at ridiculously low prices to help fund the center. I’m talking $2.50 low. It’s worth checking out if your city has something like this too.
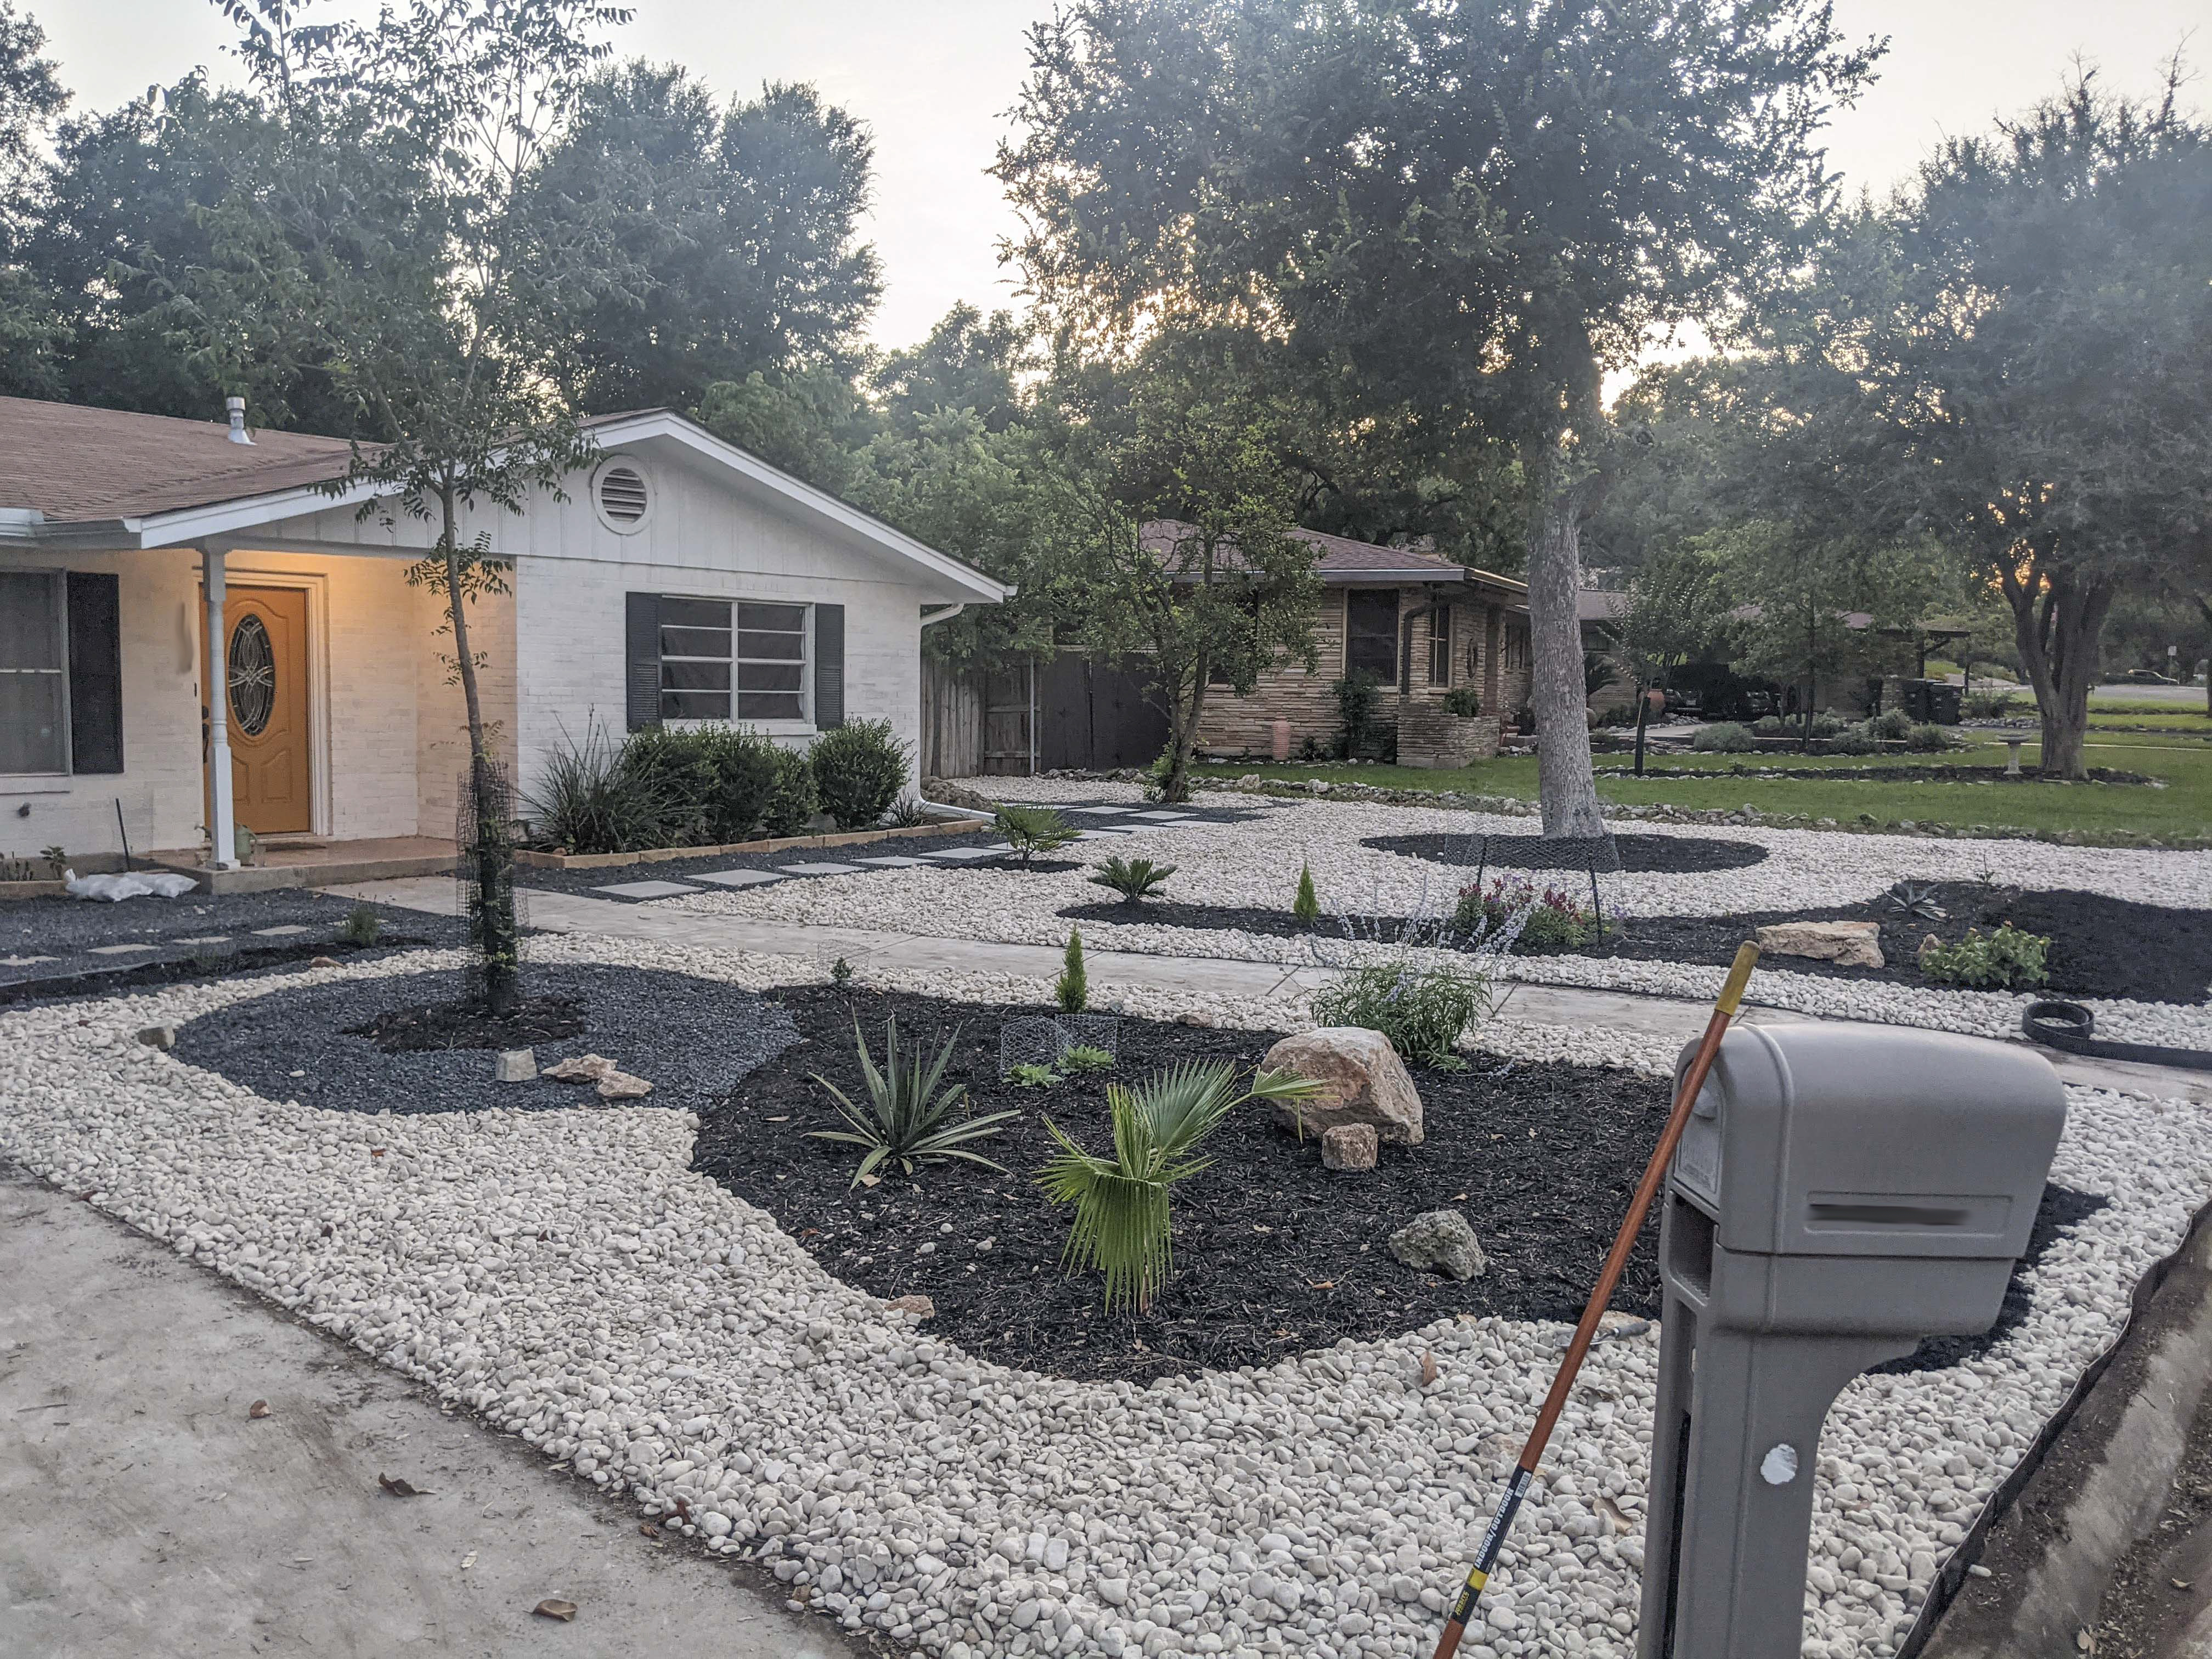
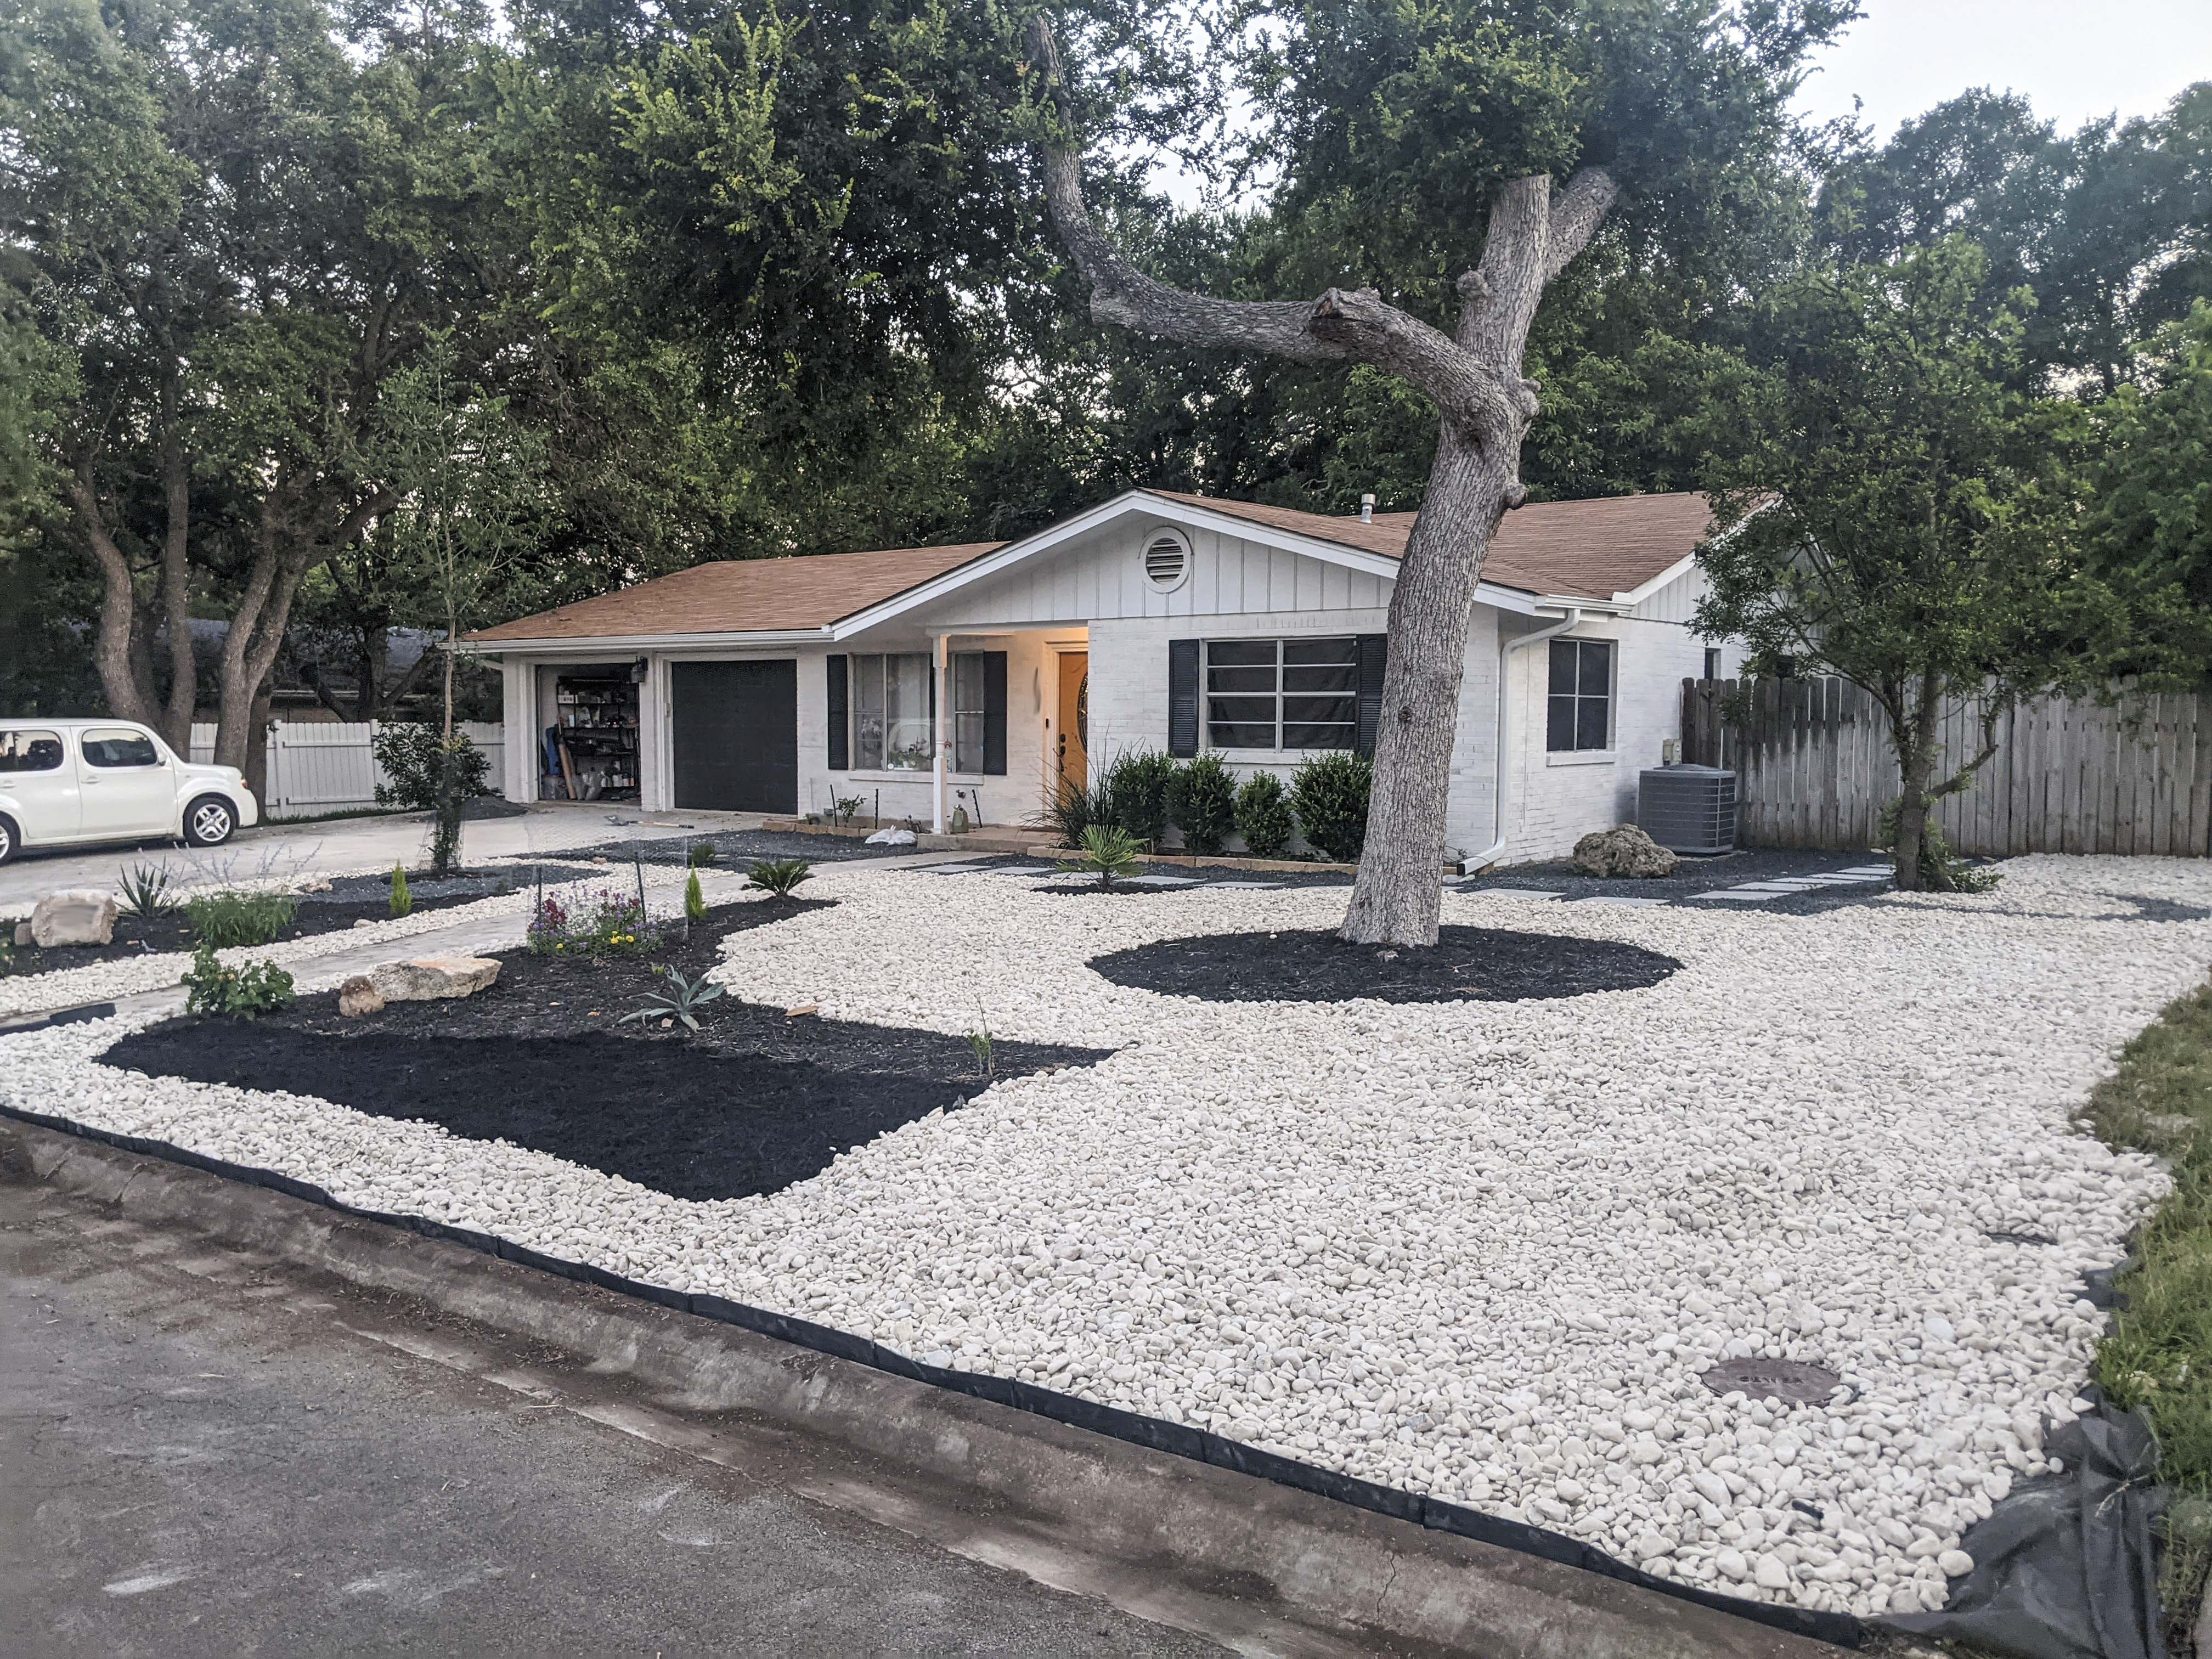
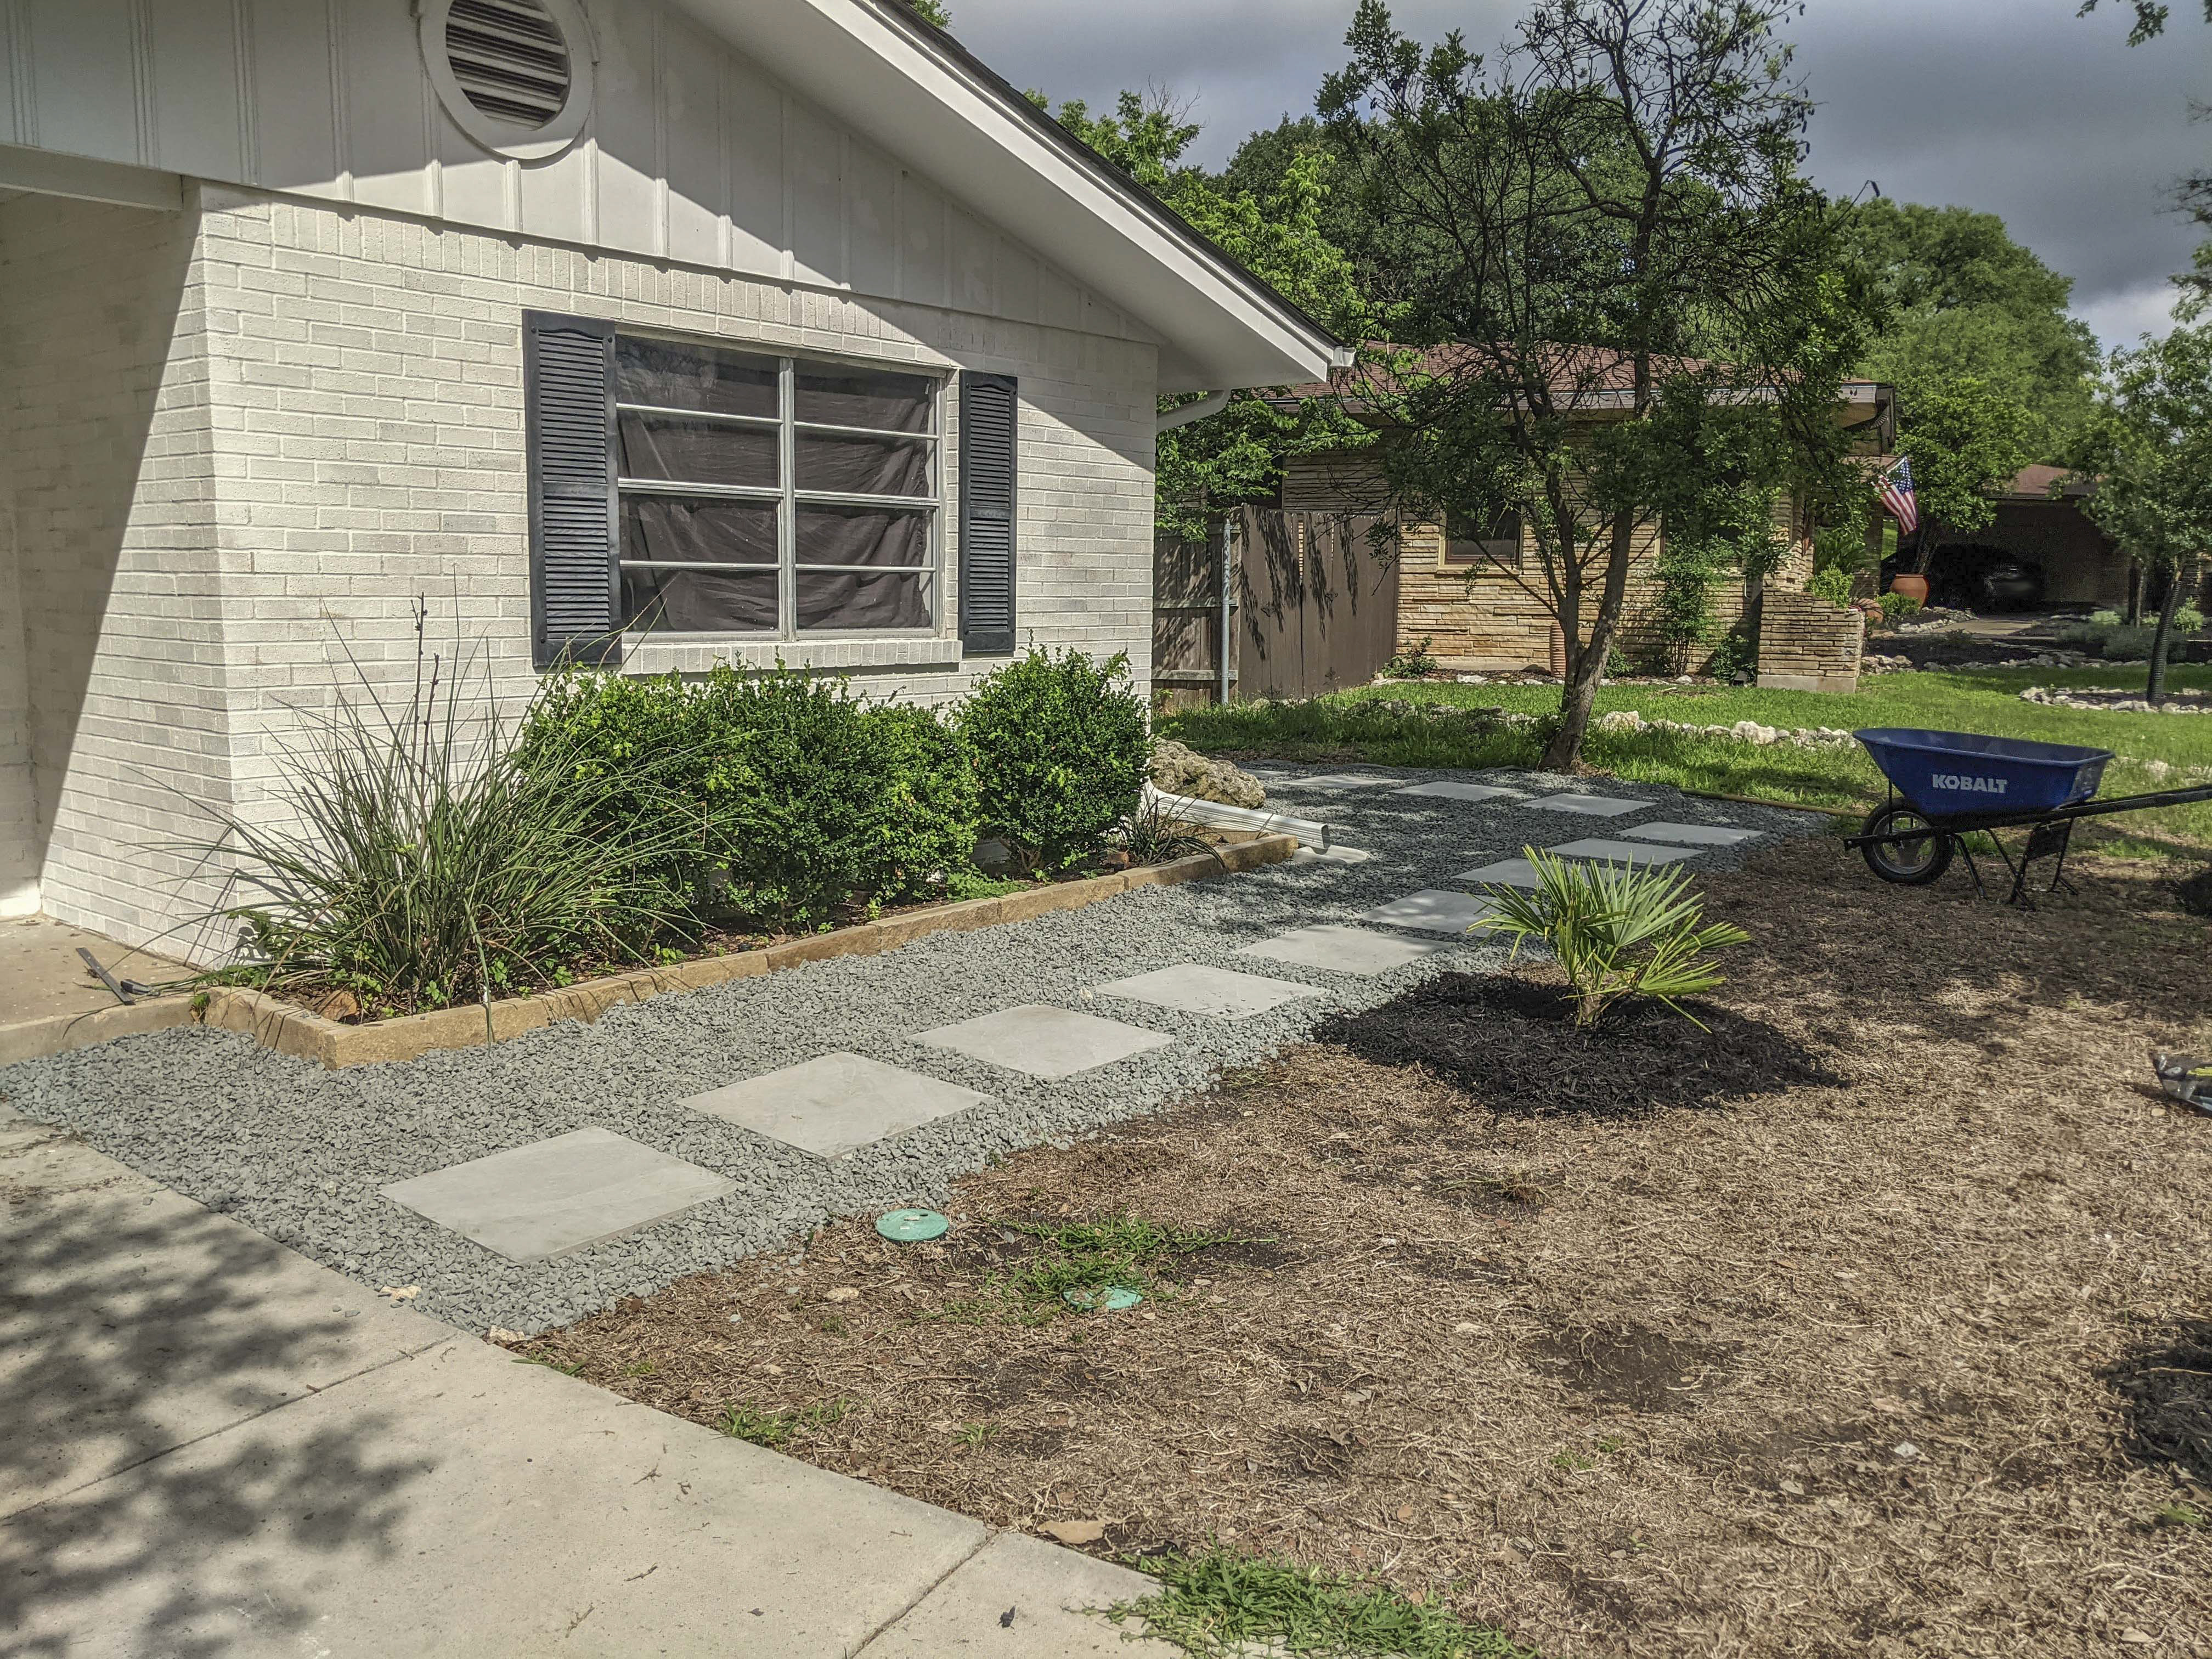
Walkway + black rocks
I’ve always loved how large pavers look when set in black rock. It’s so modern and is pretty popular right now. Hopefully, it still will be whenever we decide to sell!
I was going to go with those standard grey concrete ones, but I found these porcelain pavers and loved how they had a little bit more visual interest. The plan was to lay them from the sidewalk that leads up to our door to our back gate. I think we bought 16 in total.
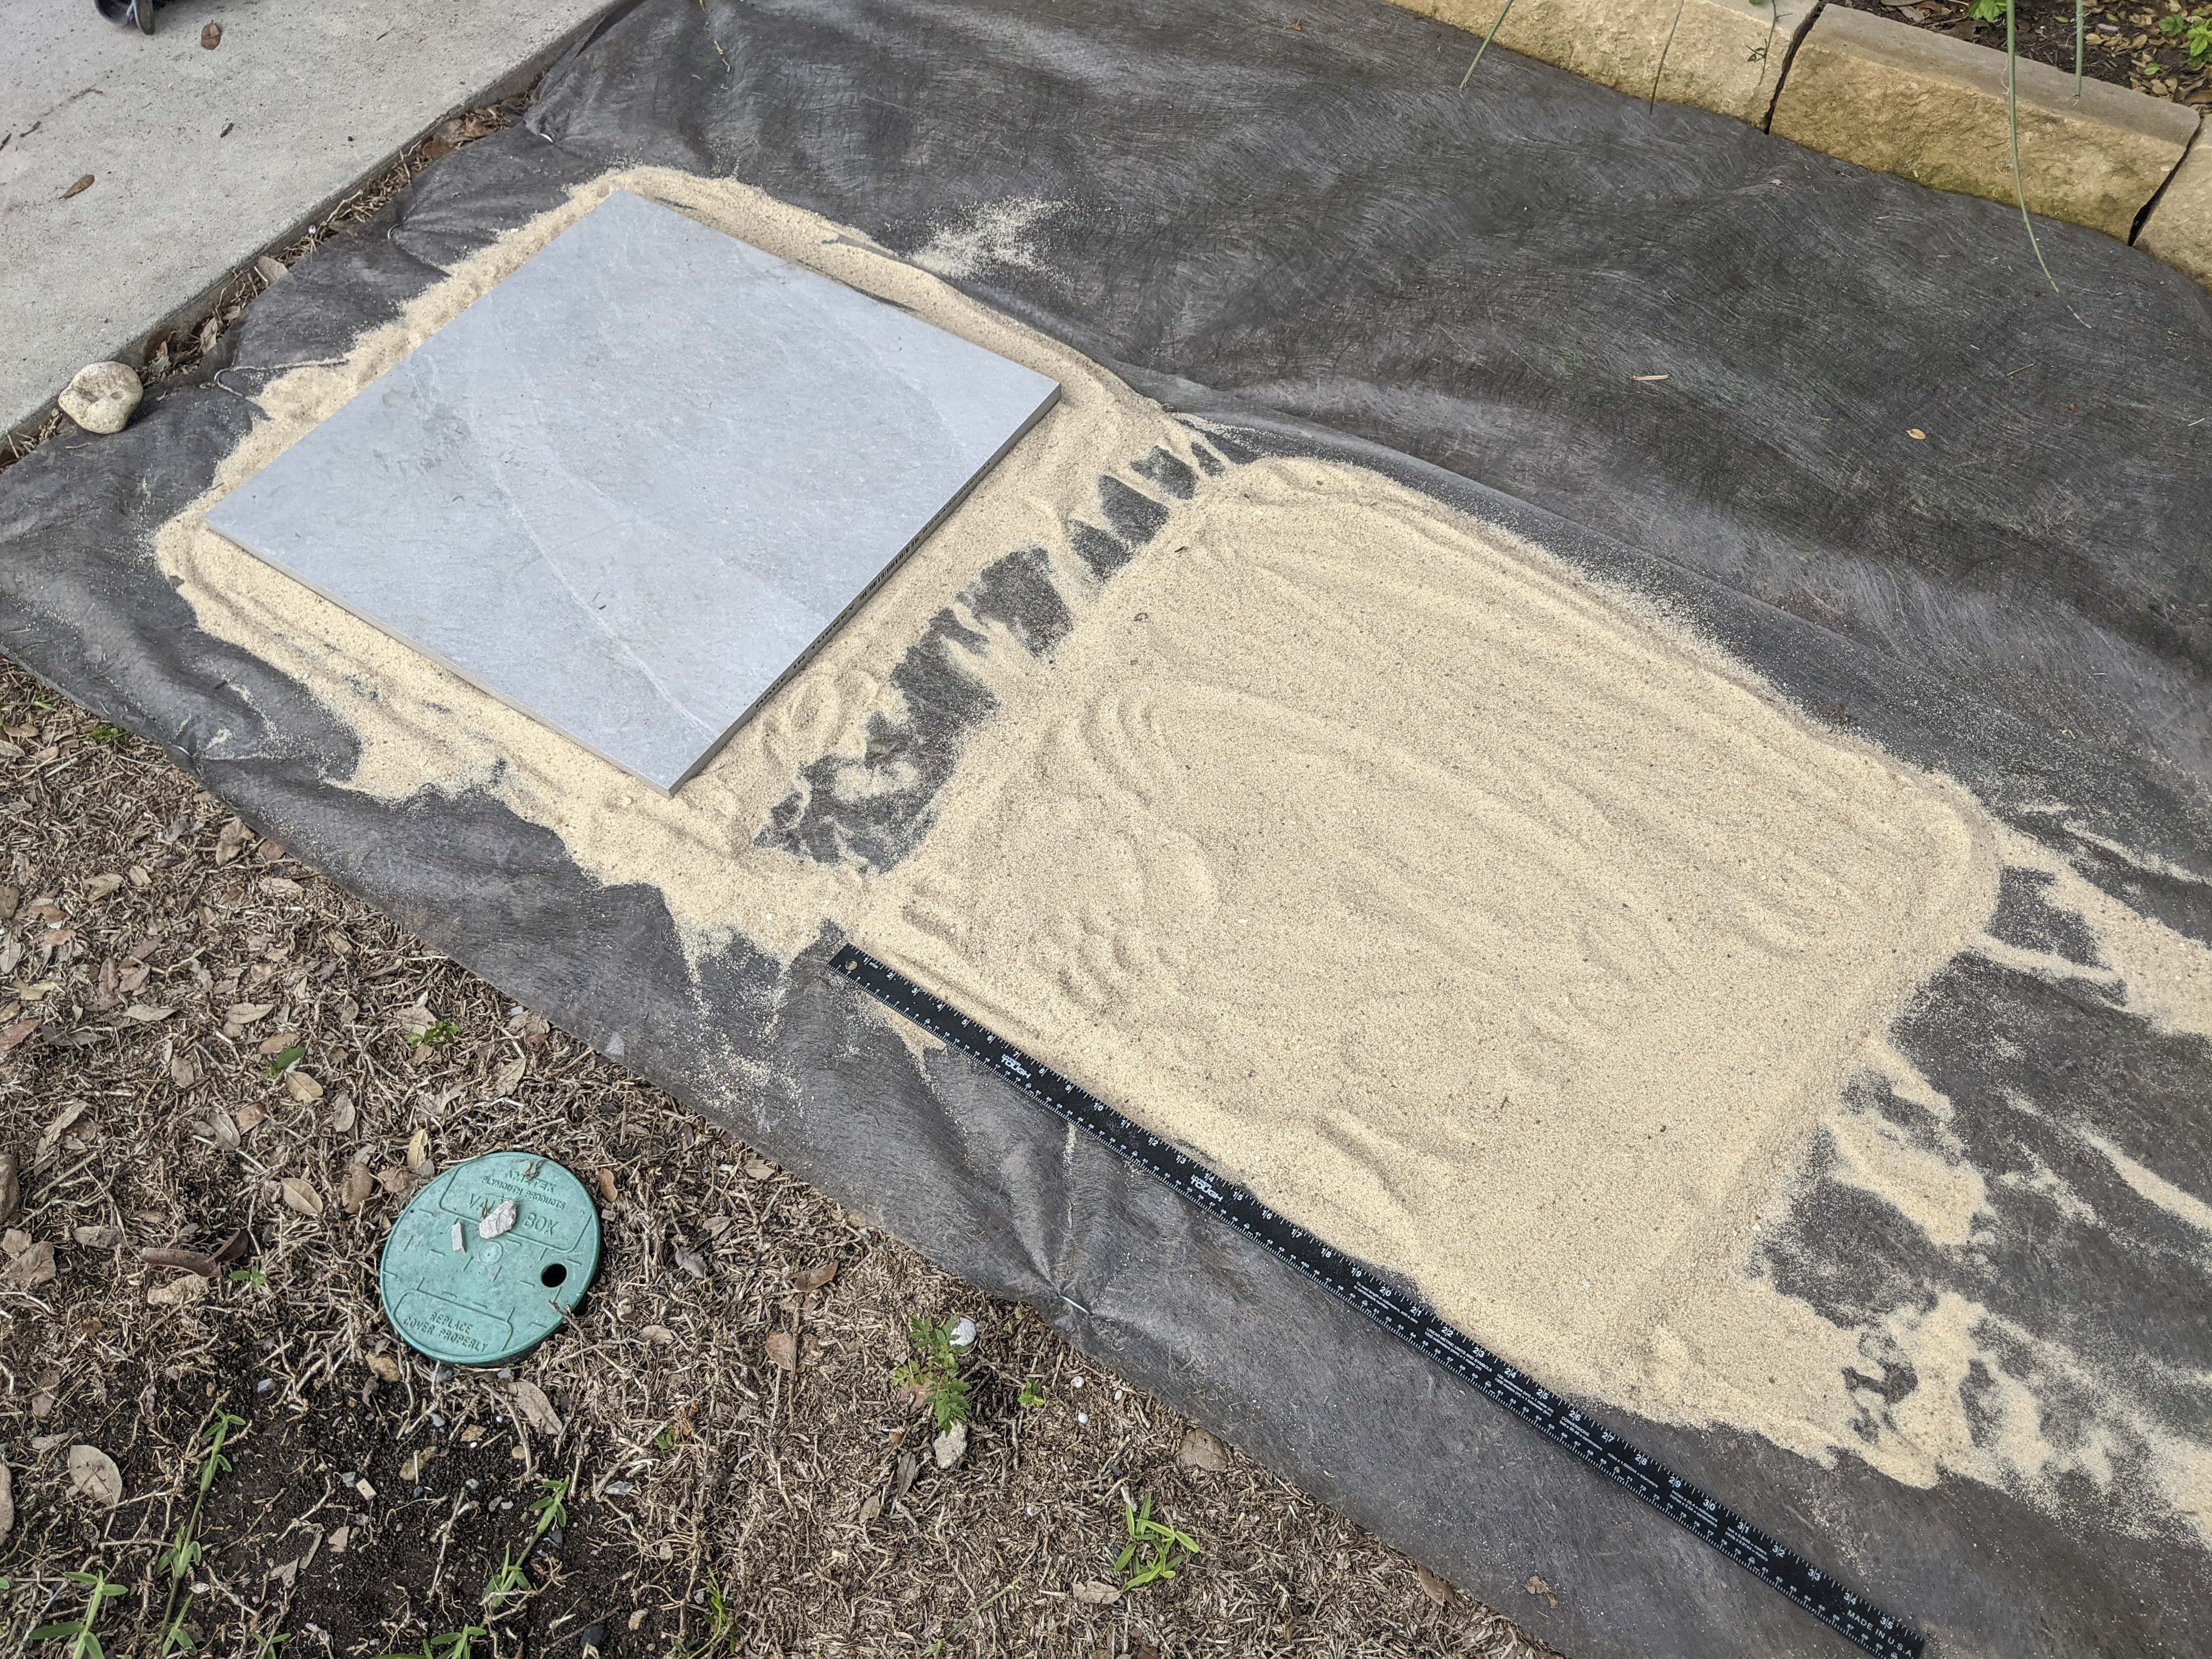
Setting pavers is straightforward, there are lots of tutorials online and even Lowe’s has a how-to in-store. Since the landscape fabric was already down, we bought bags of sand so the pavers would have something to settle in. One bag per paver. We also needed to get a tamper to make the sand level. I would pour out a bag, make a square slightly bigger than the paver, then tamp it flat and set the paver on top. I did this for each paver.
When it came to deciding what rocks we wanted to get, I knew I definitely wanted to use small, black rocks for some of the yard. We limewashed our house an off-white and the contrast would look good.
To figure out how much we needed, I measured the yard out in small square/rectangular sections and added up the combined areas. The place where we bought the rock has equations you can use to figure out how much to order. I suspect most landscape supply places will do this. Thankfully, that makes it easy to order because I am no math wizard. I did not equate for the pavers because I didn’t want to get too “exact” and then end up not having enough. I figured a little extra is much better than being a little short.
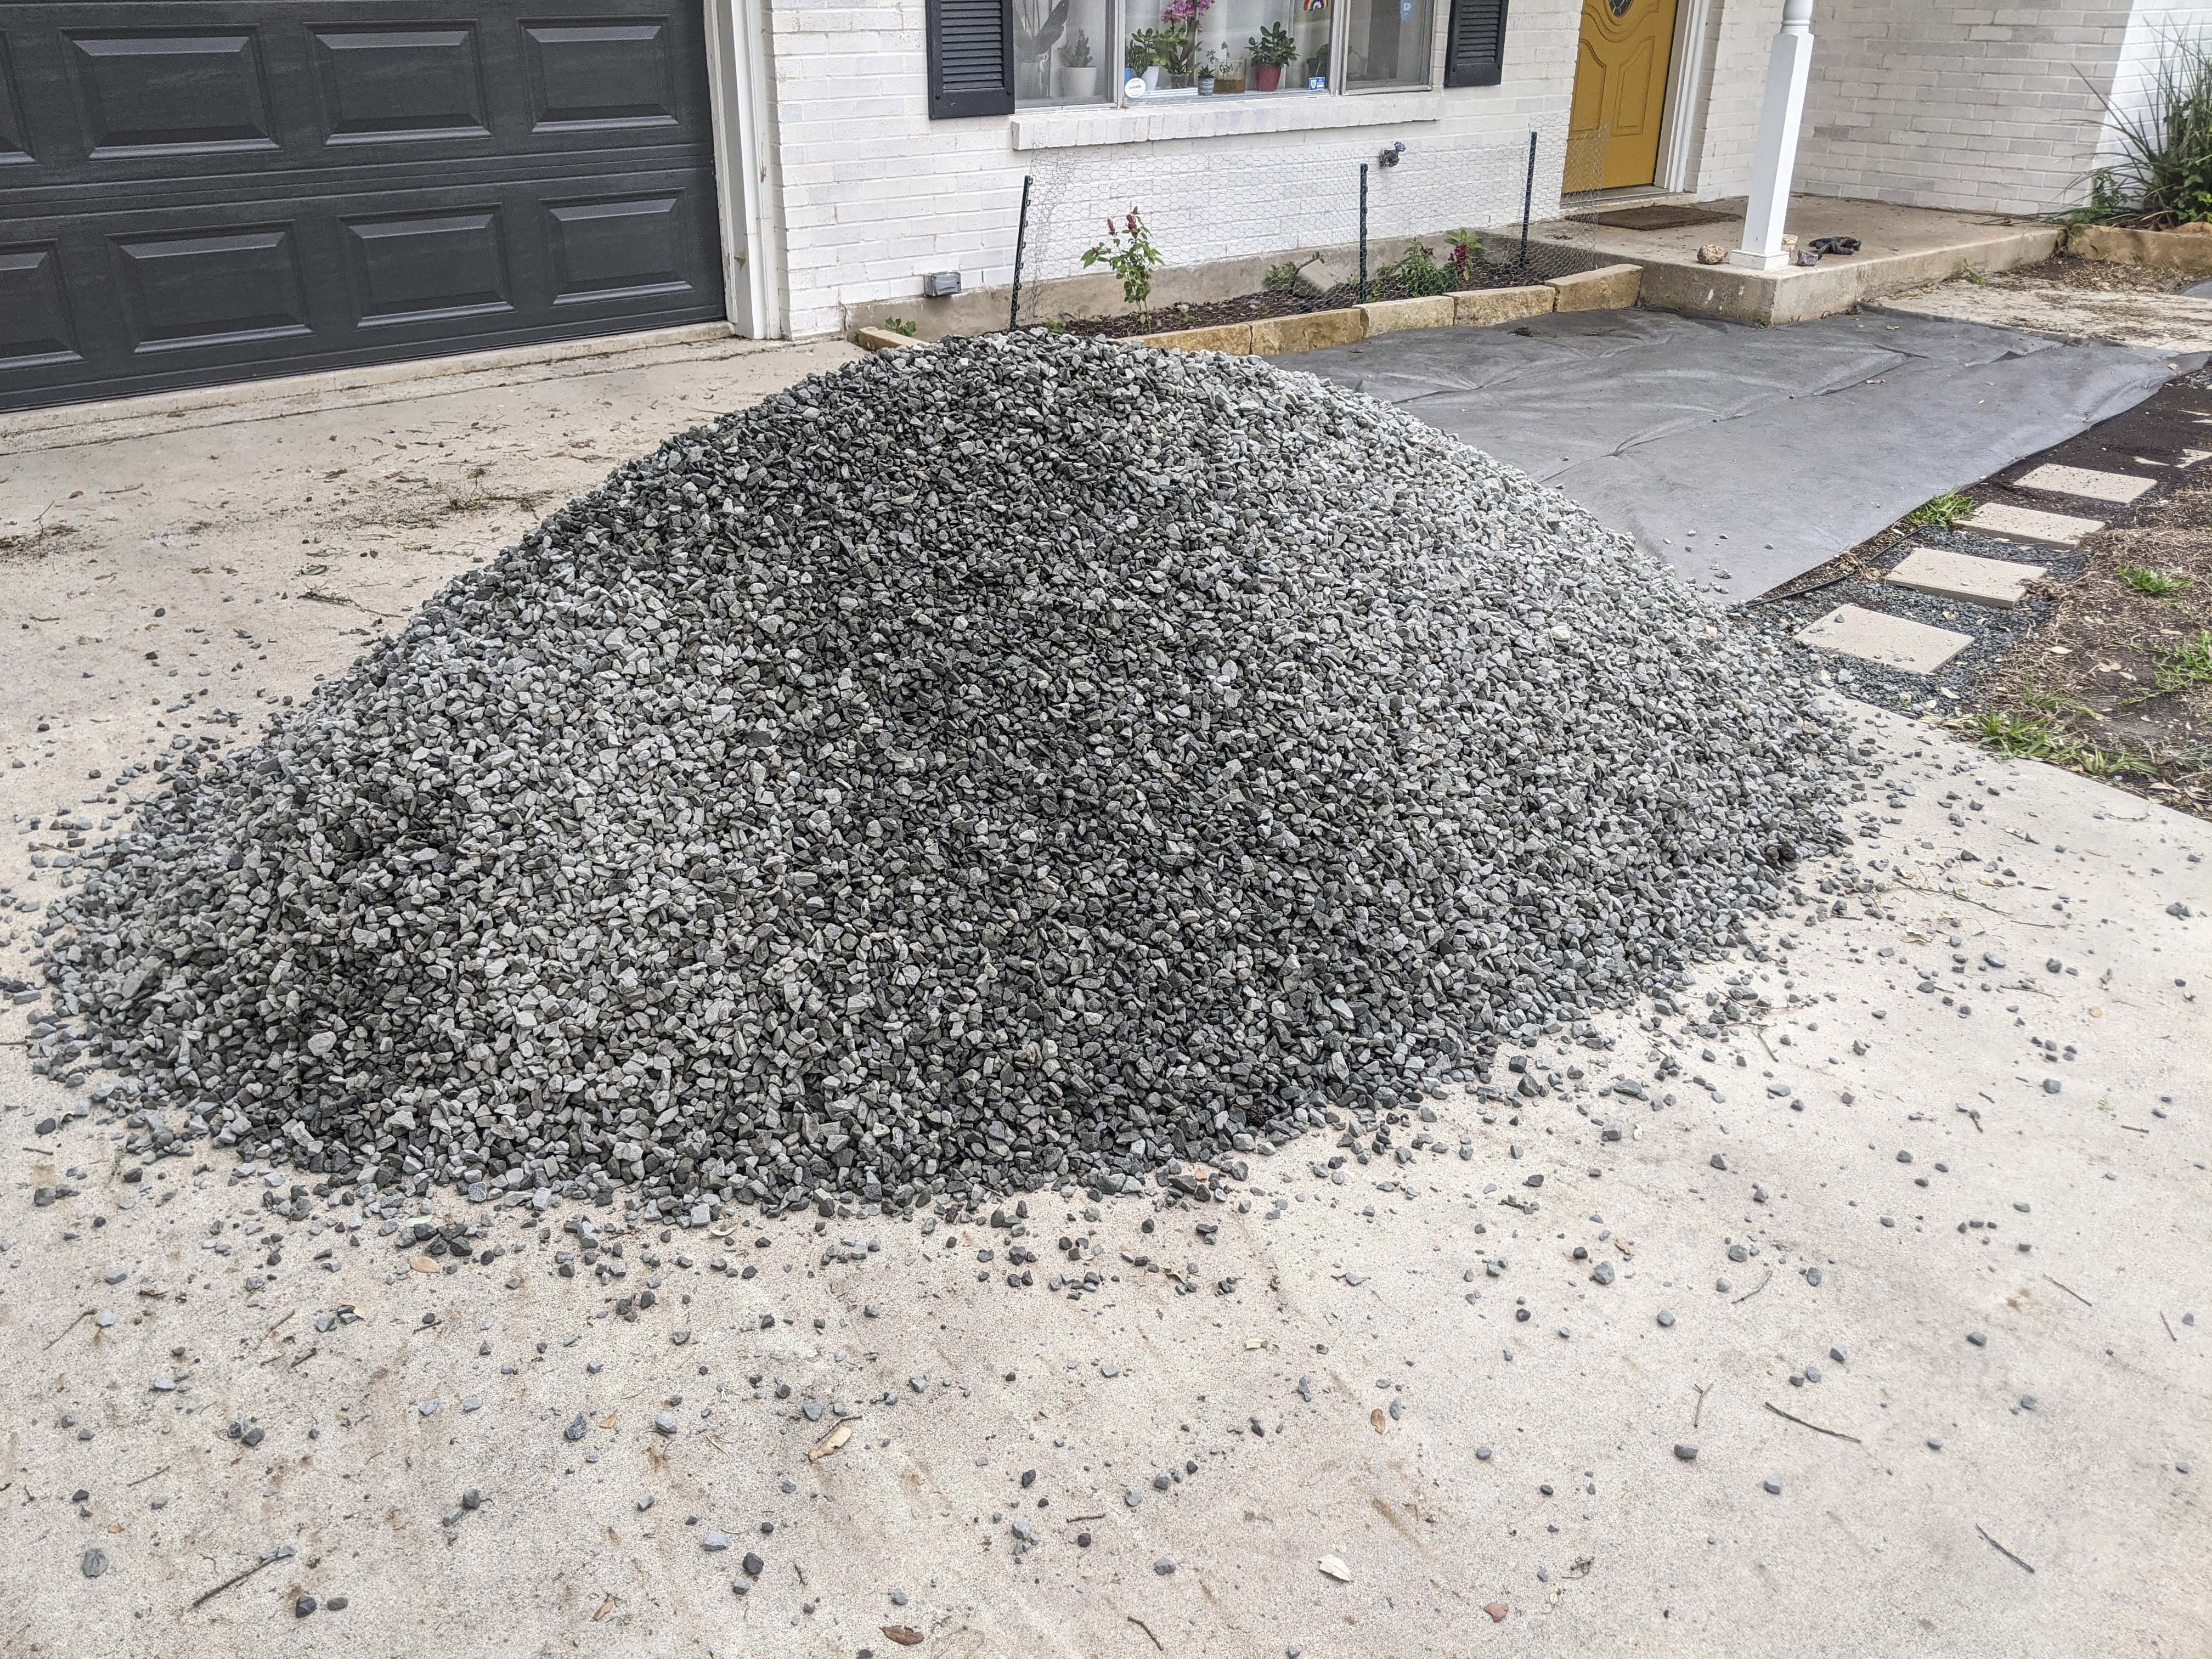
After they arrived, the only left to do was move and place them. Make sure you get a wheelbarrow and transfer shovel to load said wheelbarrow. We pour piles wherever we needed the rocks and spread them around with a metal rake or our hands.
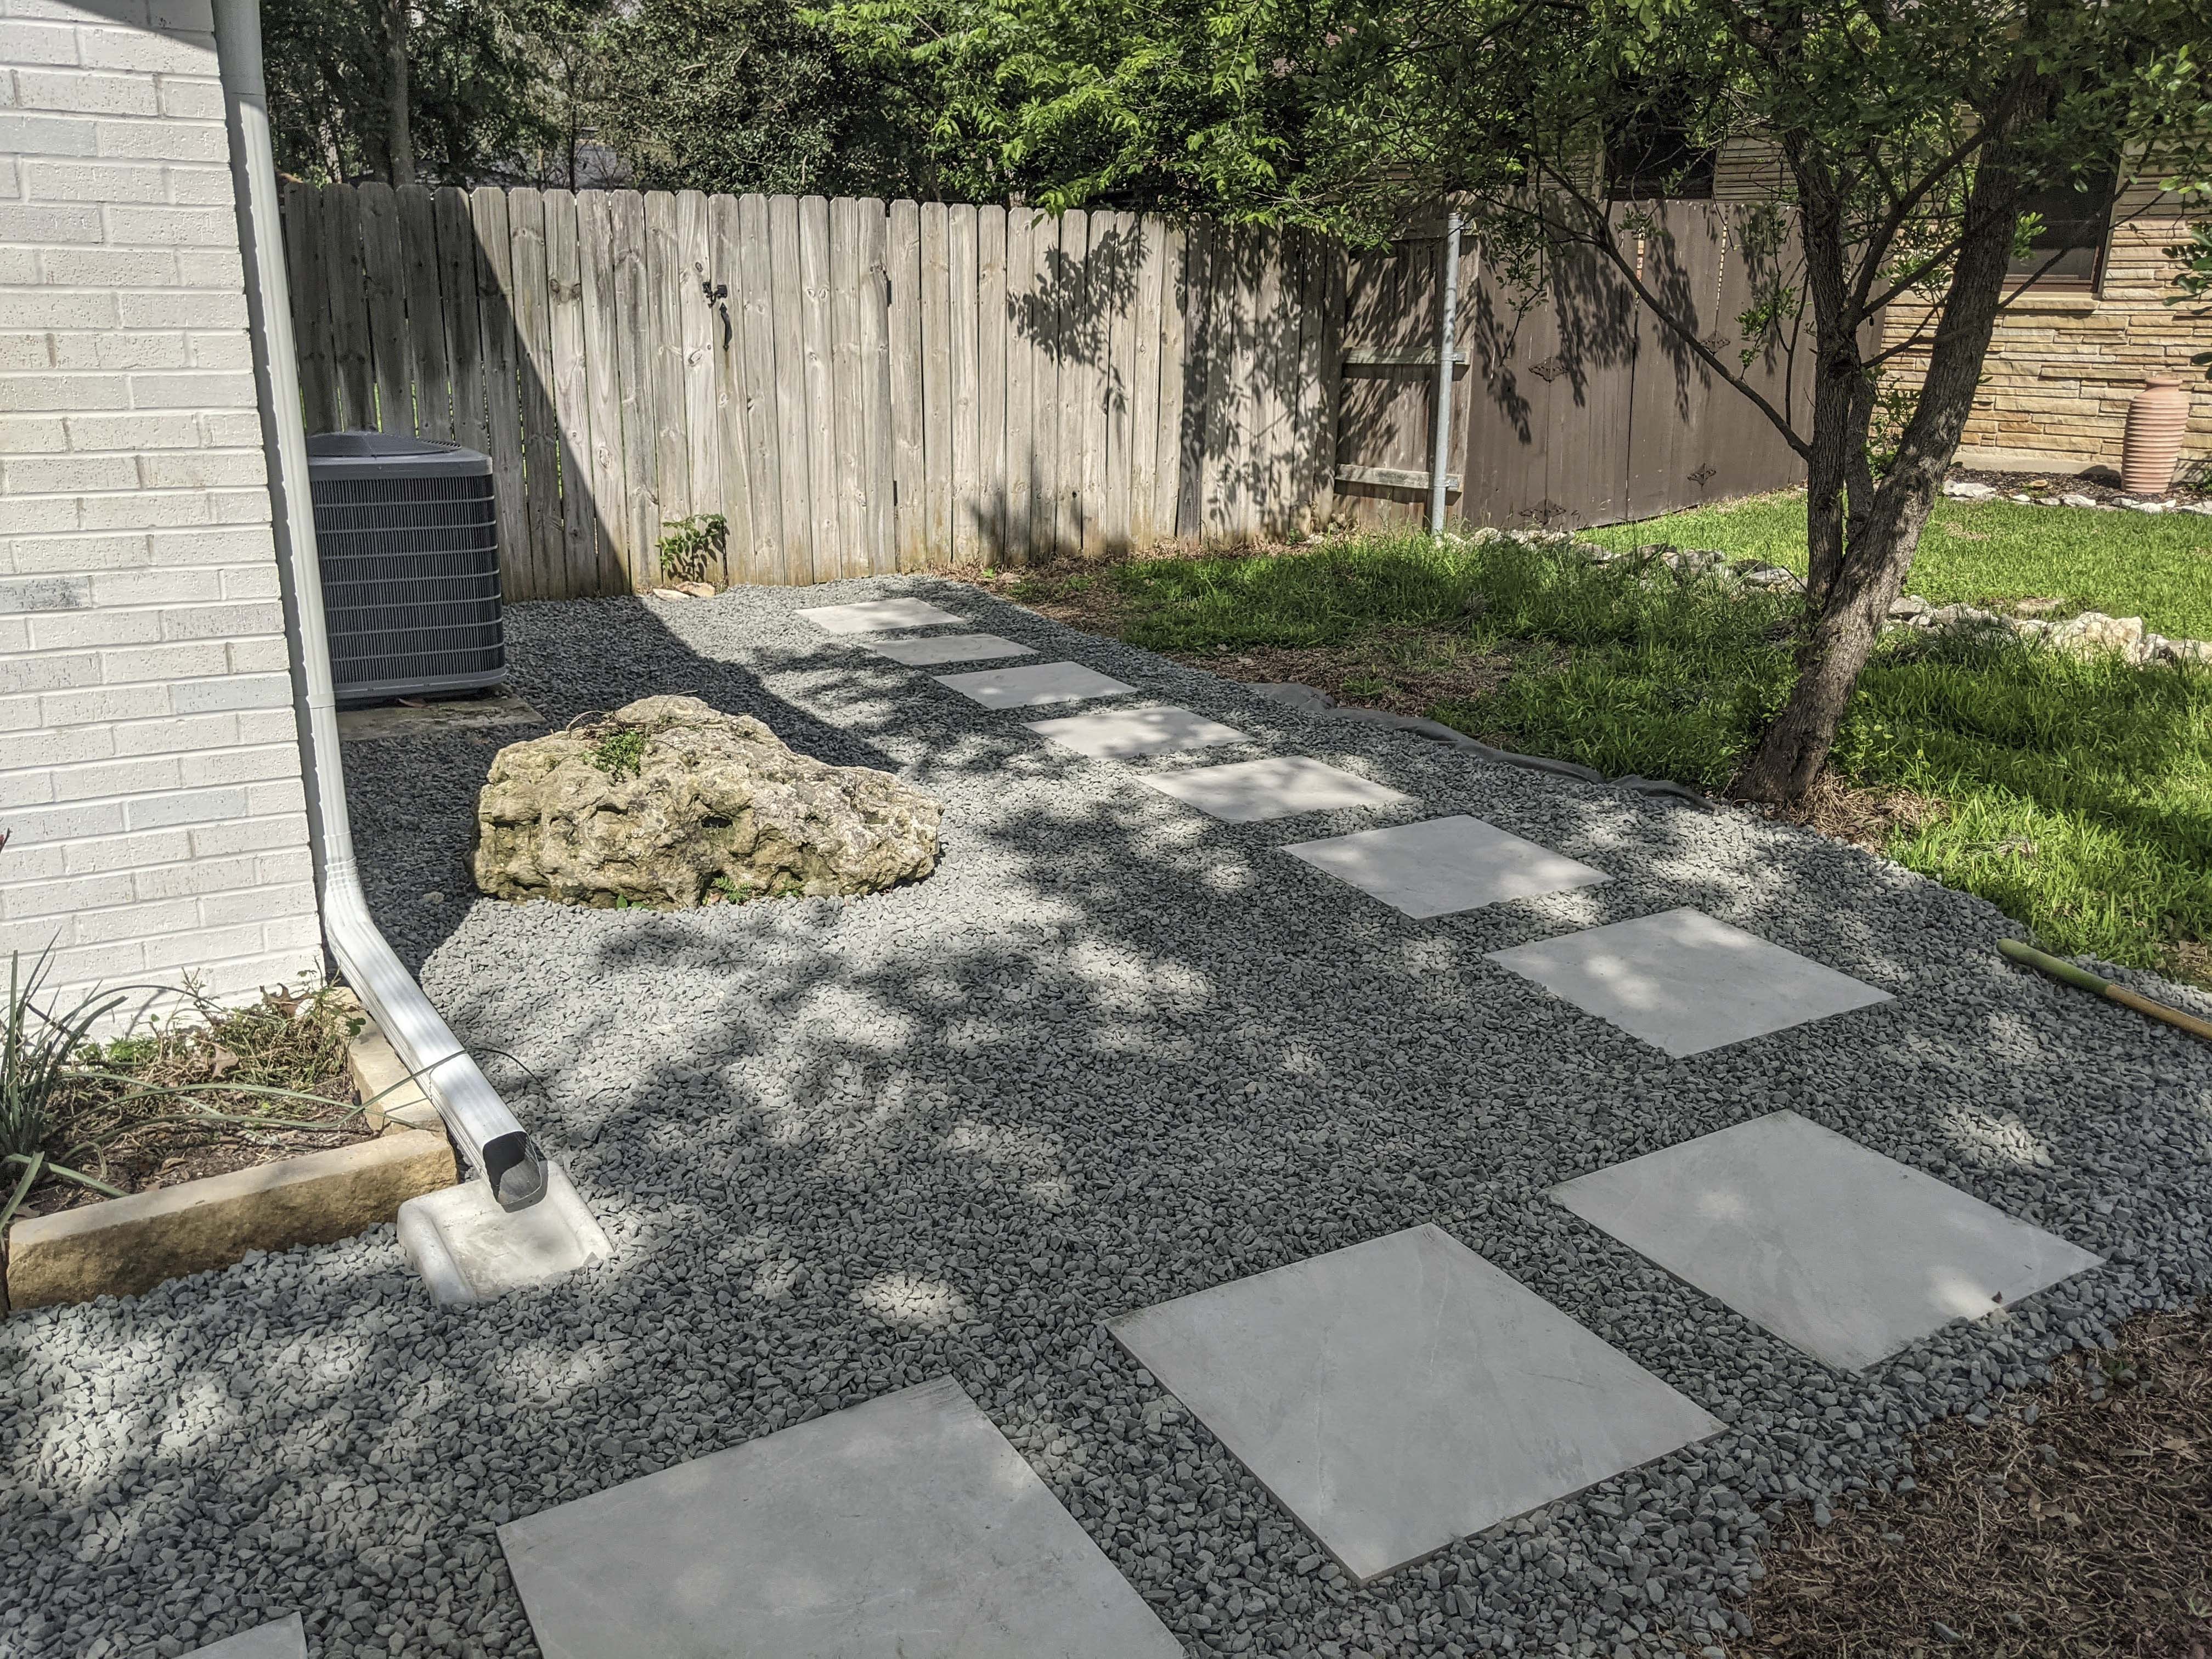
There was quite a bit of extra rock, so we went around and added extra design elements to fill in.
A few days of that and then we were done.
Yard
Done, except for the entire rest of the yard. We knew this would be the actual hard part.
We wanted to use a different colored and larger rock for the remaining yard. We settled on Guadalupe river rock which is mainly off-white and tans.
I did the same thing as before- measuring out squared-off sections of the yard and adding it up to find the area. This time, I had to measure our awkwardly shaped garden beds and subtract them from the total. That was kind of a pain, I will admit. Geometry was never my favorite subject in school.
It was also more difficult to shovel into the wheelbarrow than the gravel. I ended up using a garden spade and shoveling it into a smaller bucket and pouring it where I needed extra. My husband was much more adept at using the transfer shovel and wheelbarrow, so we tag-teamed the yard that way. Then the same rules applied- shovel, pour, and spread.
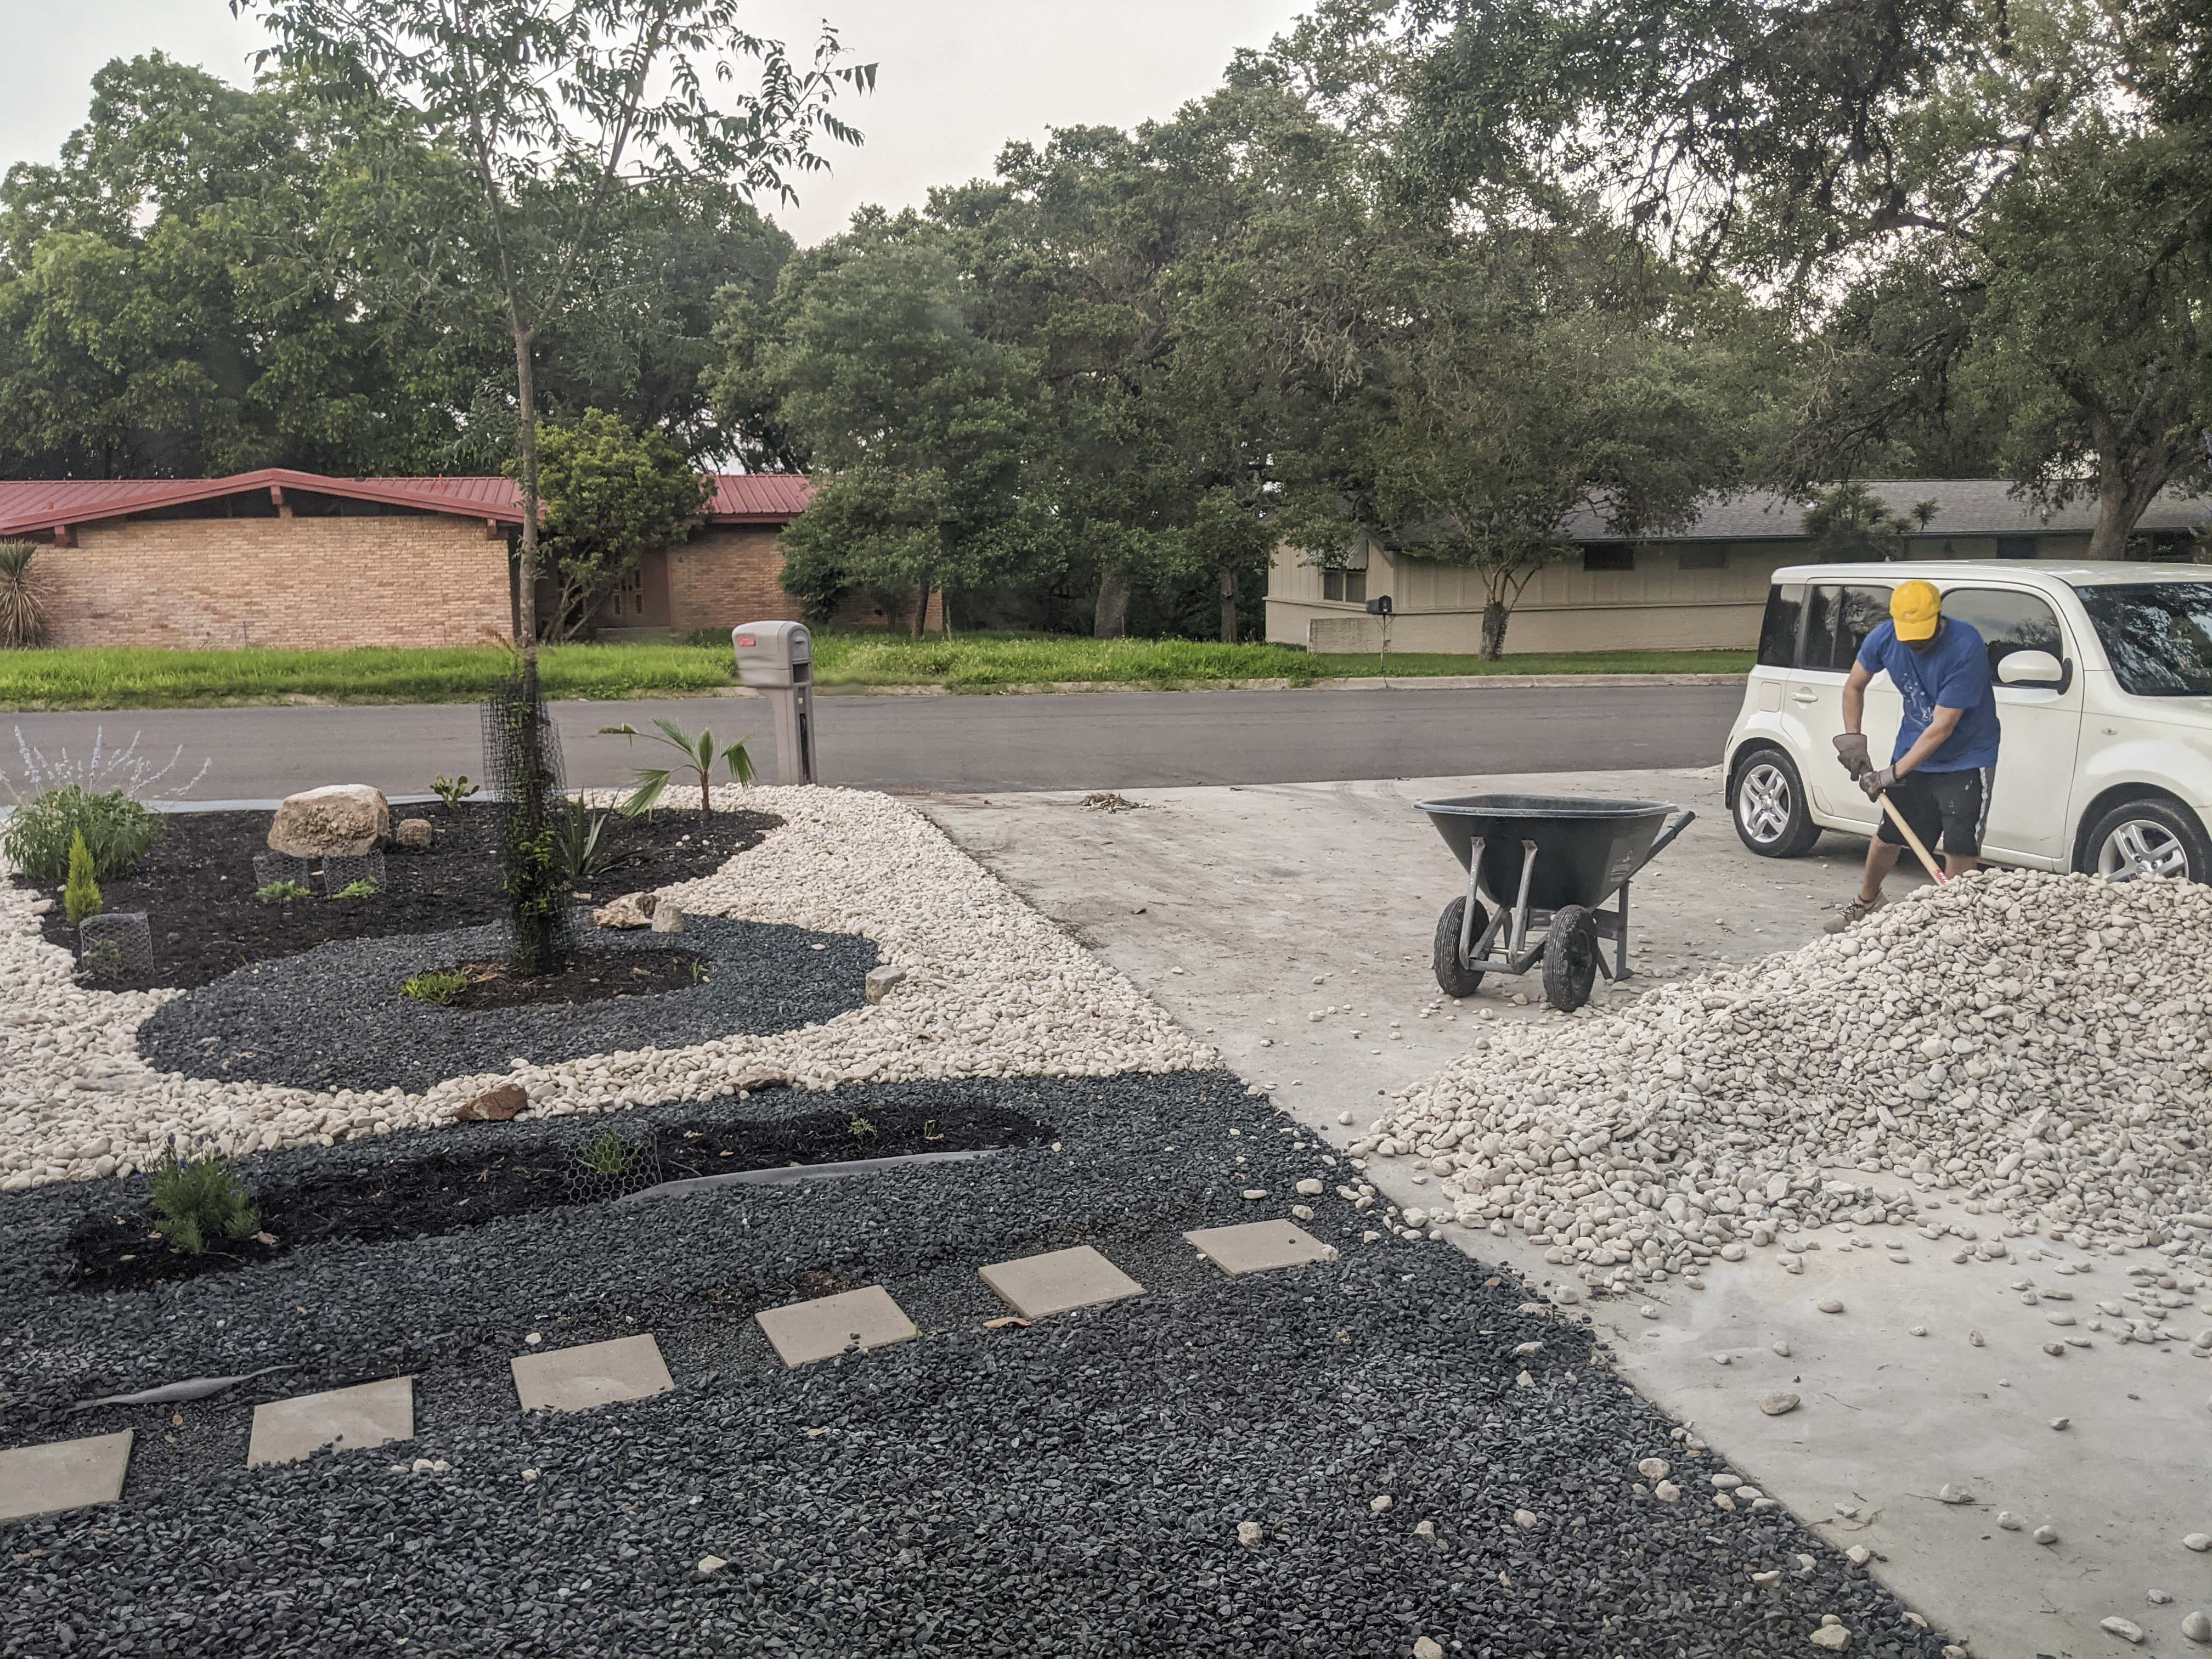
We also used landscape edging where the yard met the curb so that there would be a barrier for the rocks to lay against versus rolling into the street. I used a pair of hand pruners to cut it and that worked perfectly.
It took about 4 days of working in the mornings and evenings to get it done, but we did it.
Rainbow Rocks
My favorite part is these rainbow river rocks our landscape supply company just got in. I instantly fell in love when I saw them on the website. I wanted to do the whole yard with them.
However, it would have literally cost $10,000.
They’re expensive, to say the least.
So.
That idea was tossed out real quick and I decided we could use them as accent rocks. We bought two 50lbs bags for a much more modest price of $40 and I set to work on a design.
I actually had several more than I thought I would, so my design ended up being fairly detailed. I think I might change it into a sun later, but for now, this is pretty cute.
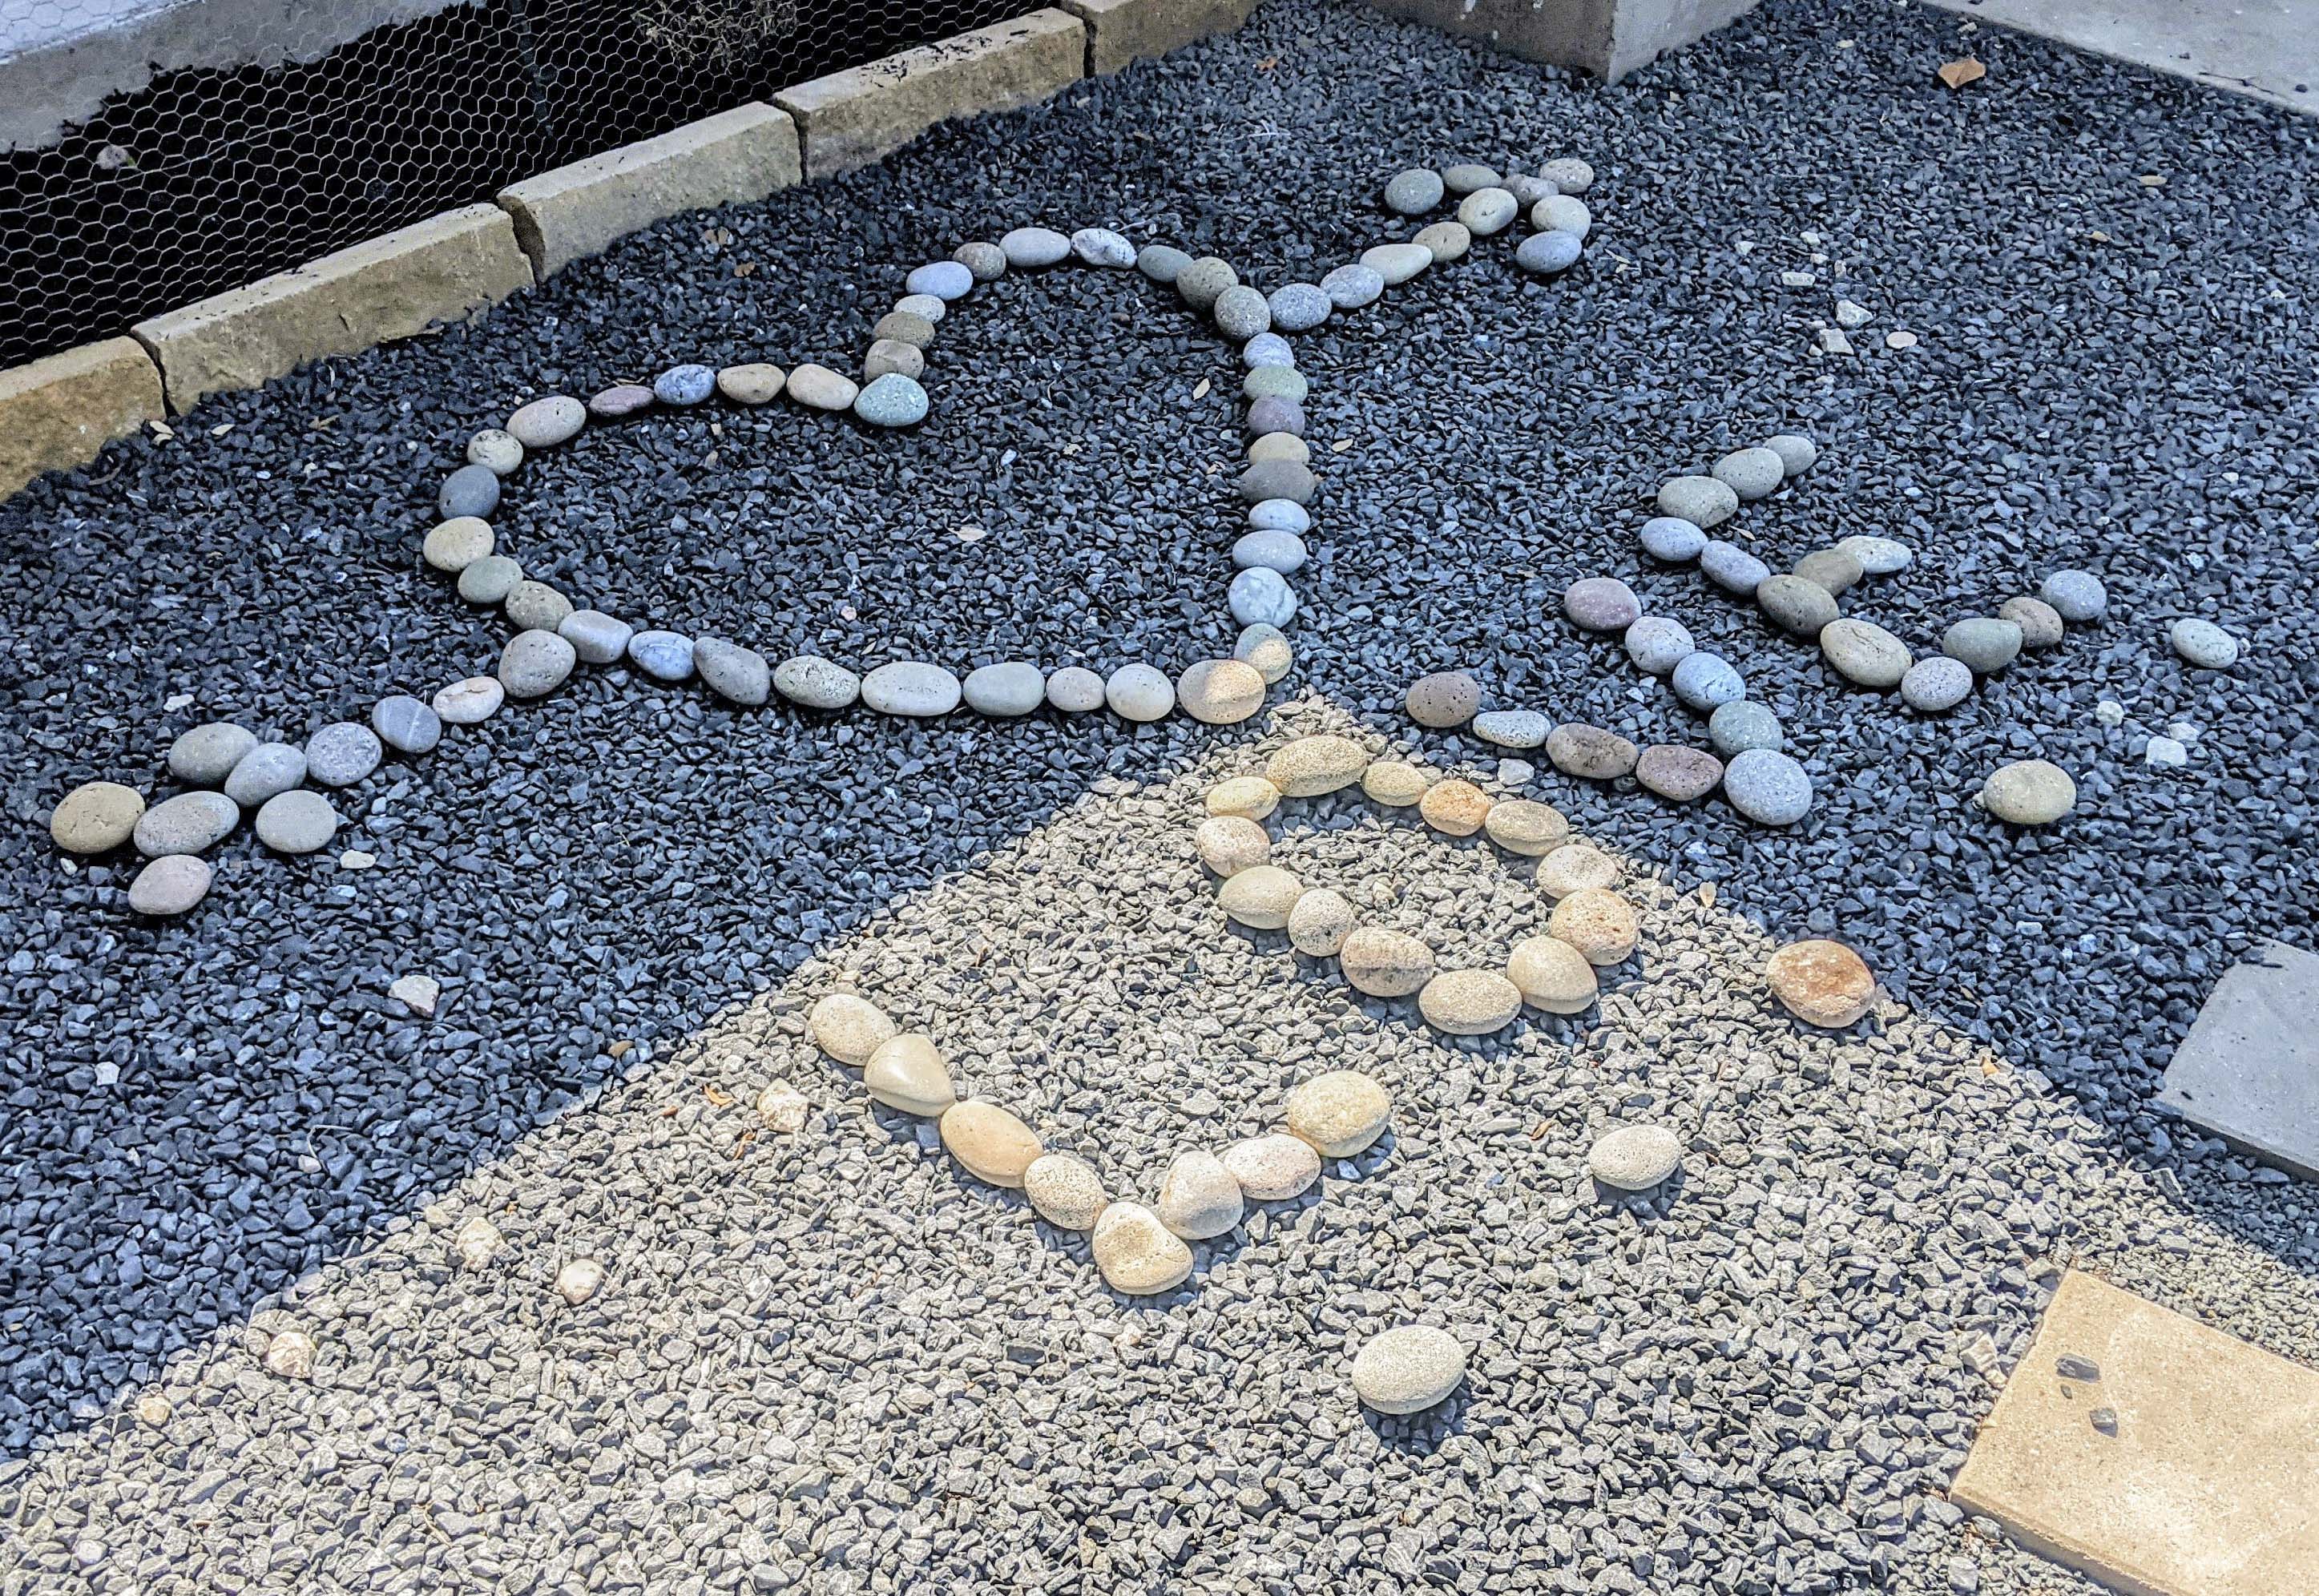
I’m also planning on sealing them later so their color looks permanently saturated.
Project finished!
And then, for real, that’s it! The front yard is all done. Thank God.